Keeping the kids entertained and outside, away from computer and colsole screens can be tricky during the summer months. To provide a little motivation, why not build your very own kids play fort in your garden or backyard.
You can of course buy pre-made kids forts and playhouses for the garden but these tend to cost updwards of £500, if you can afford this no problems, but if you are working to a budget then our kids play fort solution below was created for around £200.
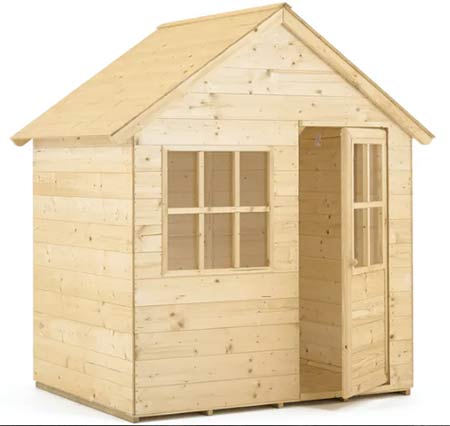
Flatpack kids playhouse kit – Image courtesy of tptoys.com
To save on material costs we sourced some of our timber that was used to clad the outside from breaking down old pallets.
Kids playhouses and forts come in a huge range of different shapes, sizes and styles. The playfort we have created below is fairly simple but if you want to build something a little more elaborate, the construction techniques used can be adapted to almost any design you can come up with.
What timber should I use to build a kids play fort or playhouse?
To answer the question of what timber you should use to build a kids playhouse in your garden, there are 2 criteria that need to be satisfied:
- Timber should be solid and sturdy and be able to support and cope with any stress and strain applied to it form kids running around, jumping and swinging on it
- To ensure all your hardwork lasts as long as possible and timbers used should be pressure treated or at minimum coated in a decent timber treatment (needs to be safe for kids though!)
To construct the kids playhouse in our tutorial below we used 3×3 inch timber fence posts to build the main structure and access ladder, 3×2 inch pressure treated timber for the balcony and then 2×2 inch timbers to form the doorway and ballustrade around the balcony.
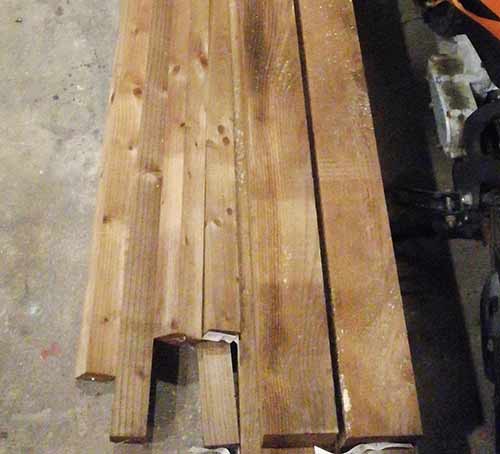
3×3 inch timber fence posts used to build kids play fort
Using heavy and sturdy timbers such as fence posts would ensure that our playhouse could withstand any amount of use thrown at it.
Another benefit of using fence posts was that they had been treated so this would provide the required resistance to any outside elements.
If you don’t fancy using fence posts for your playhouse, alternatively you could use 4×2 inch pressure treated timber to build the main structure.
As we have mentioned above, to save a bit on materials we broke down some old pallets and used the timber we got from these to clad the exterior, build the floors and also to cover the roof. Tips on how to break down pallets can be seen in our project here.
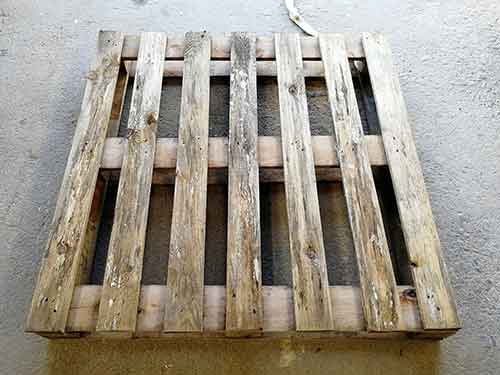
Old pallets are a good source of cheap or free timber
If you don’t fancy using pallets you can of course use 18mm (or thicker) OSB or plywood.
Tools and materials needed for building a kids playhouse
To build your playhouse or play fort you will ideally need all of the following tools and materials:
- 11x 3×3 inch 2.4m fence posts
- 4.8m of 3×2 inch treated timber
- 7x 2×2 inch 2.4m timbers
- 6x heavy duty pallets
- 22x 130mm M10 bolts plus nuts and washers
- Roll of roofing felt
- 4x light duty T-hinges
- Small sections of perspex for windows in door
- 3x anchor bolts
- 3x 1m lengths of chain/rope
- 3x anchor eyelets
- Some bitumen paint and a paint brush
- Box of 40mm decking screws
- Box of 50mm decking screws
- 4x 150mm Timbadrive (or similar) timber screws
- Spirit level
- Post level
- Mitre saw
- Table saw
- Drill/driver
- 3mm drill bit
- 1x 13mm flat wood bit
- 1x 16mm flat wood bit
- Handsaw
- Sliding bevel
- Pen/pencil
- Decent chisel
- Tape measure
- Hammer
If you don’t have a mitre saw or table saw you can use a handsaw and chisel, it just may take a little longer.
How to build a kids playhouse or fort in your garden or backyard
As mentioned above, the playhouse or play fort we have designed and built below is a fairly simple design. If you feel you would like to extend it in size or add additional doors, windows or even balconies you can simply take the construction principles we have used and adapt them to your own design.
Draw a plan of your playhouse
Before embarking on any form of construction the first job is to draw out a plan of your proposed playhouse or fort so that you know exactly what you are going to build.
Include in your plan full measurements, where timbers are to be joined, any doorways and also, if you can, a running total of materials so that you know exactly what you need.
With your plans fully prepared and your material list compiled, source all of your materials so that you have everything you need to get building.

Rough plans for a kids play house or play fort
Prepare the main structural legs
The very first job is to prepare our four main structural legs. This will involve marking out exactly where all of our joints will be cut to carry our cross bracing timbers that will tie the whole structure together.
To ensure that all the joints are as strong as possible and can cope with several young children jumping up and down on them we are going to cut halving joints and then bolt them together (more can be found on halving joints and how to cut them in our project here).
This is a fairly involved job as we are going to need to cut several halving joints on each support leg at different heights and in different positions.
Before marking our halving joints we first marked a line around each timber 450mm from the base. To provide required support we are going to sink our play fort down in the ground by 450mm and to help protect our timber we are going to coat this section in bitumen paint.

Bitumen paint used to protect the base of the main support legs of the play fort
With our paint line marked around the base of each support leg we then decided which leg would go in which position e.g. front left, back right etc. To ensure we didn’t forget we marked each one respctively with “FL (front left)”, “BL (back left)”, “FR (front right)”, “BR (back right)”,
To keep the area inside both the playhouse and space below it as clean as possible we also decided to cut all of our joints on the outside of each support leg.
In terms of the joints, to make sure that the entire playhouse structure is as sturdy and rigid as possible we decided to use halving joints (to learn about halving joints and how to cut them see our project here).
To support the main playhouse platform, timber cross members would need to be fixed across the front and back and along both sides meaning we would need to cut 2 halving joints per support leg, 8 in total.
The base of the support legs would also need to be supported to prevent the legs splaying outwards so we would also need to cut halving joints here, but as we are going to keep the front open to allow for a tyre swing we would only need to cut 6 joints 1 for the front legs and 2 for each rear leg.
Where 2 halving joints needed to be cut we would stagger these and put one on top the other as if we were to cut them at the same level this would weaken the timber too much.
Before getting stuck in with a saw, the first job is to mark out the position for each cut so that you know exactly where each is going to go.
As the posts we are using are 3 x 3 inch (75mm x 75mm), to make our halving joint we would need to cut 37.5mm (1 1/2 inches) into the timber the full 75mm (3 inch) width of each timber.
We started with the front left leg and marked out our first halving joint cut which would be for the bottom support timber which would run to the rear left support leg. We marked this 6 inches up from the paint line we created above.
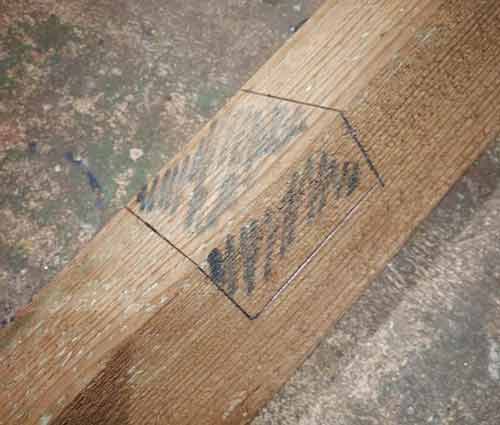
Halving joint cut marked out on playhouse timber support leg
We next marked out the playhouse platform support brace that would run from front to back. As the main platform would be 1500mm up from ground level, we measured up 1500mm from the paint line and marked out our halving joint cut, making sure it was marked on the outside of the timber.
The brace timber that would run between the front left and right main support legs would run below the front to back braces so we also marked out this cut. Remember, as this is going to run across the front, the cut needs to be marked on the front of the timber support leg.
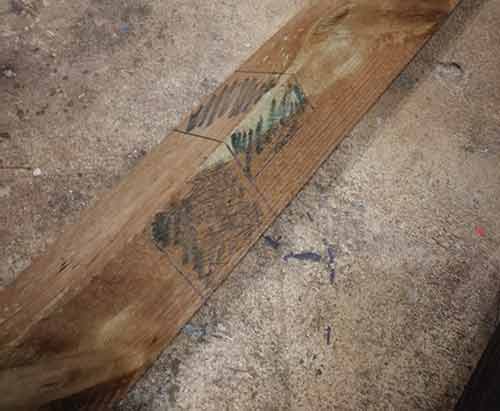
Front and left rear timber brace halving joint cuts marked out for side and platform supports
With the bottom and platform joints marked out the final joint to mark was at the very top of the support leg where the roof would sit. This joint would also sit on the outside of the leg so we positioned the leg accordingly and marked out the joint.
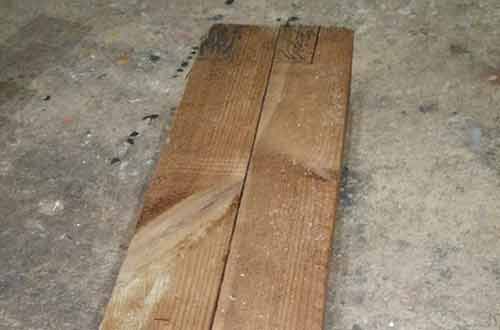
Top halving joint marked on support leg
Once all of your joints have been marked, use a marker pen to colour in the sections that will be cut away to form our halving joints. This will leave no confusion about where cuts need to be made and also ensure any cuts are marked on the corect face.
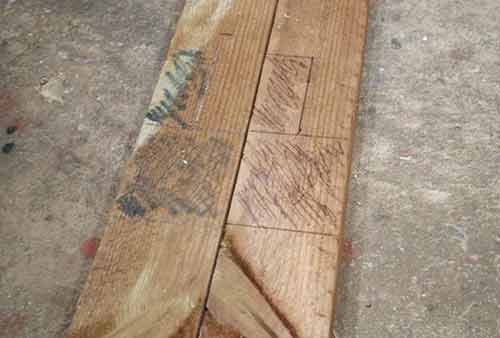
Halving joints coloured in
With our first support leg fully marked out with all cuts we could now use this as a template to mark up the other 3 support legs.
Remember to mark up any cuts on the correct face of the support depending on where it will be positioned!
Once all cuts have been marked on the correct face of each leg the next job is to get them all cut out. You can use a handsaw and chisel to do this but in this instance we are going to use a sliding mitre saw (more information on using a sliding mitre saw can be seen in our project here).
Position the timber down on the saw bed so that the blade is inline with your first cut line. As the legs are long ensure they are supported underneath so they lay flat on the saw bed.
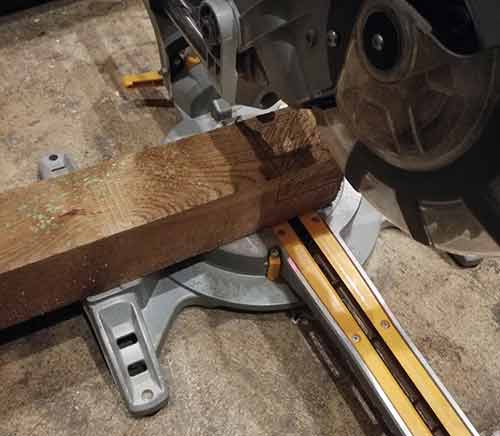
Support leg laying on saw bed ready for cutting
As we are only wanting to cut half way into the timber, set the cut depth of your saw so that it stops at this depth. Higher quality more expensive saws will have a cut depth gauge for you to set the depth but as this was a cheaper saw it didn’t so we had to adjust the depth stop in stages until we hit the correct cut depth.
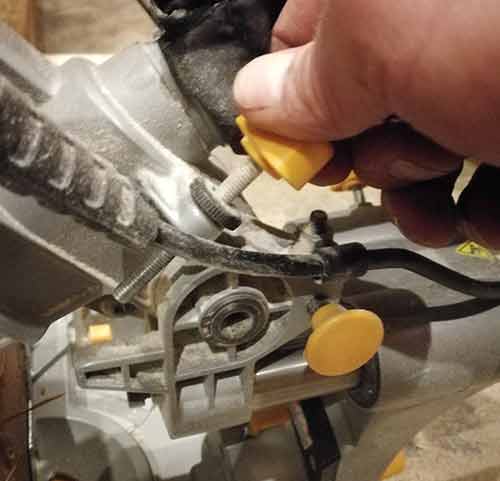
Setting cutting depth of saw blade to correct depth
Additionally, the smaller mitre saws, around 200mm blade size, wont cut all the way through the joint due to the size of the blade. To compensate for this place a 3-inch timber between the saw fence and the timber you’re working on. This will allow the saw blade to cut all the way through.
With the saw set up and ready work your way through all of your cuts taking your time and making sure they are cut spot on so the joints will be nice and tight and square.
As there is a fair chunk to take out, work your way across the width of each joint cutting a small section at a time and moving the timber on eth saw bed very slightly for each cut
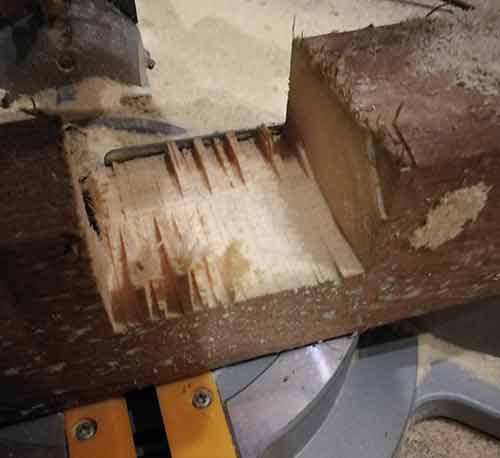
Halving joints cut in support leg
If any of your joints are a little untidy, clean them up with a chisel.
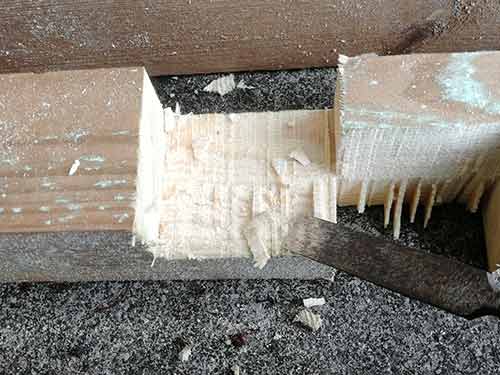
Cleaning up an untidy joint using a chisel
Prepare the main structure cross timbers
With all the support legs now prepared and ready the next job is to cut the halving joints in all of our cross bracing timbers, we would need 7 in total, 3 around the base and 4 to form the playhouse platform.
As we were going to make the playhouse 1200mm square we first cut all of our lengths of fence post down to 1200mm in length.
Using the marking up technique we used above for the support legs we then marked up our cross brace timbers and used the mitre saw to cut halving joints.
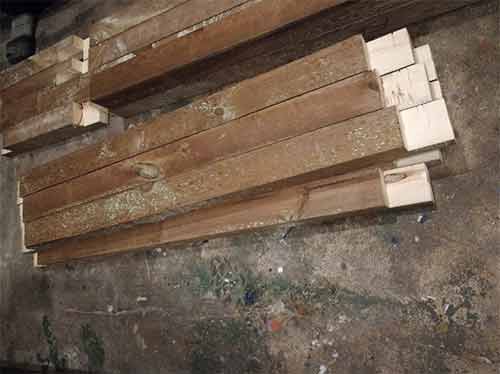
Cross bracing timbers cut to size and halving joints cut at the ends
Assemble and position the main framework
Now that all of our timber was cut to size and all of our halving joints cut and ready we could now start putting everything together.
Firstly, we paired up our legs, both front legs together and same for rear legs and then laid our rear legs out on the ground. Starting at the bottom we positioned the cross brace that would run along the back.
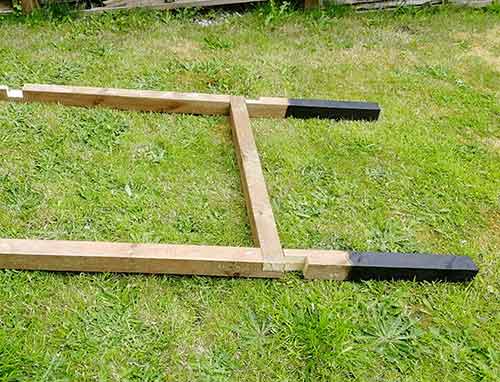
Playhouse support legs with cross brace positioned
The next job was to then drill holes through each halving joint so it could be bolted together. To do this we used a 13mm flat bit (as we were using M10 bolts).
Before drilling make sure that both timbers are fully pushed together with no gaps. If you need to knock them together with a hammer.
Once fully pushed together, mark out the very centre of the joint.
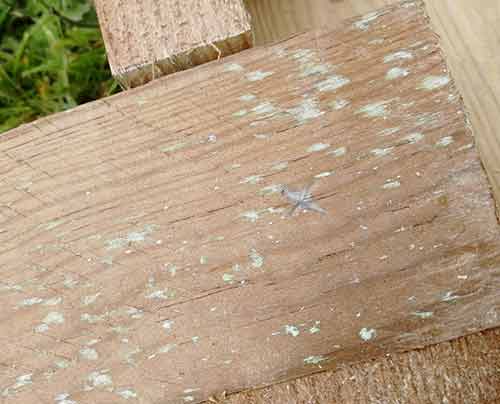
Centre drilling point marked on halving joint
Once marked drill your hole using a 16mm flat bit, making sure you run the bit through a few times to fully clear it and then insert a bolt and screw up the nut, just after adding a washer. Screw the nut up finger tight and then tighten it using the correct sized spanner, in this case a 19mm spanner
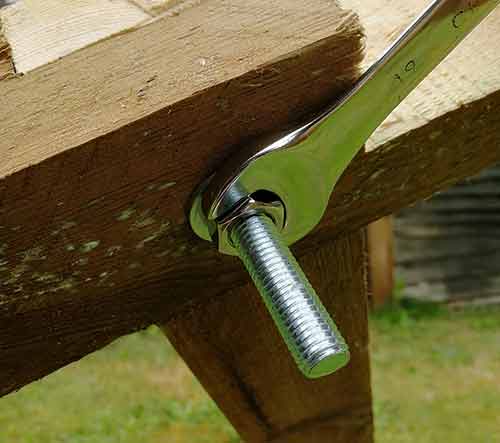
Hole drilled through halving joint in support leg and bolt inserted and tightened up
Repeat the above for the joint on the opposite side and then also for the top brace that will form the platform.
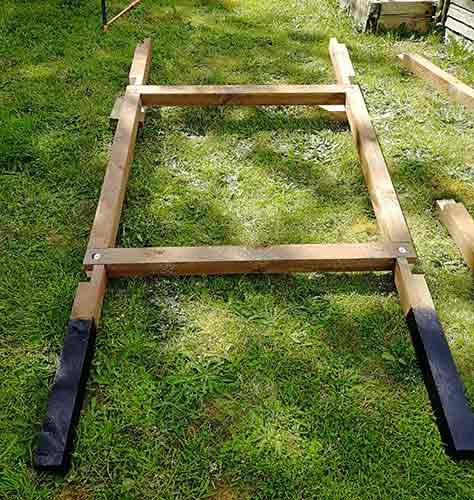
Playhouse rear support legs fully assembled and ready
The next job was then to add in the 4 side bracing timbers that would then join both sets of legs together. Each bracing timber was positioned in place and drilled and bolted one at a time.
One point to note is that all the bolts were pushed through from what would be the inside to ensure the inner area was as free from any protruding items as possible, as we would be adding a tyre swing some time down the line.
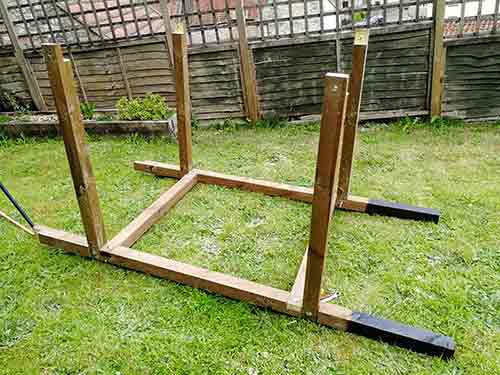
Playhouse rear support legs and side bracing timbers all bolted together
The final job was then to repeat the above for the front support legs and get these bolted together.
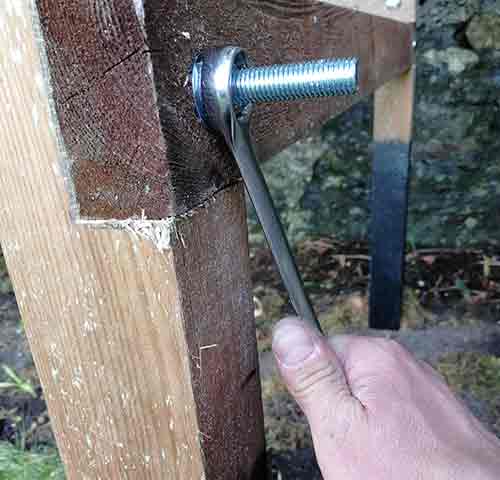
Front support legs bolted to rear legs to form playhouse main structure
With both sections now assembled, the rear support leg section was then positioned in its final position, you may need help here as the structure will be getting heavy at this stage.
The front support leg structure was then moved into place to meet with the rear section. The cross bracing timbers were then knocked into the halving joints on the front section and bolt holes drilled and then bolts inserted and tightened. At this point the playhouse was now starting to take form.
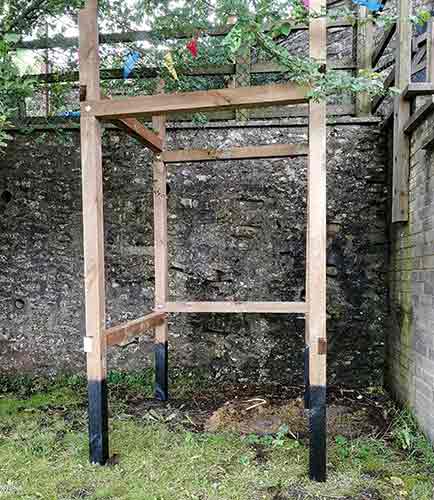
Playhouse main structure fully bolted together in position
Assemble roof and add to main framework
With the main body of the playhouse structure now bolted together it was time to get the playhouse roof built and fixed on.
As we wanted the actual playhouse area itself to be 800mm in height we needed to increase each of the tops of the support legs by 430mm, as the section of each support leg protruding above the base was 370mm in height.
To do this we cut four 430mm lengths of fence post which would then cut halving joints ready for dropping on to the top of our structure.
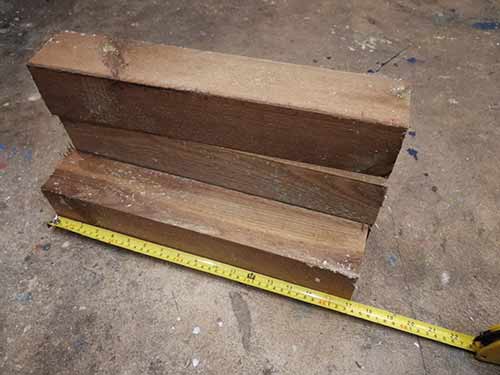
Roofing timbers cut to length
We then marked up halving joints on one end of each of the timbers and chopped them out.
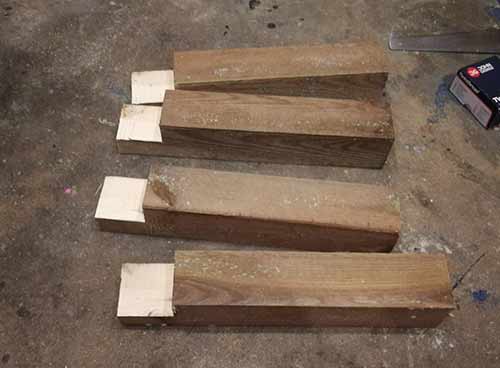
Halving joints cut into roofing timbers
The next task was to cut timbers to run between the roof structure. As our roof structure was to be 1200mm square (including posts) and our posts were 75mm square with one at each end our timbers would need to be 1050mm in length, so four lengths of 2 x 2 inch timber was cut to length.
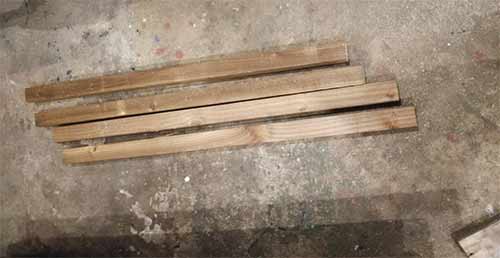
2 x 2 inch timbers cut to form roof structure
Each timber was then screwed to the top edge of each post, ensuring that the halving joint was facing outwards so that it could connect with the other half of the joint at the top of the support leg
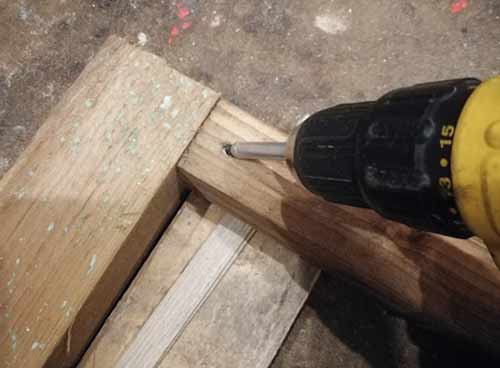
Screwing 2 x 2 inch timber to playhouse roof post
With all the posts and timbers screwed together the basis of the roof will now be pretty much there.
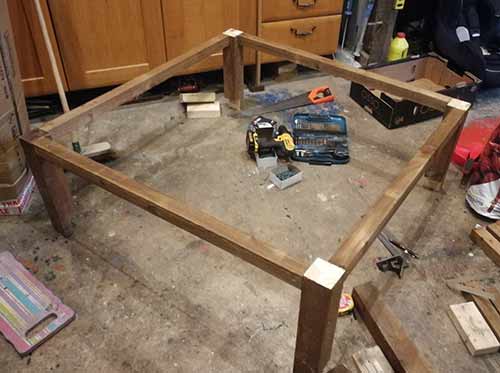
Roof structure screwed together
The final job was now to construct the ridge. Ultimately it’s up to you to decide on the pitch of the roof as it’s the height of the ridge that will decide this, but in this case we went with 400mm.
Two 400mm timbers were then cut and the middle point of the roof structure marked. We then drilled pilot holes on the underside of each opposing timber and then screwed our ridge timbers up from the bottom.
One final timber measuring 1100mm in length was then cut and screwed between the top of each ridge upright to form the roof ridge.
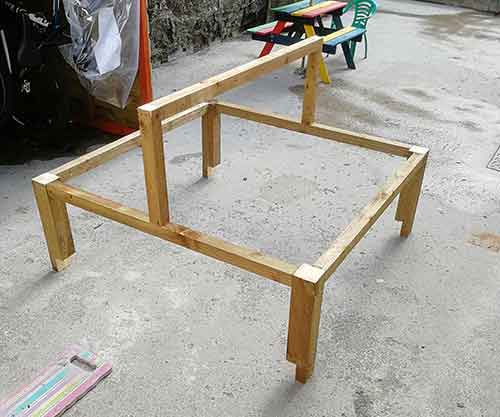
Playhouse roof structure fully built and ready for fixing in place
The roof structure was then lifted in to place on top of the main structure. Holes were then drilled through each joint and bolts added and fully tightened.
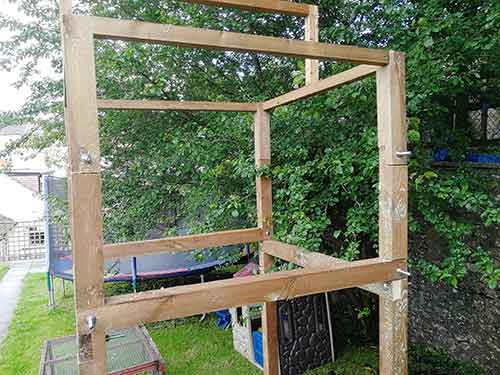
Roof structure fitted to main playhouse framework and bolted in place
Add flooring support timbers
To make sure any playhouse can withstand kids jumping up and down on it etc, the floor needs to be as solid as possible. As we staggered our halving joints we first needed to bring the floor up to level.
To do this we ran a 1200mm section of fence post across the centre area of what would be the floor to reduce the span our floorboards would have to run.
To add support to the inside corner areas between the posts we then cut four 300mm blocks and screwed them into place in each corner from the underside.
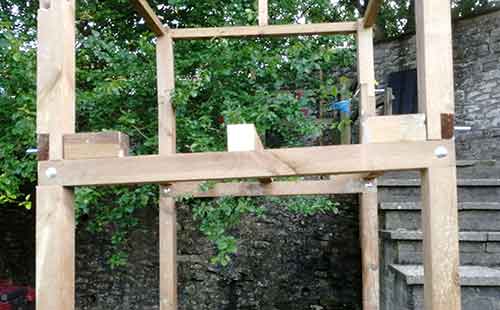
Playhouse floor support and corner blocks screwed in place
Install flooring and doorway framework
With the floor supports in place we then cut the first section of flooring to run across what will be the doorway out on to the balcony.
To help with material costs we decided to break down some old pallets and use the slats to form the floor. We used good quality pallets with 20mm thick slats as this would provide all the strength necessary.
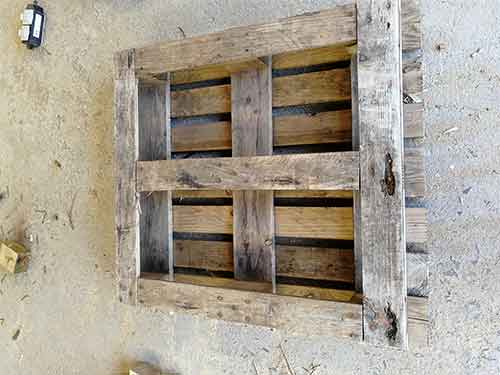
Good quality pallet, ideal for making playhouse floors and walls
After breaking the pallets down (we needed 2 to provide all the required slats) we then sanded them down using an orbital sander and 80 grit paper. Pallet timber can be quite rough so we wanted to avoid any splinter or graze injuries.
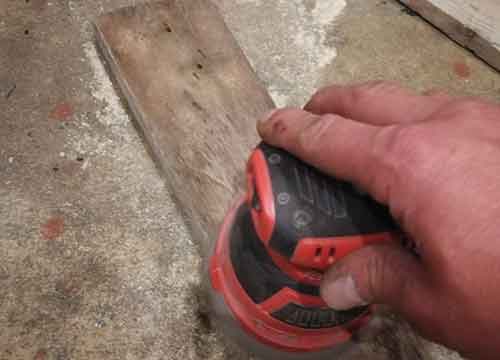
Sanding down playhouse floorboards
For the first section of flooring we then cut a 75mm square out of each corner so that it would fit around the support legs. Pilot holes were then drilled and it was then screwed in place using 40mm decking screws.
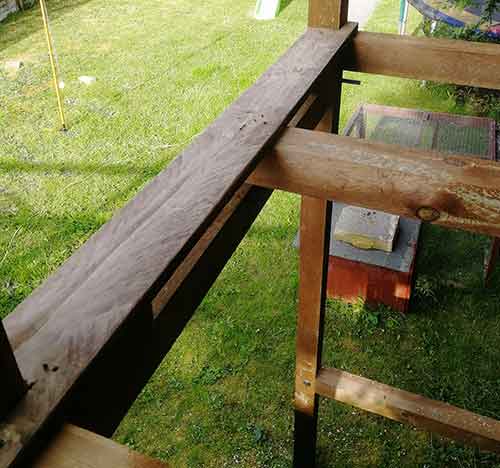
Floorboard with 75mm cut out of each corner to fit around support legs
Once the first floorboard was in place we then cut two 2 x 2 inch timbers to length so that they would fit between the floor and the timber forming the roof to create the doorway. We allowed 500mm for the door opening so the timbers were spaced 502mm to allow for a little adjustment.
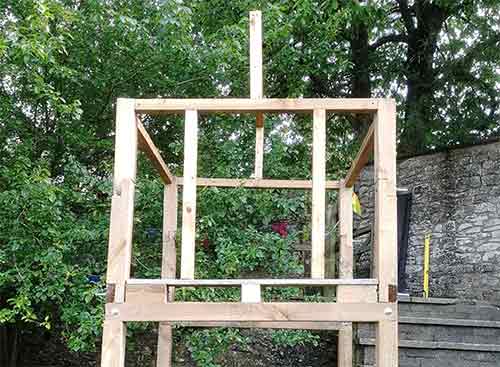
Timbers fixed in place to create playhouse doorway
Add balcony framework timber
The next task was to get the framework for the balcony fixed in place. For this we used 1400mm 3 x 2 inch treated timber that would be bolted in 3 places to ensure adequate support.
As we already had a bolt running through the corner halving joint we could use this plus add an additional 2 bolt fixings across the remaining span.
The balcony itself would run 500mm out from the playhouse structure with the remaining 900mm being used for support.
We measured and marked 500mm in from the front edge. We then measured the position of the bolt to its centre on the support leg and then transferred these measurements on to the balcony timber which then gave us the exact position to drill our hole so that it fitted over the existing bolt but would also be flush with the front to back playhouse platform timber.
Two further holes were then drilled that were evenly spaced across the remaining section of timber and it was then bolted firmly in place. The above steps were the repeated for the other timber on the opposite side.
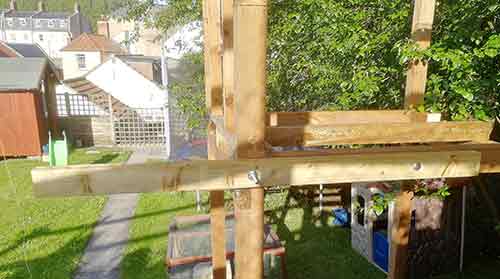
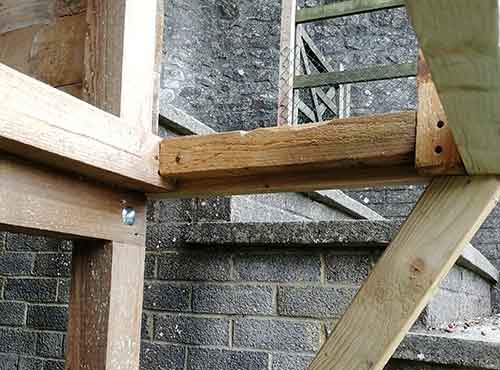
Balcony support timber bolted in place
To complete the balcony framework and make sure it’s as strong as possible, the next job was to add diagonal timbers that would run down from the front edge of the balcony down to the main upright support leg. For this we would use two 1000mm 3 x 2 inch treated timbers.
With the timbers cut to length, we then positioned one in place at the front tip of the balcony and then down to the point that it rested on the support leg.
We then marked the mitre angle at the point the diagonal support rested on the balcony timber so that it could be cut and then sit under the balcony timber. The same was then done at the other end.
The mitre cuts were then cut using a mire saw set to the correct angle.
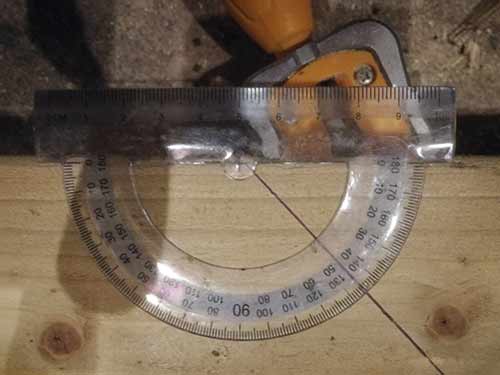
Measuring balcony support mitre angle using a protractor to set mitre angle on mitre saw
Once the mitre cuts and been made we then measured and marked the centre point at the end that would be bolted to the support leg and drilled a 13mm hole for the bolt. It was then bolted in place
Two pilot holes were then drilled in the underside of other end so that it could be screwed to the balcony support.
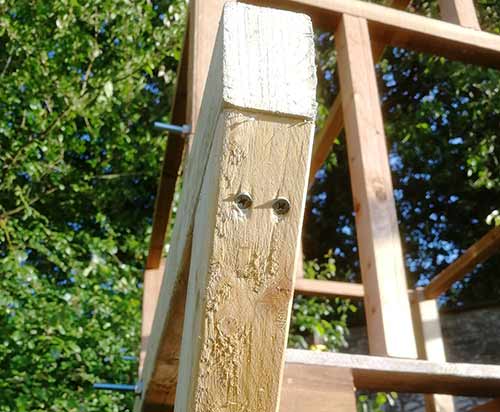
Balcony support timber screwed to underside of balcony
The same process was then repeated for the other side. Once completed the main structure of the balcony was now finished.
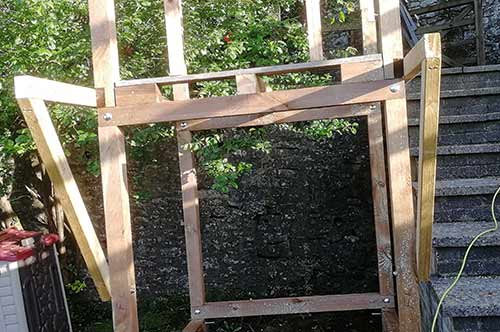
Balcony structure completed
Dig post holes and get playhouse into final resting place
Before we go ahead and add any more timber to the playhouse and it gets too heavy to move safely we’re going to need to dig some holes and sit the structure in place.
As the playhouse itself is 1200mm square we needed to dig four holes that were 1200mm centre’s.
We measured and marked these positions on the ground, hammering in stakes at the centre of each hole. With each marked out we then dug them to 450mm deep.

Holes dug to 450mm deep
With the holes dug we then moved the structure into place. Two people will be needed to do this. Once in place we checked levels with a spirit level.
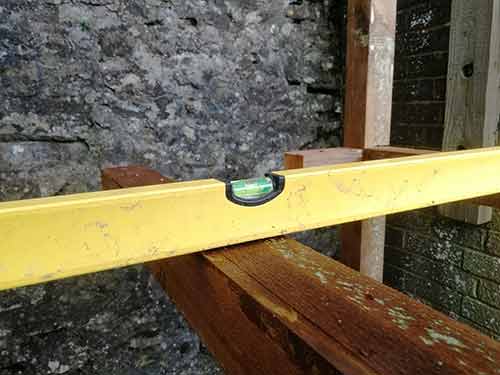
Playhouse moved into place and levels checked
As the ground we were working on wasn’t level we would need to adjust the depths of our holes slightly so that the whole structure would sit level.
The rear right was the highest point of ground and after moving the structure around in the holes until it was level we found that the front left leg was 50mm off the bottom of the hole, so we dug the rear right hole 50mm deeper.
Once done the whole structure then sat level after checking across all faces e.g. horizontally and vertically.
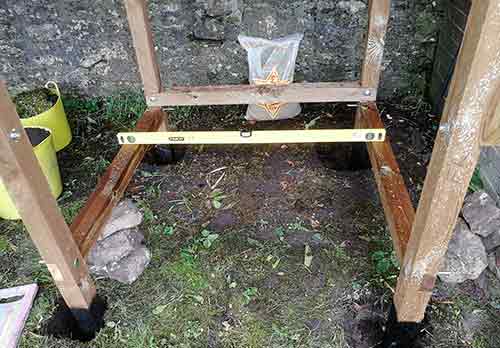
Playhouse structure sitting level
Now that the entire playhouse was sitting nice and square and level we then went back over all bolts and retightened them to make sure everything was totally solid.
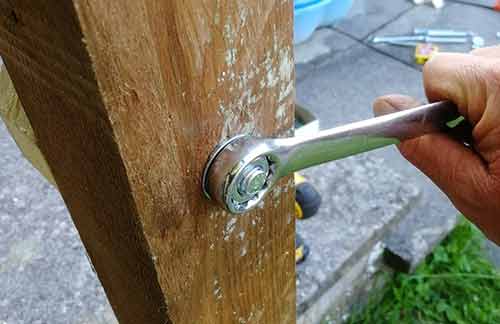
Tighten all bolts on playhouse structure
For some additional rigidity we then also screwed each joint, adding two 3 inch decking screws per joint.
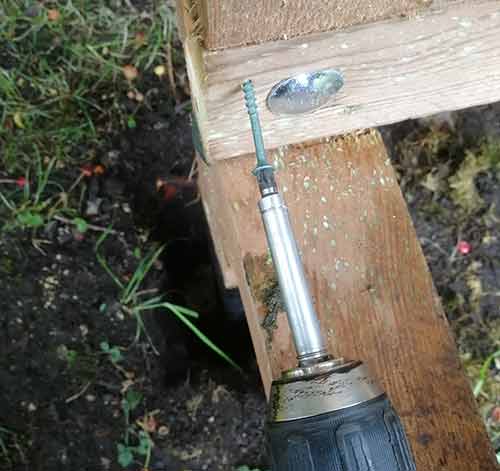
Adding decking screws to joints for added strength and rigidity
Finish floor in playhouse
With most of the structural work now completed we can now move on to constructing the actual playhouse.
To form the floor, as we mentioned above, we would be using pallet slats. As with the one prepared above, all pallet slats needed to be fully sanded down before fixing in place.
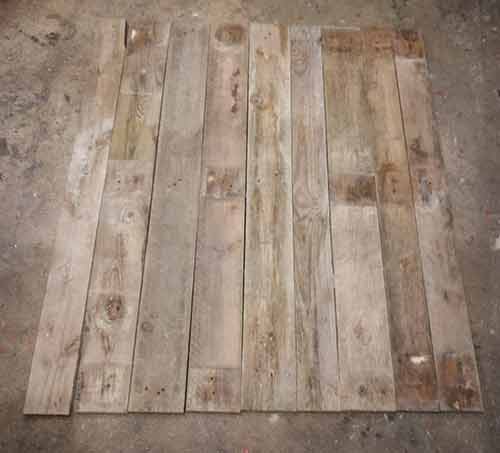
Playhouse floor pallet slats all sanded and ready for fixing in place
Before fixing, pilot holes were drilled at each corner and then all the slats were laid out across the floor area and then screwed in place using 40mm decking screws.
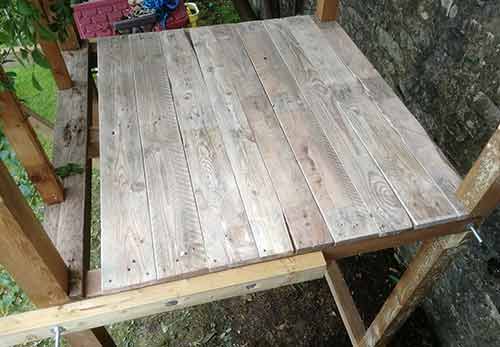
Playhouse floor screwed down
To complete the floor fully we then had to cut a floor slat down to 40mm wide to fill a small gap.
Fix the roof on to the playhouse
With the floor in place it’s now time to get the roof fixed on. Again for this we would use pallet slats but if you wanted to use something else 18mm OSB or ply is fine.
To keep things as simple as possible we had quite a few 1000mm pallet slats knocking about so we decided to use these at their full length. This would give a little overhang to the roof and ensure any rainwater was directed away from the main structural timber and help to prevent any water and rot damage.
We also wanted a little overhang at the rear of the playhouse for the same reason, but none at the front to allow for as much headroom as possible.
To allow this we fixed our first slat at the rear with 75mm overhanging. To fix it in place we screwed down through the top and into the ridge timber and then at the base it was screwed down into the top of the wall timber.
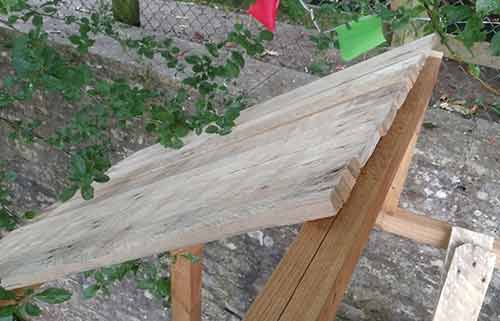
First few roofing slats fixed to roof of playhouse
To make sure that the top of each slat was at the centre of the ridge we drew a line through the centre to that we could position each roofing slat directly over it.
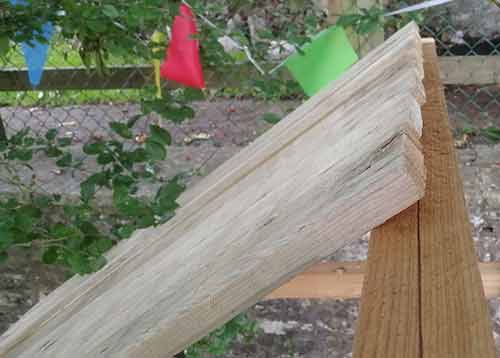
Roofing slats fixed at centre of ridge
We continued laying roofing slats until the whole of one side of the roof was covered. Luckily the size of slats we used meant that with our overhang the last slat laid had a 20mm overhang which would allow the front wall to run up to it with both edges flush. If this isn’t the case for your trim your roofing slat down accordingly.
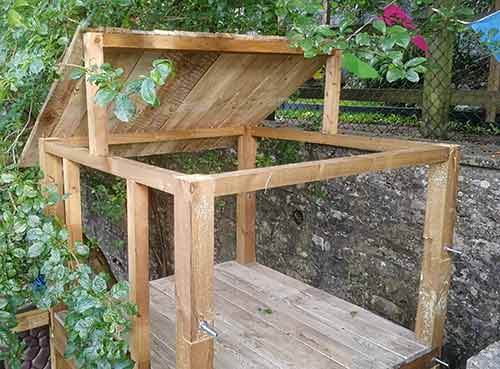
One side of playhouse roof completed
The same process was then repeated for the other side of the roof.
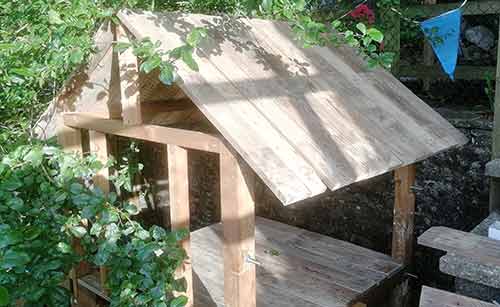
Completed playhouse roof
Clad the outside of the playhouse with timber
For this we are again going to use pallet slats. As the playhouse structure itself is 1200mm square on the closed sides we can simply use 1200mm pallet slats.
Before fixing in place, all the slats were again sanded down to remove any sharp splintering edges.
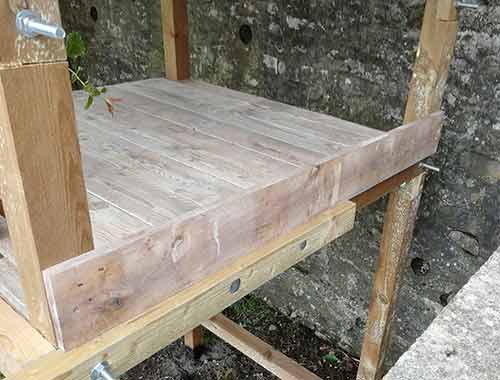
Fixing first pallet slat in place on side of playhouse
Each slat was fixed in place until the first bolt was reached. At this point we again measured and marked the point on the board where the bolt would protrude through and then drilled a hole using a 28mm flat bit. This would still allow a socket to access the nut for tightening if needed.
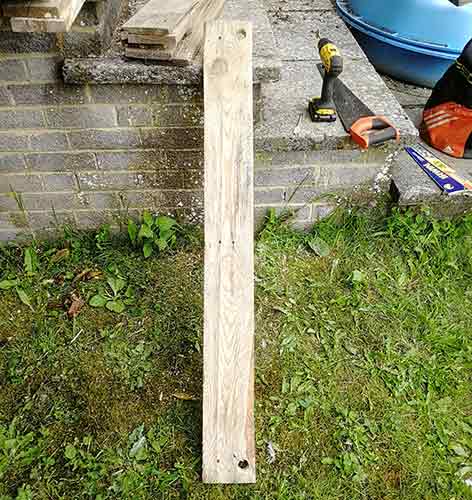
Bolt holes drilled through side slat
We then continued fixing slats in place until we reached the roof overhang. as the final gap to fill was only 50mm we trimmed a slat down to fit.
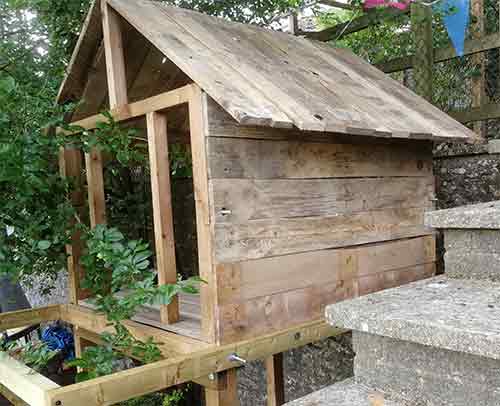
First side of playhouse cladded
The same was done to the rear wall of the playhouse but this time we had to fill in the gable. The distance from the top of the last board laid was measured up to the point it hit the roof and this was marked on a slat, in this case 20mm.
We then used a sliding bevel to set the angle of the roof pitch and then marked this on the slat from the point marked above. This was also repeated for the other end of the slat. The marks were then cut and the slat fixed in place.
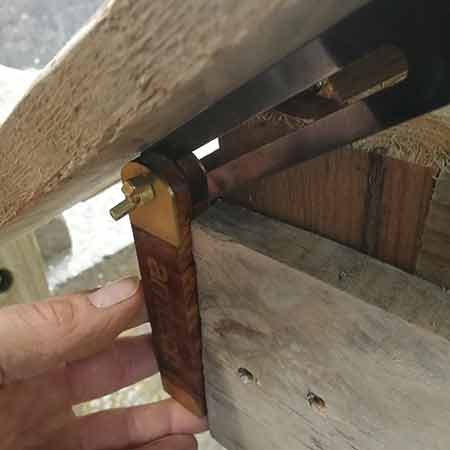
Measuring roof pitch angle with sliding bevel
We continued with this method until the gable was fully clad.
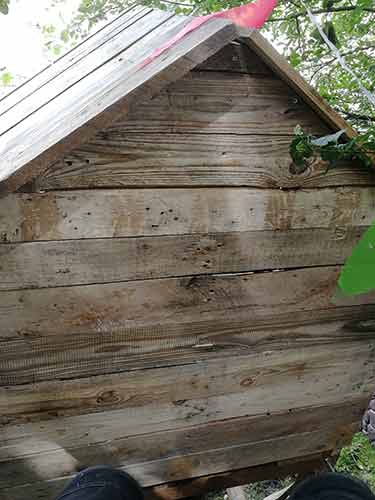
Gable end of playhouse fully clad
The final job was now to clad the areas around the door openings. This was simply a matter of measuring from the edge of the support leg to the edge of the door opening and cutting the pallet slats down to fit.
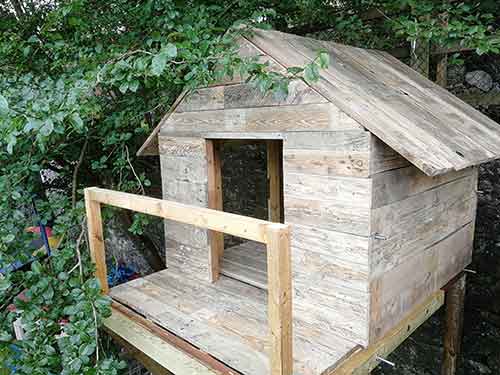
Door opening front of playhouse fully cladded
Where any slats were too big to fit the available gap they were again cut down to size.
Add balcony flooring and balustrade
Before adding the balustrade we fixed a 1200mm piece of treated 3 x 2 inch timber between the front edges of the balcony using 140mm timber screws.
We then cut two 575mm 2 x 2 inch timbers and fixed these upright to the inside front edge of the balcony. These would form the corners of the balustrade.
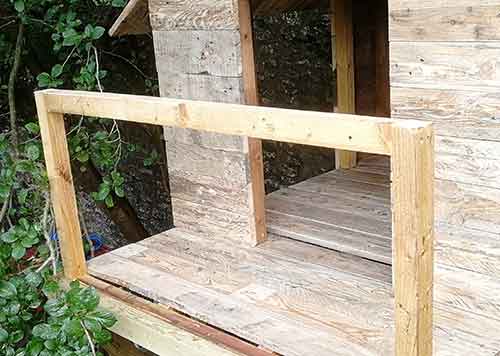
Balustrade corner upright timbers fixed to front of playhouse balcony
In order to fix the balcony floor in place we first needed to construct a frame within the balcony framework to support the floor as the current balcony was wider than our 1200mm pallet slats.
First a 1200mm piece of treated 3 x 2 to the back edge and then a 100mm 2 x 2 inch timber was fixed inside the front edge.
For the sides we used two 401mm sections of 2 x 2. We purposely cut these 1mm longer so we could hammer them into place and help to pin the balustrade uprights firmly in place. All the framework timber was then screwed up using 40mm decking screws.
Framework fixed inside balcony to support floor
For some additional support we then fixed two evenly spaced timbers between the front and rear of the balcony.
Once the floor support framework was fixed, the balcony floor was screwed down to the supporting timbers.
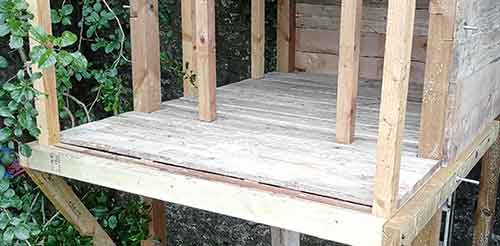
Playhouse balcony floor installed
To finish the balcony off a 2 x 2 timber was fixed between the balustrade uprights and then also across the sides. Pallets slats were then fixed around the outside perimeter with gaps to allow light into the playhouse itself as not to block it off totally.
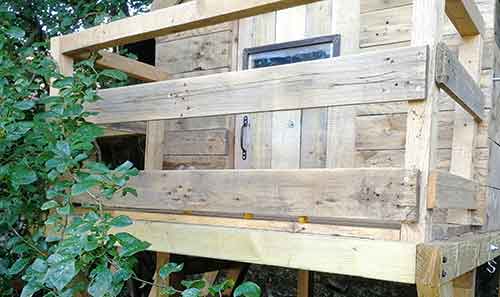
Playhouse balustrade completed
Build and fix doors in place
With the majority of the work now done we could now get started on the finishing touches, the first being the doors.
As we had made both gaps the same size, 740mm high by 500mm wide both doors could be constructed the same size. To help keep things simple even more we still had quite a few 100mm wide pallet slats which could simply be cut to length and fixed together.
Before starting their construction we just needed to make sure that each opening was also totally square so we measured across each diagonal of each opening, luckily both openings were.
Next we gathered together then 100mm wide pallet slats and sanded them all down.
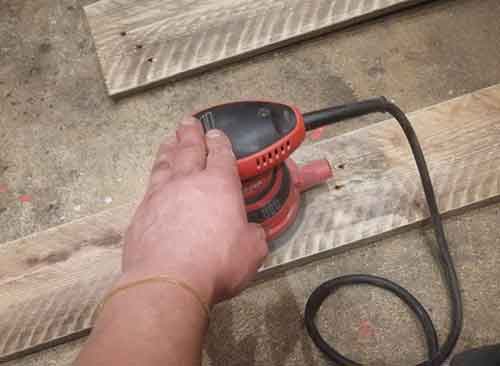
Sanding down pallets slats for doors
They were then laid face down on the floor and four further slats were then cut to 400mm wide. These would be used to brace the door together.
The braces were then laid onto the door slats and squared up and screwed in place using two 35mm timber screws per slat.
We then created the other door using the same methods.
Each door was then fixed in pace to the playhouse using some small light duty t-hinges. They were fixed on the inside of the door and playhouse so that each door would open inwards as there wasn’t room for them to open outwards.
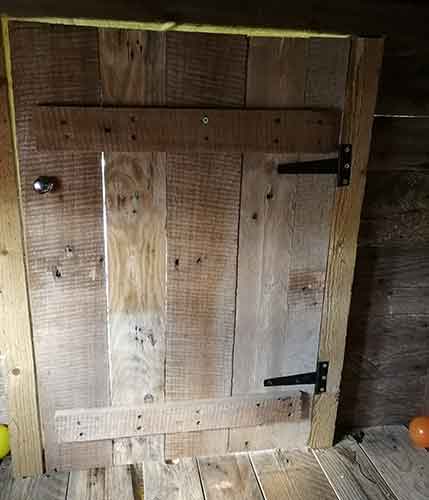
Door attached to playhouse structure
As the doors are solid, once fixed to the playhouse all natural light was then pretty much cut off so the inside was then quite dark.
The door that would form the main entrance was shaded both by the tree and also by the overhang from the roof but the door that gave access to the balcony was quite exposed so could be used to provide more light.
With this in mind we decided to add a Perspex window. We removed the door and then cut a 400mm x 250mm section out of the door using a multitool.
To fix the Perspex in place you could either drill fixing holes in the Perspex itself and fix it to the outside of the door or if you have one, use a router to cut a recess the depth of the thickness of Perspex you have, mount it into the door and then use some architrave to hold it in place.
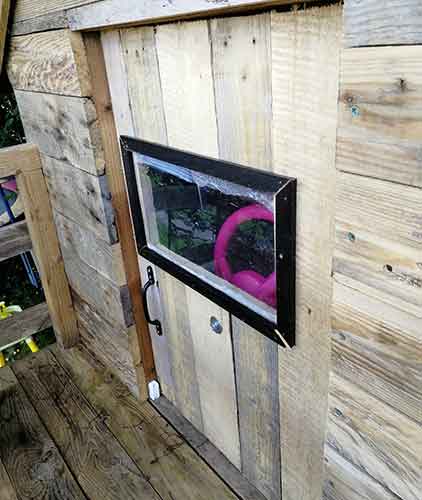
Perspex window added and architrave added to hold it in place
Build playhouse access ladder and fix in place
With everything else pretty much there the final job was to construct the access ladder for the playhouse itself. The type of ladder you go for is entirely up to you. You could construct a rope ladder using our project here or in this case we wanted something a little more rigid so we settled on an actual ladder.
To build the playhouse access ladder we would use two 75mm square fence posts and again some sturdy pallet slats.
First, we rested one post diagonally against the playhouse and adjusted by sliding upwards through the door opening until we settled with a decent angle. This angle was then set on a sliding bevel and the point that the top of the post protruded into the actual playhouse was marked.
This section would be cut off and together with the same cut from the other post, used to fix the two posts together top and bottom.
The post was then removed and the angle from the sliding bevel marked on the post starting from the mark that you made earlier where the post entered the playhouse. The same was done to the other post.
Both marks were then cut using a mitre saw. This would then allow each side of the ladder to sit flush with the side of the playhouse and also provide a flat solid surface to fix to.
We next squared off the sections of post that we cut off and then fixed these top and bottom between the two posts. They were screwed together using 140mm Timberfix structural screws. This gave us a nice solid and sturdy fix.
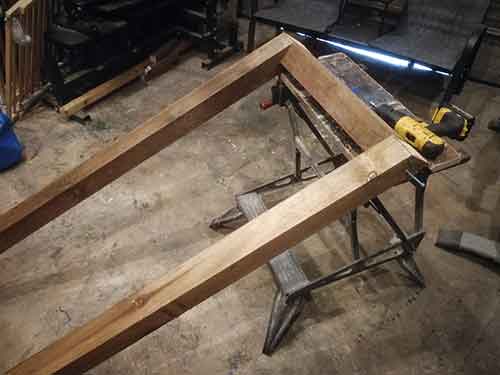
Using fence posts to construct ladder to access playhouse
To finish the ladder off we then fixed sanded pallet slats across the width of the ladder, vertically spaced at 200mm and secured with 40mm decking screws.
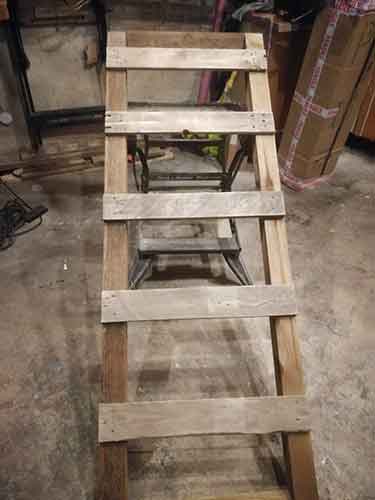
Pallet slats fixed to ladder and spaced at 200mm
Once completed the ladder was put in place against the playhouse and secured to it using two 140mm Timberfix screws.
Modifications to the playhouse ladder
After letting the kids loose on the playhouse it was discovered that the ladder needed a few modifications, especially for younger kids as there was no side support to prevent falling and the rungs of the ladder were a little too acute and narrow.
To improve things a little we decided to add some bannisters around the ladder and also some treads to make climbing it a little more comfortable.
Firstly, we fixed 400mm uprights to the outside of the playhouse at either side of the ladder.
Next, we then fixed some upright 2×2 inch timbers measuring 2003mm long at the base of the ladder so that they finished level with the top of the uprights fixed to the playhouse.
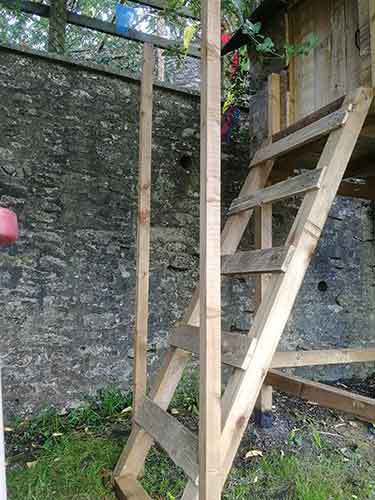
Uprights added to side of ladder
Timbers were then cut to length and fixed to the outside of both sets of uprights and the same was also done between uprights at the point the ladder rests on the playhouse and also then between the two front uprights.
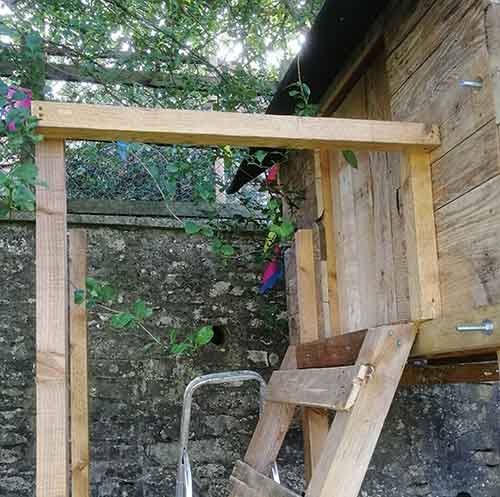
Side and front supports added to bannisters around ladder
Two pallet slats were then cut to length and mitred to fit either side of the rungs to prevent anyone falling over the side.
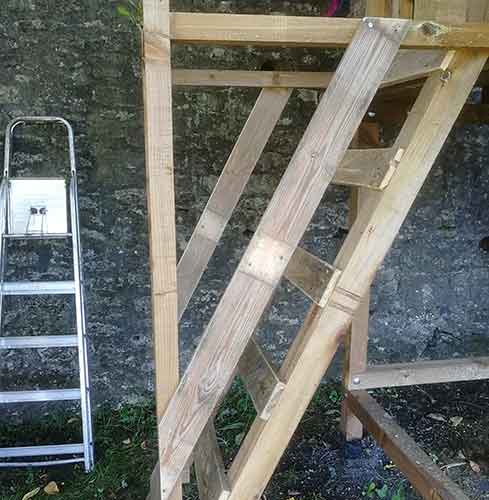
Pallet slats added to sides of ladder
Once the ladder surround had been made safer, we turned our attention to the rungs. For this we would be added some treads.
Firstly, we cut 10 small 50mm x 50mm blocks and screwed them behind each existing rung so that the top was level with the rung. To ensure they were firm, each block was screwed twice into the posts that formed the sides of the ladder.
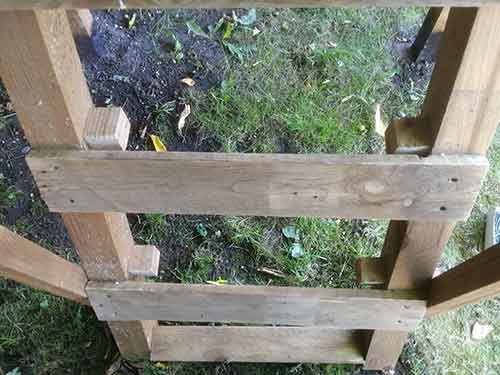
Small blocks screwed behind rungs on ladder to support treads
We then cut five 500mm wide pallet slats and then sanded them off fully, removing any splits that could cause splinters.
Each tread was then placed over the blocks so that the front edge was flush with the top of the existing rungs. They were then screwed in to the blocks either side to hold them in place.
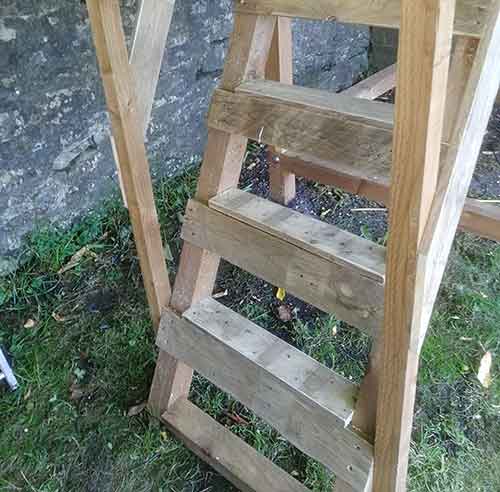
Treads screwed firmly in place on playhouse ladder
Felt the playhouse roof
For some added protection for the roof and also any occupants when it’s raining we covered the roof with some roofing felt.
Roofing felt comes in widths of 1000mm so we would need three sections to cover the roof – two at either side and one to cover the ridge.
Each side would need to drop down around 220mm from the ridge so that it could be wrapped around the overhang and tucked neatly up.
As we knew that the width of the roof was 1200mm and our overhang at the back was 70mm (plus the 20mm thickness of the slat) and we also wanted a little overhang at the front edge, say 50mm, so that it could be fixed along the front edge, the felt would be cut to a length of 1340mm.
The first section of felt was placed over the roof and the overhang wrapped under to check it was enough to reach all the way up to the wall, the felt was then squared across the width of the roof and then tacked in place using 13mm felt nails.
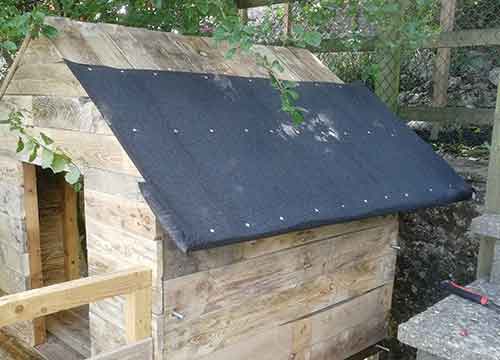
First section of felt fixed to playhouse roof
The felt on the opposite side of eth roof was then fixed using the same method. The felt at the overhang was also tacked up under using felt nails.
The final piece of felt was then laid over the ridge and then squared up so that the flap at either side was equal and then it was tacked in place.
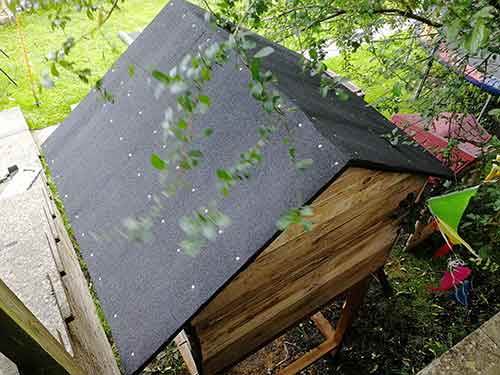
Final piece of felt tacked in place over roof
The front and rear overhanging felt was then folded over, tacking the front over the top edge of roofing slats and the rear under the overhang.
Where required the felt was cut using a utility knife so that it wrapped nicely around any edges or angles.
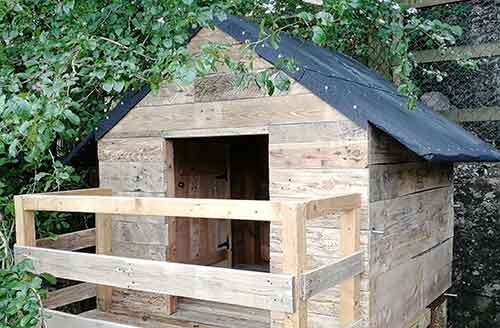
Roofing felt tacked along front edge
With the felt in place, to finish it off we added some fascia boards. The front facias were fixed to the front of the playhouse whereas due to the overhang, the rear fascias were fixed underneath.
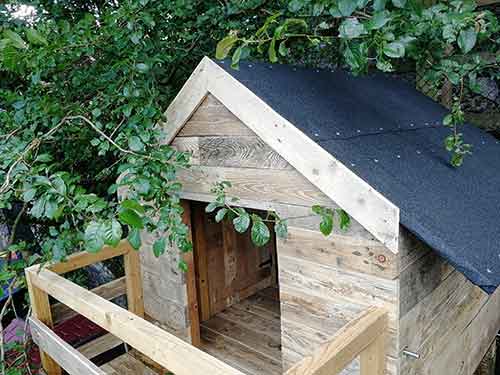
Front fascia boards fixed in place
Additional safety features for the playhouse
At the moment the only thing holding our playhouse in place is the fact that it is sunk down into the ground. Although this provides enough holding force to keep the playhouse upright when occupants are inside, stresses will be added when they move to the balcony, especially if they are jumping up and down!
To prevent any possibility of the structure from toppling over we’re going to anchor it to the two nearby walls.
First, we drilled two holes in the rear wall and then inserted eyebolt wall anchors, tightening them up to firmly hold them in place.
Next, we then drilled two holes in the rear playhouse platform brace timber and then fixed an eyebolt into each.
To secure the playhouse to the wall we cut 3 lengths of 15mm poly rope to 600mm in length and ran each end through each eyelet on the wall and playhouse.
To hold the ends of the rope together, securing the playhouse safely to the wall, two 5mm wire rope u bolts were added and then tightened fully.
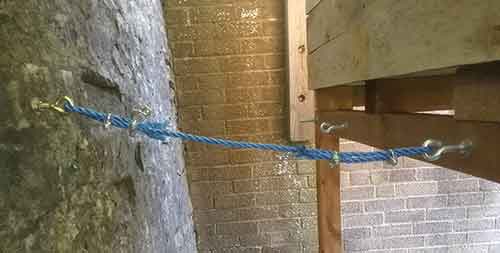
Playhouse anchored to rear wall using poly rope
The exact same process was then repeated for the two other anchoring points.
For this project we sank our playhouse down into the ground as it was installed on a lawn. If however your are putting your playhouse on solid ground it will also need to be firmly anchored in place.
This is best done by anchoring the feet firmly to the ground using heavy duty reinforced angle brackets. Each bracket should be fixed to the ground through at least two points of the bracket, both sides of each leg e.g. two brackets per leg.
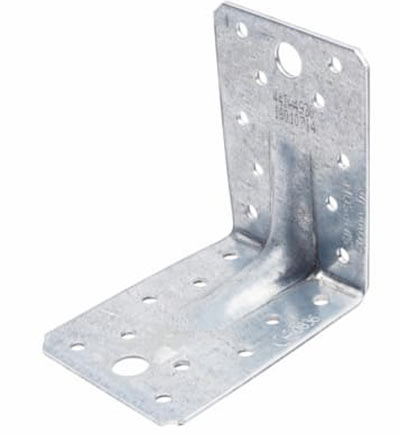
Reinforced angle bracket
You can then bolt through each bracket and the leg as opposed to using screws which will be a much stronger fix, especially when secured across eight points.
With our kids playhouse now fully waterproofed, the ladder in place and the whole structure secured it was time to hand our playhouse over the gangs of marauding kids wanting to get on it!
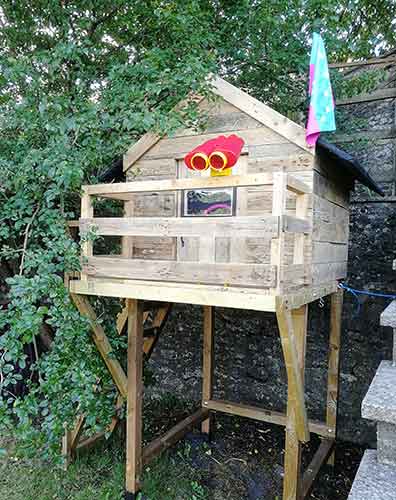
Finished playhouse ready for the kids to get stuck in, featuring the newly added bannisters and treads
To add a little more, you may also want to make a tyre swing to go underneath the playhouse structure, find out how to make a tyre swing using our project here.

