A hand file (or metal file as they are also called) is usually found within a garage, engineering shop, metalwork shop or other similar metal-based workshop due to the fact that they are really only for smoothing rough edges on metal and cleaning up welds. They can be used on pretty much all metals including steel, brass, copper etc…. and also plastic and acrylic.
Unlike a woodworking file which is called a rasp (where the teeth are set very wide apart), a file has teeth set much nearer to each other that run diagonally across the blade. As the teeth are much finer and shallower, this allows for a much smoother finish (Find out more about rasps in our project here).
Technically, it is possible to use a file when working with timber and other materials such as MDF if you want to create a nice smooth surface, but if you just want to take of layers quickly then a rasp is the tool to use.
You can use a file for this but due to the size and nature of the filings that are produced when planning off timber they quickly block up the teeth and make the file hard to use. The wider teeth that feature on a rasp prevent this from happening, hence this is the tool you should use in this situation.
Similarly, you can use a rasp on metal but the harshness of the cut does mark the metal quite badly and also wears the teeth very quickly, so if you are looking to reduce the material you’re working with quickly and easily, then a grinder should be used (find out how to use a grinder in our project here).
You may be thinking; if a file is made of metal and you are using it to smooth metal, how does that work when their both made of the same thing? Well, files are made from very high carbon steel that is heat treated during manufacturing. This process makes them much tougher than the metals they are used on, allowing it to grind or plane down the softer item you are working on.
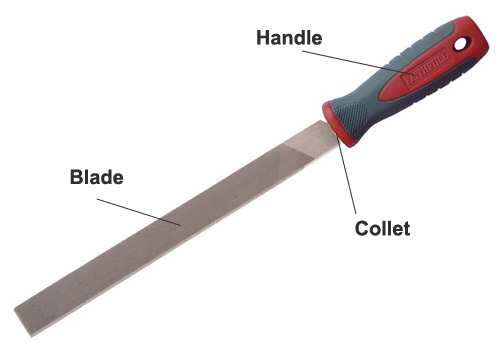
The parts of a typical hand file
What Different Types of File are There?
There are quite a few different types of file available that can be used for different situations. Files can be flat on both sides, flat on one side and half-round on the other, completely round, square or triangular. These shapes allow for most types of shaping to be done. Here are some of the most common:
- Standard Hand File: This is the traditional and most common looking flat file found in most garages and tool boxes. They are mainly used for general filing duties on flat surfaces. They are rectangular in appearance with teeth on the upper and lower sides but not on the sides or “safe edge”
- Half Round File: This is really as it sounds – this type features a flat side, the same as the file above and also a round side. The flat side can be used as a standard file, while the half round side is used for filing out curves and depressions. Unlike the above, this file is also tapered towards its end to allow for shaping
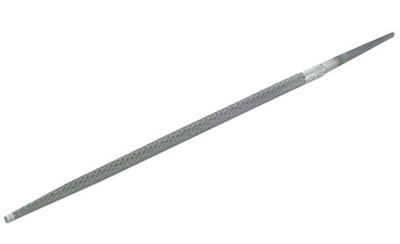
- Triangular File (or 2 square as they are also known): The main use of these is for filing in tight corners and acute angles and for getting into tight spaces
- Square File: Similar to the traingular file, this is very useful for getting into tight spaces, holes and for cleaning up angular slots
- Round File: Unlike the half round, these are fully circular. They are generally much smaller than the half round cousins and are mainly used for filing out circular cuts and holes such as drill holes
- Knife File: The main use of this file is to, again, get into very tight spaces, but unlike round, triangular and even the standard hand file, they are very thin meaning you can get them into a very narrow space
- Keyhole or Needle File: These are essentially very small and thin versions of the above type of file. Available in all the above types, they are very small in size and thickness and are ideal for very tight, intricate work such as model making, fine metal work etc….
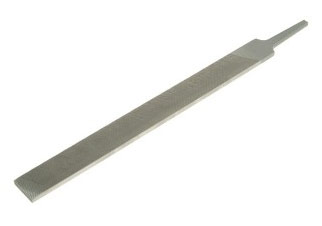
Standard flat hand file

Standard half round hand file

Traingular or 2 square file

Standard square file
Round file
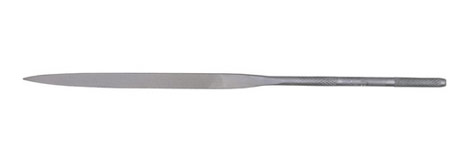
Knife file
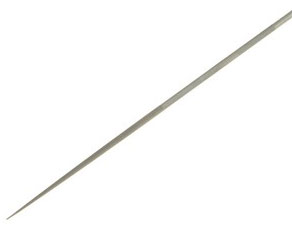
Needle file
Each shape of file is also available in a series of different “grades” ranging from rough (wider spaced teeth that give a harsh cut, allowing you to take off more material per stroke) to smooth (finer teeth spaced closer together giving a smooth finish.)
The middle grades, or second cut as they are also known, are an intermediary cut that allows for a smoother transition from rough-cutting to smoothing.
Trying to go straight from a rough to a smooth file can be hard work as getting rid of the deeper gouges can sometimes lead to you taking off too much in a certain place, especially if you are trying to produce a particular shape.
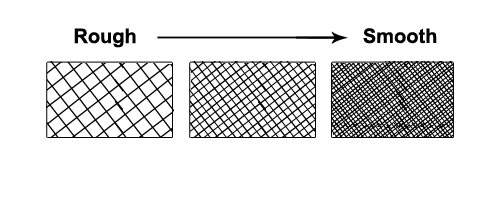
The 3 main different grades of a file
How to Use a Hand File Correctly
The main thing to know when using a file is that is cuts on the forward stroke or push stroke and will only work properly when used in this direction.
Never be tempted to try and use a file on the backward stroke or pull stroke. The teeth on the blade of the file are cut in a specific direction so that they work forwards, but when pulled backwards they can be bent which will damage them permanently. Remember, files cannot be sharpened, so once the teeth are damaged, that’s it!
Hold Your Work Firmly
To start, clamp your work firmly in a vice or Workmate. If you are aiming to take a fair bit off or you are smoothing angles or curves, it’s a good idea to use a pencil or marker and as accurately as possible, mark the point (or points) that you need to file down to.
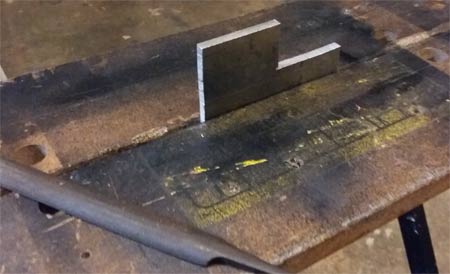
Work clamped firmly in Workmate
Mark Area to be Filed
This is a good way to ensure you don’t take too much off. Once it’s gone, you can’t stick it back on again! This should only ever be used as a rough guide though. If you are filing to fit another object, stop regularly and check the two pieces together to see how you are progressing.
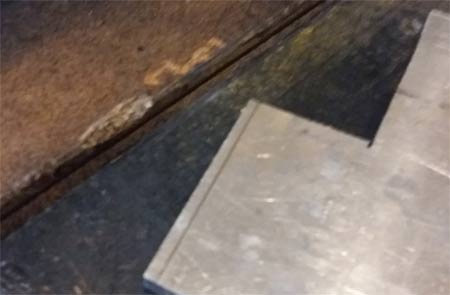
Area to be filed marked out
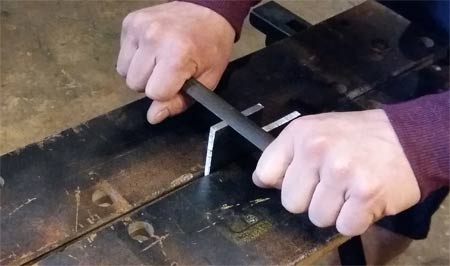
Stage 1 – Through Filing
The technique you will be using whilst filing is known as “through filing”. Hold the file by its handle with one hand and, with the other, hold it by the tip. Place the file flat on your work (or in the required position for the work your’re doing e.g. fling a flat surface, making a curve etc….) and push it forward, making sure it is held flat.
Holding it at a slight angle can cause you to file the edges of your object, rather than the actual full area you are trying to level off or grind away.
Once you have taken off your required amount or got your angle or curve to your desired shape you may find that the finish is not quite as smooth as you would like it. If this is the case, there are two remaining stages you can work through.
How to hold your file for through filing technique
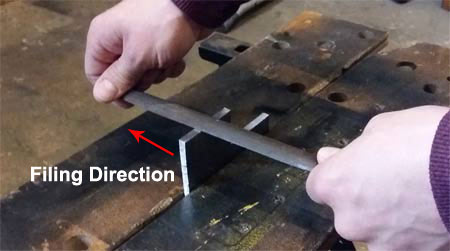
Stage 2 – Draw Filing
The draw filing stage involves you in turning your file 90° so that you then hold the blade either side of your work. Place it on your work and draw it backwards and forwards over the surface. This action will enable you to smooth your work even further.
As we mentioned above, you should never use your file on the back stroke and here we are telling you to do exactly that. Sometimes it’s necessary to do this to get the finish you desire, but as a general rule it is bad practice and will damage the file.
Holding your file for draw filing
Stage 3 – Final Stage
To get your work really smooth, take a piece of emery cloth (or wet and dry paper if working on plastic, fine grade sandpaper if working on timber) and wrap it around the blade of the file. Using the backwards/forwards motion describe above, push and pull the cloth over the surface, checking it regularly until you get that fantastic mirror finish.
You can also add a little oil (if working on metal) to the surface of your work while you are doing this to create a kind of “grinding paste” that will really finish it off!
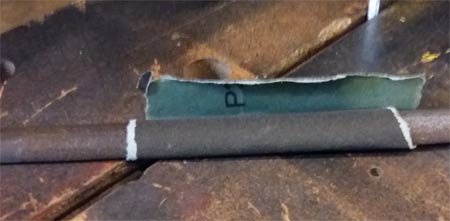
Sandpaper wrapped around blade of file