A wood rasp, also known as a woodworking file is a tool mainly used for shaping wood and other timber objects. Unlike its namesake, the metal file where the teeth are set very close together, the wood rasp has teeth set quite wide apart as well as being a fair bit deeper. This leads to a much coarser cut and allows for quite a lot of surface material to be removed in one stroke.
Wood rasps are also used to remove surfaces of other materials such as horses hooves (harriers rasp) and they are often used to shape soft stone, such as alabaster, when carving or sculpting.
As they are used by hand they can be moved and manipulated in to a huge variety of positions, allowing for much more control over the shape you are trying to create than if you were to use a plane or a draw knife.
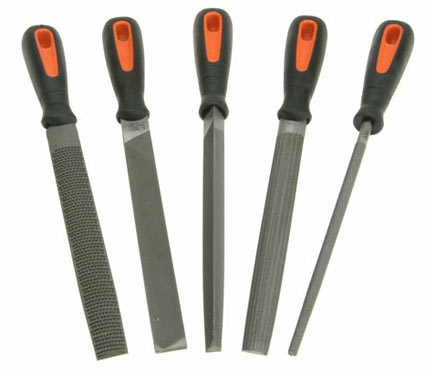
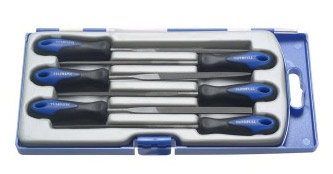
Bahco file and wood rasp set – When buying file sets, you normally get at least one rasp in with the kit
Wood rasps are designed to shape a surface quickly and can be bought with a variety of tooth settings so the finish can be made finer and smoother as the work goes on. Much the same as using a heavy grit sandpaper before moving up to a finer grit paper for getting that real neat and clean finish.
Today, most are produced by machine meaning that the teeth along the length of the blade are all cut uniform and in rows. This uniformity causes grooves to be cut in the surface you are working on leading to a not particularly smooth finish, although as mentioned, this is dealt with by using rasps with finer teeth and eventually sandpaper.
Traditionally, wood rasps (and also many other tools) were hand made and in this case the teeth were often cut into the blade with slight variations, not in precise rows. This meant that over the full length of the blade you would get total coverage and not experience the affore mentioned grooves or channels, leading to a smoother and cleaner job from the off, cutting down on a fair amount of work in terms of finishing.
If you are lucky enough to have posses some of these older tools you may already know this but if not, its well worth trying to get hold of some. They might be older, but in most cases, they were built to last! This is also the case for some of the newer and more expensive items, so examine the blade and teeth closely.
On the subject of the teeth, the way in which these have been formed will also have an impact on the cleanness of cuts and the speed of use. On a quality item, all the teeth should be of a unifom size and height (can be either pointed or slightly flat) and this will produce a nice cut, but on cheaper items you may find that the teeth are not uniform and that some are also slightly crushed, an unfortunate side effect of the manufacturing process.
What Different Types of Wood Rasp are There?
Due to the variety of ways and situations that rasps can be used, there are a fair few differing types and each type can come in a number of shapes, grades, lengths, widths, diameters and cuts. They can be flat on both sides, flat on one side and half-round on the other, completely round, square or triangular.
The ends or tips of these tools can also be shaped, allowing use in hard to reach areas and also enabling the user to create complex and detailed designs.
These designs allow for most types of shaping to be done with a wood rasp before the work is finished using finer tools.
Typically, the term “rasp” is a bit of a global term and is used to describe an entire range of items that all share some similar characteristics, in this case, woodworking. The most common rasp types are as follows:
Cabinet Rasps
These are really the most common type and can come in a variety of shapes, lengths and widths. Normally they are used for the initial shaping, so material removal and speed are the important factors, so the more course grades are commonly found in DIY sheds and stores, with the finer grades available from more specialist outlets.
Although available in a great range of shapes and sizes, the particular type you will need very much depends on the work you are doing, so for ease of working, it’s very important to get the right tool for the job.
One important point to note is that in a lot of cases, left handed and right handed versions of a particular shape or style rasp should be available so make sure you have the correct one for your needs.
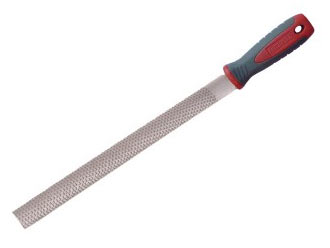
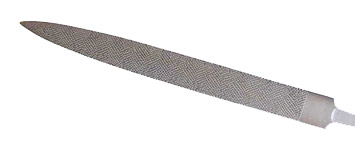
Standard course grade cabinet wood rasp
Round Rasps
This type, as with the cabinet type above, comes in a range of diameters and lengths, each suited to a particular job or situation e.g. carving out and shaping in tight spaces or accute angles.
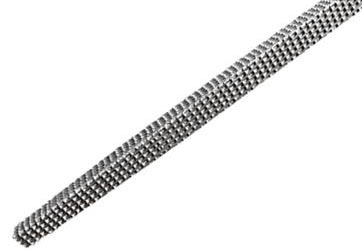
This particular tool is completely round and features teeth cut all along its usable length and around its circumference.
They are mostly used for smoothing out circular shapes or carving detail and even for creating spiral patterns into the timber itself. These are also sometimes refered to as “rat-tail files”.
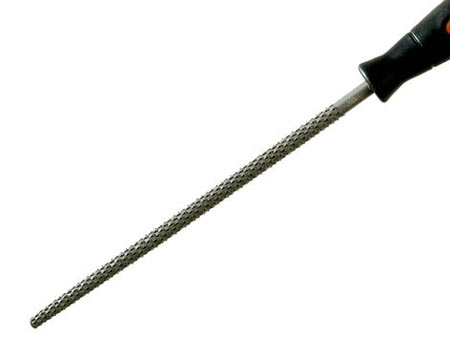
Round or rat-tail wood rasp
Square and Triangular (Threesquare) Rasps
Much like the round rasp above, these are shaped along their usable length, but square or triangular this time (as opposed to round).
Their main use is for smoothing out and cutting angular shapes or notches in timber e.g. for squaring up circular drilled holes or smoothing out mortice and tenon, halved, shoulder and rebate and other types of timber joint if needed.
Triangular rasps can also be used in pretty much the same situations but can also obviously be used for smoothing and finishing triangular shapes.
As with most other types of rasp, they are available in a vast array of lengths, widths and grades to ensure that any size of work such as smoothing large shoulders right down to finishing a tiny detailed area can be achieved by anyone.
Square course grade wood rasp
Knife Rasps
Keeping with the theme of shaped tools for detail work we now get to the knife rasp. In terms of shapes, they look very much like their namesake suggests they should – they are very knife-like in appearance, featuring a fairly wide body that tapers down to a thin point, with the top being flat.
The body of the tool itself tends to be double cut (e.g. has teeth cut in two different directions across the usable area that cross each other) with the actual knife edge area being single cut
In terms of use – these rasps are ideal for cutting very narrow slots in timber or for shaping and smoothing very tight areas, corners or angles or items that require very fine adjustment.
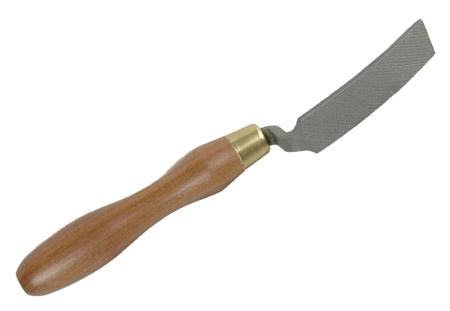
Knife edge wood rasp – Image courtesy of bobvila.com
Needle and Modeler’s Rasps
As the name might suggest, these are almost exactly the same as all other rasps but they are much smaller, allowing for working on items of a much smaller scale e.g. models. This gives the user much finer adjustment and enables cutting and smoothing
Due to their size, they normally come in sets of six or more and include a variety of profiles that include round, half round, flat, flat with a tapered end, square and triangular that should pretty much cover all possible requirements.
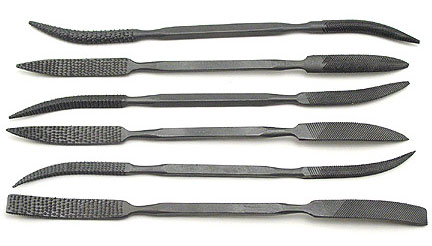
Needle file set
Cranked Rasps
These are generally quite unique items and only really available for purchase from specialist woodworking tool manufacturers. They are also normally hand made which does make them quite expensive to buy.
In respect to using them, their main purpose is for getting in to tight areas and working where space is very limited.
The usable area of these raps tends to be much shorter than their straight counterparts and the tang (the handle area) is bent or cranked allowing the user to get a firm grip on the handle without hands and knuckles getting in the way.
Cranked or bent neck wood rasp
Rifflers or Riffler Rasp (or Files)
The Riffler rasp (or riffler files as they are also known) are, as above, for detailed and fine work and are mainly used by modelworkers, patternmakers an those making musical instruments and other similar trades that require a great deal precision detail.
When it comes to the name “riffler” they are quite often referred to as “riffler files” as they share more similarities with files than rasps but due to the way in which their teeth are cut, this normally leads to them being classified using the Swiss pattern system and this is quite uncommon for rasps as they tend to be classified using the American pattern system (American pattern files are generally larger and come in different shapes).
As you will notice from the image below, they are double ended with a handle area in the middle. This is mainly a speed and efficiency thing as it is much quicker and easier to flip a tool you are already holding over than it is to locate and pick up another one or two tools.
In terms of how it is decided what ends are featured on a given tool and also what shape they are, this was developed and refined over many years by the numerous users of these tools. Essentially, each end should complement the other when it comes to the grade and shape so the user can easily flip between them when working.
Rifflers wood rasps showing range of shapes available – Image courtesy of traditionalwoodworker.com
Different Grades of Wood Rasp
The different grades of rasp are normally broken down in to three types (in much the same way as grading metal or hand files):
- Cabinet and wood grade – The most course cutting type for the quick removal of material
- Cabinet or medium cut – A medium grade cut for intermediary work
- Fine, Patternmaker or Bastard cut – This is the finest type of cut available. It is worthy to note that this is the opposite way around when it comes to hand files. The Bastard cut is most course grade
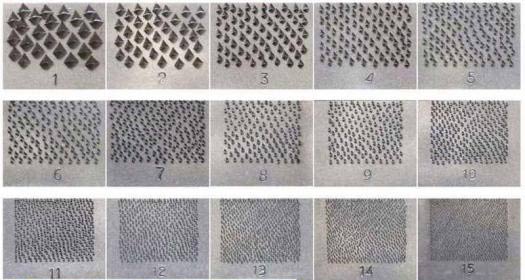
Different grades and cuts of rasp available – Image courtesy of canadianwoodworking.com
As you may imagine, the smoothness of the finish will very much depend on the type of rasp you use. To these ends it is best to start with a wood rasp to cut the rough shape you are trying to create then use a medium cut to refine the shape before finishing off with a fine cut rasp for a fine finish.
Handles for Wood Rasps
One final point to note when it comes to rasps is the handle. Most of these tools (whether bough individually or as a set) when bought from one of the chain DIY sheds should come with a handle, but if you are buying better quality or more specialist items then this may not be the case.
When using a wood rasp, you should always use it with a handle. Not only will it be more comfortable to use but it will also be safer as if you don’t, there is the chance that during use it may stick and if you are putting a fair amount of weight into each stroke and it suddenly stops dead, the tang (the thin, pointy area that the handle pushes on to) could quite easily go through your hand!
If you bought your tool from a more specialist supplier, they should also sell the correct handle for the particular item you have, please get this also. Don’t be tempted to cut costs by not buying one, it could be a painful mistake!
How to Use a Wood Rasp Correctly to Shape a Piece of Timber
Rasps, as with metal files, are designed to cut or plane on the stroke away from the body. Using a rasp or file in both directions will eventually wear and ruin the teeth.
The primary job of a rasp is to help the user create nice flowing curves and shapes in timber but it can also be used to cut angular shapes and notches.
To ensure that you end up with the desired shape it is essential that you use the correct type of wood rasp e.g. for flat surfaces use a flat rasp, for curves use a half round or round rasp and for smaller, finer details, the needle or rifflers rasps are the ones to go for.
Make Sure Work is Held Tightly
Before you start rasping away, make sure the item you are working on is gripped tightly and won’t move while you are trying to work on it. If you are working on a large and heavy piece or you are shaping a solid lump of timber e.g. a sculptor or piece of furniture then this should be heavy and bulky enough not to move too much.
If however, you are working on a smaller, lighter piece then, ideally, you will want to hold it in a vice or workmate. Depending on the timber you ar working with, it may mark easily so before you clamp the jaws up tight, insert a couple of timber scraps between the vice or workmate jaws and your working item so that the jaws themselves do not bite into the work and ruin it.
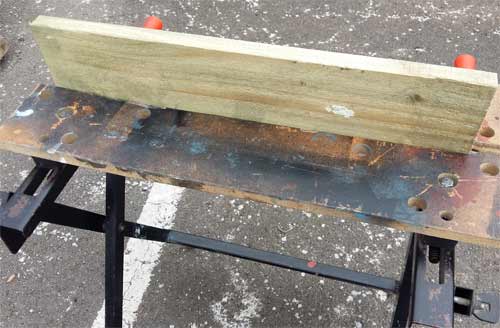
Timber to be worked on clamped tightly in Workmate
Mark out Your Working Area
Using a pencil, gently mark out the area or shape you want to create on your piece of work. Be as accurate as you can with any measurements and once you have taken it off you can’t glue it back on again!
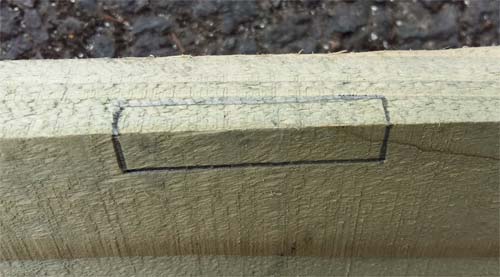
Working area to be shaped marked on timber
Start Shaping Your Work
Before starting, it is important that you know how to hold your wood rasp. Using your primary hand (e.g. left hand if left handed, right hand if right handed), pick up the rasp by its handle. With your other hand, grip the tip firmly between your thumb and index finger.
The teeth will feel slightly sharp, but you will probably get used to this after a while. If not, you can wear a sturdy, thick pair of gloves.
Place the rasp down on your piece of work with the tip resting on your working area and push it through and across your timber. Try not to push down into the work but across it. The teeth will be doing the work so let them do so.

Cutting Shape into timber with a course grade wood rasp. As we are cutting an angled shape, a flat rasp was used, for curved shapes it’s best to use a half round rasp
If you’re using a course grade tool then this will take off a fair amount of material per stroke so make sure you keep an eye on your markings and how much you are removing – Stop and check your work regularly.
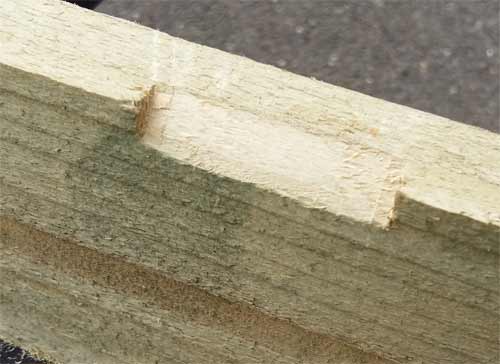
Continue working until you have cut the general shape you are going for. At this stage, don’t worry too much about how smooth it is, we will be getting to that in the next stage.
Rough surface left after first pass with course grade wood rasp
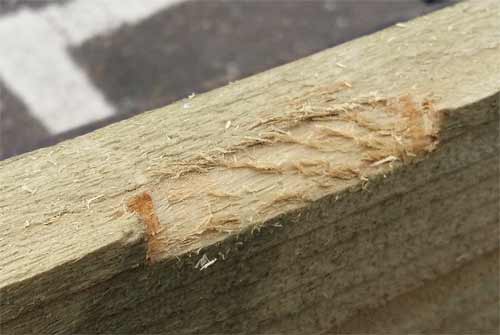
A Note on Grains and Tearout
It is also important to remember and take notice of the actual grain of the timber you are working with and which direction the grain is actually running in. If you are working across the grain there is a good chance that when you get to and end or corner, you will get some “tearout”.
This occurs because there is no support at this point and the fibres of the wood simply crumble away. To avoid this happening, it’s best to position your work so that you can rasp away from any corners or weak points. This way the grain should then be supported by the neighbouring grains.
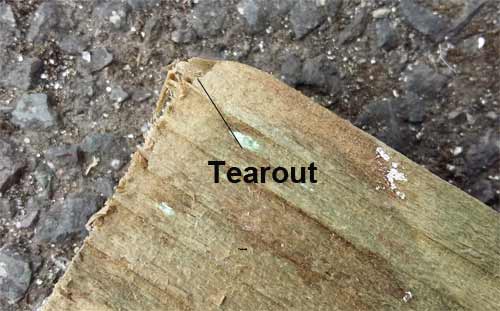
Tearout caused by rasping across timber grains
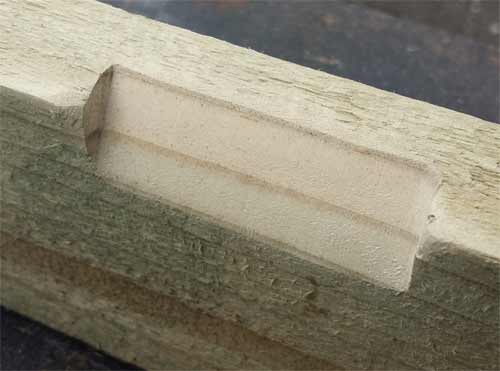
Smoothing Your Shape
With the general shaping done, now it’s time to start getting it really smooth. Depending on the quality of the rasp you are using will really depend on the work involved here.
Some cheaper rasps will leave quite a few rough grooves in the surface that will need to be smoothed away. Some of the more expensive tools will have sharper and more randomly placed teeth that will significantly reduce this problem.
To begin smoothing your work, you will need to be using a finer grade tool around the middle of the range (see image above) e.g. between 9 and 11.
Using the method stated above, grip the rasp correctly and begin running it over the surface.Again, stop and check your progress on a regular basis to see how smooth it is becoming and also that you are not taking off too much or affecting the shape you are creating.
Continue working until you have it as sooth as you possibly can with the tool you are using.
Further smoothing to timber shape using a finer grade wood rasp
Final Smoothing and Finishing
This is the final stage and the one where you will be getting as smooth and fine a finish on your work as you possibly can. With this in mind, it’s time to put down your rasps and pick up the sandpaper.
As your work should now be quite smooth already, you will want to start with a fairly fine grade of sandpaper, something around 220 – 240 grit should be fine, but test on a small area first just to make sure!
Run over your work with the paper, checking regularly until you are happy with both the shape and smoothness.
If you need to, you can move up to a higher grade grit (320 or more) if you want to get an even finer finish, but again remember, don’t take off too much.
Final smooting stage using fine grit sandpaper, it’s not quite totally smooth, but well on the way!
Cleaning and Caring for Your Wood Rasp
Wood Rasps, like most other tools, do need occasional maintenance. They need to be cleaned correctly and also stored in such a way that the teeth are not damaged. It’s no good just chucking them in a tool bag along with a load of other items as the teeth will just get bent and crushed.
you should store these items with care to ensure maximum usability! Most rasps (event the cheaper ones) will come in a plastic sleeve and this should always be kept on the item. In terms of storage, they should be hung up or placed (individually) in a location where there is no chance of damage e.g. placed in a drawer in a tool storage unit or, as mentioned, hung up.
When it comes to maintenance, they do need to be cleaned. Don’t be tempted to just bang them on a tool bench to clear any wood shavings as this will again, likely damage the teeth.
To clean them correctly you should use a wire brush or, better still, a file card (this is like a wire brush but features much finer wires).
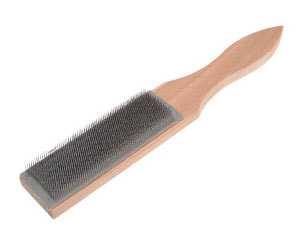
File card for cleaning files and wood rasps
Using a Wood rasp can seem like a fairly simple thing to do, but to be able to create a smooth, symmetrical shape in a piece of timber does take time and knowledge so we do recommend that you do practice first.
When working with timber we do also recommend that you use the appropriate safety equipment such as goggles, gloves, dust mask and old clothes.
If you would like to know about using a hand file for working with and shaping metal see our hand files project here.