Getting things level (or vertical) is a critical part of any construction project and for a lot of home improvement ones too. The level is one of the most useful and important tools in any toolbox. The aim of this project is to explain which type of level you should use for different types of jobs and how to use a level effectively.
What is a Level?
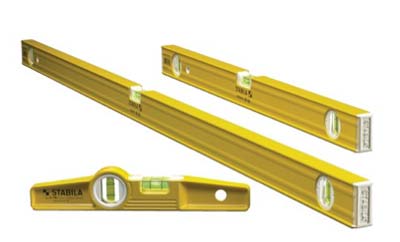
A range of different types of level made by Stabila
According to the Encyclopaedia Britannica a Level is a:
device for establishing a horizontal plane.
This is a clear definition as any; succinct and correct. Most levels can also be used to find a vertical plane also, generally in exactly the same way as finding the horizontal plan. There are many different types of levels that are used in different circumstances, of which the spirit level is one. We will cover the main types now.
The Different Types of Level Used in Construction and DIY
Broadly speaking there are 4 types or groups of level that are commonly used in construction projects, although we are only going to focus on the spirit level in this project it is worth quickly mentioning the other types before we start:
Spirit (or Bubble) Levels
We will explain the different types and also how to use a level in greater detail below.
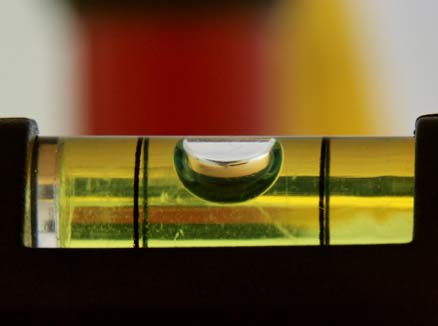
The bubble in a spirit level shows when it is level – Image courtesy of Wikipedia
Laser Levels
As the name suggests this is a level that uses a laser to project the level on to the surface that you need to establish the horizontal plane. The more expensive and sophisticated devices will show the vertical plane also, which can be very helpful.
We will not cover these here, as we have an excellent project all about using laser levels that you should read.
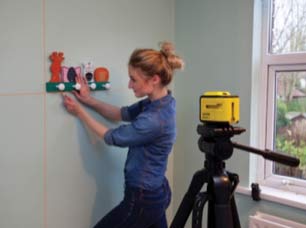
Using a Laser level
Optical Levels
These are tools that are generally used by surveyors and builders on larger construction sites where a level plane needs to be established over a long distance, such as across the whole building site.
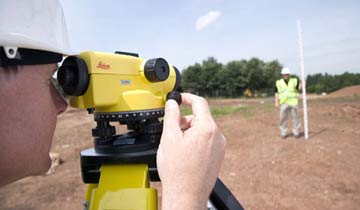
Using an Optical Level on a construction site
When using an optical level, the level plane is actually derived using a bubble in a vial and then using the lens it is transferred to the site.
Water Levels
This is one of the more simple and elegant solutions to transferring levels from one place to another, however they will not establish a level plane. We explain how to do this and even make your own in our project about water levels.
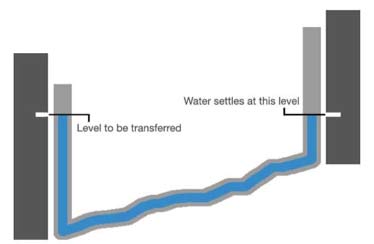
How a water level works to find a level
How does a Spirit or Bubble Level Work?
There is a small glass tube or vial containing alcohol with a little bubble sealed inside. The top of the vial or tube is ever so slightly bowed so that when the flat surface under the vial or level is absolutely horizontal the bubble will come to rest in exactly the middle of the tube or vial. This is usually marked with guide lines to make it easier to see.

Bubble levels use a bubble in an alcohol solution to show a level
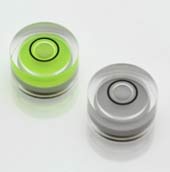
Circular bubble levels work on the same principles as linear bubble levels
The accuracy of the level is determined by how curved the top of the vial or glass tube. The “flatter” it is the more sensitive it is and therefore more accurate it will be (in the right hands).
A tube vial will be able to show the level in one plane but will tends to be easier to use and more accurate for hand use. The different planes will all need to be checked separately; widthways then lengthways and ideally across the diagonal too to get a completely horizontal surface. (A cross check level is often used for this – see types of level below).
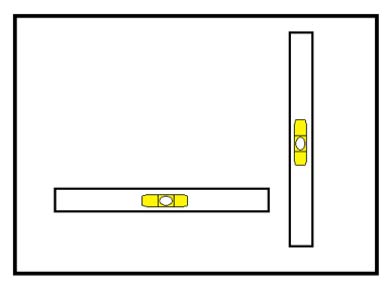
Using a Level in 2 planes to get a horizontal surface – the more checks the better!
With a round bubble vial you can get the level in all planes in one go although they can be more fiddly to use without a firm base and a mechanism for fine adjustments, which is why they are most commonly used to level devices that have a tripod stand or similar stand.
How to use a Spirit Level
This is a quick step by step process for how to use a spirit level:
- Place the level against the surface where you want to find the level. Ideally this should be smooth and flat so the level can be held securely to it without moving or wobbling
- Move the level until the bubble in the vial or tube is exactly in the middle of the guide lines. Depending on the level you are trying to achieve this might mean moving the level itself, say against the wall if you are ensuring that pictures or sockets are at the same level, or moving the object the level in on to get it horizontal, such as a paver for a patio or perhaps a shelf
- Check the bubble again, before marking the level if required
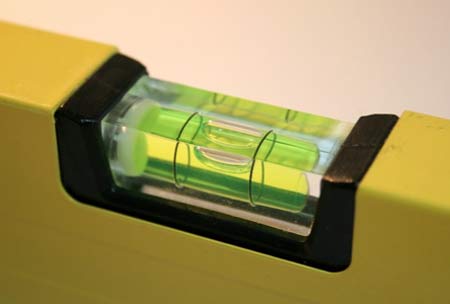
Ensure the bubble is centred between the guide lines
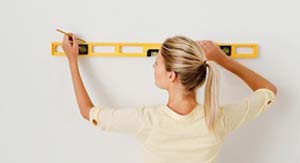
Using a Spirit Level to mark a horizontal plane to hang pictures level
Measuring a Perpendicular or Plumb with a Spirit Level
In the same way a spirit level can be used to measure true vertical surfaces, or what is called plumb in the trade.
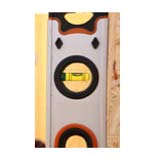
Using a spirit level to find a verical level
The same process is used however the level needs to have a vertical vial which will show the level of the perpendicular.
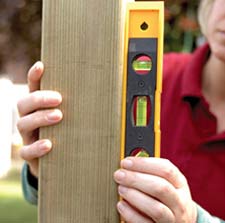
Measuring a plum with a spirit level
Measuring a Slope with a Spirit Level
On many occasions you want the surface to look level, but to actually be on a slight slope. This might be when laying a patio to ensure water runs off, or to have a slight slope in your screed.
If this is the case rather than ensuring that the bubble is in the exact centre of the vial, between the guide lines, the bubble should be slightly off centre. Here it helps if you have a vial with multiple guidelines so that you can ensure that the bubble is in the same place at all paced along your (slightly off) horizontal surface.
Once you have established the angle that you need the slope to be used can be transferred using the spirit level to ensure that you consistently keep to that slope.

The guide rings on a Spirit Level vial to show the angle off the horizontal
TIP: An old builders trick to getting the right level is to place the base of the spirit level in with the right level, then you can draw on to the top of the vial with a felt pen where the bubble comes to rest. Now as you work across the surface you can ensure that the level comes to the same point, so the bubble comes to rest at your felt pen mark. Remember to wipe the marks off when you are finished.
Some spirit levels come with a 45o vial or even an adjustable vial. These can be used in the same way to establish the angle whether it is 45o or another angle set in the adjustable vial; you need to move the spirit level until the bubble is in the centre of the vial. At this point the level is at the required angle.
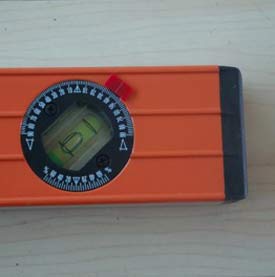
An adjustable vial in a box level
How to Check the Accuracy of a Spirit Level
When you are looking to create a level, be it horizontally or vertically you need to be confident that the spirit level that you are using is accurate. The process for checking a level’s accuracy is very simple; effectively you are checking the level in two directions to see if there is a difference – the size of the difference is a measure of the inaccuracy, as ideally it should read the same in both directions.
This process works for all types of spirit levels, but you will need to check each vial or tube individually. Here are the steps for checking the accuracy of your spirit level:
- Place the spirit level on a flat surface that is as near to level as you can conveniently find
- Mark on the surface the end of the level and the side of the level
- Check the position of the bubble – and remember exactly where it is
- Turn the spirit level around by 180o and place it against the marks you made so it is in exactly the same position but just reversed
- Check the position of the bubble (of the same vial if your level has more than one) – it should be in exactly the same position as when you first checked it relative to the level. Any difference is the degree of inaccuracy with that vial on the spirit level
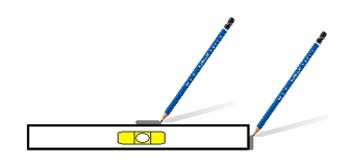
Mark against the end of the level and at the side
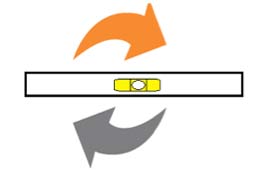
Turn the level around

Reposition the spirit level against the marks and check the position of the bubble
You can use this same process for the vials used for measuring vertical surfaces in exactly the same way, only by placing the level against a vertical surface.
It is worth double checking your measurements twice so that you are sure of the accuracy.
As this is a very easy test, we recommend regular checks, certainly do it before you make a purchase, or if you have dropped or think you might have damaged it. We check our level before we start a job, especially if we know it is one where we need to be highly accurate.
Important Features of Spirit Levels
Before we get into the different types of levels, there are some important features to look out for and are common to all, as essentially the bubble is the part that all these types of level use to do their job.
If you are buying a level these are the features you should look out for:
Accuracy
All levels should have an accuracy tolerance which will be published for you to check before purchase. It is usually stated as “+ or – 0.Xmm per meter” so you can ensure you get the accuracy that you require
Bubble Size
The bigger the better when it comes to the bubble as it is easier to see. The issue is that the bubble size is determined by properties of the liquid, which will expand and contract as it get hot and cold which affects the size of the bubble. The bubble should always remain inside the reading lines.
The sales patter will be about the liquids expansion confident and the guaranteed working temperatures. The better these are the more accurate but more expensive the level will be.
Liquid Colour
Most levels nowadays have the liquid coloured so that it is easier to see the bubble. The colour will fade from the liquid over time and in the sun, but how long this takes is a mark of the quality, but of course you have no way to tell this in advance, except by a guaranty – and may be the price!
Reading Lines
These are lines inserted into the tube or vial or in some cases they are painted. These need to be clear and easy to see without impacting the movement of the bubble.
Protection
The vial or tube is actually quite delicate and as such needs to be protected, however the level will be dropped and have a touch life especially if on a building site. The ends should be strong rubber or similar to reduce shock and the construction sturdy, but light weight. Look for shock proof vials and end caps when buying a spirit level.
Construction
Depending on where you will be using your spirit level, you need the most robust body that you can get but will not damage the materials you are working with.
Builders will use robust aluminium levels, however if working with more delicate materials such as a work top you might consider a softer body made of something like plastic.
For accuracy, some aluminium levels will have one or more milled surface, which is a precision machined surface to ensure that the surface is absolutely flat and horizontal.
Use and Grip
You need to be able to hold the spirit level in place to get an accurate reading so hand holds are helpful, particularly on the longer levels.
V-Groove
This is a feature that some levels will have and it is a groove in the surface of the level which is designed to fit against pipes of conduit so that you can ensure that they are fitted horizontally or perpendicular.
Magnetic
Some levels have magnets within their bodies so that they can be “stick” to metal pipes, scaffold poles or other metallic surfaces. This means that they can be used “hands free”.
The Common Types of Spirit Level
There are a lot of different types of spirit levels. To make things even more confusing they also have different names often depending on who or what they are being used for or sometimes how they are constructed.
Here are the most common types of spirit levels that you are likely to come across:
Carpenters, Builders or Long Levels
- i-beam levels: the frame of the level is an “i” shape when looking at its end. They are also called Girder Levels (because they look like a girder in cross section). They have similar uses to a box level but tend to be a slightly less sturdy, cost effective alternative
- Box beam levels; also known as Box Level or Box Section because the frame is a rectangle, box shape. The best ones are not hollow but encase acrylic (or similar) to make them more robust. They are stronger than I-beam levels, but typically heavier
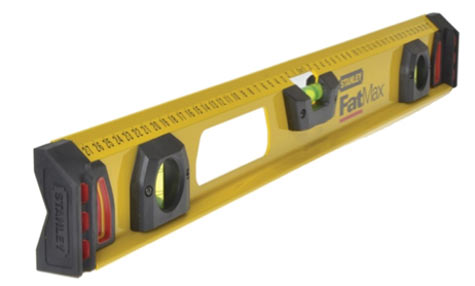
An Girder or I-Beam Level
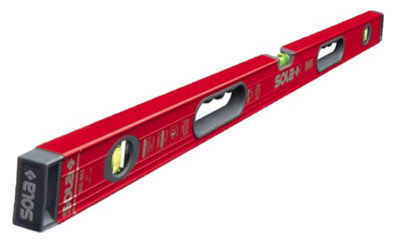
A Box Section Level
Toolbox Levels
- Torpedo levels: These are spirit levels that are ideal for keeping in a toolbox. They are slightly bigger than pocket-sized being 6 to 12 inches (15-30 cm) and typically with 3-vials. They are the generally purpose, all-rounder of the level world designed for use in tighter spaces
- Scaffold Level: A specialist variation on the torpedo level is the Scaffold Level. As the name implies it is ideal for use when erecting scaffolding, but also used by plumbers and others working with pipes or metal surfaces. They have magnets to “stick” to the pipes. Sometimes called a Boat Level.
- Pocket levels; these are small spirit levels as the name suggests, designed for quick use and often come with a belt clip mount and can be put in your pocket. Ideally they should have magnets and a v-groove for use with pipes and metallic surfaces
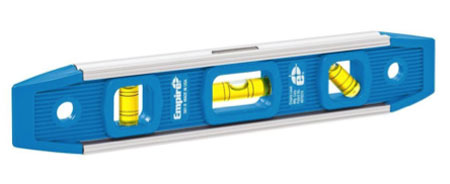
This is a typical torpedo level
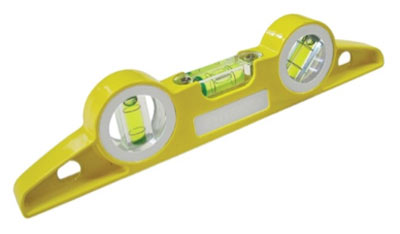
A scaffold Level made by Faithfull
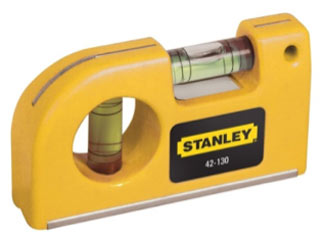
The Stanley Magnetic Horizontal / Vertical Pocket Level
Specialist Spirit Levels
- Line levels; also called a String Level, these are a single vial with a hook so it can be hung on a string. They are for levelling across long distances, and this was a method that was used before laser levels were invented. Using a taught string tied between two points (so that there is no sag in the line), when the ends of the line are moved so that the bubble is in the middle of the guide lines, then the two ends (and all the line) are at the same level. The Line Level can be hung at either end of the line, whichever is more convenient, so long as the line is tight. They are ideal for getting a level for laying paving stones or for levelling ground
- Cross check levels; Also known as 2D Levels or Right Angle Levels these are pocket sized levels with two vials at right angles to each other so that you can check the level in two planes at once
- Circular levels; These are sometimes known as surface levels as they are useful for ensuring that a surface is level. They are most commonly found on devices that need to be levelled, such as a tripod for an instrument or camera
- Post levels; This is a specialist level that is designed specifically for making sure that posts are plumb in all directions. The wrap around two sides of a post to measure the level in both horizontal planes. Most will have a third vial so that they can be used to ensure that horizontal rails, joists or other timbers, etc will be level.
- Angle levels; these are levels that are designed to be used as on angles from the horizontal. They have an adjustable vial so that you can set the desired angle
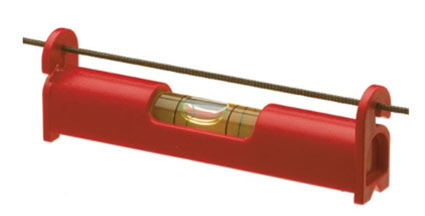
A String Level hooked on a Line
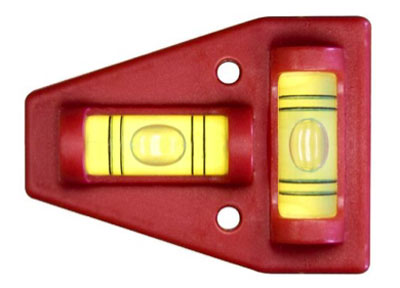
A 2D or Cross Check Level
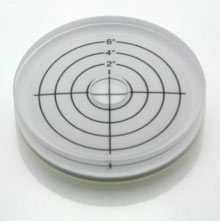
Circular level with 2, 4 and 6 degree markings
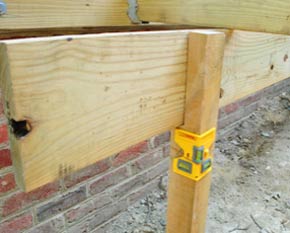
Using a Post Level
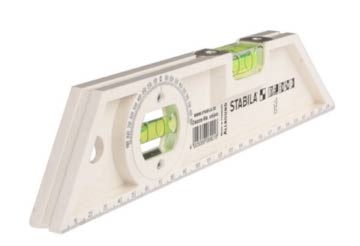
An Angle device or Angle Level
Home Made Levels
If you haven’t got a Spirit Level to hand or fancy making your own it is not actually that difficult. At the simplest you can put a marble or ball bearing on a flat surface and it will roll down any slope; when it does not roll away the surface is level.
We describe how to make a Water Level in a separate project, and this is a very useful way to transfer levels.
Water always finds a level so you know that the surface of standing water will be level. You can use this fact to find a level using a glass of water.
Spirit Levels are a vital part of any toolkit but it is important to know how to use them and which type of level you should use. Hopefully this project has given you the confidence to get the right spirit levels for your needs.

