Trying to work with warped timber that isn’t straight can be a complete nightmare, especially if the object you are constructing needs to be accurate and to a specific size. If you are measuring off of timbers that aren’t straight then nothing in turn will be straight.
Unfortunately as modern softwood timber is grown so fast it’s no where near as dense as timber of old so is very prone to warping and twisting
If you are a keen diy’er and like to dabble with a bit of carpentry at some point you will need to straighten warped wood for use with a project so read on below to find out how.
Why Does Timber Warp and Bend?
There are quite a few different reasons why a piece of wood will twist or warp and most of these are down to either the type of weather, temperature and environment it’s been exposed to and how it has been produced and stored.
Quality and Production
As we have briefly mentioned above, due to the speed that modern timber is grown and produced it’s no where near as dense as it used to be. As it’s not very dense the wood fibres that make it up are fairly loose and due to the very prone to movement.
So, if not kept totally flat and level or supported the weight of the timber itself can cause it to warp.
Insect Attack
If you live in a fairly old house or have old and antique furniture you will be well aware of existence of woodworm and other similar boring insects (if not, find out more in our woodworm project here).
Boring insects, ants, beetles and other insects can attack and destroy timber in a relatively short space of time, most through boring into it and also consuming it.
Both acts can loosen the fibres that form the timber causing it to easily bend, kink or warp.
If you find any evidence of insect attack in timbers around your home dealt with it right away!
Exposure to Temperature and Moisture
Temperature and moisture individually can both damage and warp timber but when combined can severely damage timber in a short space of time.
When timber is exposed to high temperatures it tends to swell whereas in colder temperatures it tends to shrink. This action over time will cause timber to warp, twist and kink and sometimes even split and crack.
Additionally, if timber is exposed to higher levels of humidity over a period e.g. stored in warm and damp conditions then the excess moisture that it absorbs will cause it to twist and warp.
Storage
One final main contributor to the bending, twisting and warping of timber is how it’s stored. Timber, especially if its smaller, lighter softwood timber such as 3×2 C16 should always be stored flat e.g. led on a flat surface.
If it’s stood upright and not supported through its length it can easily bend, warp and twist so always store timber flat and level.
Finally, never store timber for long periods if it’s wet. Quite often timber, especially pressure treated timber, is stored outside at timber merchants, builders yards etc and due to this can absorb moisture. If it’s then left on storage racking or other storage framework whilst still moist it was easily twist and warp.
Before storing timber for long periods, always make sure that it’s fully dried out!
Types of Warped Wood
Each of the above causations for warping can result in a different type of warping or twisting in a piece of wood.
Before you can actually straighten warped wood it’s a good idea to first find out where and how the timber is warped. By doing this you will then know how it can be straightened.
- Cup: As the name suggests, this is when the timber drops in the centre over its width to form a convex shape
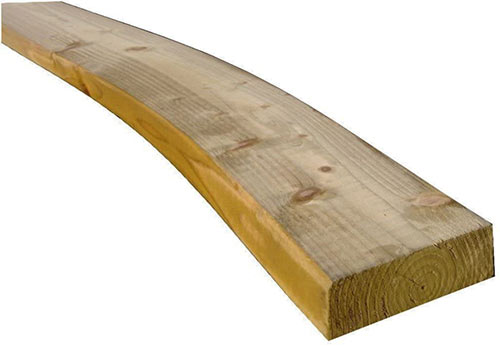
- Bow: Similar to “cupping” above, bowing is when timber drops and warps over its length when led flat on a flat surface
- Crook: Similar to bowing, crooking in timber is when it warps across its length but this time is occurs across one edge
- Twist: Again as the name suggest this is when a piece of timber twists somewhere along its length
- Kink: Kinking in timber refers to when it suddenly bends off at an angle along it’s length
Cup warping over the width of a piece of timber
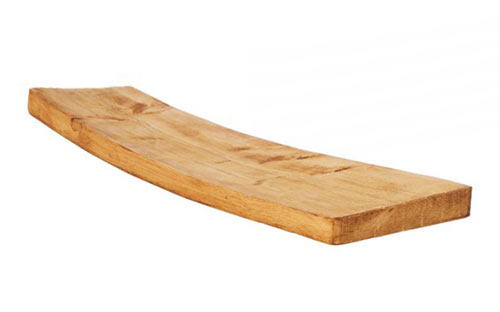
Bowing over length of a piece of timber
Crooked timber with warping occurring from one edge
Twisted piece of timber
Piece of timber with kink in it
As you can see there are a great deal of different ways that a piece of timber or wood can warp and a fair few different causes, the majority revolving around how it’s stored.
Despite its fairly hardy nature, timber (especially many modern softwoods) is in fact fairly delicate and if not treated correctly can easily get damaged and if it’s too bad its rendered useless.
How to Check Timber for Warps, Bends and Twists in Timber
The best way to check a piece of timber to see if it is twisted or warped is to lay it down on a level and flat surface and visually check along it’s length. Turn it over through all four faces, checking each as you go. If fairly severe warping is present this will be obvious right away.
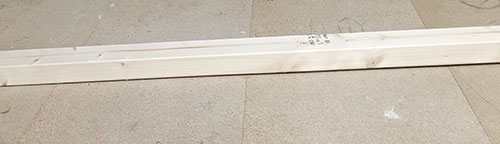
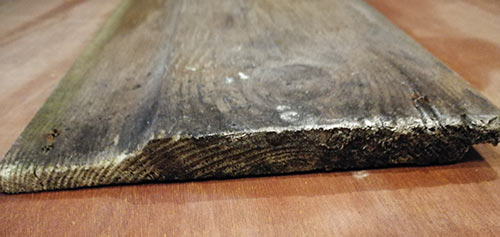
Slightly warped piece of timber laying on flat surface
Alternatively with the timber laying on the ground, pick one end up and hold it at eye level and look down it’s length. Turn the timber around through all four faces carefully inspecting each as you turn. Any warping, even slight will be visually obvious.
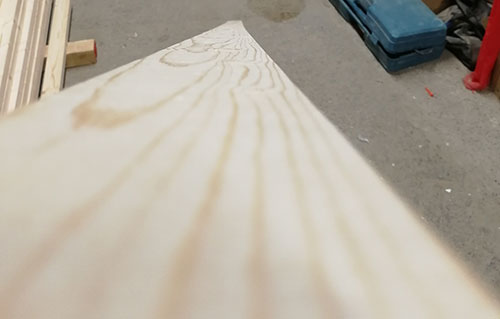
Looking down length of timber to inspect for warping
One further method to check for twisting in wood is to use winding sticks. These are short flat, level and square pieces of timber (or sometimes metal) that you can lay in pairs on a piece of timber, one front, one back and then visually inspect them. If they line up then the timber is fine, but if either drops or skews then it’s twisted.
With the wood you are inspecting laying on a flat surface, using one winding stick, lay it flat on the timer and then run it down it’s length keeping a close eye on the edge touching the timber. If light is visible its warped. Likewise, if either edge raises or drops then twisting or warping is present.
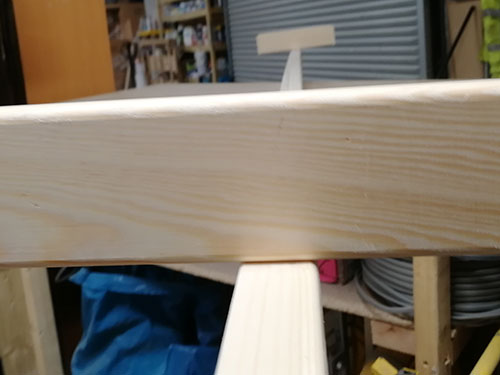
Using a winding stick to check for twisting and warping
How to Straighten Warped Wood
Now that we know how to inspect a piece of wood for bending, warping or twisting and also how to identify the particular damage it’s time to find out how to fix it.
In the majority of cases even after you have used your chosen unwarping or straightening method you will never get the timber perfectly flat but in most cases it’ll be very close.
There are numerous methods you can use, some easier or more effective than others.
Using Heat and Moisture to Fix Warping in Wood
In this method for straightening warped wood you use moisture to essentially soften the wood and then heat from a standard domestic steam iron to straighten it back out.
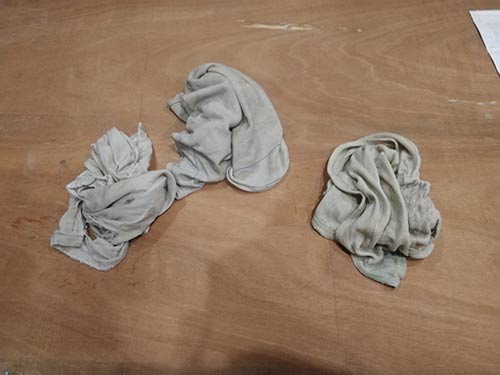
- Step 1 – Moisen towels/rags: Collect up some old towels or rags (towels best as they need to withstand the heat) and wet them down. They need to be damp but not dripping so wring them out afterwards
- Step 2 – Wrap towels around wood: Wrap the damp towels around the timber. Ensure there are no rucks in the towels and that they cover the timber completely
- Step 3 – Lay timber on flat surface: Once fully wrapped, lay the wrapped timber down on a flat and solid surface with the bulge of the warp facing upwards
- Step 4 – Warm up the iron: Using an old steam iron (must be a steam iron) plug it in and turn it on. Turn it right up to its highest temperature setting. Place the iron somewhere out of the way on a solid flat surface. Give it 5 minutes to get up to full temperature
- Step 5 – Iron over warped wood: Once up to temperature, place the iron on to the warped area of the timber and leave it resting for around 10 seconds or so and then slide the iron to the next area leaving a little overlap each time until the entire area has been covered. Put the iron safely to one side
- Step 6 – Check condition of warped wood: With the first pass done lift off the towel and check the timber over. If it’s been successful then the warping should have almost gone, however if it still remains you will need to repeat the above steps another 2 or 3 times
- Step 7 – Leave wood to dry: Once the warp has been removed unwrap the timber and leave it to dry out fully before use
Old towels dampened down
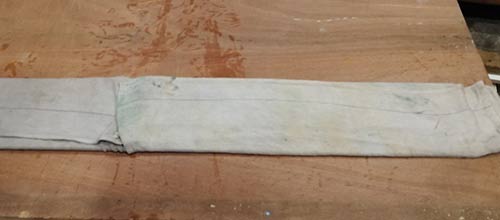
Warped timber wrapped in damp towels
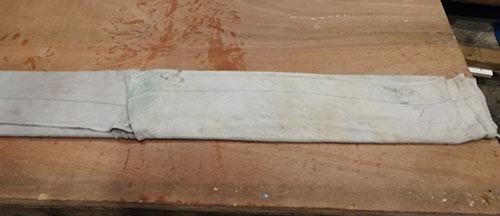
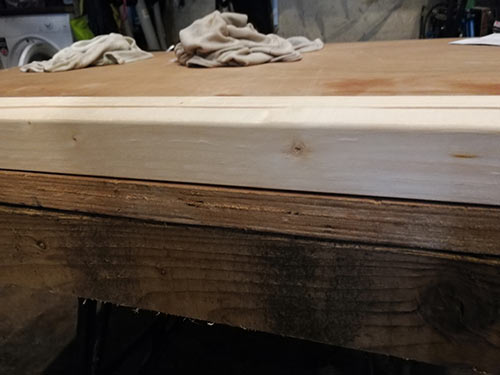
Timber led down on solid flat surface
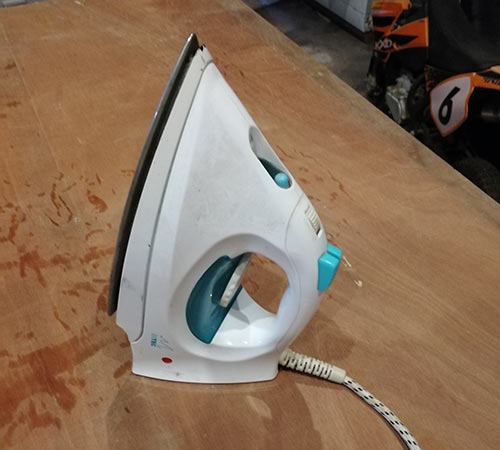
Iron turned on and up to temperature
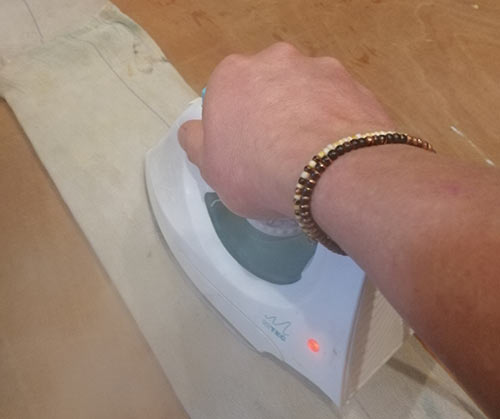
Ironing over warped timber
Check timber after ironing over
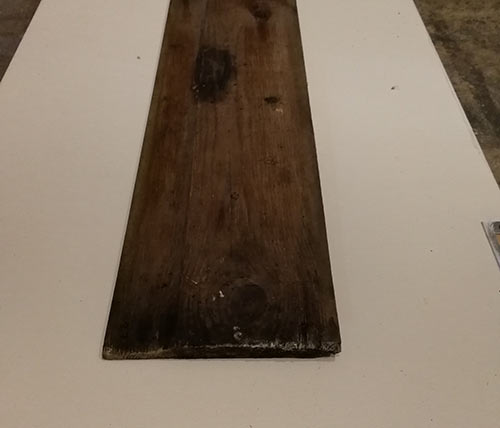
Timber left on flat level surface to fully dry out
Using heat and moisture to remove warping in wood and timber usually works quite well for very shallow warps in thinner timbers but not so well for severe warping and thicker timbers.
In these situations another technique may yield better results however it the warping is too severe it may not easily be curable and you may be better off using another piece of timber.
It’s also worth mentioning that if you don’t have an iron you can use the sun in its place, but obviously only on a very hot day.
As before wrap the wood in damp towels and place on a solid surface with the warped section facing upwards in direct sun light. Over time the heat from the sun will gradually remove the warp, but this may take a while.
You will also need to periodically dampen the timber using a rose sprayer as the moisture will quickly evaporate due to the heat from the sun.
Using Pressure to Fix Warped Wood
Applying pressure to warped wood is also a great technique for removing warps and the good thing about this technique is that it can be used on fairly large pieces of timber but you will have to ensure the clamps you are using are strong enough to pull the warp out.
The below warp-straightening technique will need to be done in as warm an area as possible not in a cold and damp garage or workshop.
Ideally temperatures need to be over 50 degrees but if this isn’t possible then the warmest room in your home should suffice or you can cover it with a heat mat, place a heat lamp over it or even leave it out in direct sunlight on a hot day.
- Step 1 – Lay timber out: Using a solid flat and level surface, lay your warped timber down with the warped section facing downwards so it effectively creates a pivot
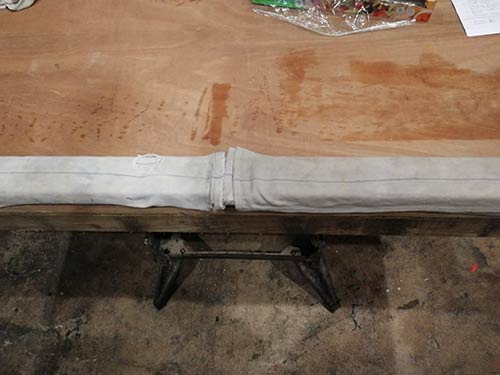
- Step 2 – Apply damp towels: Next, dampen down a towel or several towels (enough to cover the warped area fully) and lay them over the warp in the timber covering it fully. Again ensure the towels are damp and not dripping wet and that they are only covering the top of the timber and not all the way around
- Step 3 – Seal in the moisture: As this technique can take quite a while it’s necessary to seal the moisture in to prevent it from evaporating. To do this warp some cling film around the towels and timber and this well help keep the moisture concentrated on to the warping
- Step 4 – Clamp warped timber down to solid surface: Using several strong clamps along the length of the warping, clamp the wood down to a solid surface. Tighten the clamps very steadily as if you go too fast, in some cases this can break the timber. Tighten each clamp a little in turn until they start to pull the warped area down and straighten the timber
- Step 5 – Leave wood clamped: Unfortunately this is not a quick process and you will need to leave the timber clamped up for at least a week, possibly more. After a week or so check the warping and see how its progressing by removing it from the clamps and then laying it on a flat and level surface or checking with a spirit level. If it’s still there, re-wrap it, clamp it back up and leave it a little longer
- Step 6 – Allow wood to dry out fully: Once the warping has been fully removed, place the timber in a warm location to fully dry out. Make sure that the drying area is not humid. Leaving in a moist and humid area could cause the timber to warp again
Lay timber down on solid flat surface
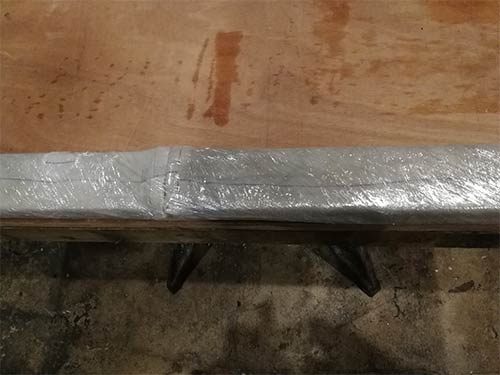
Cover timber with cling film
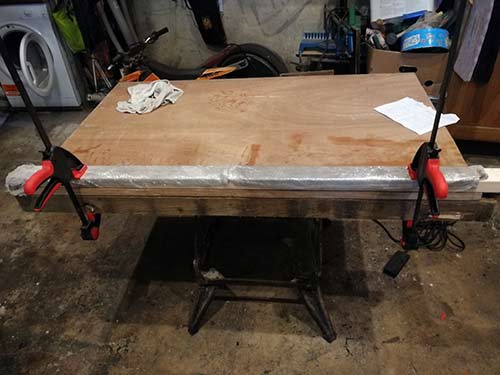
Clamp timber down to flat surface to unwarp it
Once you have confirmed that your timber has fully dried out and that the warping has been fully removed it’s then ready for use.
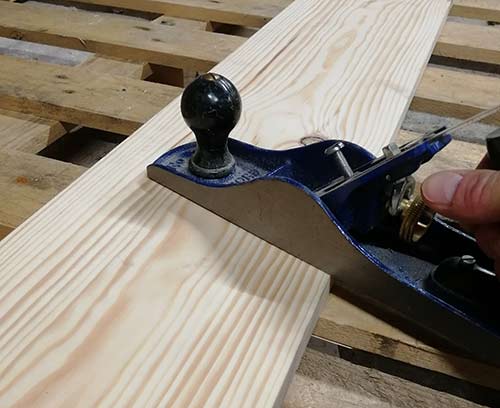
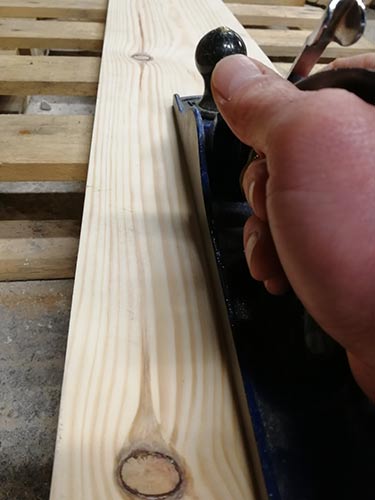
Using a Jack Plane to Level Warped Wood
If your wood is suffering from slight cupping e.g. the edges are raised and the centre has dropped to form a convex shape then it’s possible to use a jack plane to remove the cupping and straighten the timber, however this is generally only effective in less severe cases in timber planks.
The one downside of this technique is that rather then bending the timber back into shape as the above techniques do, this technique involves planning away the warped sections of wood which inherently means that it won’t be the same size anymore.
For example, if you are straightening out a 25x150mm timber plank, once you have planed it to the point it’s flat and level it will no longer be a uniform 25mm thick.
- Step 1 – Check wood for cupping: Using a winding stick, small spirit level or similar dead level object, with the timber laying on a flat level surface, lay your flat level object on the timber across it’s width and run it down its length checking for points in the centre that its not touching the timber all across the width. Lightly mark this area with a pencil and also note the direction of the cupping e.g. is the centre higher or lower. Repeat for the rest of the length
- Step 2 – Check wood for bowing: Bowing is essentially the opposite of cupping and is where the centre of the timber is higher than the edges. Using again a winding stick, small level or similar lay it on your timber and run it down the length carefully checking across the point of the level its touching the timber for points at the edges its not touching and mark these
- Step 3 – Wood cupping low in centre (convex): If the centre of your timber has dropped and the edges are higher you will need to plane across the width of the timber. Plane until sole (flat base of the plane) touches the centre of the timber and is flat across the whole width. Where the timber you’re working with isn’t that wide you can plane across it slightly diagonally
- Step 4 – Wood bowing high in centre (concave): To level off timber that’s bowed or high in the centre, using a jack plane, plane down through the centre of the timber over all the points that its high. Once flattened down use the above technique to plane across the width to fully flatten the surface back
Plane across the width of the timber where cupping is present
Plane down length of timber when it’s bowed
Using a jack plane to level off cupped or bowed timber can be fairly successful but take your time whilst using this method as once you’ve taken it off you can’t just stick it back on again!
Straightening out warped wood can be done in a number of different ways with pros and cons for each different method, but unfortunately none of them guarantee to get the timber in question back to a state where its fully flat and level.
In some cases the wood may be so damaged that it’s unusable and in these situations it’s easier to simply cut the damaged sections out and salvage what you can.