What Does a Waste Disposal Unit Do?
Unbelievably food represents 23% of our household waste. Mountains of food are placed in all sorts of bins and (if we’re lucky) sent to recycling depots all over the country. A great alternative is to be flush it down the sink and turn it into excellent fertilisers and soil food once it has been treated. Waste disposal units can achieve this and are not difficult or expensive to install.

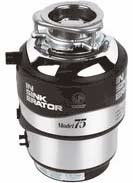
Economy waste disposal unit
In simple terms, a waste disposal unit (or waste disposer, as they are sometimes referred to) is a little device that is fitted to the outlet drain of your sink. It can be turned on to mash or grind up all the non-liquid waste that collects in your kitchen sink. Once all the food waste has been ground down it can easily be washed down the waste pipes and it will be treated by your waste water company. This is a very efficient way of getting rid of all the little bits of waste that collect at the base of your sink.
The Different Kinds of Waste Disposers or Waste Disposal Units
Broadly speaking there are two kinds of waste disposal. Some waste disposal units cut the waste into shreds using rotating blades which can be quite noisy and do tend to take a little longer to shred up the harder items of waste. Blades also have a habit of cutting the waste into stringy lengths which can potentially block standard waste pipes.
The other type of waste disposal unit is rather like the grinding wheel in a stone quarry. A grinding wheel rotates inside a serrated edge and crushes the waste into easily disposable, tiny lumps. This kind of unit can cope with far tougher waste including, in a lot of cases, small bones and fruit stones.
You can generally tell the quality of a waste disposal unit by how quiet it is but the actual composition of the sink can affect this. Waste units installed in stainless steel sinks are noisier than those set into ceramic or plastic bowls.
How to Choose a Waste Disposer and What to Look for in a Waste Disposal Unit
There are a number of things that you need to consider before you buy your waste disposer. This is our short list of these points:
Cutter Quality: Inside the disposers are a set of two cutters. One is held stationary and the other rotates. The lighter the weight of the cutters the lower the quality. At the bottom end are galvanised steel cutters, then there are stainless steel blades that are resistant to corrosion. The best cutters tend to be made of cast iron. These typically have an extra "ripper" or impellers.
Size and Space: It sounds obvious, but make sure that there is enough space to fit your waste disposer! Avoid having a shelf directly underneath the unit as some models have a overload or reset button on the base that you need to ensure you can access. It is entirely possible to insert an upright panel under your sink to divide the base unit in two. One half for the waste disposal unit and the other half for cleaning materials. Once the upright panel is in place, shelves can also be fitted into the no waster disposal half.
Type of Feed: There are two types; Batch feed and continuous feed
- Batch Feed: A batch Feed waste disposal unit only works when a special stopper is in place after feeding the food into the unit. As the name suggests it disposes of the food in batches and because the unit will only run when the stopper is in place it is safe, especially if there are small children in the household
- Continuous Feed: A continuous feed waste disposer will work whenever there is food in the unit and the water is on. It will work continuously until all the food is disposed of. All types of unit need to be switched on before they will run. This is the next thing to consider
Switch for your Waste Disposer: Whether you have a Batch or Continuous Feed disposer you will need to switch it on. The common types of switch to consider are:
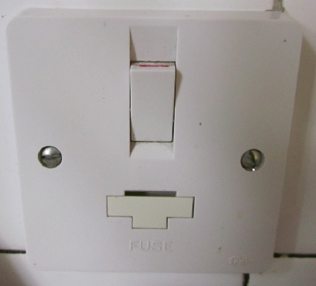
- Switched, fused spur – This will be spurred from a 13 amp supply. The power will be “spurred” or branched, from an existing socket or accessible part of the ring main. This spur line will lead to a switch which also contains as fuse (and often a little red neon light which indicates on and off positions). The cable are then run from the switched, fused spur, to the socket where the waste disposal unit is plugged in. Sometimes the unit is "hard-wired directly to the switched fused spur which removes the need for a socket. The fuse in the spur switch makes sure you cannot overload the unit and adds a safety barrier to the operation. You can see how to create an ordinary spurred socket in our project on spur socket wiring.
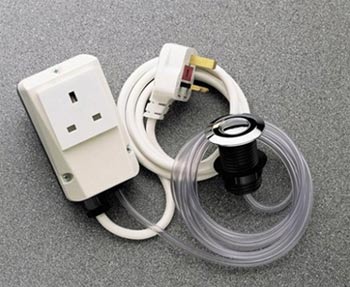
- Air Switch – This is a switch typically set into the worktop that sends a pulse of air to the disposer to switch it on and off, which makes it very safe when you have wet hands
- Remote Control Unit – This is safe and simple to install.

Switched fused spur for waste disposal unit

Waste Disposer Air Switch prior to fitting
Waste disposal unit motor size: The motor must be large enough to do the job. As a rule of thumb look for motors larger than 1/2 to 3/4 HP or 475 Watts.
Noise: There are two common types of motor that are used in Waste Disposers. Induction motors are generally much quieter. A permanent magnet motor will run much faster and will therefore grind the food down much finer; it might be necessary to use one of these if your pipe work is long or prone to blockage.
As we mentioned before, the type of sink you have will also have a baring on the noise levels.
How to Fit a Waste Disposal Unit
Always follow the manufacturers fitting instructions that come with the unit that you purchase. These are general guidelines to help you should you need further guidance.
Prepare the Sink
If you’re fitting to an already plumbed in sink the first thing you need to do is to remove any existing waste trap from the waste pipe and the sink. Once you have done this, remove the existing outlet from the sink and then clean off any sealant compound from under the sink.
Attach the Waste Disposal Unit
Most modern sinks, especially those with 1 1/2 bowls, can take a waste disposal unit with a 90mm (3 1/2 inch) outlet. Adapters can be bought for sinks and waste units to match most units to most sinks. This is especially true of the higher range units, some of which actually come with adapters.
Connecting the Waste Pipe
After the unit is connected to the underside of the sink following the manufacturers instructions, most manufacturers recommend at least a 40mm if not 50mm waste pipe system to take the waste to the drains. See our projects on waste systems to understand what a P trap is and how a U bend works. The existing pipe work in your kitchen however is likely to be 40mm so this is fine for connecting a unit to as long as you always remember to keep the tap running while the unit is working to help flush the waste more easily down the pipes. There are a few things that you should avoid doing:
- Bottle traps should not be used with most waste disposal units
- Avoid using tee connector and stop ends wherever possible
- The outlet must not discharge over a grate
- Try to achieve a fall of 15 degrees as a minimum, so that the unit will drain fully
- Do not reduce the diameter of the pipe from the unit to the drain. If this distance is long or meandering increasing the diameter to 2 inches (54mm)
Connecting a washing machine or dishwasher to the same outlet as the waster Disposal Unit is a good idea. The waste water from these appliances will help to "flush" the pipes and ensure that they don’t fur up. You can see how to fit a dishwasher or washing machine on this page.

Deluxe waste disposal unit
Wiring the Waste Disposer
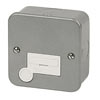
To wire up a waste disposal unit you need to fit a 13 amp fused connection unit with a flex outlet. This unit has incoming terminals marked on the back together with the outgoing, or load connections. Fixed connection units can be bought without the extra flex outlet but this means a flex unit also has to be installed. This work should be completed by a qualified tradesman, especially if you are unsure of what you are doing.

Fused connection unit with flex outlet
Please check when working with electrics that you are within the new laws and not breaking Part P of the building regulations. Please click on the link to see the project. Most waste disposal units come in ranges of Economy type, Mid range type and Luxury type. The more "luxurious” your disposal unit, the more it can cope with in less time in a quieter way.
The Cost and Pitfalls of Fitting a Waste Disposal Unit
Fitting a new waste disposal unit will require both plumbing and electrical work. As mentioned above it is illegal to do your own electrics in the kitchen unless you are qualified. However, most often the waste disposal unit is fitted into the domestic sink which in most cases is pretty close to the washing machine and/or dishwasher. This is done to make the plumbing much easier.
This means that the electrician does not have a difficult job in providing the power and will usually charge for a couple of hours work plus traveling time. Electricians rates vary across the UK but the average (March 2014) is about £160 per day or £20 per hour. For
smaller jobs however, the electrician has to charge for traveling in and out and picking up the materials you may need so if the wiring is easily accessible with no difficult connections you can expect the electrician to be there for 2 or 3 hours and make a charge of around £100 – £120.
The plumbing is (if all the existing work is fine) also 2 – 3 hours work and a similar charge can be expected from them.
If you can find a qualified electrician or plumber who is also able to work in the other trade safely, you can reduce your price by about 25%. Take a look at our find a tradesman section for this.
Troubleshooting and Maintenance
- Using your waste disposal unit: Make sure your unit is running at full power (with the tap running) before you put food into it. The motor does not get to full speed (or power) immediately it is switched on so if there is food in it when you switch on, it may jam up
- Waste disposal jammed: Sometimes your unit may make a humming noise, but not be working. This may mean the motor is jammed; check the instructions for the way your unit can be operated manually. This is usually done via a hex key which comes with the unit. Turn the unit off at the switched spur. Place the manual key in the unit and turn both clockwise and anti-clockwise, this should free the roller or blades from the food that is jamming it
- Unit stops suddenly: This is also the result (usually) of the motor being jammed. Try steps above and also press the reset switch to restart the motor. If this keeps happening it may be there is something stuck in the unit which is making it work much harder than it should and is therefore overheating. This may require disconnecting the unit from its brackets and dismantling it to get to the blockage
- Unit banging or vibrating: This usually means something metal has found it’s way into the unit or one of the mounting screws has come loose. It may also mean a previous blockage has shaken something loose inside the unit. If there is nothing obviously visible and the manual un-jamming operation does not work, then the unit may need to be stripped down
- Waste disposal unit will not turn on: Try the reset button and check the fuse on the switch. Check all wired connections
- Cleaning the waste disposal unit: Under normal circumstances the water used for flushing will keep the unit clean but sometimes food can get stuck in either the machine or waste trap and start to smell. Usually, filling the sink with about 3 or 4 inches of water and adding a beaker of baking power before running through the (switched on) unit will do the trick but proprietary dishwasher cleaner can be purchased for this job

