• Skip to primary navigation
  • Skip to main content
  • Skip to primary sidebar
  • Skip to footer
DIY Doctor

Main navigation

      • Project Type A - E
      • All Projects
      • Brick, Block, Masonry and Concrete
      • Damp, Condensation, Rot and Woodworm
      • Doors, Windows and Conservatories
      • Electrical
      • Project Type F - G
      • Fencing, Decking, Paving and Patios
      • Floors, Walls, Ceilings and Lofts
      • Garages, Sheds and Outbuildings
      • Gardening and Landscaping
      • General Building, Self Build and Renovation
      • Project Type G - J
      • General Repairs and Cleaning
      • Green Living and Eco DIY
      • Ground, Foundations and Drainage
      • Heating, Central Heating and Boilers
      • Joinery and Carpentry
      • Project Type M - P
      • Materials, Fixings and Fixing
      • Painting, Decorating and Finishing
      • Planning Regs, Project Management and Safety
      • Plastering, Plasterboard and Rendering
      • Plumbing
      • Project Type R - T
      • Roofing and Gutters
      • Tiling and Tiles
      • Tools, Appliances and Access
      • Useful Tips
      • DIY Tips
      • Find a Tradesman
      • Contract Download
      • Working With Tradesmen - Ultimate Guide
      • Home Improver Protection
      • Price Doctor
      • About DIY Doctor
      • What we do
      • Trade Shows and Exhibitions
      • Master Classes
      • Book Store
      • Contact Us
      • Feedback
      • DIY Competitions

Home > DIY How To Projects and Tutorial Guides > Fitting a Kitchen Sink

Fitting a Kitchen Sink

In tis DIy guide you will learn all about fitting a kitchen sink, in particular an inset kitchen sink. Follow this step-by-step guide with pictures, to help with cutting a kitchen worktop, plumbing a kitchen sink and fix your sink in place.

TwitterFacebookPin ItBuffer

Don't want to do this job yourself? Let us help you find a tradesman local to you

Project Page Menu
  • How to Tutorial
  • Video
  • Find Tradesmen
  • Help

Fitting a kitchen sink, especially an inset kitchen sink and kitchen plumbing are not the easiest of DIY jobs and many people find them very scary, but with a little understanding of why you do things rather than just how you do them, the whole job is a lot easier.

Kitchen Sink Base Unit

Kitchen Base Unit for a Sink

Fitting Kitchen Base Units for Sinks

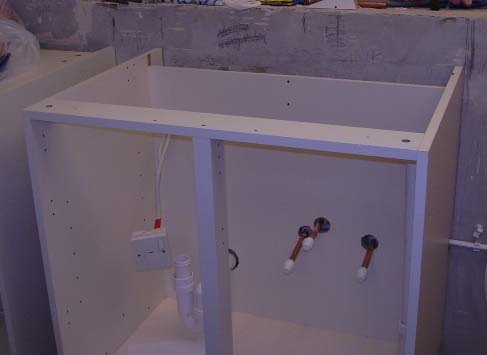
Kitchen sink units, as with other base units, come with an open top ready for the sinks or hobs to be inserted (this can be seen in the first image above). When the base unit is in place it is much easier, at this stage, to sit the sink on top of the unit just to see where the kitchen taps and waste will go. See our related projects on how to fit base units.

This allows you to do the plumbing in a more open space, and to be able to reach down from the top, before you fit the worktop.

Many people fit the worktop and sink first then struggle underneath it in a really confined space, but there is no need to fit the kitchen worktop before you get the plumbing ready to accept the sink and taps.

Fitting Kitchen Worktops

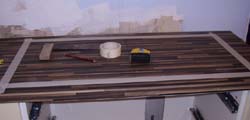
When you are fitting a kitchen worktop you need to follow the manufacturer’s recommendations for cutting and fitting. These vary depending on the material. See more about fitting different kitchen worktops in our Projects section.

If you have wood or Formica worktops you will be able to cut your own worktops to size and shape and you will be able to cut the holes you need for your sink, taps and other appliances. The best tool to use for this is a jigsaw.

jigsaw

Use a jigsaw to cut your worktops

There are composite kitchen worktops that have to have the sink or the holes for the sink, hob etc. moulded into the worktop by the manufacturer. As these come preformed, you must be absolutely sure your measurements are correct when you order your worktops.

You can also have stone, granite, marble or stainless steel worktops, and these are also easier to order with the holes you need already in place, although you can cut these materials yourself, it is a more advanced DIY skill to do so.

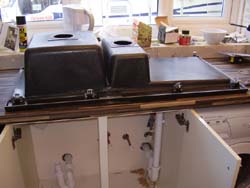
When the worktop is fitted and all the pipes for the plumbing are roughly in place inside the base unit, lay the sink on the worktop.

Most sink perimeters will be 25mm larger than the opening that they are intended to sit in, and many sinks come with a paper template which makes cutting the hole a lot easier.

Cutting Kitchen Worktops for a Sink

Place your sink upside down on the worktop to enable you to see where to mark out the cutting area.

Place sink on worktop to mark out cutting area

Position your sink on top of the worktop

Place the sink where you want it to sit on the base unit, checking that the depth of the sink will drop down unobstructed inside the unit.

Mark around the sink with a pencil.

Move the sink. Measure in from the pencil mark 25mm all around (or whatever measurement is recommended by the manufacturer). Then use masking tape to tape out the area that needs to be removed. We always use masking tape because following a pencil line when there is a lot of sawdust flying about is not always easy and with this kind of operation you only get one chance!

Cutting a hole for a Kitchen Sink

Use masking tape to mark the perimeter of the hole for the kitchen sink

Drill a 25mm hole in the worktop, inside the taped off area, and push the blade of your jigsaw through the hole. You can drill more than one hole if it makes it easier for you to cut round the inside of the tapes. Keep firm pressure on the jigsaw but do not try to force it to cut faster or you may get a jagged edge.

Jig saw in place ready for cutting

Cut the Hole for a Kitchen Sink with a Jigsaw

Follow the taped lines all the way round with the jigsaw, and don’t forget to support the cut out section as you work your way around to prevent it pulling and snapping as you reach the end.

Fitting the Kitchen Sink

Hole in a Kitchen Worktop for a Kitchen Sink

Sink area cut out and ready for sink

It is very important that the joint between the underside of the sink and the top of the worktop is kept waterproof. This is achieved by sealing putty and most sinks are supplied with this. It either comes in a self-adhesive roll or a small tub.

While the sink is upside down, apply the sealing putty to the edges of the sink and fit the sink clips.

Sink clip to hold the Kitchen Sink in place

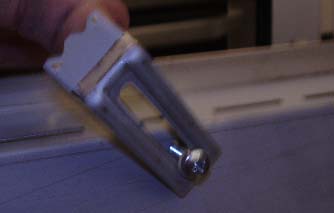
Use the supplied Sink Clips to fix the Kitchen Sink Securely in Place

Put the sink in the cut out. When the sink is placed in the hole it should sit on the seal all the way round. Clamp the sink firmly into place.

Sink sealant putty

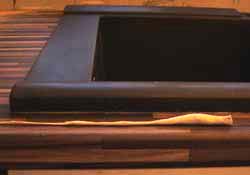
Cut off the Excess Sealant Putty

Then the excess sealant is cut off.

Sink Waste Plumbing

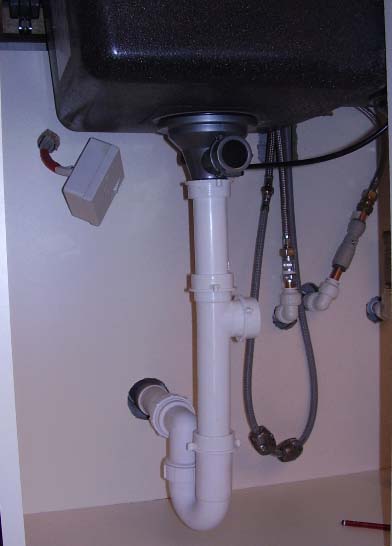
Plan the Kitchen Sink Plumbing before you fit the sink

You can see from the image above that, with some careful planning, it is possible to work out the position of the sink waste, taps etc before you site the sink.

All project content written and produced by Mike Edwards, founder of DIY Doctor and industry expert in building technology.

TwitterFacebookPin ItBuffer

Video

Back to the Top

Find a Reliable Local Tradesman

Back to the Top
Don't fancy doing this project yourself? We work with the industries best to ensure that we recommend only reliable and trustworthy tradesmen.
Let DIY Doctor help you find a tradesman

Find a tradesman now!


More Help

Back to the Top
Related Projects That May Help You:
  • Kitchen Ceiling Light Box: How to Build
  • How to Fit Kitchen Base Units
  • Fitting a Kitchen Wall Unit
  • How to Choose the Right Kitchen Appliances
  • Painting Kitchen Units
  • Planning a Kitchen Layout
Give us Some Feedback!

We love feedback on our DIY tutorials it helps us to make them the best they possibly can be so if you have any comments you would like to share with us, click the button below and let us know.

Primary Sidebar

Master Basic DIY - By DIY Doctor

Our Book - Master Basic DIY

Grab your copy now for all the DIY help you need right at your finger tips!

Buy it Here!

Signup for our Newsletter

Keep up to date with our DIY projects, tips and latest deals

Sign Me Up!

Our Sponsors

Find out about advertising on DIY Doctor

Advertisments

Other Similar Projects
  • How To Fit A Kitchen Wall Unit Or Cupboard
  • How To Fit A Kitchen Base Unit
  • How To Improve And Update Your Kitchen Lighting
  • Painting Kitchen Units - How To Give Your Kitchen A Makeover By Painting Your Worktops, Units, Cupboards And Doors

Footer

DIY Doctor company logo

Here at DIY Doctor, we offer completely free DIY and construction help and advice to any and all, from professional tradesmen, exactly as they would do it.

We have hundreds of DIY project tutorials covering all aspects of building and DIY that provide step by step instructions on how to complete your given task.

If you need a little help then we also have an active question and answer forum and a find a trademan service and much more.

Site Menu

  • DIY Doctor Ltd,
    The Workshop,
    Newbury Works, Somerset,
    BA3 5RX

  • 0845 6342 179

  • Contact Us

  • Company Number: 05863375
  • VAT Number: 811134774

Other Stuff

  • About DIY Doctor
  • Contact DIY Doctor
  • Media and Press
  • DIY Projects
  • UK DIY Forum
  • DIY Doctor Suppliers
  • DIY Webinars

DIY Doctor Social Channels

  • Advertise
  • Competitions
  • Terms and Conditions
  • Privacy Policy
  • Cookie Information
  • NHIC
  • Sitemap

DIY Doctor are members of:

© DIY Doctor Ltd 2025 All Rights Reserved