Adding a socket from an existing outlet is known as installing a spur socket. It’s a common method used to create an extra socket quickly without rewiring the entire circuit.
You can add a spur to a ring main or radial circuit by connecting into the existing wiring. While the process is simple in principle, strict wiring rules apply to ensure safety and compliance. Below, you’ll learn the key regulations and the correct way to wire a spur socket step by step.
What is a Spur Socket
A spur socket is an additional socket outlet added to an existing radial circuit or ring main. It is created by tapping into the existing wiring via a junction box or socket and running a feed to a new socket location.
Spur sockets are ideal when a room doesn’t have enough outlets, allowing you to add power safely without relying on extension leads, which can create very dangerous fire and trip hazards.
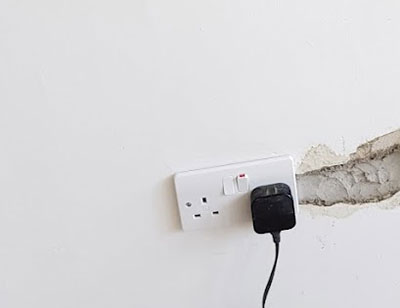
New spur socket taken from existing ring main
Rules for Spur Sockets
Spur sockets can be added safely on a DIY basis, but strict rules must be followed:
- Only one spur per existing socket is allowed, whether on a radial or ring circuit.
- The total number of spurs cannot exceed the number of sockets already on the circuit.
- Use the same cable type and size as the main circuit, usually 2.5mm² twin and earth.
- Each spur may feed only one new socket.
- Only one spur per socket or junction box is permitted.
- Spur cables should not exceed 3 meters.
- All spur cables must be protected by conduit, surface-mounted, or properly enclosed in walls.
- Burying cables in walls? They must run vertically, never horizontally.
- Do not place cables inside insulation, floor, or ceiling voids where they could overheat.
- Check total circuit length limits: radial or ring circuits must not exceed 100m² floor area and long spurs may violate this.
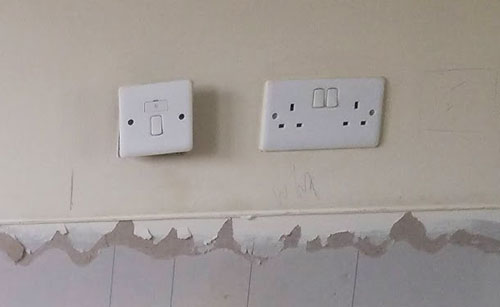
- Sockets must meet minimum height and corner distance requirements. See socket height rules.
If your home has old wiring colours, refer to our wiring colour guide to match new cables correctly.
If adding a spur would break any of these rules, do not install it. In that case, the safe options are to add a new ring main or extend an existing ring main safely.
Remember, Part P Building Regulations require qualified checks for additional circuits. Non-compliant wiring can void your house insurance, affect resale and may break the law. Always have a qualified electrician review your work.
How Many Sockets Can You Have on a Spur?
Each socket or junction box can only support one spur. This prevents overloading, which can cause overheating and potentially start a fire.
How to Identify if a Socket is on a Spur
To determine if a socket is already on a spur or that it can support a spur:
- On a ring main, two cables at the back of a socket usually indicate it’s safe to add a spur.
- On a radial circuit, two cables in and out may mean it’s the last socket or already has a spur.
- In general, one cable comes from the previous socket and one goes to the next. Additional cables may indicate an existing spur.
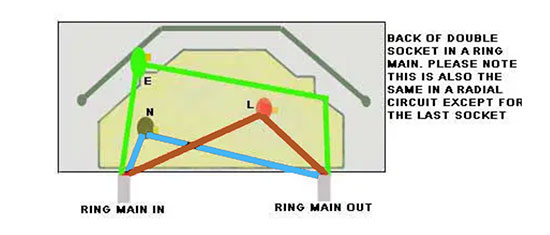
Rear view of socket face plate showing cables running in and out
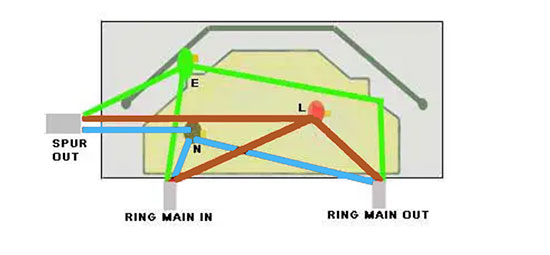
Rear view of a socket showing cables in and out and a spur connected
Identifying the circuit type can be tricky without testing equipment. A safe method is to trace the cable from the consumer unit:
- For a ring main, follow the cable back to the start.
- For a radial circuit, trace it to the end point.
This lets you check for junction boxes along the route, though it may not reveal existing spurs. The safest approach is to tap into the supply cable of a known circuit using a 30A junction box to ensure no other spurs exist.
If you are unsure which cable is safe to use, always consult a qualified electrician. Mistakes can be dangerous and costly.
Can I Legally Add a Spur Socket Myself?
DIY electrics has always been a bit of a grey area and although technically yes, you can indeed add you own spur socket (including light switch or a light fitting), you do however need to be “competent person”.
What this means is that you must poses the necessary skills and knowlege in order to fully test the circuit safely, isolate the circuit, use the correct fittings and cabling and make sure everything is done to regulations standard e.g. everything a qualified electrician can do.
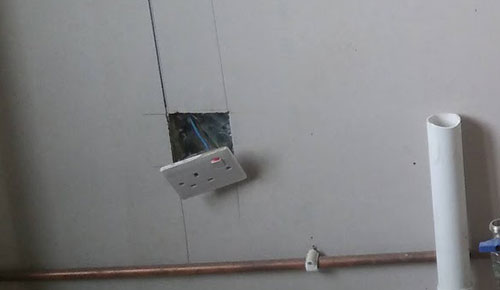
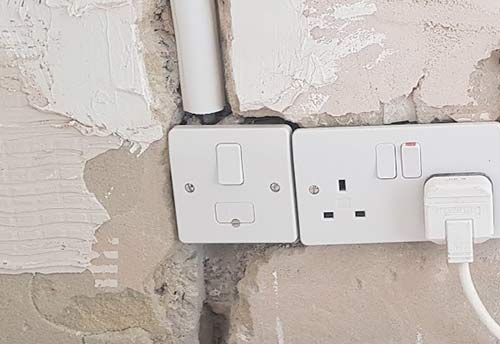
DIY installed spur socket
What Do You Use to Create a Spur?
You can create a spur socket by either tapping into an existing socket or using a 30A junction box to feed the new outlet.
The easiest and safest method is a junction box. It allows you to choose the installation location, provides ample working space and avoids cramped connections.
For more details, see our junction box wiring guide.
Junction boxes are rated by amperage; always use a 30A junction box for spurs on ring or radial circuits. Ensure it is securely fixed to a solid surface and not suspended by the cables.
Using an existing socket is possible but adding a spur to a faceplate can be tricky due to limited space for extra wires. For beginners, a junction box is generally the safer and more practical choice.
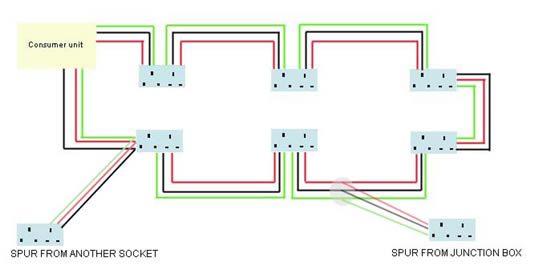
Standard example of a ring main with a spur from a socket and one from a junction box
Tools and Products Needed to Install a Spur Socket
Before installing a spur socket, make sure you have the correct tools and materials. Having everything ready will make the job quicker, safer and easier to complete.
- 30A junction box
- 2.5mm² twin and earth cable (or the same type used in the existing circuit)
- Utility knife
- Wire cutters
- Wire strippers
- Flat-head screwdriver
- Phillips screwdriver
- Wall chaser (if cutting cable channels in walls)
- Hammer and bolster
- Wood chisel (for notching joists or timbers)
- Plasterboard saw or multi-tool with cutting blade
- Electrician’s cable fishing tape
- Wall filler
- Filling knife
- Sandpaper and sanding block
- Socket back box (metal for solid walls or plasterboard box for stud walls)
Using the correct tools ensures the spur socket installation is neat, secure and compliant with electrical safety standards.
How to Install a Spur Socket
In this example we are going to be using a 30amp junction box to install our new spur socket and we are going to tap into the supply cable for an existing ring main that’s easily reached in the loft.
Step 1 – Plan the Spur Socket Installation
Start by deciding where the new spur socket will be installed and how the cable will run from the existing circuit to the new outlet.
Measure and mark the socket position on the wall, ensuring it meets the correct height requirements and is positioned safely away from corners. Hold the back box in place, level it and mark around it to show where the wall opening will need to be cut.
Next, identify the wall type, such as solid brick, block, or plasterboard. This will determine how the cable is routed and the method used to cut out and install the back box.
Careful planning at this stage makes the installation faster, neater and easier to complete.
Brick or Block Walls
With solid brick or block walls, cables are often run under the floor and then up to the socket position. This reduces the amount of wall you need to chase out for cables, unless you plan to surface-mount the wiring in trunking.
If lifting floorboards, carpet or laminate isn’t practical, another option is to run the cable from the loft, through the ceiling and then down the wall to the socket location.
Plasterboard Walls
For plasterboard stud walls, the easiest method is usually to drop the cable down inside the wall cavity. However, horizontal studs can sometimes block the route.
If this happens, cut a small access section in the plasterboard, notch the timber stud with a chisel, pass the cable through, and then repair the wall afterwards.
Another option is to run the cable from below by lifting floorboards and feeding it up through the wall cavity. In either case, you may need to use cable rods or fish tape. See our guide to fishing electrical cables for step-by-step help.
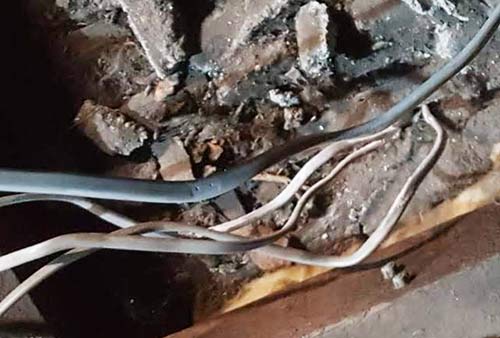
Ideal location for tapping into existing ring main for spur socket
Step 2 – Install the Socket Back Box
After planning your cable route and socket position, it’s time to install the back box.
Solid Walls: Use a wall chaser, breaker or hammer and bolster to cut out the marked area to the depth of the back box. Chase a channel for the cable from the floor or ceiling. Fix the back box securely with screws and wall plugs. A wall chaser makes this process quicker and neater.
Plasterboard Walls: Cut out the back box shape from the wall and tidy the edges. Leave the back box aside for now; this larger opening makes it easier to pull the cable through before final installation.
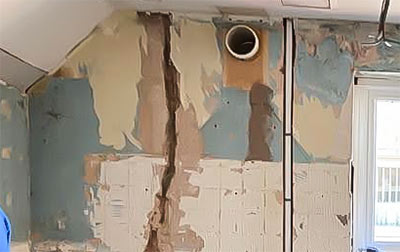
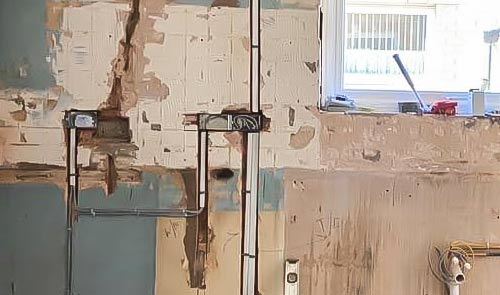
Chase cut out of solid wall ready for cable
Step 3 – Run the Cable
Next, run the supply cable from the point you’re tapping into the radial or ring circuit.
Leave 6–8 inches of extra cable at the junction box end for connections and secure it so it cannot be pulled out. Route the cable along your planned path to the socket location. For solid walls, leave another 8-inch tail at the socket end. Keep the cable flat in wall chases and protect it with PVC conduit where required.
For plasterboard walls, use a stud detector to locate horizontal timbers. Cut small sections of the plasterboard as needed and notch the studs (~15mm) to allow the cable to pass. Run the cable down the stud cavity, around any obstructions, and leave an 8-inch tail at the socket.
Slide the back box over the cable tail and push it into the wall opening, ensuring the wings clip securely to hold it in place.
If you’ve cut any holes in the wall, repair them afterwards. See our guide to repairing plasterboard for tips.
Electrical cable tails in back boxes ready for connecting up
Step 4 – Connect the Socket
Now it’s time to wire the socket. Hold the cable tail against the back box and measure how much needs stripping for each terminal. Carefully remove the outer sheath of the cable.
Strip around 10–12mm from each conductor, then fold the stripped ends. Slide the earth wire into its sheath if needed.
Connect the wires to the correct terminals:
- Brown > Live (L)
- Blue > Neutral (N)
- Green/Yellow > Earth (E)
Once wired, secure the faceplate onto the back box, ensuring all wires are neatly inside and no copper is exposed.
Socket faceplate screwed on to back box
Step 5 – Connect the Junction Box
To complete the spur, the junction box is then connected. Always isolate the circuit at the consumer unit first and leave a note to prevent it being switched on while you work.
At a suitable location, the existing ring or radial cable is cut. Strip the outer sheath from both cut ends and from the new supply cable so the cores can reach the terminals. Then strip around 10mm from each core.
The junction box wires are then connected, matching each type to the correct terminal: all live wires together, all neutral wires together and all earth wires together. Tighten all terminals and securely fix the junction box to a solid surface before replacing the cover.
Once all connected up, the entire circuit is then fully tested. This must only be done by a “competent person” with the necessary skills and knowledge to do it to regulation standards.
Once tested, any repair and finishing work is then carried out and completed and once done, you are then finished.
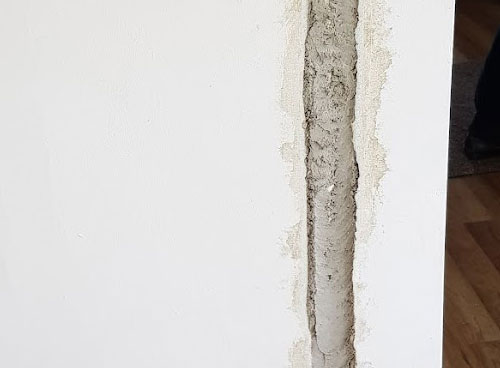
Filling a chase to the level of the surrounding surfaces
Fused Spurs
Normally, only one spur socket can be added to an existing socket or junction box. To add multiple sockets, you need a Fused Connection Unit (FCU) between the supply and the new sockets.
The FCU protects both the new spur and the original circuit. If there’s a fault or overload, the fuse will blow, cutting power and preventing damage to the ring or radial circuit.
Learn more about installing and wiring an FCU in our Fused Connection Unit project guide.
Fused connection unit or FCU
Adding a spur socket to a radial circuit or ring main may seem tricky at first, but with the circuit isolated and all safety rules followed, it is actually a straightforward task, however it should only ever be attempted by a competent person with the skills and knowledge to do the job to regulation standards.