Wiring a plug involves stripping each cable and connecting the wires to the correct terminals: live (red or brown) to the live terminal, neutral (black or blue) to the neutral terminal, and earth (green/yellow or bare) to the earth terminal.
Although it seems straightforward, doing it incorrectly can be dangerous. Learn how to wire a plug safely and correctly using our guide below.
What Type of Plug Should You Use?
For wiring a UK plug, always use a standard BS1363 3-pin plug, as shown below. This plug is used across the UK, including England, Scotland, Wales and Northern Ireland—and in the Republic of Ireland.
The UK 3-pin plug is one of the safest in the world. It features an integrated fuse, bottom-exit flex to prevent pull damage, an extended earth pin and a design that prevents incorrect insertion. Its easy-grip housing also makes handling simple and safe.
Thanks to its safety and reliability, this plug has been adopted in many other countries, including:
- Hong Kong
- Cyprus
- Malta
- Singapore
- Malaysia
- Saudi Arabia
- Uganda
- Zambia
- Pakistan
- Nigeria
- Lebanon
- And many more
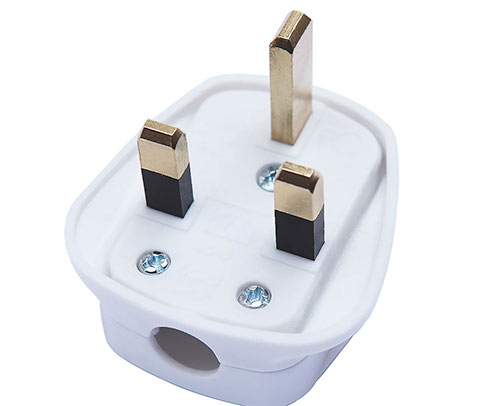
The standard UK 3-pin domestic plug
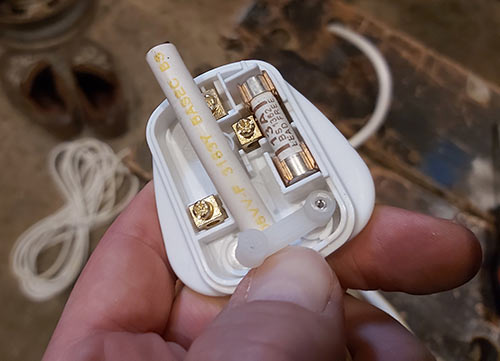
Parts of a Plug
Before wiring a UK plug, it’s important to understand its key components:
- Plug Body: The main casing that houses and protects all internal components.
- Plug Cap: Covers the internal parts, keeping the terminals safe when the plug is live.
- Earth Terminal (E): Connects the earth wire to the socket. In a fault, it safely directs electricity away from the user.
- Live Terminal (L): Holds the live wire, which passes through the fuse to power the appliance.
- Neutral Terminal (N): Holds the neutral wire and completes the circuit back to the power source.
- Fuse: Typically a 13A ceramic HBC fuse that prevents overheating by breaking the circuit if too much current flows. Ceramic is used for safety, as glass fuses can’t handle high heat.
- Cable Clamp: Secures the appliance cable to prevent wires from being pulled out, avoiding fire or injury.
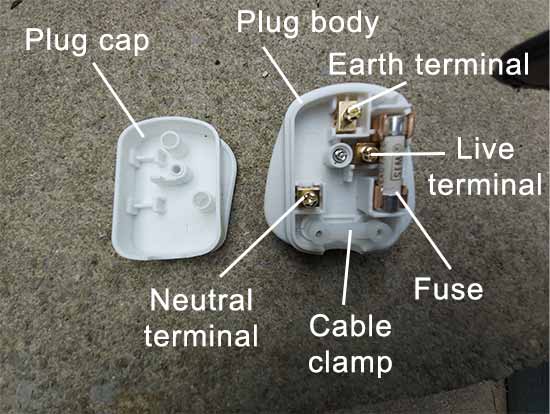
The parts of a standard UK 3-pin domestic plug
What Type of Cable Should You Use?
When wiring a UK plug for an appliance like a washing machine, microwave or kettle, you’ll usually use 3-core appliance flex cable.
Unlike standard flat 2.5mm² twin and earth cable, appliance flex is round and flexible, typically white, but also available in grey, black, red, yellow or blue. Its flexibility makes it easy to bend around corners and furniture.
Most appliances come with correctly rated flex to safely carry the required current, reducing the risk of overheating or fire. Always use the supplied cable or one of equal rating to ensure safety.
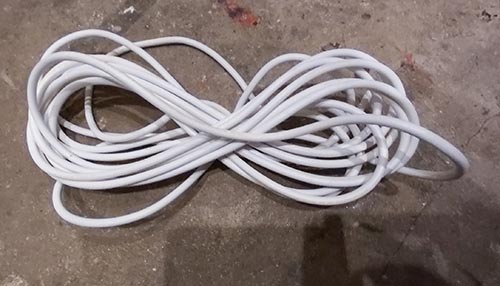
Standard 3-core appliance flex cable
A Note About Wire Colours in Appliance Flex
The wire colours in appliance flex depend on the age of the appliance. Newer appliances follow the updated standard: brown live, blue neutral and green/yellow earth. Older appliances may use the previous older scheme: red live, black neutral and green/yellow earth.
If an older appliance blows a fuse or shows issues, have it fully tested to ensure it’s safe to use. For more details on wire colours, see our old and new wiring colours project.
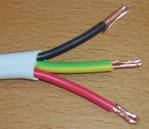
Appliance flex with older wiring colours
Some appliance flex may only have two wires: brown live and blue neutral. This is safe for plastic or fully insulated appliances. Double-insulated appliances, those with extra insulation between live parts and outer surfaces, also do not require an earth wire. Always follow the manufacturer’s instructions when using non-earthed flex.
Double insulated 4-bar light fitting
Testing Plug Fuses
In a UK plug, the brown live wire connects to the live terminal and passes through the fuse before reaching your appliance. If something goes wrong, the fuse blows to protect the appliance, wiring and user.
If an appliance stops working, first replace the fuse with the correct ceramic type. If unavailable, you can test the old fuse to see if it’s blown, which may indicate a larger electrical issue that needs attention.
Fuses can be tested using a multimeter or a simple battery and bulb setup. For step-by-step instructions, see our guide on testing plug fuses.
Why do Some Appliances not Have an Earth?
Not all appliances need an earth wire, and this is usually a safety design choice. Many modern appliances are double insulated, meaning they have two layers of insulation between the live electrical parts and any metal surfaces you might touch. This design ensures that even if one layer fails, there’s still no risk of electric shock.
For plastic or other non-conductive appliances, an earth isn’t necessary because the outer casing cannot carry a live current. In these cases, a two-core flex with live and neutral wires is sufficient to power the appliance safely.
Even some metal appliances can be double insulated, with internal insulation preventing any contact with live parts. Manufacturers will clearly mark double-insulated appliances with the square within a square symbol, indicating that an earth connection is not required.
Tools Needed for Wiring a Plug
To wire a UK plug you will need the following tools and products:
- Philips screwdriver
- Small flat blade screwdriver
- Wire cutters/side cutters
- Wire strippers/automatic wire strippers
- Multimeter
- Standard 3-pin UK plug
- Length of appliance flex
- Utility knife
How to Wire a Plug
Wiring a UK 3-pin plug is straightforward if you follow these steps carefully. In this guide, we use appliance flex with the latest wiring colours: brown for live, blue for neutral, and green/yellow for earth.
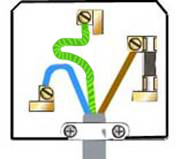
Wiring diagram for a domestic UK 3-pin plug
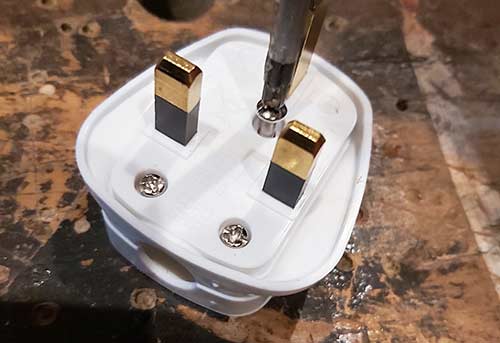
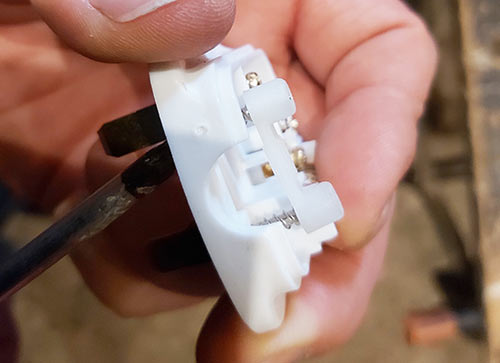
Step 1 – Remove the Plug Cap and Cable Clamp
Start by unscrewing the small central screw on the underside of the plug using a Philips screwdriver.
Unscrew the retaining screw
Carefully remove the screw and set it aside, then lift off the plug cap to expose the terminals and cable clamp.
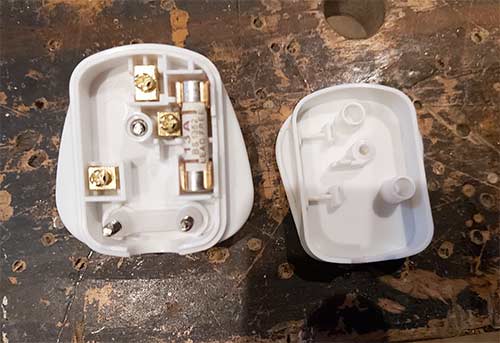
Remove plug cap and expose plug internals
Step 2 – Loosen the Cable Clamp
Use a Philips screwdriver to loosen the two small screws securing the cable clamp. Once loosened, fully remove one screw and set it aside.
Loosen cable clamp screws
Step 3 – Strip the Power Cord Sheath
Feed the appliance flex through the plug so about 8–10mm extends past the top of the plug body. Mark the point where the flex passes under the cable clamp.
Mark the point where the cable passes under the clamp
Carefully score the outer sheath around the marked section using a utility knife, avoiding the inner wires. Bend the sheath gently back and forth until it snaps, then remove it to expose the cores.
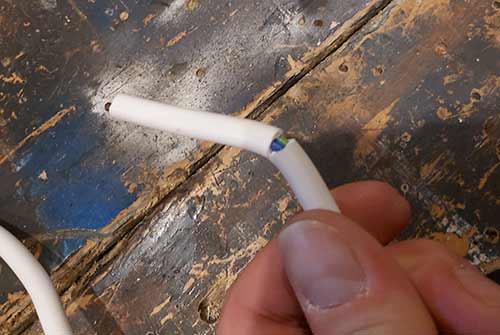
Bend flex cable until the sheath breaks open
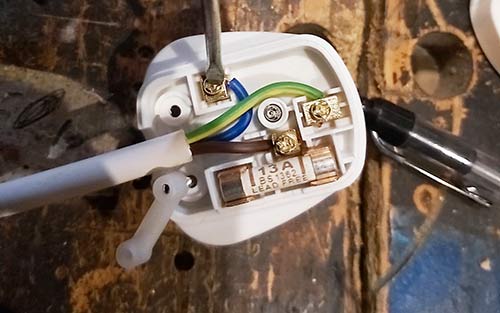
Step 4 – Cut Internal Core Wires to Length
Place the flex under the cable clamp and separate the three core wires to their terminals: brown to the live/fuse terminal, blue to neutral, and yellow/green to earth.
Pull each wire past its terminal and mark about 10mm beyond the terminal, this is where you’ll strip the insulation.
Make the earth wire slightly longer than the others and add a small loop. This ensures it remains connected first if the cable clamp fails, keeping the appliance earthed for safety.
Position and mark internal core wires for stripping
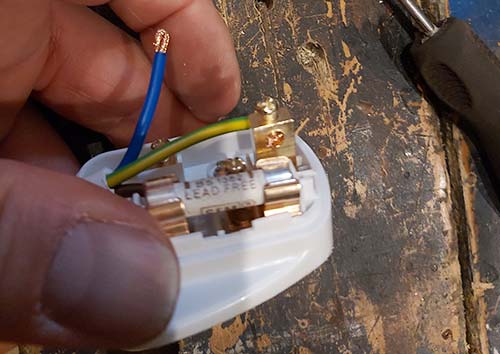
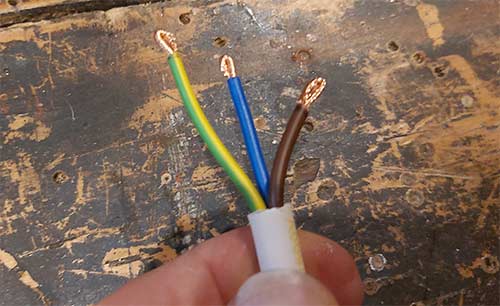
Step 5 – Strip, Twist, and Bend Wires
Remove the flex and carefully strip the insulation from each wire at your marked points using wire strippers or automatic strippers to avoid damaging the cores.
Once stripped, twist the strands tightly and bend each wire back on itself, forming a small loop to make connecting to the terminals easier and more secure.

Strip cores wires and then twist and bend them, doubling them over
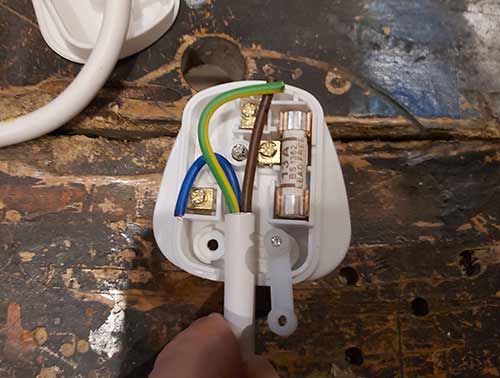
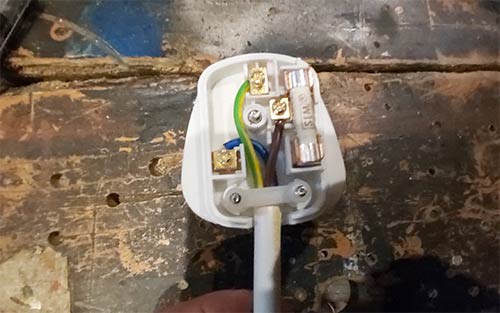
Step 6 – Connect Wires to Plug Terminals
Place the flex back into the plug and position each core wire near its terminal. Start with the brown live wire: loosen the right-hand terminal screw by the fuse, insert the wire fully, and tighten the screw securely.
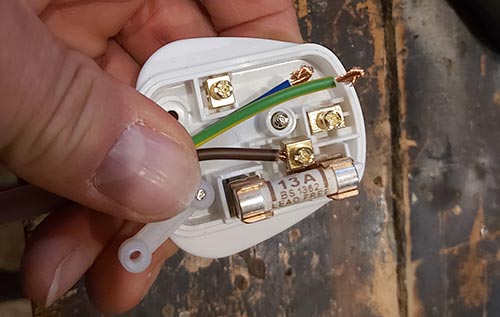
Brown live wire connected to live terminal
Next, insert the yellow/green earth wire into the top terminal and tighten the screw firmly.
Connect earth wire to top earth terminal
Finally, connect the blue neutral wire to the left terminal, ensuring it is fully inserted and securely clamped.
Connect neutral blue wire to the left hand terminal
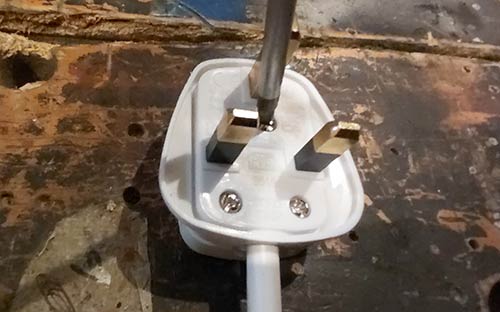
Step 7 – Test the Fuse
Before reassembling the plug, check the fuse to ensure it works. Even if it’s new, testing helps avoid issues.
You can test the fuse with a multimeter or, alternatively, using a car battery and bulb.
For detailed instructions, see the Testing a Fuse section above.
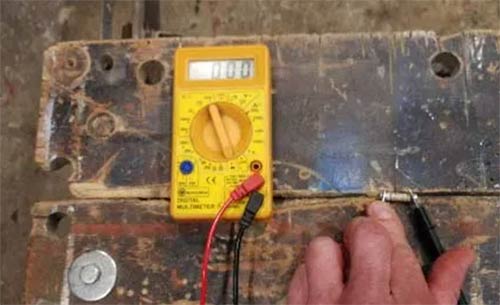
Testing a fuse using a multimeter
Step 8 – Secure Cable Clamp and Replace Plug Cover
Position the cable clamp over the flex wire and tighten both screws with a Philips screwdriver to hold the cable securely.
Cable clamp tightened to secure flex wire
Replace the plug cap, insert the retaining screw through the base and tighten firmly. Your plug is now safely assembled and ready to use.
Replace plug cap and tighten retaining screw
Step 9 – Test the Plug
With the plug fully assembled, plug it in and test the appliance to ensure it works correctly.
Many new plugs include a paper strip over the three pins. This isn’t just packaging—it provides key instructions, like the recommended wire length for a safe, secure connection to the terminals. Keep it for reference before removing.

Paper instruction card supplied with all new plugs
Stripping Wires and Cables
Stripping wires is simple with the right tools but requires care. Professionals use side cutters, cable cutters or wire strippers to safely remove insulation without damaging the core wires.
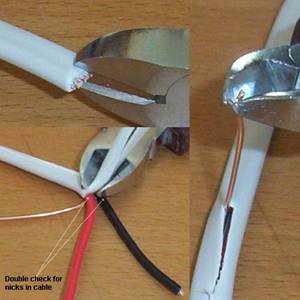
Using wire cutters to strip cable safely
For beginners, even a small nick in the insulation can be dangerous, allowing electricity to arc between wires. Always handle cables carefully and keep your cuts precise.
When stripping a cable, like a 2.5mm² twin and earth, nick the sheath at the middle, gently pull it apart, and expose the bare wires. Hold the wire in one hand and carefully pull the sheath off. For flexibility and safety, use pliers instead of side cutters if you’re inexperienced.
Measure and allow extra length for connections. Stretching wires can cause them to pull out over time, especially as homes expand and contract. It’s better to have a little slack folded neatly than to cut too short.
Fold back stripped wires, doubling them over for secure connections
Always slide an earth sleeve over exposed earth wires. Stripping flexible appliance flex can be trickier due to thinner sheaths. Avoid any nicks, if a core wire is damaged, cut and start again.
Using a purpose-made cable stripper for flexible flex
Investing in proper wire strippers or automatic cable strippers from DIY stores is worthwhile. They make stripping precise, safe and reduce the risk of dangerous mistakes.
Once you know which wire goes to which terminal and how to safely strip and prepare the insulation, wiring a plug is a simple and straightforward job that anyone can do.
Warning: All electrical work must follow current UK Electrical Regulations. Click here for guidance.