

When it comes to painting, all too often the quality of the finish will be determined the quality of the preparation. It is so tempting to pick up to roller and get cracking with the painting as this feels like you are really making progress, but “Stop!”, get the preparation done first.
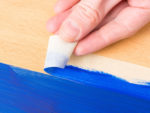
This section will give you all the information that you need to prepare any surface, be it metal, wood or plaster. We will help you understand the best way to mask up so that paint does not get where it shouldn’t be, saving you hours on the clean up.
Should you need still need to strip paint, wallpaper and other decoration before you start to prepare the surface you can find projects all about how to do this in our Stripping and Removing Decoration section.
The next stage having prepared the surface is to actually go ahead and paint it. All the information that you need to know about doing this is in our section on Painting, which is worth a browse before you start.
The Benefits of Preparation before Painting
As we have already said, a great finish is more often than not determined by the quality of the preparation. This is not the only reason that it is worth investing a little time and effort up front. Thorough preparation will save time also, as there is less mess to clear up at the end, and you do not get bogged down trying to tackle issues that could have been dealt with in the preparation stage, when you’re not juggling a paint brush, pot and ladder!
As it is impossible to cover all cracks, bumps and blemishes in your wall (or whatever surface you are painting) with paint alone, you will need to do some work to get rid of these before you start painting.
Good preparation will ensure that the surface that you are painting is primed and ready for the paint. This means that it will adhere to the surface properly and you might not need extra coats of paint, saving you time and money.
There are 4 elements to preparing a room for painting:
- Clearing the area and protecting the fixtures and fittings
- Prepare the surface – cleaning it so that paint will stick to it
- Filling the cracks and smoothing any lumps or bumps
- Priming surfaces that haven’t been painted before
Follow these steps in order, and when you get to the actual painting, you will find that it is very easy.
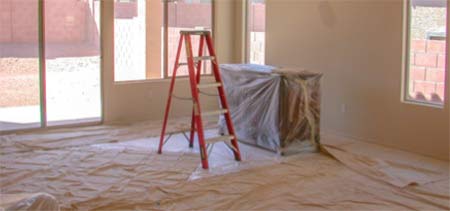
Clearing for Decorating – Protecting Fixtures and Fittings from Paint
It is important to get the room cleared before you start, so that you don’t inadvertently splatter paint on something but also so as to give yourself enough space to paint and place all your equipment conveniently. Ideally remove the furniture from the room, but if this is not possible then you should push it to the centre of the room so that you can get to all the walls to be painted easily.

Take down any pictures, curtains and curtain poles. If there are any fixtures and fittings these should be removed as far as possible, this includes lampshades and shelf brackets. Potentially you should drop or even remove radiators so that you can paint behind them.
If you are going to remove the face plates from switches and plugs, ensure that you turn off the electricity. Also be careful not to lose the screws – masking tape them up to the item that they came from so they are there when you come to put them back.
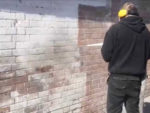
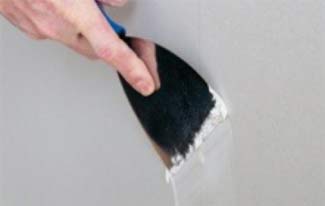
Cleaning for Decorating – How to Prepare the Surface for Painting
We have specific advice for preparing specific surfaces which you might face, such as Distemper which can be particularly tricky, in the projects above. In general the surface you are going to paint needs to be clean and dust or dirt free.
If there is anything on the surface the paint will not adhere properly, and you’ll find yourself repainting long before you intended. Also if you do not clean the surface marks will show through and require extra coats to cover, costing time and money.
Dust and Hoover the surface thoroughly before washing with Sugar Soap. Sugar Soap will clean and cut through any grease on the walls, but it is powerful stuff so wear gloves and dilute as recommended on the bottle.
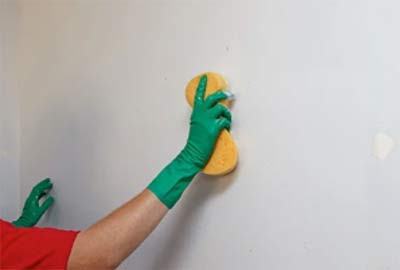
You will need to wash the sugar soap off with clean water before painting. Make sure that the sugar soap solution or water does not run down the wall on the carpet or floor.
While cleaning the surface have a look for other issues that might cause you problems. If there are signs of damp or mould then you need to cure this before painting, or it will only come back any ruin the lovely new paint job. Find out more about dealing with mould and damp here.
If the paint is peeling or flaking this could be a sign that the there is damp, that the wrong type of paint has been applied or the paint has not been applied properly. If this is the case then you might be forced to remove it and then prepare the surface properly before painting again.
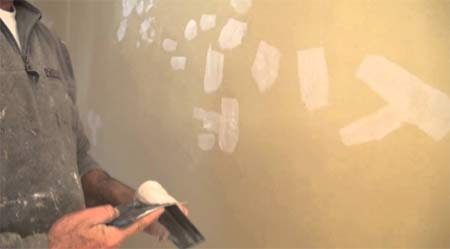
Filling Cracks and Smoothing Bumps Before Painting
With a clean wall, you are almost ready to paint. Before you do, it is worth filling and cracks and smoothing out the bumps and lumps. Give the filler time to dry before sanding flat and then paint a base coat.
We have a project that will help you to repair a holes in plasterboard if you are unfortunate enough to have one, however if your plaster has blown (is falling away from the wall – it will sound hollow when you tap it) the repair job will need to be more substantial. We explain how to repair plaster especially if you have Lath and Plaster walls here.
Thankfully most of the time repairs like this are not necessary. It is generally just a little bit of filling for larger cracks or you can use a base coat to cover fine cracks, particularly if there are lots.
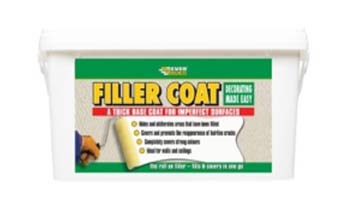
Using A Base Coat
This is a thick paint/filler that is applied to the surface to cover hairline cracks. You generally apply with a roller, hiding all the cracks and it should be flexible enough to stop them reappearing once the paint has been applied on top.
Filling Cracks
Firstly you need to remove any loose debris or plaster in the cracks with a stiff brush or stripping knife. Make sure that there is no dust in the crack as this will stop the filler from bonding properly.
We advise that you dampen the crack prior to applying the filler as this stops it drying too quickly; plaster absorbs the moisture from the filler very greedily, stopping a firm bond forming.
Apply the filler with a filling knife, pressing it firmly into the crack until it is totally full. Scrape off any excess while it is still wet. You can choose from a huge range of fillers and there are specialist fillers for things like deep cracks or quick setting. We think that they are all, much of a muchness (let us know your preference).
Once it has dried you can then sand off any excess to get a smooth and flat surface ready for painting. Make sure that you Hoover up all the dust before you start painting.
You might find that you need to sand the whole wall down before you can paint it. If this is the case then you should use sandpaper wrapped around a sanding block. The block will help you to get the lumps and bumps flat even with the rest of the wall.
Remember to hoover up all the dust before you start painting and this will get into the paint and could potentially ruin the finish.
All the remains if to mask up the fixtures and fitting that you cannot remove and lay down your dust sheets to protest the floor and anything else that need to be protected. There is more information about masking up in the project above.
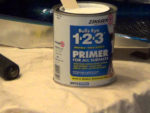
Priming Surfaces
The surface being primed for painting the first time will determine what you should do. We have detailed projects above which explain how to prime the different types of surface that you might paint in a DIY home improvement project.
When it comes to painting new plaster, we have a dedicated project which explains how long you need to wait and what to do when the plaster is ready to paint.