The success of any painting job always depends on how well the surface has been prepared and in most cases the best preparation is to prime the surface first.
In this guide we look at all the different surface types and how they are prepared and successfully primed ready for top coating.
Why Should a Surface be Primed?
Wondering why priming your surface is crucial before picking up that paintbrush?
Essentially a primer paint is the foundation for your paint job. It’s like a preparatory layer that ensures your topcoat of paint sticks well and looks fabulous. But it’s not just about adhesion; primers work in other ways too.
Firstly, they create a smooth and stable base, smoothing out any small imperfections or uneven spots on the surface. If you’ve got bold colours underneath or stubborn stains, a primer can cover them up, preventing them from bleeding through your finishing coat.
When dealing with porous surfaces like bare wood, plasterboard, or fresh plaster, primers play a crucial role. Without them, the moisture in your top coat paint might get absorbed too quickly, leading to a flawed bond and a short-lived finish.
And if you’re working with a stained surface, a primer is essential. It stops the top coat paint from just sitting on the surface, ensuring it properly bonds for a polished final look.
Similarly, shiny surfaces like metal, plastic, or tiles need a priming paint applied too. Without it, your topcoat might just peel off those non-porous materials. The right primer acts as a bridge, creating a strong link between the surface and your paint, preventing any failure.
So, whether you’re a DIY enthusiast or a first timer, remember: priming sets the stage for a successful and long-lasting paint job. Don’t be tempted with shortcuts here! Bare plaster in need of priming
Choosing the Right Primer: A Beginner’s Guide
Getting that perfect finish starts with using the right primer for the surface you’re working on. It’s not just about slapping on any primer; you need the one that suits the job.
Before we explore primer types, note that there’s a actually different types of paints. We have oil-based, acrylic/latex (water-based), and shellac paints. Matching them correctly is vital – oil-based primer goes with oil-based topcoat, and so on. Mismatching can lead to less-than-ideal results as they might repel each other.
If you’re working on a painted surface with an unknown paint type, a universal primer is your ally. Sand the surface well, and most Zinser products or similar fit the bill. Always double-check the manufacturer’s recommendations, though.
Now, let’s break down the types of primers:
- Wood Primer (sometimes with undercoat): Perfect for timber surfaces; check the manufacturer’s recommendations for specifics
- Plaster and Plasterboard: Often called a mist coat, it’s a diluted acrylic (water-based) matt emulsion
- Tile and Melamine, Glass, and Plastic Primer: Tailored for glossy and non-porous surfaces
- Metal Primer: Designed for metal surfaces, as the name suggests
If you’re curious about different paint types, check out our detailed project on paint types here. Tile and melamine surface primer paint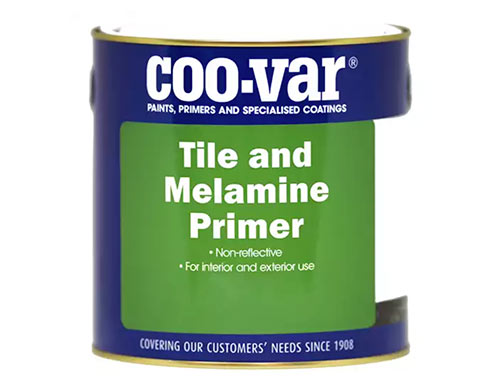
How many Coats fo Primer Should I use?
Wondering how many coats of primer you should use? In general, unless the manufacturer specifies otherwise or you’re using a combined primer and undercoat, it’s advisable to apply two coats of primer for most situations. This approach ensures the creation of a stable and solid foundation for subsequent layers.
For smoother surfaces or when aiming for a nice, flat top coat finish, sand each dried primer coat before applying the next one. This step helps achieve a more even and polished result.
Remember, the key is to follow the manufacturer’s instructions and tailor the number of primer coats to your specific project requirements for the best outcome.
Preparing Surfaces fo Priming: Step-by-Step Guide
Ensuring a successful painting project, and many others, hinges on the proper preparation of the working surface. If this step is neglected, the final result may not meet expectations. The typical preparation steps include cleaning the surface, sanding, filling any damage, and sealing knots.
Here’s a detailed breakdown:
- Clean the Surface: Thoroughly clean the surface by vacuuming away any dust and wiping it with a damp cloth to eliminate remaining debris.
- Sand the Surface: After removing initial debris, sand the surface. For painted or varnished surfaces, use coarse paper to eliminate as much as possible, ensuring no visible hard edges. For bare timber, plastic, and similar materials, use medium grit to roughen the surface for better adhesion. For metal, use medium grit to remove paint, rust, or other contaminants. For glass, tiles, etc., refer to the primer manufacturer’s suggestions.
- Fill Damage: Repair any damage, such as dents or scrapes, using a suitable filler. Once cured, sand the repaired areas flat with medium grit paper.
- Seal Knots: If knots are present in timber surfaces, seal them to prevent knot bleed. Use a specific knot-sealing solution or products like Zinser B.I.N or Bulls Eye.
Note: When dealing with previously painted surfaces, it’s possible to coat over them. However, it’s advisable to remove any existing coatings and reach the original surface for the best results.
For stained surfaces, the nature of the stain creates a barrier, making it challenging for future coatings to bond effectively. There are two options to address this issue: either sand or plane the surface until past the stained layers, or use products like Zinser B.I.N or Bulls Eye formulated to bond to surfaces regardless of their composition.
Remember, thorough preparation sets the stage for a successful and long-lasting job, you won’t get one without it!
Tools and Products Needed for Applying Primer
In order to successfully prime a given surface, you will need the following tools and products:
- Correct primer for the surface you’re working with
- Selection of different grades of sandpaper
- Clean cloth
- Vacuum
- Bowl and clean water
- Flat sanding block
- White spirit
What Type of Primer to Use and How to Apply it
There are a great many different surfaces that could potentially require priming and, although they are all slightly different in terms of how they are prepared to ensure the finished job is as good as possible, they are effectively primed in a very similar manner.
In the below section we look a little closer at the types of surface you may need to prime, the exact type of primer that should be used and how it should be applied.
Although it may be obvious to use a wood primer on a wood surface, there are numerous different type of wood and they can react in different ways so we will clarify any confusion there may be.
How to Prime Wood Surfaces
New wood should always be primed prior to painting. This is to seal it, stopping the paint from being absorbed, and to stop any moisture from getting into the wood. Priming new wood will also stop any tannins (sap) from coming through and discolouring the paint. Ronseal wood primer and undercoat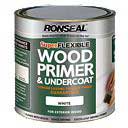
Look for a primer which says it is for wood, and make sure it is suitable for the type of wood you are painting. Hardwoods and softwood have different properties, and will absorb primers in different ways. Manmade woods such as plywood and chipboard are different again, but can usually use the same type of primer as a softwood.
Acrylic Primer Undercoat is a basic, fast-drying primer suitable for non-resinous softwoods and manmade woods. It is suitable for both interior and exterior use. Acrylic primer and undercoat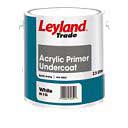
Oil-based or Alkyd primer is a basic wood primer suitable for interior and exterior use. Usually complies with BS regulations – check the tin to confirm this.
Aluminium primer is required for resinous woods, hardwoods and woods that have been treated with a preserver. It is self-knotting (prevents knot bleed) and can be used indoors or outdoors.
To correctly prepare the surface and prime it:
- Step 1: Clean – Clean the surface correctly and vacuum it after. Wipe with a damp cloth or white spirit to remove remnants
- Step 2: Sand – If already painted, use a course grit paper to remove as much as possible, if not, use a medium grit paper to rough the surface and create a key
- Step 3: Repair Damage – If there is any damage such as depressions, dents, chips etc, use a good quality wood filler to repair. Once cured, sand it off flat
- Step 4: Seal Knots – For any knots, treat them with knotting solution or proprietary product, e.g. Zinser BIN
- Step 5: Apply 1st Coat – Once fully prepared correctly, apply the primer to the surface using a brush or roller. Once died, sand off flat using medium grit paper
- Step 6: Apply 2nd Coat – Again, using a brush or roller, apply the 2nd coat of primer and once dried, sand it off flat ready for the finishing coat
Priming New Plaster and Plasterboard
When dealing with plasterboard or newly applied plaster, it’s crucial to understand that these surfaces are highly porous. They can absorb water and moisture from standard paint, causing it to peel off rather than properly bonding with the surface.
To prevent this issue, you should use a watered-down matt emulsion paint, applied in several coats. The additional water content ensures that the paint doesn’t dry out too quickly, allowing it to bond effectively with the surface. This results in a stable and solid base coat for your final decorative layer.
If you’re working with plastered or plasterboard surfaces and need more guidance, check out our Painting New Plaster project here. Bare plastered surface in need of a priming coat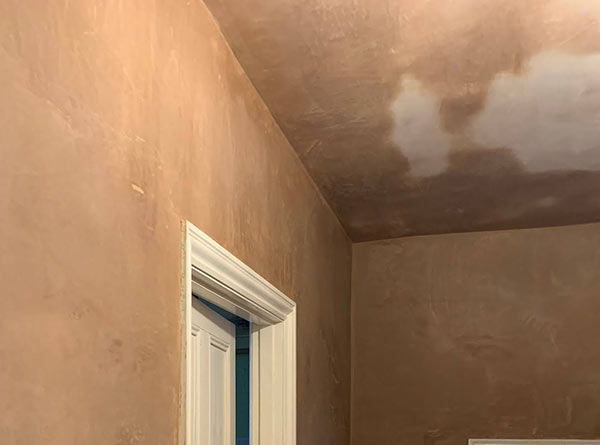
By following these steps, you’ll not only achieve a better-looking finish but also ensure the longevity of your paint job, preventing peeling and other issues.
To correctly prime new plaster and plasterboard surfaces, follow the steps below:
- Step 1: Using a damp rag or white spirit, wipe the full surface ver to remove any plaster dust –
- Step 2: Sand – Is there are any lumps or rough areas, use a medium to fine grit paper to sand them off
- Step 3: Repair – For any damage, dips, holes etc., use a good quality filler or some fresh skim plaster to fill over. Once fully cured, sand of flat
- Step 4: Mix Primer – Mix up a batch of matt emulsion and water to ratio of between 50/50 and 75/25
- Step 5: Apply Primer – Brush or roller on to the wall, covering every area and leave to dry for 24 hours
- Step 6: Apply Coat 2 – Once first coat dried, apply a second coat and leave to dry ready for receiving topcoat
Priming Plastic, Tile, Glass, and Melamine Surfaces
Just like new plaster and plasterboard, glossy non-porous surfaces such as glass, plastic, or tiles require special attention when painting. Without the right preparation, standard paint may struggle to adhere, leading to peeling issues.
To address this, use a primer specifically designed for non-porous surfaces. Look for an all-surface primer and undercoat that explicitly mentions compatibility with these materials, or opt for a dedicated product like Zinser Bulls Eye 1-2-3.
If a primer is formulated for a specific surface type, it often works well on similar surfaces, but it’s wise to conduct a small test in an inconspicuous area beforehand to ensure compatibility. Zinser Bulls Eye 1-2-3 primer paint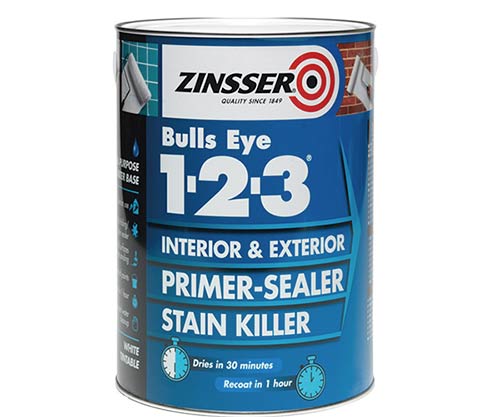
By selecting the right primer for your non-porous surfaces, such as Zinser Bulls Eye 1-2-3, you’ll create a stable foundation for topcoats, ensuring a lasting and professional finish. Always test on a small area first to guarantee optimal results.
To prime plastic, tile or glass surfaces, work through the steps below:
- Step 1: Clean – Using a good quality glass, tile, or plastic cleaner (for the surface you’re working with), fully clean the surface to remove any traces of grease, grime, soap residue etc.
- Step 2: Repair Damage – Where any damage is present, repair it where possible. It may not be possible to purchase a product to fill or repair damage in all of these surface-types and the only option with some may be to replace an entire section e.g. a whole tile, pane of glass etc.
- Step 3: Apply 1st Primer Coat – Apply the primer to the surface as instructed by the manufacturer. In most cases this will be simply brushing or rollering it on. Once dry, use a medium to fine paper to sand over and remove any marks or brush strokes if there are any
- Step 4: Apply 2nd Coat – Apply a 2nd coat of primer in the same manner as the first and sand flat once dried ready for final finishing coat
Priming Metal Surfaces for Painting
When it comes to priming metal surfaces for painting, it’s essential to understand the unique properties of different metals. However, a universal metal primer can effectively work on both ferrous and non-ferrous metals, providing rust inhibition and reducing the risk of corrosion.
For those considering metal paints, especially when dealing with objects like cars, spray cans can be a convenient option. Using spray cans helps to achieve a smooth, brush-stroke-free finish, enhancing the overall appearance.
Another popular choice for metal primer and paint is Hammerite, commonly used for outdoor items like fences and garden furniture. Hammerite is known for its single-application feature, serving as both a primer and topcoat. It is easy to apply with a brush, but spray versions are also available for added convenience.
One of the widely used metal primers is Red Oxide, specifically designed for metals prone to rust when exposed to cold air or humidity. Applying Red Oxide primer provides effective protection against corrosion and an added layer of protection.
Red oxide primer
To successfully prime a metal surface, follow the steps below:
- Step 1: Clean – Using a cloth with white spirit or similar, wipe the whole surface over to remove any fine dust, grease or grime and vacuum if necessary
- Step 2: Sand – If there is paint on the surface or rust, use a medium to fine grit paper to sand the surface off fully, removing as much paint as you can and all rust. Don’t leave any paint hard edges
- Step 3: Fil Damage – Fill any damage such as dents, depressions and the like with a good quality car body filler. Once cured, sand off using a flat sand block
- Step 4: Clean Dust – Clean any dust, grease and grime away using a white spirit rag and vacuum
- Step 5: Apply 1st Primer Coat – Apply the first coat of primer using a brush, roller or in most cases from a spray can. Once dry, sand off flat using a medium ro fine paper on a flat sanding block
- Step 6: Apply 2nd Primer – Apply the 2nd coat of primer in the same manner as the first and then sand back flat once cured ready for final coat
Stains and Problem Surfaces
As is often the case, especially when working on walls, ceilings and timber objects, you will run into some kind of stain or problem area that will have to be delt with otherwise, inevitably, it will totally ruin the final result.
Stabilising Solutions can be used to prime surfaces that are especially porous, or have a loose, powdery finish, such as plaster and masonry. An Alkali Resisting Sealer should be used on lime-based plaster, concrete and cement.
Stains such as smoke and nicotine can be sealed in with special stain-blocking primers. Mould paint or fungicidal solutions should be used to prime walls that have been subject to organic growth such as mould and algae.
With timber surfaces, it’s best to use a specialist stain blocking product or one of the products that we have already mentioned above e.g. Zinser Bulls Eye or BIN. These are generally thick enough to fully cover any such issues and provide a base for most types of top coat finish paint.
Regardless of what surface you’re working with, as we have stated numerous times, it is absolutely essential that it is prepared correctly first, this is the absolute key to the success of the job!