Any decoration job, either DIY or professionally done is always only as good as the preparation and thought that has gone into it and this is exactly the same when preparing any kind of wooden surface for painting.
We get so many questions as to why a surface is peeling or has gone blotchy etc. and the answer is, 99% of the time, because the surface has not been prepared properly.
In this DIY project we will run through all of the necessary work required when preparing woodwork and timber surfaces for painting.
Sanding Wooden Surfaces
What ever situation you are in in terms of needing to prepare a wooden surface for painting, at some point in the preparation phase you are going to need to do some sanding.
With this in mind, before doing anything you should always put a mask on! Never ever sand anything without wearing one. Older paints contained lead and this can be very harmful to your health if you breath it in.
In the interests of safety, we do not recommend sanding down or burning off paint from internal or external surfaces of a house unless you can be sure the paint does not contain lead. If this is the case, please see our project on stripping lead paint where you will get full instructions on how to do it correctly.
There are many different types of sand paper and the best sandpapers to use are aluminium oxide or silicone carbide papers which are a little more expensive but stay workable for much longer than cheaper versions.
When sanding over flat surfaces it is always best to wrap the paper around a sanding block to keep it flat to the surface you’re working on. If you don’t then you can easily sand in depressions if you concentrate too long on a given area.
If the timber has different contours or detailed areas, such as chamfered architrave or skirting, wrapping the paper round a firm sponge will allow the paper to get into and onto the contours, enabling you to remove paint from these hard to reach areas.
In some situations if you have time to allow the timber to dry out before you need to paint it, it is possible to use wet and dry sand paper. When using this product you can get a super smooth finish and this is especially good when you need to blend surfaces as you can get a seamless finish.
If a surface is to be varnished, one thing you have to remember is sanding the timber across the grain prior to varnishing will leave scratches which will show through the varnish and ruin your work. When sanding, always sand with the grain.
If you have large flat areas to sand over then trying to do this by hand is very hard work and hugely time consuming. In these situations it’s time to break out the power tools, in this case a random orbit sander.
This tool has a flat circular sanding pad that. as the name suggests rotates using a random pattern. This enables it to take off paint and other materials and flatten surfaces very evenly. When it comes to sanding this tool is an absolute must!
One final point is that when sanding always remember to protect carpets, furniture and other appliances with dust sheets. Dust can get into everything and cause quite a bit of damage so ensure everything is protected.
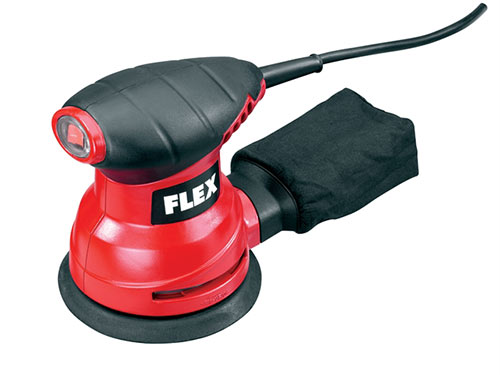
Random orbit sander for sanding large flat areas with ease
Stripping Paint From Wooden Surfaces
If the existing paint on the object you’re working on is not in good condition in that it is cracked, chipped and flaking off it’s best to remove it all and get back to the bare surface below so that you can start form scratch.
Getting an object back to bare wood can be a tricky and time consuming job which is why many prefer to simply patch up and put a new coat over the top. This isn’t always the best solution and certainly doesn’t give the most professional finish.
In terms of stripping an object of it’s paint there are really only 2 different methods to use; sand the paint off (as we have detailed above) or strip it off.
This is usually easiest done using a paint stripper together with a shaped shave hook or putty knife to get into corners and moulding’s and will generally give you the best results. In most situations it’s also faster and cleaner!
When it comes to what paint stripper to use, there is a huge selection available today. A visit to your local DIY store should reveal an entire sections worth, however some are better than others.
We would always recommend using the Eco Solutions Paint and Varnish stripper. We have used this product for many years, both on DIY projects and out on site and have always found it to be as good as if not better than anything else out there.
As with all paint strippers (except for the Eco Solutions mentioned above as it’s non-toxic) always use them in a well ventilated area, ensure you have covered everything in dust sheets and that you wear old clothes, gloves and eye protection.
Simply apply the stripper to the area you want to strip following the manufacturers instructions (usually just paint it on), leave it for the required amount of time and then start scraping the pant off.
Once done and all the paint is gone, wipe the entire area down with clean water and allow it to dry and then you should be good to paint.
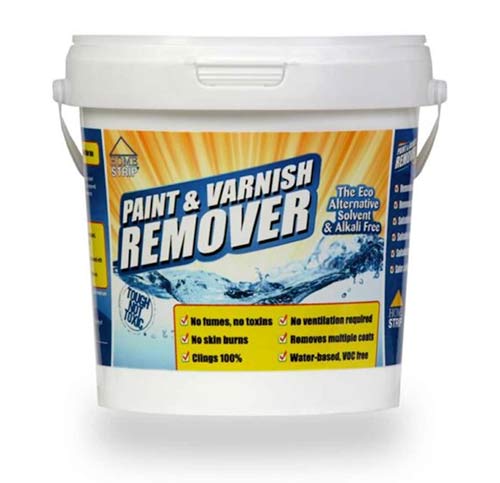
Eco Solutions Paint and Varnish Stripper – Available form our online store here
Dealing With Knots
When it comes to painting timber knots can be a real pain, especially in sappy soft woods such as Pine. If you have ever painted a bare piece of wood only to come back and find that any knots have bled through the finish it’s very frustrating.
Typically knots in such timber contain a lot of sap and over time the sap will ooze out of the knot and bleed through the paint. Also as the sap itself is greasy the paint doesn’t stick very well anyway.
Despite this there are ways to remedy the issues that knots produce and this is simply to cover the knot with a knotting solution or to use a shellac primer.
A Knotting solution is again available from pretty much all DIY stores and is simply a solution that you paint over the knot in 2 – 3 coats once it’s been fully sanded. Once dried the solution seals the knot and prevents any further sap from coming out. Once fully dried you can then simply paint over it.
With a shellac primer, you first need to get as much sap out of the knot as possible and this is generally done using a heat gun to heat the knot at which point the sap will flow out and can then be scraped off.
You then leave it for a day or so for any remaining sap to seep out and dry on the surface where it can be scraped off. Once removed the area is fully sanded and the shellac primer is applied in 2 – 3 coats, allowing each coat to fully dry before it’s lightly sanded before the next coat.
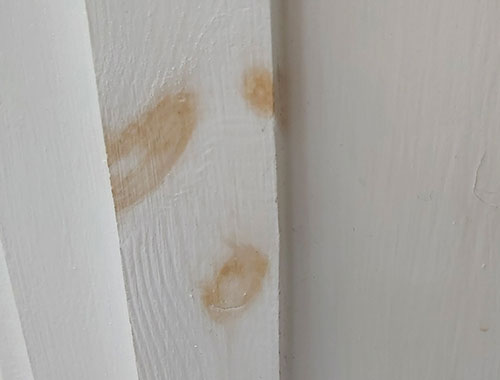
Knots bleeding through paint
Filling Holes and Making Repairs
A very popular myth amongst DIY enthusiasts is that paint can fill holes. This is simply not true at all! Any holes, no matter how slight they are will need to be filled and sanded before they are painted as once it has a coat of paint on, even the slightest depression will be noticeable.
When it comes to what filler to use, for the best results on timber you will need to use a specific good quality wood filler. As with paint strippers above, today there is a huge selection available, however we would recommend an epoxy-based filler such as the Ronseal High Performance wood filler
For a varnished surface, wood filler should be used which matches the colour of the wood as closely as possible as if it’s not matched as well as it could be, once it has a coat of varnish on it, it will be very noticeable.
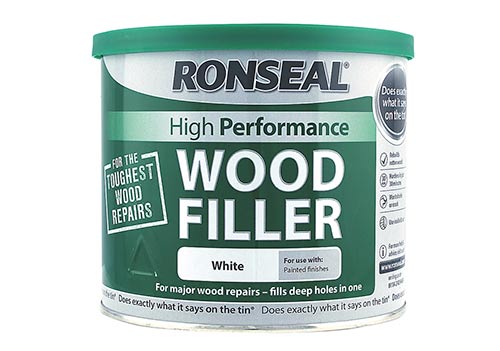
Ronseal High Performance wood filler
Making Small Repairs Before Painting Wood
If only small areas of the paintwork need to be removed as they are damaged, blistered or flaking then it is possible to just fix these areas without the need to repaint the whole item.
To do so, sand within the damaged area fully after you have scraped off any further loose paint (providing you can be sure there is no lead in the paint).
In terms of sanding you need to get the area as smooth as possible and then “feather” each layer of paint around the damage and create a very gentle slope between the existing paint and the wood underneath.
By doing so, once painted you shouldn’t be able to see the repair, however if this isn’t done correctly then you will get a “hard edge” will you’ll be able to see from the other side of the room!
Once sanded correctly you can then apply 2 or so coats of primer, allow them to fully dry and then sand over. However if the depression is too deep then it will need to be filled using a general purpose filler and then sanded flat to the surrounding area after which it can be painted.
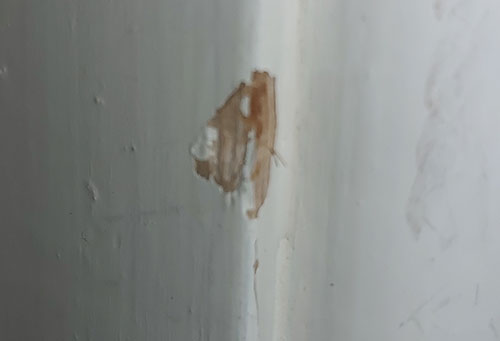
Damaged area of paint that could be patch repaired
Before Applying Paint or Varnish to Wood Surfaces
Despite how clean you think your home is there is grease in the air in every home, from cooking and general cleaning. This grease settles on all surfaces and must be removed before any form of painting takes place. Paint, if it to stay where its put, must have a stable base.
When it comes to applying any form of paint or varnish to any surface, even if you haven’t sanded it, it first needs degreasing correctly so that this film of grime is removed and the paint can get a solid bond with the surface below.
To do this you can either wash the surface over with a sugar soap solution to remove any remaining grime. Once washed with the solution it then needs to be wiped over with fresh clean water and then allowed to fully dry.
Alternatively you can also use a clean rag and white spirit to wipe the area over fully. This will also remove any surface grease.
If you have done any form of sanding at all then every molecule of dust will need to be removed as even the smallest crumb can be visually obvious once covered in fresh paint.
When you have finished your sanding, use a vacuum to clean up all dust from the immediate area and also from the surrounding area. If there is lots of surface dust even the slightest movement can send it up into the area where it will then settle on your freshly painted surfaces.
Once, and only once you are totally sure the area to be painted is free from dust and grease can painting commence.
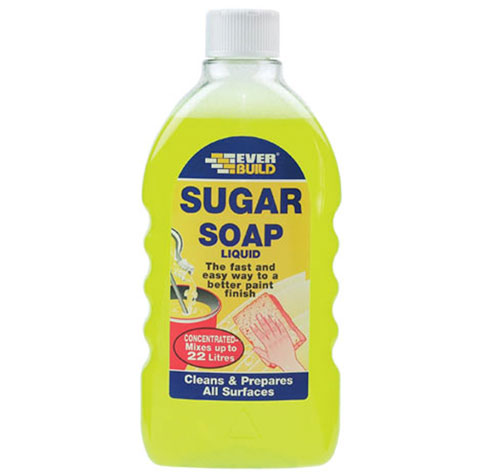
Sugar soap for degreasing surfaces before painting
Priming and Painting
Although this project page is geared at preparing wood for paint, we thought it also important to briefly look at the types of paint that you’ll use.
Primer is a thin paint which soaks into the grain slightly and takes some of the porosity out of the new, or bare timber. It creates a stable base and key for your final top coat.
When an undercoat or top coat of paint is applied directly to bare wood, the moisture is "sucked" out of it too quickly and the paint itself does not get a chance to soak into the timber. The paint therefore dries on the surface and has no "roots" so to speak – it will quickly peel.
To avoid this issue the primer itself can only soak in properly if the surface is free from grease and the grain is a little open to receive it. This can be achieved by (if necessary) washing down with a solution of sugar soap which will degrease the surface and then sanding with a medium grit sand paper.
So as we can see form the above, for your primer to provide a stable base and do the job it’s supposed to do, the surface needs to be correctly sanded and degreased.
Although the primer creates a solid stable base for your further coats, in some cases it will also be necessary to use an undercoat. An undercoat is generally a slightly thicker type of paint that, once applied to the primer, helps to iron out and very small imperfections in the surface and provide and even more flat and level surface for your final coat.
Additionally if you are changing the colour of a surface e.g. from dark to light, to prevent the dark surface from bleeding through any new lighter coats, several coats of a thick undercoat will stop this from happening.
In terms of the types of primer, undercoat and topcoat paint, there are essentially 2; newer water -based paint and older more traditional oil-based paint. There is also a third that we have mentioned above and that’s shellac which is a resin based paint, however these are not commonly available in primers, undercoats and topcoats.
When choosing paints you should never mix different types e.g. mixing oil based undercoat with a water based top coat and vice versa, you should always use like-for-like
In general today, water-based paints are on the whole more readily available than oil based, however oil-based still have their place for sure. Oil paints excel where a tough surface is needed e.g. skirting boards, architrave, doorways etc. as they are very hardwearing.
Another question that crops up quite a bit is; How many coats should be applied at each stage? This really depends on what you’re painting and how but in general you should always really do at least 2 coats per stage.
Other than not mixing different paint types, what paint you decide to use is really up to you.
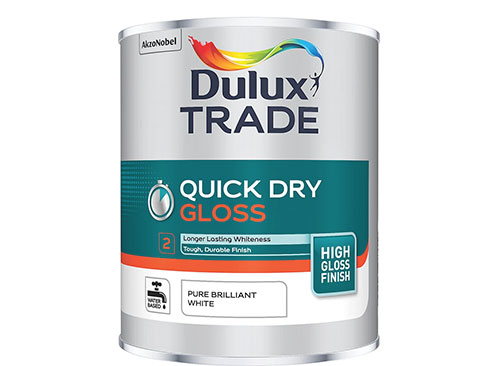
Good quality water based top coat paint
Dealing With Mill Glaze
Mill glaze is an odd occurrence in that when you pop a small amount of water on to a timber surface, the water will bead up in the same way that it would do on a waterproof surface, this is because it is essentially water proof.
This becomes an issue when it needs to be painted as in order for the paint to bond to the surface it must soak into it, and if it can’t it’s just sitting on the top and will easily flake off.
Mill glaze is generally created during the milling process (when the timber is prepared, cut and planed in the timber mill). When a section of timber is cut and then planed, the heat produced by the planning blades encourages the natural oils to come out and at the same time the blade closes the pours of the timber.
After the process finishes and the oils cool they form a solid glaze on the surface of the timber that’s essentially water tight.
In terms of how to fix this issue, the best method is to sand it off using a medium grit paper such as 120 – 180 grit. As we have stated above, always sand in the same direction as the wood grain.
Preparing Previously Painted Wood for Paint
Previously painted wooden surfaces are in many ways are one of the easiest and most straightforward surface-types to prepare.
For previously painted surfaces there is no need to remove all the paint if its not flaking and is in a flat, level and stable condition.
In this instance the best approach is to lightly sand over the entire surface using a medium to fine sandpaper, somewhere between 120 and 180 grit to provide a decent key for the new paint and to also take out and minor imperfections.
Once thoroughly cleaned down and degreased you can then apply 1 – 2 new coats of paint using a good quality brush correct for the type of paint you’re suing (find out more about types of paint brush and how to use them in our project).
If you want to be totally thorough, an undercoat is always a good idea on previously painted surfaces as it will give you a much better finish and stops the paint "dragging" on the surface.
After sanding over the existing surface, apply your primer or undercoat and then once fully dried give it a light sand off with a fine sandpaper such as 240 or 320 grit, fully clean down and then you can apply your topcoat.
Additionally if you are applying a different colour topcoat to that of the existing then to ensure the colour below doesn’t bleed through then you will need to apply a primer.
However if the paint you’re working with is damages, flaking or blistering off then you will need to strip it all back to the bare surface below. It is possible to patch bad areas and blend them but in pretty much all cases you’ll be able to spot these areas.
Likewise if there are any damaged areas, nail heads, holes etc. all of these will need to be filled and sanded with a fine sand paper before any paint is applied.
Ultimately, to get the very best finish possible it is always best to start with a bare surface e.g. strip all of the old paint off but we totally understand this isn’t always possible!
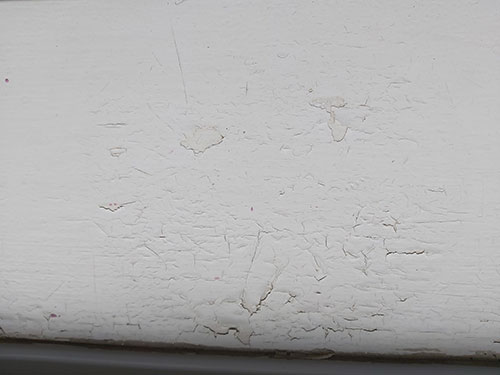
Previously painted surface to be re-painted
Preparing Brand new Wood for Painting
Where as the previously painted surface-type mentioned above is one of the easiest to work with, bare, brand new woodwork is arguably the easiest as you have a totally blank canvas.
Despite the fact that it’s new you may be thinking that you can simply paint straight on to it but this is not the case. Mill glaze, air-bourne grease, dust etc. can all settle on bare timber surfaces and effect the final overall finish.
To avoid any such issues bare wood surfaces need to be sanded down. To do so, use a fine grade sandpaper, around 240 – 320 grit and as we state in our sanding tips section, always sad along the grain and not against it.
Occasionally, even with new timber, you will get holes, depressions and splits that will need to be filled in order to get a perfect finish. Once filled sand everything flat and then clean any trace of dust using a vacuum and then degrease the surface ready for paint.
If there are any knots present these should be treated with a knotting solution to prevent any bleeding of the knot or indeed any sap from penetrating through.
Any new or bare timber will need to be primed after sanding if you are to paint it. 2 coats of primer, at least one undercoat and then 2 topcoats will generally give the best results.
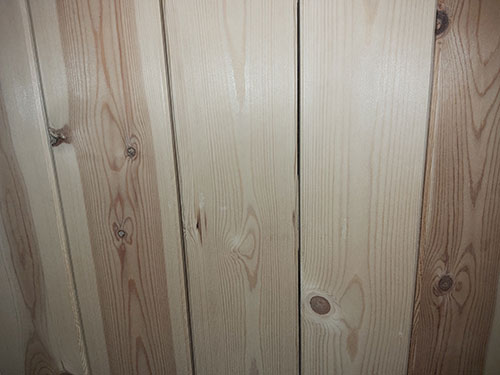
Bare piece of timber ready to be painted
Preparing Interior Wood Surfaces for Paint
Preparing interior surfaces for paint is a fairly straight forward and task and basically follows the steps mentioned in the above.
One major area to pay attention to though is the fact you are indoors and the volume of mess that certain preparation tasks can make.
With this in mind make sure that you cover absolutely everything in dust sheets so that any furniture, appliances and carpets are protected and when sanding, work on small areas at a time and stop and vacuum away any dust regularly.
- For existing painted surfaces remove any flaking/damaged paint with a scraper
- Repair any damaged areas, holes, knock any nail heads below the surface etc. and fill over
- Sand all surfaces over fully using 120 – 180 grit sandpaper and also any areas that have been filled
- Vacuum away any dust and debris from the entire area, not just the immediate work area but floors and other surfaces also. As you move this will create dust that will settle on fresh paint so minimise this as much as possible
- Once vacuumed, fully degrease all surfaces to be painted using sugar soap or white spirit applied to a rag and then wipe over with a damp clean cloth to remove any residue
- Once dried you should be ready to paint
- Before painting, ensure you cover and mask any surfaces you don’t want covered in paint
One of the major issues you may encountered when painting internal timber surfaces is if they have been subjected to water and moisture.
Typically this occurs around windows and door frames in the form of condensation and if left for long periods can easily lead to rot and decay.
If any woodwork you’re planning to paint has started to rot, if it’s not too bad then decayed areas can be cut or scraped out and then filled with a suitable wood filler, however if it’s too bad then the item or area in question will need to be replaced with a new piece of timber.
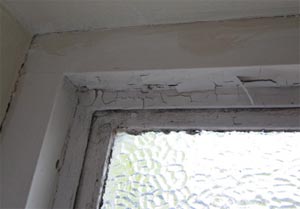
Peeling paint around window that can cause it to rot
Preparing Exterior Wood Surfaces for Paint
Preparing wooden surfaces outside for painting isn’t too difficult at all with few differences from preparing and internal wooden surface.
The major difference and requirement is that you have to be extra thorough with any preparation work. As your painted surfaces will reside outside and be subjected to the full force of the elements then you will need to ensure that it’s bonded as tightly to the timber surface below as possible.
Additionally as you are working outside and working with wood you don’t want it getting wet, so it’s best to only work on dry days so the summer time is generally the best time to get any exterior painting done.
To prepare an external wooden surface for paint:
- Scrape off any splintering, flaking or blistered paint using a scraper or decorators knife back down to the timber surface below
- For the best and longest lasting job, ideally strip all surfaces back down to the bare timber surface below by scraping, sanding or stripping
- If you are unable to do so thoroughly sand each bare scraped area using a 120 – 180 grit sandpaper. Pay close attention to the edges and feather these fully to prevent them showing though final coats of paint
- Sand the entire surface over using 120 – 180 grit sandpaper, making sure you get down into any tight areas and detail to create a good key for the paint and remove any left over flaking paint
- Vacuum the entire area over and remove all traces of dust and old paint
- Clean the entire area over to degrease it using white spirit or sugar soap and then remove any left over residue with a clean damp cloth
- Once fully dried out you are ready to paint after to have masked up any surfaces you don’t want to get paint on
Again, where wood surfaces are exposed to water and moisture they can decay and rot. If you have found any such areas scrape as much of the decay away as possible and then fill with a suitable filler but if too bad then you will need to fully replace the timber section.
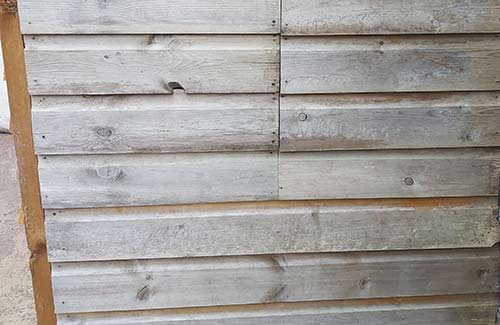
External wooden surface to be painted
Finishing up and Making Good Painted or Varnished Wood
Once you have completed your painting project and it has fully dried there may be some final finishing items that need to be attended to, to totally complete the job.
Where any woodwork meets a wall, there is often a gap. This gap can be filled very easily using flexible filler or decorators caulk in a special application tool called a sealant gun.
Using the correct colour and type of sealant for the job you’re doing, the sealed end of the tube is cut off and a nozzle is screwed on. This nozzle has a hole in the end which is, more often than not, not large enough. It can be cut back further to allow a larger bead of filler to be released from the tube.
Cutting this nozzle at an angle makes application much easier. The tube is then inserted into the gun and the trigger squeezed to apply the filler. Once the gap is filled a wet finger can be run down the joint to "tidy" it up. Surplus filler can be removed easily with a damp rag.
As with anything else in the building industry, practice makes perfect, so don’t rush to your walls straight away, sacrifice a couple of pounds on an extra tube to practice with on some old offcuts. This little bit of preparation will save you hours of frustration later.
If you have any type of wooden surface to paint then to ensure that the project is a success at the end it is essential that it’s prepared correctly. Preparing wood correctly for painting is the absolute key to a successful job.

