Matching mortar colours is often required with older, period properties where repairs that are carried out need to be made invisible.
In this project guide we go through what’s involved with matching mortar colours, read on to find out how.
Why Match Mortar Colours?
Quite often it is necessary to cut out damaged bricks from a wall and while it is relatively easy to match the bricks, matching the colour of the mortar used is no easy task.
If mortar colour is not matched precisely, any type of repair to a wall is made immediately obvious and stands out like a sore thumb. Over time, weathering, lichen growth etc. will eventually dull the visually differences but this can take many, many years.
The slight differences in mortar colour may not be such a major concern on newer properties as often the mortar colour can be matched fairly closely, but as said in older properties that may be several hundred years old, matching mortar colour can be a nightmare.
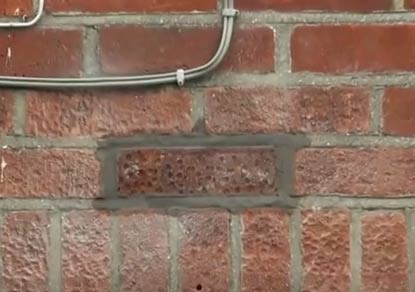
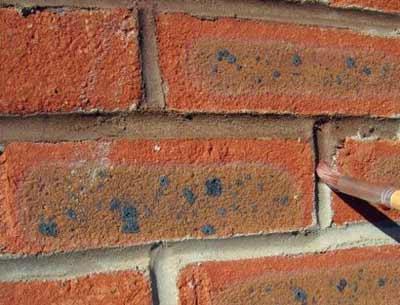
Brick replaced in wall with mortar that does not match
Why is Some Mortar a Different Colour to Others?
Before we actually start looking at mortar and cement colour matching techniques, it’s important to understand exactly why mortar and cement colours can vary so drastically.
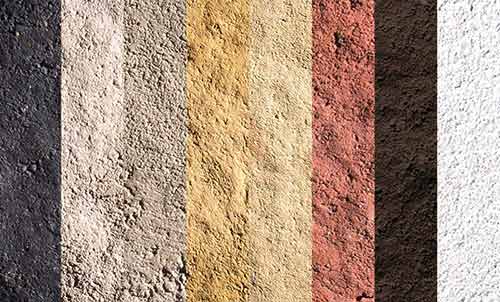
Essentially, this is down to the colour and type of sand that’s used. There are many types of sand and each type will produce a different colour mortar when mixed with cement.
Your property may have been built from a local sand or it may have been imported by a developer who got a great deal from a quarry further afield.
If your neighbouring properties are of a similar age and style to your own property, take a close look at the mortar joints between brick courses. They should all be the same or similar colour to your own.
If your house is relatively new it may be worth talking to the local builders’ merchants to see if the development was built using materials ordered through them. This way you should be able to fairly easily track down the source of the sand that was used.
If local merchants didn’t supply the materials, you can also try to contact the builder or developers responsible for constructing the property. They should be able to trace where they purchased the sand that was used.
Life will certainly be easier in terms of colour matching any cement and mortar that may be used for repairs or improvements in the future if you can track down the exact sand that was used.
If you cannot locate the sand then talk to the builders merchants and even the local quarry to find out how many local building sands there are available.
Ask if you can have a small sample of each so that you can run some colour matching experiments (more on this later). Its boring and time consuming, but if you do not want your repairs to stand out a mile off, it has to be done!
Some mortars are artificially coloured with a cement dye or mortar tone. This makes the permutations endless as you not only have to think about the sand and cement that was used but also what dye was used!

Different types and colours of sand – Image courtesy of sandatlas.org
Does the Colour of the Cement Matter?
In short, yes, the colour of the cement that used in a mortar mix does have an effect on its overall colour.
It’s no coincidence that both the colour of most standard mortars and cement is a grey’ish colour. This is due to the fact that the grey colour-tones of the cement go a fair way into the overall colour of the mortar.
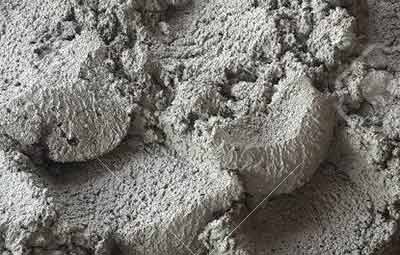
Concrete mix coloured grey due to colour of the cement used
What Other Factors Affect Mortar Colour?
Another factor that can alter the colour of mortar is whether lime was used in the original mix. As lime is naturally light in colour and is often used in place of cement in some mixes, mortar created using lime can look very light in colour and in some cases be nearly white.
On the topic of light coloured mortar, did you know you can also get white cement? If not, indeed you can. White cement is created using raw materials that don’t contain any (or at least very little) manganese or iron, the components that give traditional cement its grey colouring.
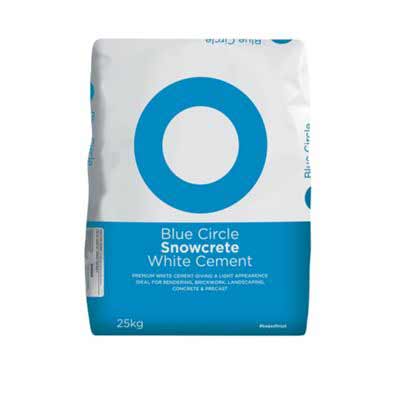
White cement or Snowcrete created form raw materials that don’t contain any manganese or iron
Similar to the way in which lime can significantly lighten the colour of mortar, as you may imagine, using white cement has the same effect.
So as you can see, not only does the colour and type of the sand that used in a mortar mix affect its colour but so does the cement and the presence of lime if it has been used.
How do I Know What Colour Sand was Used in the Original Mortar?
As we have mentioned above, the real key to matching mortar colour is to work out exactly what type of sand was originally used.
In some cases it is possible to take a sample of the original mortar, break it down and separate out the sand. With a sample of the original sand to hand you can then use it to compare against sand from different sources until you find an exact or very close match.
Step 1 – Get Samples
Firstly, get a couple of samples of mortar. If the joints that you’re looking to repair are particularly damaged then you should be able to prise some chunks of old mortar out.
If they won’t come out easily, use a small cold chisel to knock some out, being very careful not to chip or damage any surrounding bricks or blocks while you’re doing so.
Step 2 – Grind Mortar Down
With your sample to hand place them on an old scrap piece of wood. Using a similar scrap piece of wood, place this on top and use it to grind the mortar down.
Don’t be tempted to use anything too heavy or blunt for this. If you get too carried away you will grind the actual sand particles down too much and have nothing to compare other than a pile of dust.
Step 3 – Mix Muriatic Acid Solution
Next you need to mix up a solution of water and muriatic acid (brick acid) at the ratio of 25ml muriatic acid to 300ml or fresh, clean water.
Muriatic acid or brick acid
As the name suggests, muriatic acid is in fact hydrochloric acid which is very dangerous. At all times during this experiment you should wear old clothes, chemical resistant gloves made from PVC or Butyl rubber and at minimum eye protection, preferably full facial protection.
With your solution prepared, pour in the course dust that you created earlier and stir it around to mix it up fully.
Step 4 – Wait for Results
The next part is a waiting game! You will need to leave the solution for 2-3 days for the Muratic Acid to get to work on the on the cement and dissolve it (and also any lime that may also be present).
After the brick acid has got to work and dissolved the cement/lime you should now be left with the sand that should have sunk to the base of the container.
Step 5 – Drain off Acid Solution
You will now need to drain off the brick acid solution. Gently pour this into another plastic container (that can be sealed with a lid), being careful not to loose any of the sand solution. Pour off as much as you can into the container.
Now pour some clean, fresh water into both the containers. This will help to dilute the remaining acid in both, making it weaker and less hazardous. Put a lid on the container with your waste acid and put this to one side for now.
Step 6 – Drain off Sand Solution
You now need to drain off your sand solution. Using a container with a fairly large mouth that can again be sealed, stretch an old pair of tights over the mouth and secure it with a strong elastic band.
Now, pour your sand solution gently over the top. The tights will act as a sieve, allowing the remaining water/acid solution to drain off, leaving you with just your sand.
Place the sand on an old sheet/cloth and leave it somewhere out of the way to fully dry off. Once dry, pop it into a clear sealed jar or container.
Step 7 – Match the Sample
You can now take this container to your local DIY sheds, builders merchants or other locations that sell sand so that you can compare it and hopefully get a close if not exact match.
On having a close look at the sand, pay attention to the size of the particles. If they are fairly small and of a uniform size, then it most cases this will be a standard building sand. However if small visible stone chips of varying sizes are evident this may indicate the possible use of sharp sand.
Step 8 – Dispose of Acid Solution
The last job now is to dispose of your acid solution. As this is classed as hazardous waste DO NOT simply pour it down the drain! It needs to be disposed of safely and correctly.
For information on this, contact your local recycling centre or checkout the Health and Safety Executive website here.
How to Colour Match Mortar
Essentially, there is no science involved in matching a sand and cement mix to that of your existing wall or property, it’s really just a question of trial and error and also possibly a little research.
As we have mentioned, colour matching mortar when repointing or repairing walls or replacing bricks is an absolute must if you want a top-quality job. Poorly matched fresh mortar will stand out a mile off and make a job look sloppy and un-professional.
If you have read through the above you should now know exactly why mortar can vary in colour and how a fresh mortar mix can be a totally different colour to existing mortar, it’s now time to look at the methods that can be used to actually colour match cement and mortar.
Experiment With Different Mortar Mixes and Raw Materials
As we have established, the colour and tone of the sand that is used in your mortar mix has pretty much the greatest bearing on the overall colour of new mortar.
For this reason it is fairly essential that you identify and use the same sand that was used for the original mortar, although often this isn’t always possible as pits, mines and quarries close or run out of materials, local suppliers shut down, sand supplies are sourced from abroad etc.
Step 1 – Identify the Sand
As we have mentioned, as the sand used in a mix makes up the bulk of the actual mix itself, it has the greatest effect on the overall colour, so to get a good match, it’s really essential to identify it.
Aside from the techniques we have run through above for extracting sand from the original mortar, which is very effective by the way, you can also undertake some local research.
Get in touch with any local historians or custodians of local monuments or historic buildings as it is likely that they will know exactly where the majority of original materials used were sourced from.
Step 2 – Identify the Cement
The next most significant component of a mortar mix is the cement. Unless the existing mortar is particularly light in colour (light cream or white colour), in most cases a standard cement will have been used e.g. grey cement.
However, if the mortar is very light in colour then this suggests that either a white cement (aka Snowcrete) or lime has been used.
Step 3 – Has Lime Been Used?
When it comes to lime, traditionally, this would have been used in place of cement as it does exactly the same job e.g. binds materials together, but it also has the added benefit of making a mortar mix breathable and more flexible.
Lime putty or lime mortar
Lime mortar has been pretty much the go-to choice for building and construction for thousands of years but was replaced by more modern cement mortars due to their faster setting times and greater compressive strength towards the end of the 19th century.
If you know the age of your property and its pre-1900’ish then the chances are it may feature a lime-based mortar, especially if it is light in colour.
Step 4 – Establish Correct Ratio of Mix
Now that we have established the probable types of sand and cement or lime that was used for the original mortar mix, all that remains is to match the correct cement content.
This is easy enough to do but does involve a little time and patience as you will need to create a range of different mixes using different ratios of cement to sand.
Firstly, start with a 3:1 mix (3 sand to 1 cement) and then a 3½:1 (3½ sand to 1 cement), then a 4:1 mix (4 sand to 1 cement), then a 4½:1 mix (4½ sand to 1 cement) and so on, all the way up to a 6:1 mix.
Note: Do not go beyond a 6:1 mix as anything above this will be too weak to support ordinary brickwork.
If you are working with lime then you will also need to do the same, but with lime you will only be working with ratios between 3:1 (3 sand to 1 lime) and 5:1 (5 sand to 1 lime).
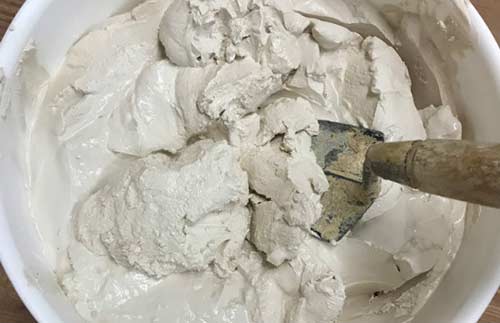
After you have created each mix, take a sample and place it on a scrap piece of wood. Do this for each mix until you have a long line of samples. Label each mix e.g. 3:1, 4:1 etc. so you know which is which and then leave them to fully dry.
Selection of mortar samples of differing colours – Image courtesy of eurobrick.co.uk
This may take a day or so but you will need to be patient as each one needs to be fully dried to get an exact colour.
Once dried, simply hold your sample board up to the existing mortar and look along the line until you spot a close or identical colour match and this will indicate the mix ratio to go for.
The key to this whole process is consistency with the mix ratio. If you have a lot of pointing or repair work to do then to maintain a consistent colour match from your first mix to your last, everyone has to be the same.
This is also the case for your test mixes, so when measuring quantities for each mix component use a set size object such as a measuring jug or cut down soft drink bottle, filling each one to the brim each time and then levelling it off.
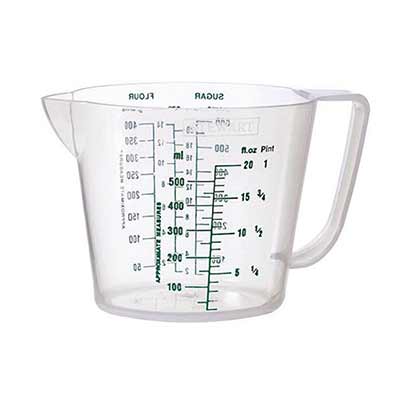
Measuring jug or cut down drinks bottle used as a measuring jug
Step 5 – Use a Table of Quantities
To help you keep track of each mix and the quantities used, we suggest you make up a table, similar to the one below to keep track of everything.
| Mix Number | Sand Type | Sand Amount | Cement/Lime Type | Cement/Lime Amount | Dye Added | Dye Amount |
| 1 | Soft yellow | 3 | Cement – Portland | 1 | Y – White | 5ml |
| 2 | ||||||
| 3 | ||||||
| 4 | ||||||
| 5 |
Step 6 – Points to Think About
Now that you know exactly how to create some test mixes and compare to your existing mortar to find a colour match, it’s now just a question of getting it done, but before you make a start there are a few further points to be aware of:
- While waiting for your test mixes to dry you can still do some preliminary tests by giving a section of your existing mortar a good soaking with some water. This should then reflect the damp drying state of your test mixes
- Once your new mortar has dried it will change colour very slightly. This may be even more evident over a large area
- Over time the colour of fresh mortar will change due to UV exposure, weathering etc
- Under no circumstances should you ever change the cement to sand ratio of a mortar mix for a new mix so that it’s different from any existing mortar just to ensure a colour match! This may affect structural integrity
Using Dye, Tint and Mortar Tone
If you have hit a brick wall (pardon the pun) in terms of matching new mortar to existing mortar and you just can’t get a close match then there are other solutions such as mortar dyes/tones and tints.
Using Dyes and Tones
Dyes and tones are exactly what they sound like: a colouring that is added to a mortar mix in order to change it’s colour.
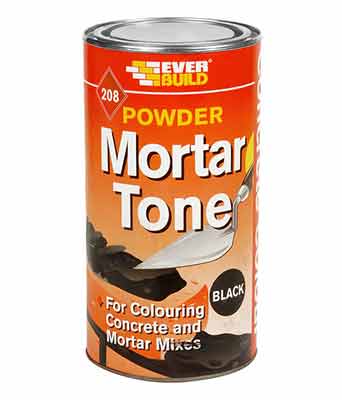
Mortar tone used for creating different coloured mortar
They are available in a huge range of different shades and colours and can be used to change the colour of a mortar mix to match any given existing mortar or surface.
As with finding an existing mix ratio, quite a bit of experimentation is needed to get a good match.
Essentially you have to repeat the above process e.g. creating several different mixes but adding the required dye or tone colour in different quantities until you have a decent colour match.
Even a small trace of dye can have quite a dramatic effect on the overall colour so you will need to experiment using quite small quantities at a time.
One thing to be aware of is that it is important to mix the dye into the cement before you add the water.
Dyes are available in a huge variety of colours from all builder’s merchants
Using Mortar Tints
Mortar tints, however are slightly different in that they tend to come in concentrated liquid form that you then dilute to a point until you get a colour match.
Mortar or brick tint used to colour match bricks and mortar
Once the colour is matched as closely as possible, the tint is then brushed onto the mortar after it has been applied and fully cured where it then dyes and colours it.
One very good example of a mortar tint that we have used on numerous occasions is the Bebbington Brick range of mortar tints and if you would like to know more, check out our review here.
As with creating your test mixes, the key to getting a spot on colour match across a number of different mixes is using exactly the same quantities of each material every time, so again, use the table above to keep track of the exact amounts used.
Specialist Mortar Colour Matching Service
If you have gotten to this point, done a vast array of test mixes, tried every dye, tone and tint you can find and still cannot get a match there is yet still more hope!
As colour matching mortar is a notoriously tricky process there are quite a few different companies that have sprung up specialising in this very technique.
As you may imagine, this is quite a costly process but if you are set on getting the best, most naturally blended finish possible, it may be something you’re willing to dig a bit deeper for.
Many of these companies can be found online through a simple search for “mortar colour matching service”.
Matching Brick, Block and Stone Colours
Using the tips and information above you should now be fairly confident in how to colour-match new mortar to existing mortar, but what about colour matching actual bricks, blocks or stonework?
If you’re actually replacing physical bricks, then it’s all well and good matching new mortar, but if the new bricks your using don’t match the existing bricks of your property then this is going to look even worse right?
With this in mind, as well as matching your mortar, you’re also going to need to match your bricks, blocks or stone if you really want as seamless a repair as possible.
As I’m sure you are guessing at this point this means using the same bricks, blocks etc. as the existing.
Newer Buildings
If the property requiring the work is quite new then this may be a fairly easy task as the original bricks will probably still be in wide use, making them easy to come by.
As with sourcing sand, this is just a question of visiting local builders merchants with an original sample until you find a match, or contacting the builder or contractor that built the property as they should have records.
Alternatively you can also find out who actually manufactured the bricks or blocks or where the stone was originally quarried and contact them directly. There aren’t a huge number of companies in the UK that still manufacturer bricks (Ibstock, UK Brick, Forterra etc.) so shouldn’t take too long.
Older Buildings
However, if the property in question is quite old then this can complicate things as brick styles go out of fashion, manufacturers close down/get bought up by larger companies, raw material sources change or are sourced from different locations, and manufacturing techniques change, all of which can affect the colouring and style of bricks and blocks.
If you are unable to locate the bricks that you need easily and you are losing hope, don’t fret, you do still have a few options:
- Reclaimed Bricks: These are basically second-hand bricks that have been reclaimed and cleaned up ready for reuse. Local reclamation yards are normally good sources for reclaimed bricks or there are quite few online companies that deal in reclaimed bricks and other building materials
- Have Them Specially Made: There are a fair few independent brick companies that can manufacturer bricks to order if you have original examples, although colours can very slightly due to changes in manufacturing process or raw materials
- Brick matching Service: If you don’t know the specific name or original manufacturer of a given brick, there are companies that specialize in finding this information out for you, one such company is Brick Hunter that also has quite a useful brick library on their website.
If you have read through all of the above information you should be fairly well versed in what’s involved in colour matching mortar and also be wise to the fact that it can be quite a long drawn out affair, but if you want the best finish, then sometimes you’ve just got to be prepared to work for it.
If you also need any assistance with actually creating a mortar mix, see our how to mix mortar project here. If you would also like to find out more about mixing cement, then see our mixing cement project here.