Today, artex ceilings are though of as very undesirable and old fashioned as most people today prefer a nice smooth, plastered finish, however it does have some advantages.
If you have a period property or are trying to create a retro look then you may be looking to create an artex or textured finish to match an existing artex covering and if so, read on to find out how.
What is Artex?
Artex is a type of surface coating for ceilings and walls that was seen a lot in the 1970s. Traditionally they were a cheap and easy way to cover and hide defects including undulation, uneven surfaces, cracks and the similar in ceilings and walls.
Unlike plaster, artex was specifically created so that a pattern could be imprinted or created in it, and as it doesn’t need to be totally smooth, it was a practical solution for anyone to apply as you don’t need the greater skills involved in getting a smooth plastered finish.
Aside from textured finishes being rather out of fashion these days, artex does have a few disadvantages in that trying to patch and repair a section is very hard and in most cases will stand out a mile of, some older artex can contain asbestos which is highly dangerous and finally it is notoriously difficult to remove.
Up until 1984, it was commonly used to provide additional strength to artex when it was only made available to those with a licensed, however it continued to be used up until 2000 when it was made illegal for use anywhere, so be aware that any artex applied before 2000 can contain asbestos!
Artex is actually a brand name used to describe the product (in the same way as Tarmac and Hoover). It is registered to Artex Ltd, which is a UK-based company.
Artex can be bought as a ready-mixed paste, or as a powder. A 25kg bag of Artex Ceiling Finish will cover 25-40m2 depending on the texture finish, whereas the ready-mixed paste is mainly suitable for much smaller areas and repairs.
Artex on ceiling
Artex and Asbestos – How to Test and Stay Safe
As we have stated above, any atrex applied before the year 2000 has the potential to contain harmful asbestos.
In terms of what asbestos is, it is a very versatile fibre-based material that has been used for a great many things over the years including brake pads, roofing sheets, gutters, fire surrounds and insulation (as it’s fire/heat proof) and a great many other things.
The reason it’s so dangerous is that if the microscopic fibres that make it up are released into the air and breathed in, they can become lodged in a persons lungs for many years, and can cause severe breathing problems and also have been linked with certain cancers!
With this in mind, if you are in any doubt about whether any artex surface in your home contains asbestos, you should get it tested. This can either be done by a professional licensed company or you can purchase your own test kit and test it yourself.
To learn more about the dangers of asbestos and how to stay safe around it, see our asbestos safety project here.
Different Types of Artex Patterns
As artex is a textured finish you can create a whole plethora of different designs and styles, it’s really up to you, however there are a few set patterns and designs that are commonly used, some of these can be found below, including how they are created.
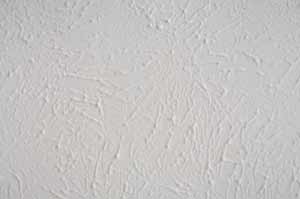
Artex Swirls
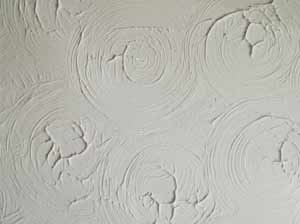
Artex swirl effect
Use a stipple brush for this texture. After applying the mixture to the surface using a trowel (work in small sections at a time), use the brush in a circular motion by twisting it around, before pulling it away from the surface cleanly. Repeat this action, overlapping each swirl slightly and forming a random pattern.
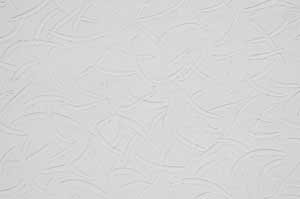
Artex Circles
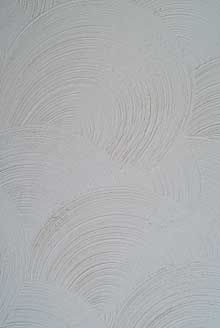
Artex circle effect
Use a comb to work this texture after applying the mixture over a small area of surface with a trowel. Hold the comb at a 30 degree angle to the ceiling, and firmly bring it around in a circular motion. Overlap each circle to the bottom and the side to form a repeating pattern.
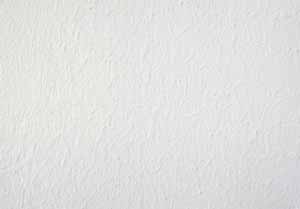
Artex Stipples
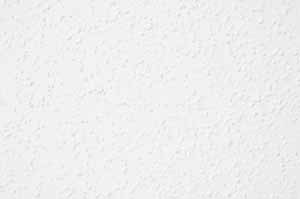
Artex Stipple effect
Stippling is probably the easiest texture to achieve. Apply the artex mixture to the surface, then take a stipple brush and bounce it over the area. Move the brush cleanly away each time without twisting it. Change the angle of the brush as you go so that you don’t get square edges anywhere. Clean excess artex off the brush at intervals when necessary.
Broken Leather Effect Artex
Artex Broken Leather effect
Take a stipple brush and cover it with a polythene bag. Apply the mixture over the surface you’re artexing, then bounce the polythene-covered brush over the surface, twisting it left and right as you go.
Medusa Effect Artex
Artex Medusa effect
This effect does not require any special tools. After applying artex mixture to the surface in a small area first, run your fingers through it randomly to create a pattern. Wear a rubber glove to protect your hand and don’t press too hard and cut to deeply.
Bark Effect Artex
Artex Bark effect
Use a special bark-textured roller that you will need to buy or hire, after covering a small area you’re working on with artex, simply run the roller over it, overlapping to produce a random texture.
Knifed Plaster Artex Finishes
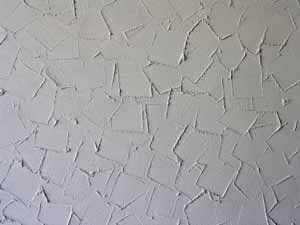
Artex Knifed Plaster effect
For this you will need to use a 4 inch filling knife. Apply the artex mixture to the surface then take the filling knife and pull the wide blade across the surface. Keep working at it, changing your angle and overlapping to create a random effect.
Tools and Materials Needed for Artexing
If you are keen on repairing or covering a wall or ceiling with artex then you will need the following tools and products. In terms of the tools, which ones you need will depend on the type of finish you want to create.
- Ready mixed paste or bad of powder artex, depending on size of job
- Stipple brush
- Large comb
- Plastic bag
- Bark-textured roller
- 4 inch filling knife
- Plenty of dust sheets
- Trowel for applying artex
- Plasterers hawk
- PPE kit – old clothes, rubber/latex gloves, goggles, FFP3 mask, hat
- 14 litre mixing bucket
- Drill with artex/plaster mixing paddle
- Clean, fresh water
- Bucket trowel
- 2 – 3 inch paint brush
Preparing Surfaces for Artexing
As with all surface covering jobs, the overall success is very much dependent on how well the surface you’re covering is prepared to begin with.
In terms of exactly what type of surfaces artex can be laid on, these include plasterboard, plastered and also painted surfaces, however each needs to be prepared correctly first:
- Preparing Plastered Surfaces: Before applying artex to a bare plastered surface it will need to be sealed using artex sealer or a coating of PVA. This is due to the fact that it’s very porous and will suck all the moisture out of the artex mix before it has cured, causing it to fail
- Preparing Painted Surfaces: If the surface you’re artexing has been painted with an emulsion paint then you can artex straight over it (after wiping away any dust, debris and grime). However if there is satin paint on the surface then you will need to sand the whole area over using a medium grit 120 – 240 grit sandpaper first. If the existing paint colour is dark then to prevent any colour-bleed through the artex, over paint it with white emulsion first
- Preparing Bare Plasterboard: If you are planning to artex over bare plasterboard, as with bare plaster, it will first need to be sealed using artex sealer or a PVA solution and you will also need to tape over every joint using skrim tape and fill over any and all nail or screw heads
- Preparing Wallpapered Surfaces: If the surface you’re working with is wallpapered, any and all wallpaper will need to be stripped off first. Once gone, any trace of adhesive left on the wall will also have to be removed. If a bare plaster surface is left afterwards then this will need sealing with PVA or artex sealer
As applying artex is a very messy job, you will need to empty the room you’re working in as much as possible and then cover anything remaining, including floors, with dustsheets. Wear overalls and safety glasses to protect yourself while you work.
How to Artex Walls or Ceilings
It is a good idea to have a practice run before you start on a real wall or ceiling in your home. Try applying some artex to a piece of board fixed to your fence, garage wall or other similar area, and try out, first applying the artex mix using a trowel and then creating your chosen texture to make sure you are confident before moving on to working on the walls of your home.
Step 1 – Prepare Existing Surface
The first job is to correctly prepare the surface according to the directions above for the type of surface you’re covering.
This is arguably the most important stage as it will determine the overall success of your artexing.
If in the unlikely event that your wall or ceiling is already prepared according to the above steps then wipe the entire area over using a damp sponge to remove any dust, cobwebs and the likes.
Step 2 – Mix up Artex
The next job is to mix up the artex to the correct consistency, which should be like a thick, self supporting paste. This should be done by adding the powder to your mixing bucket and then slowly adding the water to the powder, never the other way around. Stir the mixture using your drill and mixing paddle.
Periodically test the mix until it’s at the correct self supporting state.
Step 3 – Lay on Artex
Scoop the artex mix from the bucket using your bucket trowel and pop a few dollops on the hawk. Scoop some on to your trowel and then lay it onto the wall in a fairly thick coating around 5mm thick.
Getting it on the wall and smooth is the tricky part and is done in very much the same way as plaster (as seen in our skim plastering project here).
Do not try to cover the whole ceiling in one go, or it will dry before you have a chance to work on the texturing. Work on an area roughly 1m x 0.5m. You should also be able to reach this without having to constantly move your ladder around.
The aim when laying on is to get as even and flat a coat as possible.
Step 4 – Apply Desired Finish
With the first artex laid on you can then start creating your desired textured finish. Depending on the style your going for will depend on how this is done, see the directions above for your chosen texture.
As stippling is one of the easiest and most common finishes this is probably what you may opt for. This is simply done by bouncing the brush over the surface, making sure you don’t overlap and also ensuring any gaps are evenly spaced.
As you work, change the angle of the brush each time to create a little difference and prevent any square edges.
As excess artex can build up on the brush as you work, make sure you clean it regularly.
Cover the narrowest width of the room first, if there is one, then work your way across in stages, applying the artex mix and then adding the textured finish. Carefully blend in each join between working areas so that when you are finished you have an even pattern covering the whole ceiling.
Step 5 – Finish Around Edges
Once the entire wall or ceiling has been covered and your chosen textured finish applied, the last job to do is to blend around the edges.
Sometimes getting the textured finish all the way up to the joint between the top of the wall and ceiling and keeping it uniform and complete can be very tricky.
To get around this and keep everything looking good you can run a 2 or 3 inch paint brush around the entire perimeter of the room, making sure you don’t push too hard and splay the bristles as you want to keep the lines as uniform as possible.
This leaves a nice clean and flat edge all around the room.
Step 6 – Leave to Dry
Once the wall or ceiling you’re working on is totally covered with artex and you are happy with the texture you’ve produced, the final job now is to leave everything to dry
Don’t be tempted to overwork it by going back over areas as in most cases this will have a negative effect. Allow 12 to 24 hours for the artex to dry fully.
Make sure the temperature in the room is above 5o°C and the area is well ventilated to allow the material to dry properly and naturally. This way it will form a more complete bond.
Step 7 – Paint Over (if required)
This final step is really up to you as it’s not a requirement to paint once it’s on a surface but many choose to just to finish it off.
Once you are sure it is completely dry, apply a sealer and you can then over paint the surface using standard emulsion paint. 2 good coats should be sufficient but you can add a third if you wish.
Can you Paint Artex?
Yes you can absolutely paint over artex and many choose to do this as a final finishing step. The best paint to use to cover it is a decent quality standard emulsion paint.
As with other similar surfaces such as bare plaster, bare artex is very porous so will need sealing before it’s painted to stop it sucking all the moisture out of the paint before its bonded correctly with the surface.
You should apply at least 2 coats of paint to give a good finish, however you can add a third finishing coat if you wish.
What if I Want to Remove Artex?
As we have stated at the top of this page, artex is rather undesirable these days and when present in a home, many choose to completely remove it in favour of a nice flat plastered finish.
Unfortunately removing artex is not an easy job, and if after testing it, it’s found to contain asbestos this is another head ache to deal with.
Fortunately there are several solutions to this, one being pay someone else to do it, normally at great cost and the second which is our preferred method is to use a specialist product, our favourite being the Eco Solutions Artex Remover. The great thing about this product it that it can be safely used with artex containing asbestos.
If you have artex that you want to remove, for more help and advice, see our project here on removing artex
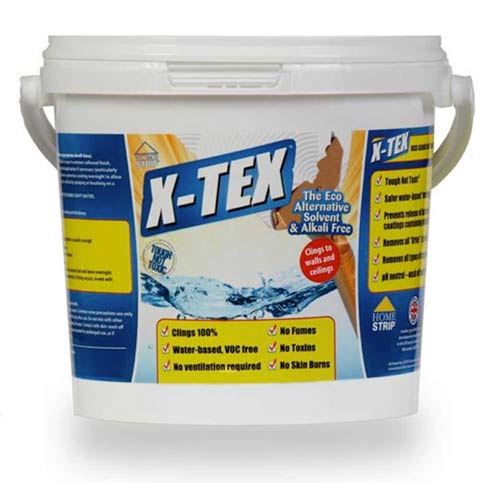
X-Tex Artex Remover for removing artex
Artexing a ceiling or wall can be fairly tricky, and like applying plaster, is something that needs some practice, but once you have perfected the technique it’s certainly a job that you can do yourself.