Cutting and fixing plasterboard to a variety surfaces is an important thing to learn in the DIY world. Plasterboard is such a versatile material it can be used in so many situations but lack of knowledge on how to cut and fix plasterboard can stop many people using.
With this in mind, this guide is dedicated to how to cut plasterboard and then fix it in place.
Tools to Use For Cutting Plasterboard
The best tool to use to cut plasterboard is a sharp utility knife. Once you have measured and marked your cutting points, lay a spirit level or straight edge between them and then use the knife to cut a perfectly straight line.
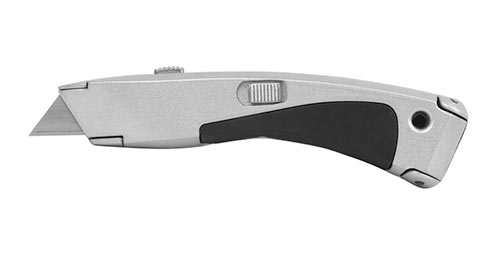
Utility or plasterboard knife
However there are a range of other tools that you can also use and some that are more suited to specific situations:
- Sharp utility or Stanley knife (the best tool to use)
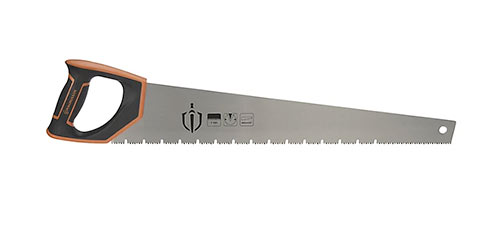
- Standard handsaw
- Stab/jab saw or plasterboard saw
- Coarse drywall saw
- Multitool with fine cut blade
- Plunge-cut saw and a guide rail for accurate, straight cuts
As you can see there is a multitude of different items that you can use for cutting plasterboard, but generally using a straight edge and utility knife gives the straightest and more importantly the cleanest cut.
Plasterboard can also be sawn using an ordinary timber saw. The finer the teeth, the better, cleaner and smoother a cut you will get. However, plasterboard will blunt your wood saw blade in no time at all.
There are proprietary saws available for cutting plasterboard and if you have a fairly large project to do we suggest you get one. These are known as drywall saws and differ slightly to stab saws or plasterboard saws as they are also known.
Coarse-cut drywall hand saw
Stab saws or plasterboard saws and they are known are much smaller than a standard handsaw and are only really used for cutting openings and shapes. As they are quite coarse they leave a rough edge that then needs to be smoothed off using a plasterboard rasp or file.

Stab saw, jab saw or plasterboard saw
Multitools are also a handy item for cutting plasterboard but due to the size of the blade they’re only really good for cutting small holes and shapes such as those for socket back boxes.
Finally, you can, if all else fails use a plunge-cut saw and guiderail. This will give you a nice straight and clean cut but it’s a little overkill as not only will it blunt the blade but using a simple utility knife will give equally as good a cut.
What Side of the Plasterboard Should You Use?
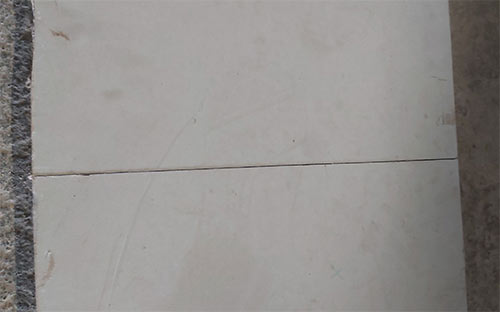
This has always been an age-old argument and the rule of thumb is that the grey or lighter side of the board should face outwards into the room and should be used for plastering, painting or wallpapering over and the darker side should be fixed against the wall facing away from the room.
There are various arguments from numerous manufacturers why this should be the case but in all honesty, if a board gets placed the wrong way around, the plaster, paint or wallpaper should still stick to it fine if it’s prepared correctly.
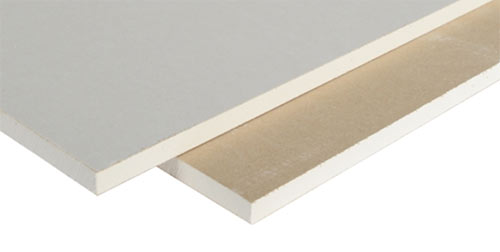
2 different sides of a piece of plasterboard
How to Cut Plasterboard
As you now know what tools are best for cutting plasterboard, it’s time to take a look at how to cut plasterboard in various different ways.
Cutting Plasterboard in a Straight Line
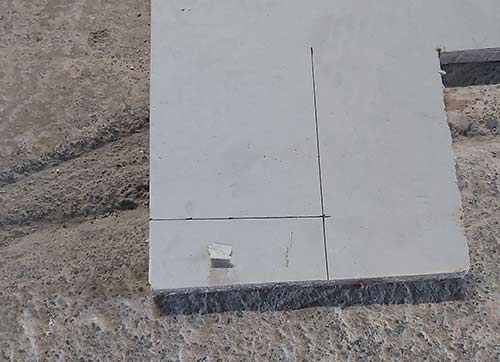
Step 1 – Measure and Mark Plasterboard
To cut plasterboard in a straight line, first measure and mark the point you want to cut it in 2 places and then draw a line between them.
Measure and mark cutting point on plasterboard
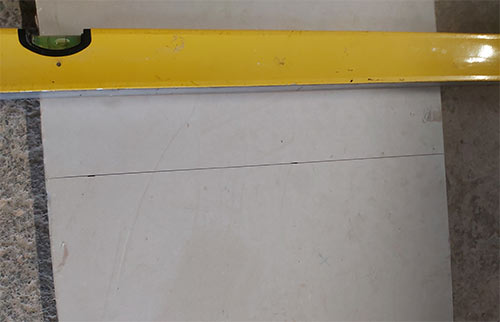
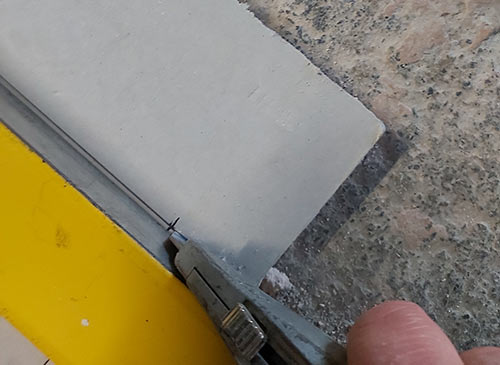
Step 2 – Position Spirit Level and Knife
Next, lay a spirit level, or other sort of straight edge on the line positioned exactly over it. Take your utility knife and place it at the beginning of the line.
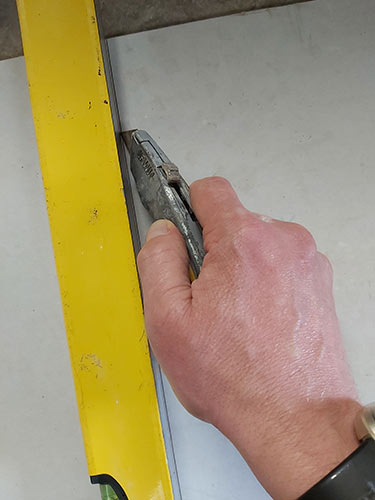
Position spirit level and knife on line
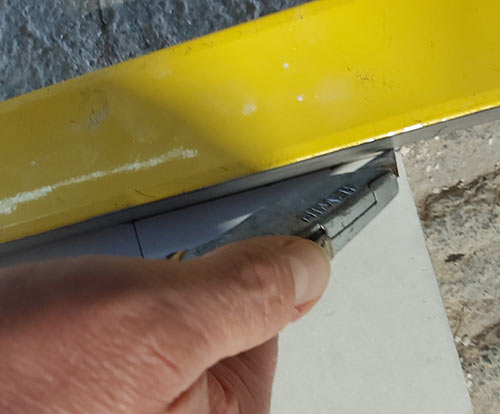
Step 3 – Cut Along Line
Apply some pressure to the blade, pushing it into the board and pull the knife along scored through the line to the end and then go back to the beginning and score along it again, cutting a little deeper into the board. You want to score around 3 – 5mm into it.
Cut along line on plasterboard using a utility knife
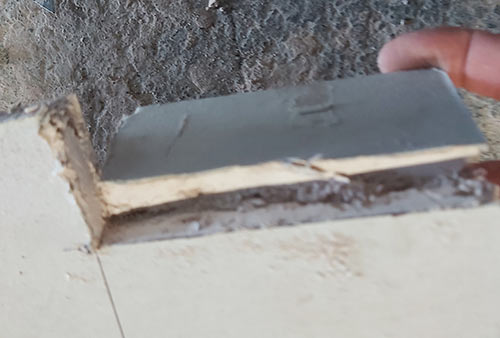
Step 4 – Stand Board up and Snap it
Stand the board up and bend or fold it away from the cut and you will see it split very neatly along the line of the cut as you fold it backwards. You will also see a crease developing along the line of the cut on the opposite side of the board.
Stand plasterboard up and bend it to break
Step 5 – Cut Along Backing Paper
Finally with the board standing up, run your blade down the crease in the backing paper to split the 2 pieces of the board in half and you’re done.
Cut along backing paper with utility knife
Cutting L-Shapes in Plasterboard
When cutting a piece of plasterboard to size, this usually involves cutting a section off e.g. a straight line, however quite often you will need to fit around angular objects which requires cutting an L-shape.
Step 1 – Measure and Mark Shape
Measure and mark the L-shape on your piece of plasterboard. Make sure all measurements are accurate and that, once fitted, it’s a nice tight fit.
Measure and mark L-shape on plasterboard
Step 2 – Position Spirit Level and Cut First Line
Position the spirit level on the first cut line and then position the knife in place and apply pressure to the blade and cut into the board. Pull the knife along, scoring the line all the way to the end and then repeat, cutting a little deeper.
Position spirit level and knife and cut first line
Step 3 – Position Spirit Level and Cut Second Line
As in the step above, position the spirit level and knife and score twice along the second cutting line.
Position spirit level and cut along second cut line
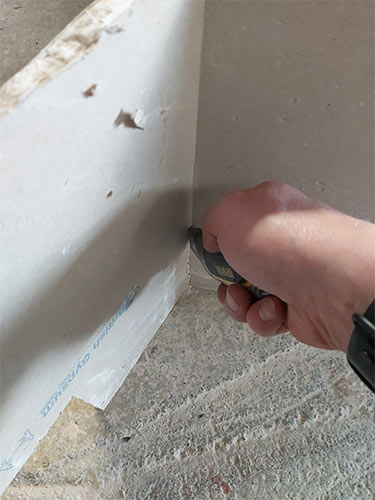
Step 4 – Cut Through First Cut Line
Remove the spirit level and use the utility knife to cut all the way through the first line by placing the board on the floor and pushing the blade gently down through. Next, flip the board over and cut along the backing paper and the section will come free.
Cut all the way through the first cut line
Step 5 – Cut off L-Shape Section
The final job now with the L-section flapping is to flip the board over and cut through the backing paper, cutting it away.
Cut through backing paper and remove L-shape section
Cutting Shapes in Plasterboard
Along with straight lines and L-shapes, the other most common cut that needs to be made in plasterboard is a shape, most commonly a rectangle or square for socket and light switch back boxes.
Step 1 – Measure and Mark Shape
Firstly, accurately measure and mark the shape that you need to cut on a piece of plasterboard using a pen or pencil.
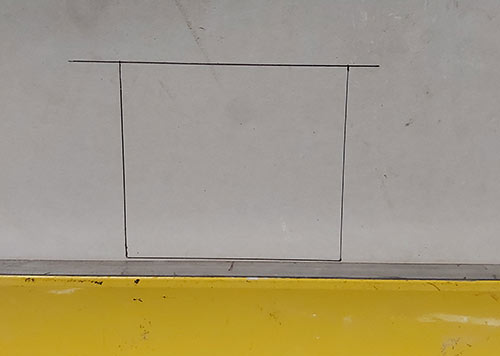
Measure and mark your shape on the plasterboard
Step 2 – Cut out Shape
To cut out the shape you can use a multitool and fine cut blade or a stab/plasterboard saw. As not everyone has a multitool we are going to use a stab saw. Most tradesmen however will use a multitool as they generally have one to hand.
Prop the board on a solid object such as a piece of timber and position the point of the saw blade on a cutting line and gently wiggle and push it in and through the plasterboard.
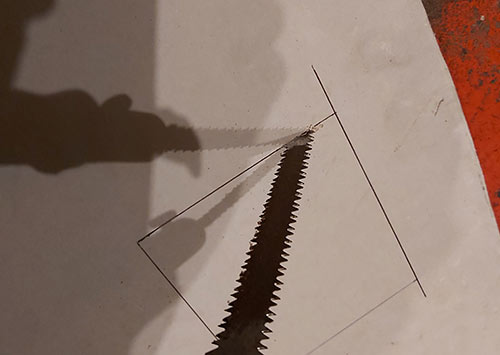
Position saw tip and push through plasterboard
Once pushed through, lift the board up and push the blade all the way through and then start cutting, working slowly and making sure you keep the blade square and following the line.
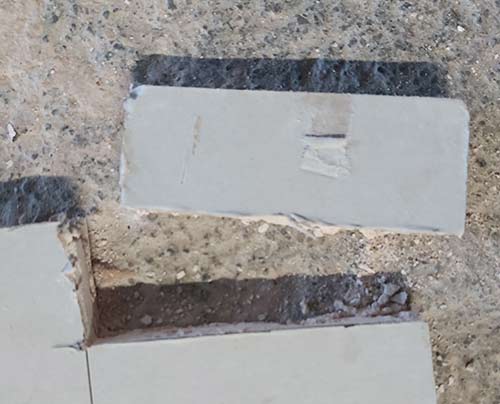
Once you have cut along one line, repeat for the remaining lines until the centre of the shape falls away.
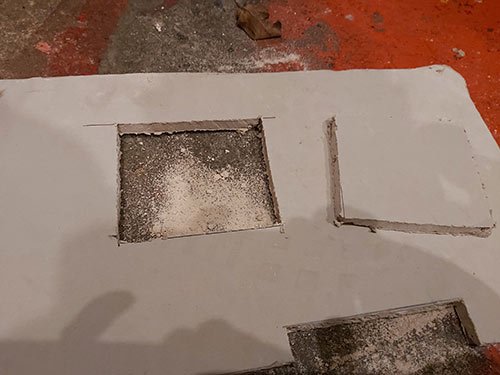
Hole cut out of plasterboard using stab saw
Step 3 – Tidy up Edges
As cutting with a stab or plasterboard saw leaves you with rough edges, the final job is to use a plasterboard rasp or file and run it over the edges to tidy them up. Work gently, making sure that you don’t take off too much.
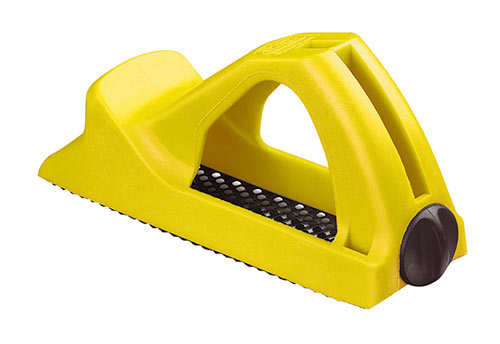
Tidy up cut edges using a plasterboard rasp or file
What to Use For Fixing Plasterboard?
There are 3 ways to fix plasterboard and that’s to use galvanised nails, special plasterboards screws or a strong adhesive. On the whole, using plasterboard screws is much easier and more reliable.
Using nails is ok but trying to hold a piece of plasterboard up to a ceiling, even if it is propped or you’ve got someone holding it, position a nail and then hammer it in upside down is difficult to say the least. Using a screw is much easier.
Using adhesive is generally reserved for dot and dab, a method used for fixing plasterboard to masonry surfaces without first building a timber studwork frame.
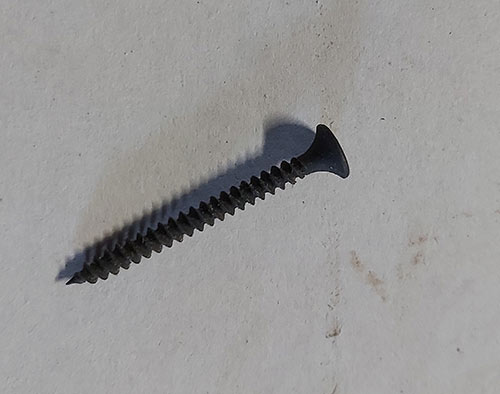
Standard plasterboard screw
How to Fix Plasterboard
As we have mentioned, screwing plasterboard in place to fix it is by far the best and easiest method over using nails, but if it needs to be fixed straight onto masonry then using plasterboard adhesive is the way to go.
Using Screws to Fix Plasterboard
Screwing plasterboard is done with dry wall or plasterboard screws which have a coarse biting thread that drives its way through the boards while keeping a good grip of them.
Step 1 – Position Plasterboard on Timber
Take your piece of plasterboard and position it in place over the timber you are trying to fix it to, ensuring you line up any edges accurately and flush.

Position plasterboard on timber
Step 2 – Position Screw
Starting at a corner, take a plasterboard screw and place it on the plasterboard at the centre of the timber so that it’s at least 10mm from any edges. If it’s too close to the edge it will blow it out.
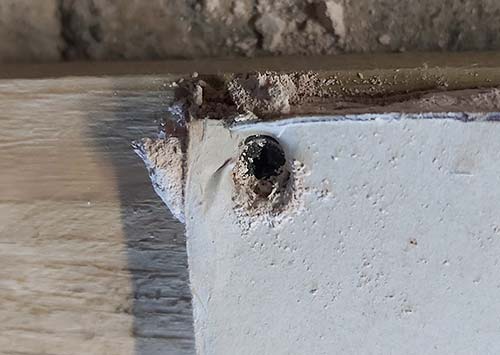
Corner blown out by screwing to close to edge
Once position accurately, screw in the screw using a driver, taking your time as you don’t want to drive it to fast through the board. Stop screwing once the head of the screw is a 2mm or so below the boards surface so they can be easily filled.
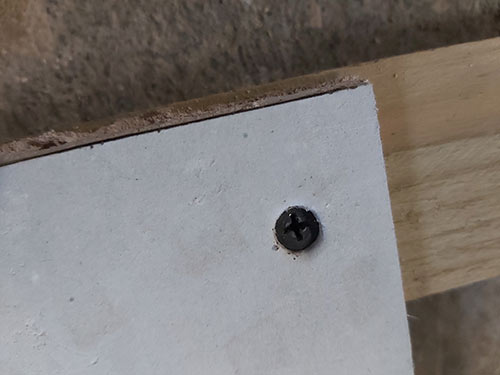
Screw inserted just below surface of plasterboard
Screw in any further screws using the same technique. You should aim to space screws roughly 200 – 250mm apart. This will provide enough fixing strength to hold the board firmly in place.
Plasterboard is heavy and awkward to handle so it is strongly advised that you get help when fixing it to ensure you get a decent finish.
If you do accidentally cause any damage then in most cases this isn’t too much of an issue if you are plastering as the plaster will hide it, however if you are painting straight onto the plasterboard then keep any damage or imperfections to a minimum.
Using Nails to Fix Plasterboard
Nailing plasterboard is traditionally the most popular way to fix the boards before screwing took over, however heavy hammering on one timber section can easily work another timbers loose, including any boards already fixed so plasterboard screws are preferred by tradesmen because of this.
Plasterboard nails are always galvanised to protect against rust which could follow a good soaking by two or three layers of wet plaster.
To fix plasterboard using nails, simply position the nail at the centre of the timber stud, at least 10mm from any edges and knock it in with the hammer.
Try to tap the head of the nail about 2mm below the surface, however this isn’t easy without causing damage due to the size of the hammer head. To get around this you can use a punch to hit the head in without affecting the plasterboard.
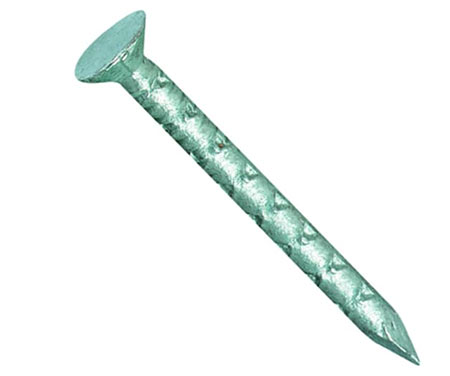
Galvanised plasterboard nail
Using Adhesive to Fix Plasterboard
This method is most often called dot and dab and involves mixing a bucket of (usually) skim plaster or plasterboard adhesive to a fairly thick consistency, and placing dots or blobs of this plaster on the solid surface you’re fixing to and then fixing the board in place.
We have a full, in-depth project covering dot and dab plaster boarding here if you would like to learn more.
One useful tip when fixing plasterboard is to try and work out your board cuts e.g. cut edges so they go against a wall or other surface where you can seal them using some decorators caulk and disguise them. See our project on using sealants for tips on using sealants and caulks correctly.
One further situation you may run into is if you have to cut a board to the shape of the wall or other surface, i.e. the surface is not flat and has humps and bumps on it. To get a tight and accurate fit you will need to scribe it to shape so see our project on scribing timber here for help. Scribing timber, plasterboard and any other material uses the exact same principles.
Using plasterboard is almost inevitable at some point in your DIY life so learning how to cut plasterboard and then fix it correctly is a very necessary skill to posses.