Cast iron has been used for making baths for hundreds of years and I’m sure most are familiar with its classic looks and roll top.
The cast iron bath has gone from being common place bathroom furniture in most homes to being very much sought after especially when trying to create a luxury feel in a contemporary home due to their classy looks and sturdy construction, they can become the focus of any well designed bathroom.
Often called roll top baths because of the way the top of the bath “rolls over”, cast iron baths are similar to steel baths in that they are immensely strong, are very rigid, are coated with porcelain enamel, have a very long life and are easy to clean.

Cast iron bath
Comparing Cast Iron Baths to Other Baths
On the subject of comparisons, at this point is’s a good idea to talk about the various different types of bath that are available and see how cast iron baths stack up:
Porcelain/Enamel Coated Steel Baths
- Reasonably corrosion resistant
- Easy to clean and maintain
- Do not fade
- Can be damaged and chipped by heavy and falling objects
- Heavy to move and install
Acrylic Plastic Baths
- Cost effective and cheap to buy
- Good insulation qualities and ability to maintain water temperatures
- Easy to clean and maintain
- Easily repaired if scratched
- Can be scratched easily
- Available in a wide variety of shapes and colours
Fiberglass Baths
- Cheap to purchase
- Lightweight and easy to move and install
- Available in a variety of colours and shapes
- Not very strong
- Can be easily scratched or damaged
- Can easily fade in colour and finish
As you can see from the above, baths made from lighter materials such as fiberglass or acrylic are generally cheaper than their steel and cast iron counterparts and also much lighter, making them easier to move around, transport and also install. If you need to know more about acrylic baths, see our project here.
Acrylic plastic and fibreglass are also materials that are easy to get hold of and work with meaning that production costs are much less and due to this, cheaper to purchase.
Where there are plus sides there are also down-sides – Plastic and fibreglass isn’t that strong and can crack with comparatively little pressure. As they are also quite “soft” materials, they can be easily marked and scratched.
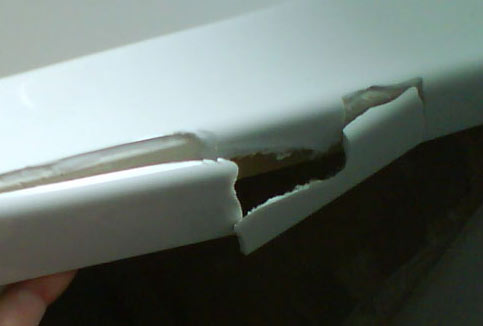
Damaged acrylic plastic bath – Image courtesy of plastic-surgeon.co.uk
Where the above materials fall down, the tougher, stronger materials such as steel and cast iron really win through. They are many times stronger than their plastic and fibre counter-parts and through this tend to last much longer. Their porcelain or enamel coatings are also very tough and hardwearing and can resist fading and damage.
Advantages and Disadvantages of Cast Iron Baths
In the information above we have looked at some of the advantages and disadvantages of the other types of available baths but we haven’t gone in to too much detail about cast iron baths.
As we have established, heavier construction materials such as cast iron are extremely durable and long lasting. Many cast iron baths still in use are at least 40 years old with some being over a hundred years old!
As well as the actual inner section of the tub being hardwearing, the outer skin is also. Most cast iron tubs are covered with a porcelain enamel coating. This essentially protects the iron core of the tub and prevents rusting and also provides a nice smooth and sanitary covering for you to sit or stand on.
As ever, with the up sides there are down sides and cast iron baths are no different:
- Weight: Cast iron is a heavy material and so is the enamel. When both are combined this makes for one weighty bath! The side effects of this are that they are difficult to move (especially if you have to get one up a few flights of stairs) and once filled, can put a lot of stress on floors and joists requiring them to be reinforced before the bath is fixed into its final resting place
- Expense: Due to the production methods involved and costs of these and the fact that acrylic and fiberglass are now the materials of choice, they are expensive to buy, even second hand, not to mention brand new
- Styles, Shapes and Designs: They do tend to only come in only a few shapes and styles – traditional flat, single end slipper or double end slipper (slipper means that one or both ends slope upwards). There are some specialist companies that can produce them to specific shapes and designs but again, this comes at a cost
- Rusting: As we all know, metals oxidise and rust and iron is no different. If suitable coatings (paint for the outside, enamel inside) are not used to cover the entire bath or one of these coatings become damaged then the high levels of humidity common to bathrooms can quickly cause rust and costly repairs
- Maintenance: As we have established above, any damage to surfaces should quickly be repaired. As tough as enamel is, it can be chipped so if you don’t look after your bath it can swiftly become an eyesore
- Heat: This is both a disadvantage and advantage – When filling a cast iron bath with water you shouldn’t mix any cold with the hot water. The idea of this is that some of the heat is drawn out of the water and absorbed by the bath itself, heating it up. This does obviously cool the water but the heat retained in the tub itself, keeps it warmer for much longer. Some see this as a disadvantage in the fact that it does take quite a while for the metal to warm up
Despite the few disadvantages of cast iron baths, they do indeed provide an excellent bathing solution and a real focus to any bathroom, making what would normally be quite a “dull” room into a very nice and relaxing environment to be in.
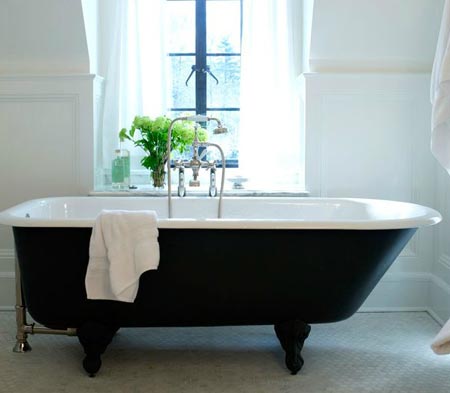
Cast iron as the focus point in clean and spacious bathroom – Image courtesy of decorpad.com
What to Think About Before Purchasing a Cast Iron Bath
When it comes to purchasing a cast iron bath, as commented, there are really only a few different designs – traditional flat top or single or double slipper. The choice is really down to personal taste.
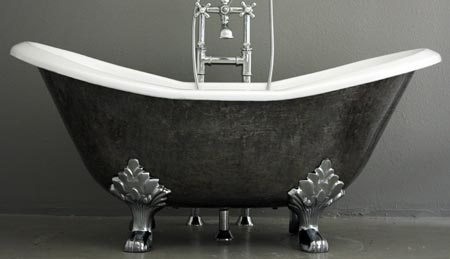
Double slipper style cast iron bath tub – Image courtesy of penhaglion.com
One thing to think about though is where your taps are going to go. You might want to work with the hot and cold feeds that you have already in which case ensure that the tap holes in your chosen bath are at the right end.
If however you are renovating the whole bathroom then you might want to alter your plumbing to fit the tap holes in the bath, which can be at either end, in the middle or even free standing outside of the bath (in which case you will need a tub with no tap holes).
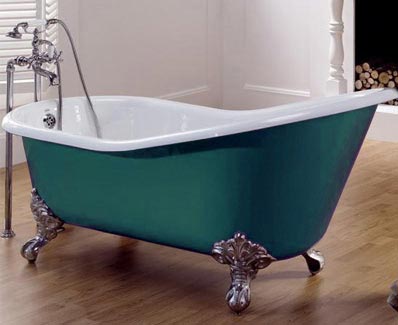
Cast iron bath with no tap holes and free standing taps on standpipes – Image courtesy of bathroomsblog.wordpress.com
One final consideration is feet! We don’t mean the ones on the end of your legs, rather the feet that will go on your bath. Cast iron baths are known for their decorative feet (the supports on the underside of each corner of the bath that raise it off the floor). Ths may not be a consideration for you and you may want to box the underside of the bath in with bath panels. This is fine, again, this is really down to personal choice.
There are a massive range of these available in many different colours and styles from modern to traditional so it’s worth taking your time to decide what particular style will fit with the overall design of your bathroom, that is, if you are going down this road.
The most popular type of foot for a cast iron bath is a clawed foot. When a cast iron bath has clawed feet it is very often left open so all of the bath can be seen, including the feet.
In this instance, this normally leads to the decoration of the underside of the bath. Some very attractive designs can be done to highlight a clawed foot bath, particularly in a traditional-style bathroom. To see how to paint a cast iron bath check out our project here.
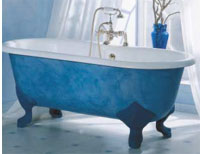
Painted cast iron bath and ornate feet
How are Cast Iron Baths Made?
Cast iron baths can either be cast from iron in a mould that is shaped to the particular size and design of the bath ro formed (this is normally just for steel baths). Firstly, a mould is created and then the iron is cast into the mould to set. In terms of the iron, it is normally refered to as gray cast iron and normally contains carbon, sulfur, silicon, manganese and phosphorus. This mix of raw materials is, by design, ideal for coating with enamel.
After forming and setting the bath it is then either chemically cleaned or shot blasted to make sure the surface is spotless before any enamel coating is applied.
When it comes to the enamel coating, this is a combination of feldspar, clay, barium carbonate, limestone and a few other raw materials that are mixed in specific quantities to form a mix that is then melted in a furnace and then run out into a vat of cold water so that it fragments into what is known as a “frit”. It is then dried and bagged up before it is then ground into a powder before use.
The final coating process involves the cast iron tub being heated up to a temperature above the melting point of the frit. The enamel frit is then dusted over the surface of the cast iron, at which point it melts on contact creating a smooth enamel covering.
It is also possible to dip the enamel on. This involves creating a “wet mix” of enamel and storing it in a large tank. The cast iron tub is then dipped in the solution, whithdrawn and left for the excess to drain off. Once this has done so, a thin, final coat of enamel is left.
Finally, the whole thing is fired in a huge kiln to give an enormously strong chemical bond between the cast iron and the enamel. Two coats are normally applied using this process, a base coat and top coat.
Porcelain enamel is an extremely high quality material which is not only very durable but offers the best sanitary finish available for metal surfaces. It gives a finish which is smooth and even, is resistant to chipping and scratches, resistant to most chemicals and fade proof.
With older cast iron baths it is not unusual to have a slightly rippled effect in the enamel. Dimples may also be seen along with tiny black flecks in the enamel surface. These are nothing to worry about and are formed as part of the process of bonding porcelain enamel to cast iron.
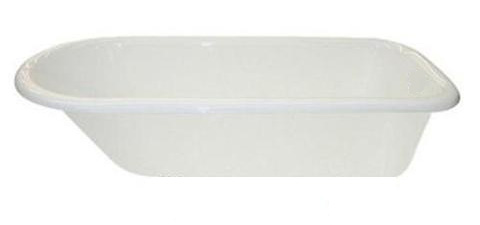
The finished coated cast iron bath tub
How to Install a Cast Iron Bath
What to Think About Before you Start
Cast iron baths as with steel baths, need no cradle or frame as their inherent strength allows feet to be cast or bolted onto the body of the bath. The nature and strength of the steel or cast iron is more than enough to support both the bath itself and also the contents e.g. you and the water.
When installing a cast iron bath the most important thing to think about is the surface you are installing it on due to the weight of the bath itself (in most cases, roughly around 150KG), weight of water (when full to just under overflow, around 60KG) and also the weight of a person in it (average person being around 80KG). When you add all this up, you are looking at around 300KG, that’s a lot of weight!
With the above in mind, a bath of this type must be installed on a stable surface that is capable of coping with large weights. If you’re looking at installing in a ground floor bathroom on a solid concrete floor then there should be no issues, but if you are thinking about a first floor bathroom then this is when it gets slightly more complicated.
In this instance (depending on the size of floor joists there already) you are going to need to reinforce your joists to cope with the extra weight. This is working on the assumption that you are replacing an existing acrylic plastic bath with a new cast iron bath. If you previously had a cast iron bath and you are just replacing it with a new one, chances are that the joists should already be up to the job, but it’s certainly worth checking them.
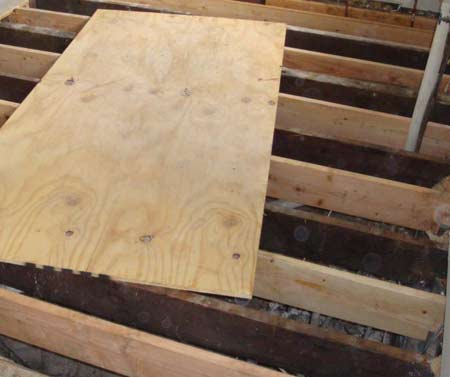
Bathroom floor with boards removed to check joists
Due to the variety of different types of flooring and joist combinations and sizes, proximity of load bearing walls, span of the floor etc…. we cannot say for sure whether your particular chosen installation location needs some work before a bath of this type can be installed. As a rough guide, you should ensure:
- The bath is positioned as close to or on a load bearing wall
- All joists are doubled up along their full length with cross-members between to spread the weight
- Which ever surface/floor you are installing on, it has to be solid and deflection free (e.g. not bouncy) if you are planning on tiling the floor. If the floor moves, however little, tiles and grout will crack
If you are looking at installing in a first floor room or on to a floating floor you will really need to get a structural engineer. They will be able to tell you exactly what you need to do to reinforce your floor and ensure that it is capable of sustaining any and all weight.
You may be thinking that this is a needless cost but better to sepnd a few quid and get things checked than suddenly disappear through the floor and end up in the living room while you’re enjoying a nice soak!
One final additional point is, make sure that you have enough room to install your cast iron bath. This may sound obvious but get the dimensions of yor new bath and measure up the space that you have to ensure that it will fit comfortably, leaving enough space for cleaning etc….
Prepare and Treat the Floor and any Timbers
It is likely that to view the joists in the above step you will have had to remove your old bath and maybe also the toilet, sink or other items. If not, then they will need to be removed now so turn off the water or isolation valves to each and remove as required.
With old item(s) removed and the floor area made suitable to take any weight and that there is also no rot or damage from past leaks (if so, then these damaged areas will need to be replaced) then it’s a good idea to treat any and all timber with some wood treatment such as the one below. This will ensure it remains in good condition for the future.
Once all areas are coated, leave to dry for the manufacturers specified time before continuing.

Cuprinol timber and wood treatment
Check Positioning and Plumbing Fittings
As all the existing plumbing fittings should now be exposed, now is an ideal time to check that all will fit and that you do not need to make any adjsutmenst. Line the plumbing fittings (tap holes, waste etc…) on the bath up with your existing fittings and secure them in place roughly.
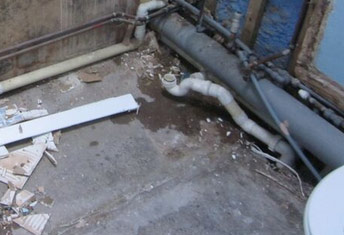
Existing bath waste fitting
You will need to get the bath in place for this so, firstly fit the feet to the bath and then move it into position. You will probably need at least one other pair of hands for this due to the weight of the bath.
If you are doing a direct replacement e.g. putting your new bath in the same place as the old one then this is hopefully going to be a fairly straight forward job. Most of the existing fittings (hot and cold water supply, waste etc….) should lineup quite well, if not exactley.
If you have to bend or stretch anything to fit then it’s likely that leaks will occur in the not too distant future, so you will have to make some adjustments so that each point fits perfectly.
In pretty much all cases, waste pipes will be plastic and can be lengthened or shortened easily by cutting sections out or extending through using solvent welding (more can be found about waste fittings in our project here) and also plastic compression fittings (more about compression waste fittings in our project here).
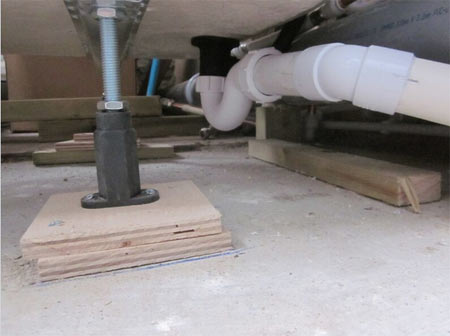
Bath waste in place for testing fitting – Although this is for an acrylic bath on a solid floor, the fitting principals are the same
When it comes to the taps they will require a little more consideration. It is possible to purchase baths with no pre-drilled tap holes so that you can drill your own. Making your own tap holes is a tricky job and one that can easily go wrong, chipping the enamel and ruining the finish.
If you want your tap holes in a specific place, we would recommend that you get your supplier to do this for you. If they mess it up then it’s their responsibility to rectify the damage.
As we are working on the principle that the external area of the bath will be exposed, the hot and cold water supplies really need to look nice and neat so you dont really want to be using flexible connectors, unless the taps are going on a side of the bath where they will be hidden.
The choice in taps really boils down to three different types:
- Seperate Bath Mounted Hot and Cold or Mixer Taps: Either two taps, hot and cold, are fixed to the top of the bath in a traditional manner. Hot and cold feeds connect to each tap on the underside. The mixer tap is installed in the same manner, but instead of two taps there is one mixer tap
- Free Standing on Standpipes: The taps (nornally mixers) sits outside of the bath on two standpipes that are fixed to the floor and also house each of the supply pipes
- Wall Mounted Concealed: The water supply for each tap is concealed within a nearby wall, including the filler spout that then extends out and over the bath
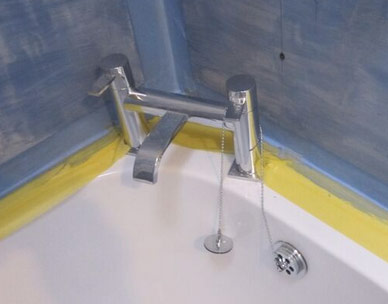
Mixer tap fixed to bath
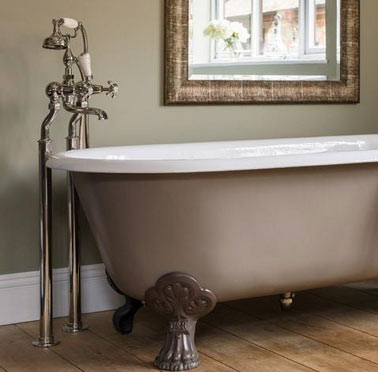
Mixer tap on standpipes – Image courtesy of ecopowerlife.com
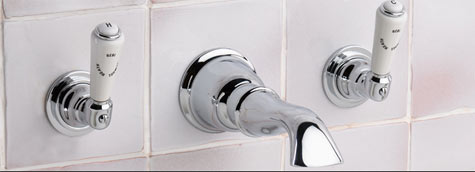
Concealed baths taps set into wall outside bath – Image courtesy of samual-heath.com
The most straight forward installation for taps is really the bath mounted or free standing methods as essentially the hot and cold water supply pipes are routed through the floor (as they probobly are already) and then straight up to connect to the base of each tap. If you are looking to install concealed taps then check out our concealed showers project here. Although this is for installing a concealed shower, the principles are the same.
For the sake of this project we will go with a mixer tap. Ideally, each water supply pipe should come vertically out of the floor and straight into the base of the tap, on the underside of the bath. This can be quite tricky to get an exact line.
The best method is to use a plumbob. Pull the string end through the tap hole on the bath and hold it in the centre and let the weighted end settle and this will give you the exact position that your pipe will need to protrude out of the floor. make a mark on this point and repeat for the second tap hole.
The final task is now to actually get your vertical pipework in position, you can do this one of two ways:
- Use Copper Pipe and Copper Fittings: This can be quite tricky for beginners but involves using copper fittings (compression fittings or solder fittings) to run pipework to each of the marks you made in the steps above and then use a 90° bend to connect to a section of verticle copper pipe and on up to the taps. More information on working with copper pipe and fittings can be found here
- Use Speedfit or Pushfit Pipework, Fittings and Chrome Pipe: This is a slightly easier route for beginners as pushfit fittings and plastic pipe is easier to work with and can be connected to existing copper pipes. As above and as needed, run your new pipes to the marks you made earlier and then use a 90° ready for connecting to the taps. As an added feature you might want to think about using chrome pipe. More about Pushfit and Speedfit plumbing can be found in our project here
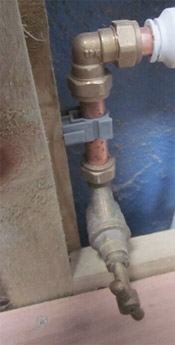
Copper pipe and water supply isolation tap

Speedfit plumbing used in bathroom renovation
As soon as your plumbing is in place and ready, use some brackets to clamp it in place and prevent any unnecessary movement and to ensure they remain in their exact positions and then remove your vertical pipework ready for fitting the floor.
Tip: Before moving the bath out to fit the floor, connect up the waste and taps and turn the water back on, put the plug in and fill the bath to about a 1/4 full. While the bath is filling, check the water supply pipes for leaks and adjust or tighten as required.
Once the bath is suitably full, turn off taps and pull the plug and check for leaks from the waste. Again, adjust if any are present.
It’s worth leaving the taps connected and repeating the above a couple of times so that you can be 100% sure all is fine. Once the floors down and all is finished it would be a nighmare to pull it all up again to fix a leak!
Lay the Subfloor
Once any treated timber and joists have dried and you have prepared and positioned all necessary water supplies and wastes and cleared the room space (including moving the bath out) you will need to board the joists over with a subfloor.
Again, this should be as strong as possible, especially if you are laying someting like natural stone tiles as a final finish. 15mm WBP or Marine Plyboard should be suitable, but again, your structural engineer should tell you whats best to use.
When laying your boards, ensure they are laid across the joists and not inlne with them. This will provide some additional strength and rigidity. Boards should also be laid to the middle of each joist where a joint is required.
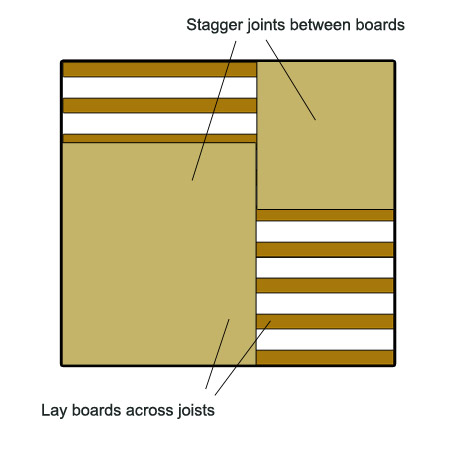
Lay boards across joists
In terms of fixing, all baords should be screwed down with the screw heads countersunk below the surface as this will prevent any damage to the final finished layer. It is possible to nail them but overtime the nails will work loose and you will start to get “squeeking”.
Useful Tip: When storing boards before use, ensure they are stored laid flat on the floor. This will prevent any warping etc….
The only tricky part in this job comes when you get to your water supply pipes and wastes. For this:
- Lay your board over the respective area making sure that it butts up right to adjacent boards and mark the edge of the board on the nearest two joists and then remove it
- Using a tape measure, measure along the joist to the centre of 90° upward bend and mark it on the joist. Repeat this for the pipe.
- Once you have your two marks, use a straight edge to lay across the joists on each mark and looking down, the straight edge should be centre to each of the bends
- Next, measure inwards from each joists to the centre of each bend and note this on a piece of paper for each pipe and also note the first set of measurements that you took above
- Put your board back into place and now transfer the measurements onto the board. This should provide you with the position of the holes you need to drill to run your vertical pipe up to the taps. If you are confident with your measurements you can drill the holes but if you want to double check, you can use this method to make a template out of cardboard before you go ahead and drill the holes for real
- To drill your holes, use a suitable size hole saw or flat bit. Each water pipe should be 15mm and you will need to allow a little expansion room around each pipe so 16-17mm hole should be fine. Before you sart drilling, put an old cloth over the bends below to prevent saw dusts from entering
- With each hole drilled, refit the board to make sure all fits. If not, you can use a file to make some fine adjustmenst. Remember to insert your vertical pipework and ensure the waste outlet is above floor level
- Use this technique to also make the hole for the waste outlet and any other wastes and supply pipes.
- Once the subfloor is down, use some silicone sealer to seal around the holes for the waste pipe and hot and cold water supplies. This will create a waterproof seal and prevent water and moisture seeping down into the void below the floor
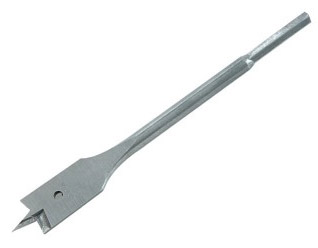
15mm flat drill bit
On final important point to note is that, in most cases, you cannot adjust the level of a cast iron bath as the feet are fixed in position. With this in mind, you have to ensure that your floor is absolutely level and ultimately, this starts with he joists so you will need to make sure they are level.
For help and information on how to level floor joists, see our leveling floor joists project here.
Lay the Final Floor Finish
The final stage in the floor area will depend on how you are going to present your bath. Due to the visually appealing nature of the cast iron bath, most peole opt to expose as much of it as possible by not enclosing it with panels.
Working on this principle, before the bath is fixed in position you will need to lay your chosen floor finish, be this ceramic or natural tiles, vinyl or lino as if the bath is fixed in position before this is done you will end up having to cut or tile around the feet.
Not only will this spoil the finish but it will also leave “weak points” where water and moisture could seep through and cause damage to below surfaces.
As mentioned above, if you are going to be tiling the floor, check with your structural engineer that your tiles are suitable. Natural stone or quarry tiles can add a significant amount more weight to a floor requiring additional support.
If you are going down the tiling route then see our project here on laying floor tiles for full information on completing this task
Although not quite as attractive as a nicely tiled floor, there is also the vinyl or lino option. This is certainly quicker and more straightforward than tiling and with the range of good quality vinyls available today, a good finish you can be chuffed with is certainly more than possible.
You can find quite a good tutorial on laying vinyl flooring here.
When laying lino or vinly in the bathroom area, once it’s down, remember to go around the edge of the whole room and seal it up using a suitable good quality sealant to prevent any water from find it’s way on to the timbers below. ths also goes for the water and water supplies.
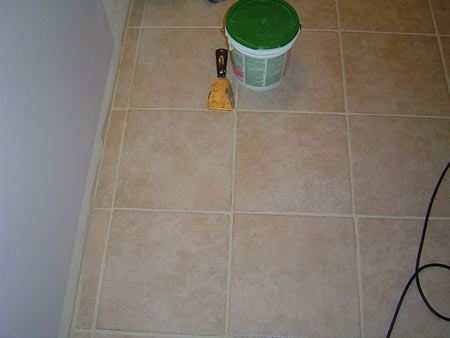
Tiled bathroom floor – Image courtesy of homeadditionplus.com
Connect up the Bath
If you have tiled the floor and your feet need to be screwed down to hold the tub in place, first get the tub in the exact final position it will reside in and then use a felt tip to mark the floor where the fixing holes will need to be drilled. Once marked, move the bath and drill your holes using a tile or diamond drill bit.
Once back in place, connect up the taps and waste pipe, paying attention to connections and ensuring they are secure and will not leak.
As before, once all connected, turn the water back on and check connections for the taps and waste for leaks. Tighten or adjust if any are present.
If you have removed other items such as the toilet or sink then these can now be put back into place and reconnected. Again, as each is connected, check for leaks and adjust fittings as needed until they are resolved.
Some feet have screw holes in behind them that allow you to screw the tub firmly to the floor. If this is the case with yours, screw it down into the floor.
If the floor is tiled, as mentioned above, you will need to drill your holes in the tiles before you fit the tub.
Once you have screwed the tub down, apply some sealant over the screw head and to any areas that may allow water to seep into the floor.
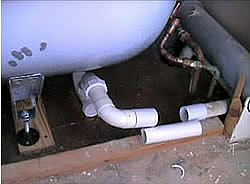
Connecting up bath waste with bath in place
Levelling Your Cast Iron Bath
As mentioned above, you really need to ensure that your floor is absolutely dead level before your bath is in place as, unlike acrylic and plastic baths, cast iron bath feet are not normally adjustable, although it is now possible purchase feet that allow a small amount of adjustment.
If you neglected to level the floor before this point then you really only have two choices – either leave the bath out of level if it’s not too bad or use some chocks or shims to level it up. These can be small square sections of ply that are inserted under the feet of the bath to bring it up to level.
Lay a spirit level across the bath in both directions to find the slope. Once you have found the offending side, lift the level slightly until it is level and then you can measure the gap between the base of the level and top of the tub to give a rough idea of how high each shim needs to be
Not too desirable and will ultimately spoil the look but does solve the issue. You should also treat each stack of shims with a suitable varnish to prevent them from rotting

