Aside form a toilet, bath or shower and a sink, one other core component of a fully functioning bathroom is a decent mirror for shaving and general checking.
The ideal position for a mirror in a bathroom is often over the sink but in some bathrooms there may be a window or other object behind the sink as opposed to a decent solid surface to hang a mirror.
In this situation many normally resort to a cosmetic or shaving mirror fixed to a nearby wall that can be adjusted and moved to suit or simply a standard mirror placed on the window sill or what ever object is behind the sink.
This is ok but it’s not as good as having a decent sized mirror fixed to a solid surface that’s also well lit and in the ideal position above the sink.
Apart from helping you look at your very best a decent sized bathroom mirror can also create the illusion of space, making your bathroom feel much bigger than it actually is.
With this in mind we have found the ideal solution to this problem in the form of one of our customers innovations – a sliding mirror, read on below for information on how to construct this awesome idea.
Different Types of Bathroom Mirror
Before we go head on into how to construct a sliding mirror it’s a good idea to look at all the different mirror options available on the market today just in case there is something better suited to your needs:
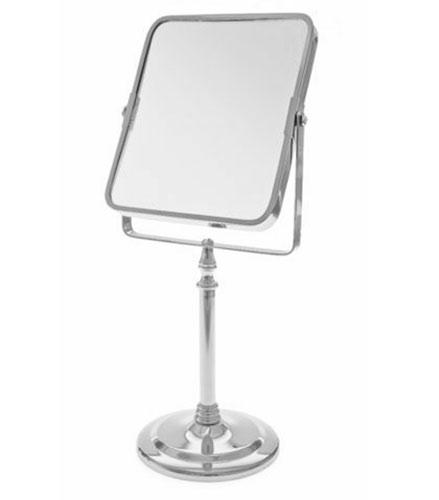
- Cosmetic and Shaving Mirrors: Generally fairly small in size and circular in shape, shaving and cosmetic mirrors can be freestanding or mounted on an adjustable arm fixed to a wall. Some models feature an integrated light and most also are flippable, with a standard mirror on one side and magnified mirror on the other
- Mirrors With Shaving Socket: As the name suggests this type of mirror has a shaver socket built into it allow you to power a shaver. Due to the depth of the socket fitting these mirrors can also feature a cabinet and built in light
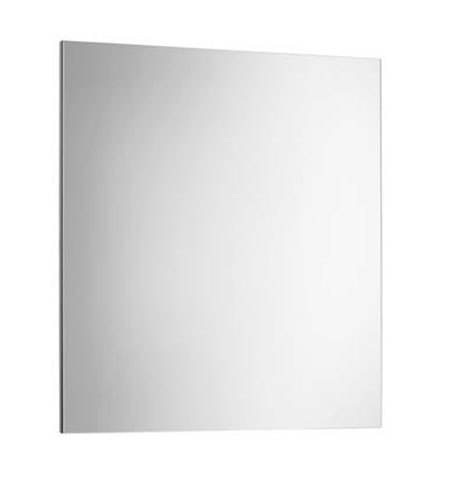
- Standard Bathroom Mirror: Standard bathroom mirrors offer probably widest range of choices of styles, shapes, sizes and colours out of any type of bathroom mirror making them generally the most popular choice in most UK homes
- Mirrored Bathroom Cabinets: The mirrored bathroom cabinet is a fantastic choice in any bathroom due to its multifunctionality, not only does it provide a visual aid but it also provides a great storage solution for any number of bathroom products
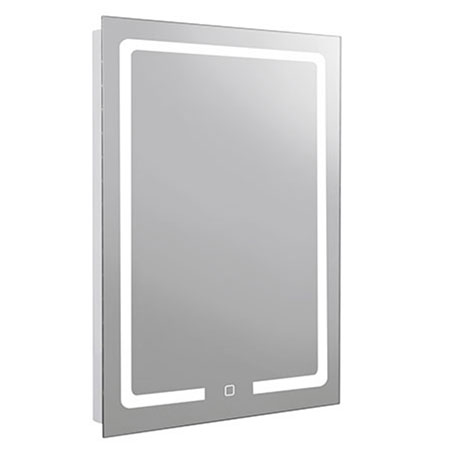
- Illuminated and Backlit Bathroom Mirrors: Again as the name suggests, this is a bathroom cabinet with an in-built light that normally tries to mimic natural light as best as possible so that you can perform your viewing in as natural an environment as possible. To appeal to as wide an audience as possible they are also available in a wide range of sizes, types and styles and not all need to be mains fed, some are battery powered
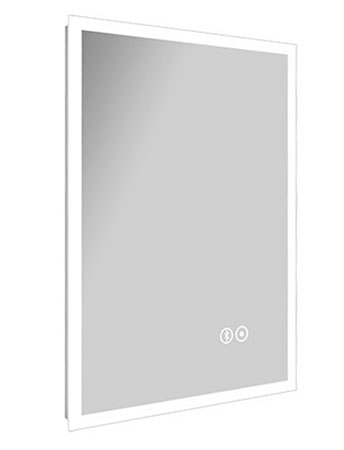
- Bluetooth Bathroom Mirror: As you may imagine the Bluetooth bathroom mirror is somewhat of a modern innovation. In essence the mirror itself features speakers and allows you to sync your phone or device so that you can play music while you go about your business
Cosmetic or shaving mirror

Bathroom mirror with shaver socket
Standard bathroom mirror

Mirrored bathroom cabinet
Illuminated bathroom mirror
Bluetooth bathroom mirror
As we have mentioned, the above list of different types of bathroom mirror are all available in a huge range of different colours, styles and sizes. When it comes to sizes it is generally recommended that you keep your mirror to the same or similar width to the appliance or feature that it is behind. However this is only a guideline and at the end of the day it’s up to you how large you want your mirror to be.
One other factor to be aware of is the whole water and electricity thing in that bathrooms are very wet and humid places and featuring devices and appliances that run on electricity in a bathroom has to be done in a very controlled manner.
To this end any installation work should be done by a Part P qualified electrician and each appliance needs to meet the specifications set to be installed in a particular “Zone” (more on bathroom zones in our project here).
Are Bathroom Mirrors the Same as Regular Mirrors?
As we have touched on above, bathrooms are very wet and humid places with water being splashed around and large amounts of steam being produced through showering and bathing.
If a mirror that is subjected to these conditions isn’t properly resistant to water and moisture it can easily become damaged, causing the silver backing paper that gives the mirror its reflective characteristics to come off. When this happens, typically non-reflective spots start to appear.
Likewise if the frame that the mirror sits in (if indeed it does) is also non-resistant to water and moisture this can also become damaged.
With these above points in mind it is essential that you use a specific bathroom mirror designed to cope with the conditions encountered in a bathroom.
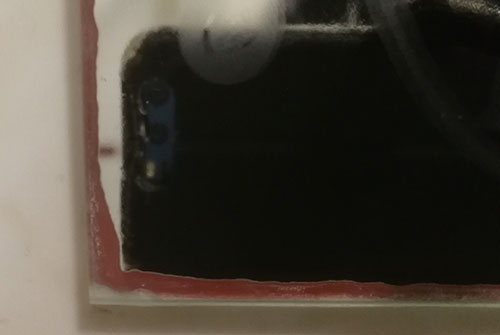
Damage to mirror caused by moisture
How to Make a Sliding Bathroom Mirror
Now that we have looked at the different mirror options it’s time to now get back to the point of this guide – constructing our sliding mirror.
Select Bathroom Mirror Installation Location
The first job is to select the install location for your mirror. As the point of this guide is to provide your basin area with a decent mirror for grooming, shaving etc. this installation area we are going for is a surface to the left or right of the basin area.
As in our example here the basin has a window directly behind it that extends off to the right, but to the left of the sink there is a suitable solid wall ideal for mounting our mirror on.
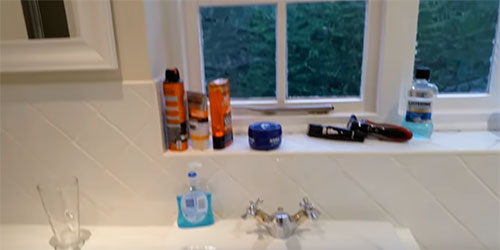
Bathroom mirror install location to left of basin
Select a Mirror
Once you have settled on the correct install location for the mirror the next job is to select the correct mirror for your needs.
Essentially the mirror needs to be the correct size so that it caters for all of your viewing needs but you also need to make sure that it will slide away nicely and not spill over any edges or foul any other objects in close proximity.
One further point you need to be aware of is the size of mirror and the type of drawer runners you are using e.g. if you select a very large mirror but only use standard single extension runners then there is a chance that once fully extended the mirror won’t extend far enough in order to reach your desired location.
So with the above in mind ensure that you use a mirror big or indeed small enough that it sits over the required viewing location correctly.
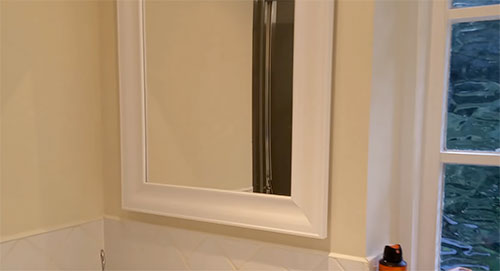
Ideal sized mirror for install location
Fix Draw Runners to Mirror
The next job is to install the drawer runners on the mirror so that it can be installed, but first we need to mention the type of runners that you should use.
As we have mentioned already above it is essential that you use the correct size or type of drawer runner for your needs. For example if you only need to extend a little way either left or right then a single extension drawer runner will be fine. However if you need to your mirror to extend quite a way a double extension drawer runner will be needed.
Next you will need to select the correct type of drawer runner, by this we mean how the runner would be fixed to a drawer, either at the side, at the centre, underneath or above. As we want our mirror to extend either left or right and we want to fix them on a flat wall or similar surface we need to use side sliding runners.
The final choice concerning our runners is their construction material. As we have established, bathrooms are damp and humid places and the drawer runners are going to need to be able to cope with these conditions so to ensure this go for stainless steel drawer runners.
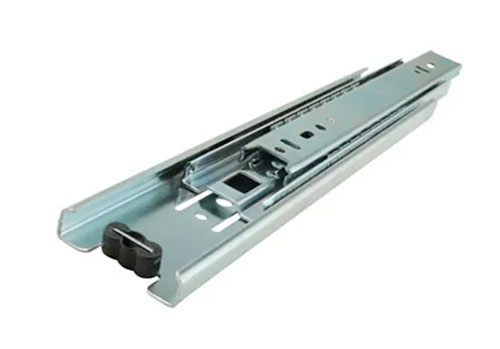
Heavy duty ball bearing stainless steel double extension drawer runners
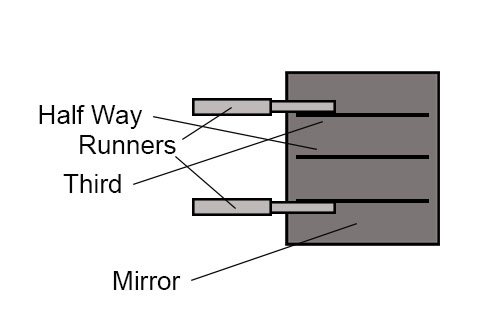
Once selected, place your mirror face down on a level and solid surface and then measure and mark the centre or the horizontal edge of the mirror and then measure and mark the centre points of each top and bottom half so that you have now marked a top and bottom third. Transfer this measurement horizontally across from each mark and then join them with a horizontal line.
Next, take each runner, extend it out and then flip it over and lay the top above the top line and the bottom runner below the bottom line so that the fixing face is aligned with the horizontal line.
In terms of securing each runner in place, if the mirror is in a timber frame you can screw each runner through its fixing holes to the frame. If the frame is too thin or there is no surface to fix to you can use Mirror Mate mirror adhesive to stick each runner to the drawer slider.
When sticking or screwing each runner to your mirror ensure that each is fully aligned with the horizontal line you created earlier so that it slides nicely without binding.
Fixing runners to rear of mirror
Fix Drawer Runners in Place on Wall
Once screwed in place or the adhesive has fully cured you can then fix the opposing end of each runner to your bathroom wall.
Using a second pair of hands to support the mirror and runners, extend the runners out fully and position them on the wall you are fixing to. Using a spirit level, horizontally level both runners with your helper holding the structure firmly in place to prevent any movement.
Mark each slider fixing hole on the surface behind using a pen or marker if on tiles and then put the mirror assembly to one side. If your fixing to a masonry surface, use a 6mm masonry bit to drill each fixing hole and then insert a red wall plug.
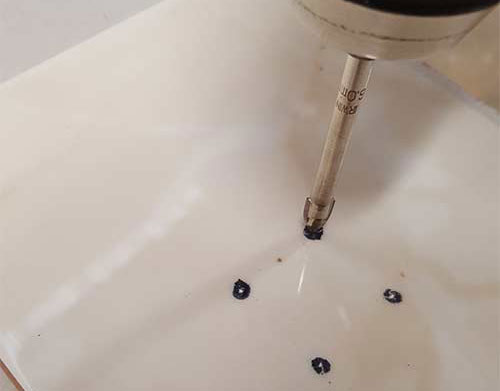
Drilling fixing holes marked in tiled surface and drilled out using a ceramic tile drill bit
If you are fixing to a tiled surface you will need to use a special 6mm tile drill bit to drill through the surface of each marking and then use a 6mm masonry drill bit to drill through the masonry wall. As before insert a red wall plug but be sure to push it all the way through the tile to the masonry surface.
Once the wall plugs are in place you can then reposition your mirror and drawer sliders back in place and then secure each fixing hole in place suing the correct sized screw (in this case an 8 x 1 1/4 inch screw). As you screw it up ensure it sits fully level using a spirit level.
Once secured in place, extend the mirror in and out several times to ensure it slides smoothly without binding or sticking. If all is well the mirror should slides nicely in and out, job done!
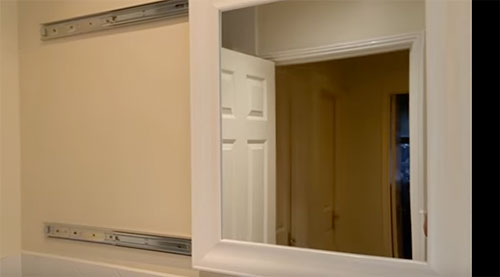
Mirror extended out and tested
Constructing a sliding mirror is a fantastic solution to the age old issue of not having a decent mirror behind your basin and one that, for the cost of a mirror and a few good quality drawer runners can be done for a reasonable price.