At diydoctor we have lost count of the times we have been asked about a DIY method of repainting a bath, resurfacing a bath or just repairing a leak in a bath. If your bath is leaking from the joints between the bath and the walls you need to see our leaking bath or shower project on just that. Coincidentally, this project is also presented by Plumbworld!
This project has been divided into different segments covering just about every bath repair scenario you could think of.
Repairing Scratches in Baths
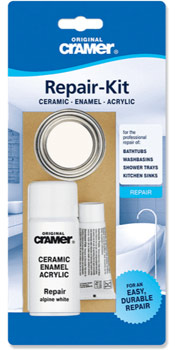
When it comes to cleaning baths and polishing out scratches, normally a form of textured cream or rubbing compound would be used but in most cases these types of polish and cleaners are far too harsh for acrylic surfaces and tend to tarnish the surface further. The product we have shown below has been specially made to work with acrylic surfaces and ensure that no further damage is caused as it is acid free and eco-friendly.
The product itself works to remove discolouration, soiling and stains and also limescale deposits that can be evident around the taps in hardwater areas. Whilst removing the previously mentioned marks, this product also does a fantastic job of removing scratches and at the same time does not produce the horrible chemical smell that can be associated with these types of products.
Shake the tube well before use and apply with a soft, moist cloth or sponge. Rinse off with warm water…How simple is that!!
The kit comprises of just the professional scratch removal cream (you will need to get some sandpaper for deeper scratches and a soft cloth – full details of use can be found in the technical specifications by clicking on the image below).

Bath Scratch Repair
Removing Scuffs from Baths and Mould from Tile Grout
An amazing product available at Plumbworld is the bath scuff removing rubber. Simply use as a normal "pencil rubber" to remove scuffs from baths and tiles, mould and dirt from ceramic tile grout and stubborn water marks from baths.
Other types of cleaner can be harsh and damage acrylic and enamel surfaces as they can contain acid but with this product all you do is rub! It can be used on pretty much all material surfaces such as chrome, ceramic and enamel.
The kit comes complete with your bath rubber.

Bath and Tile Scuff Remover
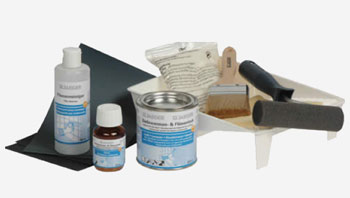
Repairing Scratches and Chips in Baths
This product is incredible and so easy to use. Suitable for enamel baths, acrylic baths, fibreglass baths, ceramics and stone resin shower trays, simply mix this two part filler and apply with a spatula (supplied). Sand down and spray with the enamel spray
Ask any bathroom fitter how many times he has dropped his ceramic tile nips into a shower tray and chipped it. He will tear your arm off for this product!
The kit comes complete with everything you need and includes the filling compound and hardener, selection of grades of sandpaper (course grade to fine grade), spray paint (available in a selection of colours) and a spatula for applying the filler.
Bath Chip Repair
Repairing a Cracked Bath
To repair a cracked bath, wherever possible, approach the job from the underside or back. We know of several products on the market that are capable of doing the job, but be aware that they may not work on all baths, especially some plastic ones as once a plastic/acrylic bath is cracked much of the integral strength is lost, especially if the crack is in the base.
Due to the cost of replacing the entire bath, it is well worth looking into repair products before you take the plunge and invest in a new bath.
To repair a crack in an acrylic or plastic bath the best solution is to use fibre glass mesh sheets. You can buy a complete kit with everything you need that should include fibre glass resin and hardener, fibre glass mesh and/or matting and a small brush.
- Locate the crack on the underside of the bath and thoroughly clean it to remove any grease or residue
- Mix the resin and hardener together according to manufacturers instructions
- Apply the mixture to the area around the crack. For larger cracks make sure that you cover at least 2-3 inches either side of the crack with the resin
- Cut a section of the mesh/matt to cover the entire crack and push it onto the resin
- Brush some more resin over the top of the matting and ensure that it is completely covered in resin
- Leave to cure for the required time and it should set rock hard
- Use the below product to fill and repair the visible crack on the top side of the bath, following the instructions
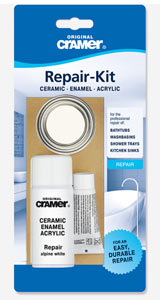
Bath, shower and sink repair for ceramic, enamel and acrylic surfaces
Resurfacing an Enamel Bath
A stylish bathtub can really finish off a bathroom but when damage, stains or marks are caused these can really stand out like a sore thumb and completely ruin what should be the rooms main focal point.
Particularly stylish baths can cost a fortune, sometimes up into the thousands of pounds and even with cheaper variations replacing a damaged bath is not really an option. In these instances the Jaeger Bath Refinishing Kit is the ideal solution.
Some products similar to this one will get the job done but the final finish can be a little dull which again, is still noticeable. The Jaeger kit ensures not only a nice shiny finish but also a long lasting one. Additionally, the kit is easy to use for both professionals and DIYer’s alike.
Firstly, all surfaces must be thoroughly cleaned to remove any grease or residue and then sanded with sand paper to rough it up and allow a key for the enamel. You must then remove all traces of dust and debris and then you can apply the enamel paint with either a brush or roller. One coat should be enough to give a great finish. To find out more click on the image below.
Bath Enamel Resurface
This amazing kit is available in white and also 4 other colours but is definitely only for use on enamel baths.