Lets face it, standard black or grey plastic guttering is a bit ugly, especially when it’s attached to a stunning period or indeed contemporary property which really deserves a little more.
Fortunately there are alternate options for guttering in the form of seamless aluminium guttering, steel guttering, traditional cast iron guttering and even copper guttering. On the downside materials such as these can cost a fortune and even more so when turned into guttering.
In terms of the guttering, the running outlets, brackets etc. are all above head height in most cases it’s the downpipe that gets seen. In respect to this there is a solution to this in the form of a chain downpipe or a “rain chain” as it’s known, read on to find out more.
What is a Rain Chain and how Does it Work?
If you have never heard the term “rain chain” before you may be thinking that this is some kind of new green or eco initiative aimed at reducing the use of plastic in the guttering industry.
In actual fact rain chains or rain cups as they are also known have been in use in Eastern Asia, particularly Japan for hundreds of years so they most certainly aren’t some new innovation.
If you’ve never seen one before you may also be thinking that they are some kind of super complicated rain dispersal system that uses chains to magically make rainwater disperse itself when it runs off of your roof. Well we can confirm this is not the case either, in actuality it’s just a chain that hangs from your gutter in place of a downpipe!
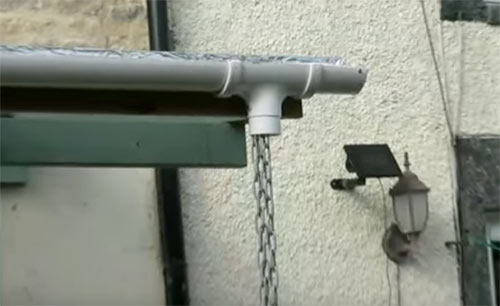
Chain downpipe or rain chain
In terms of how they work, it’s a fairly simple scientific concept that has to do primarily with surface tension and fluid dynamics, in essence the science of the flow of fluids or liquids. Simply put when water meets an object such as a chain, as opposed to flowing away from it, it will cling to it and flow along it wherever its directed.
When it comes to comparing a rain chain to a traditional plastic or even steel/aluminium downpipe one isn’t necessarily better or more effective than the other. The main benefit is in most cases a visual one in that rain chains are generally much more attractive than their plastic counterparts.
Although chains are most commonly used, cups are another alternative and these are used a fair amount in Japan. As opposed to the water flowing down as with a chain, with cups water runs into the first cup and fills it which then flows into the second cup and so on until it reaches the last cup.
Rain cups are an equally popular choice and not only do they offer even more visual appeal but during rain they can also produce a pleasing and rather hypnotic sound.
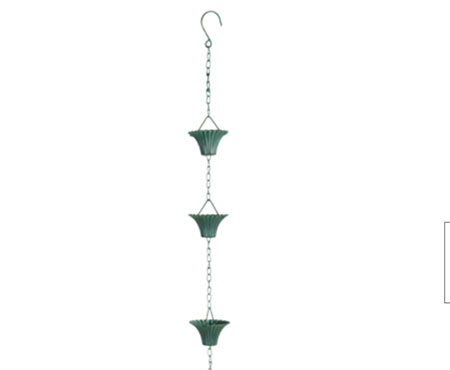
Rain cups are an alternative to rain chains
Aside from the visual advantage there are some disadvantages with rain chains. The first is that they don’t cope well with heavy downpours of rain. Whereas a traditional downpipe will fairly easily cope with large amounts of water, rain chains get totally overwhelmed and the water ends up flowing everywhere.
One further disadvantage is the wind. With a traditional downpipe the water runs all the way down it to the drain or soak away as the downpipe itself channels it in the direction it’s running in. As a drain chain is totally exposed to the elements any significant wind will simply blow the water off, rendering it pretty useless!
With the above in mind and considering the volumes of wind and rain we experience in large parts of the UK, if you live in an area that is subjected to such conditions then rain chains may not be that suitable for you, but on the other if you don’t then find out how to install a rain chain below.
One final point concerns construction materials. In most cases, unless you are going for a rustic look and don’t mind your chain being rusty, your rain chain or cups will need to be constructed from weather resistant materials and in most cases this will either be galvanised or stainless steel or if the budget allows copper is a great choice and one that offers even more visual appeal!
How to Make a Rain Chain Downpipe
If you are lucky enough to live in an area that isn’t constantly subjected to wind and rain and fancy improving the visual appearance of your ugly plastic downpipes then find out how to install a rain chain below.
Remove old Downpipe
Before fixing your new rain chain or rain cups in place the first job is to remove your old downpipe. In most cases once you have removed the one or two brackets that will probably be holding it to the wall or surface behind, hold it with both hands and twist it left and right.
This should help to loosen it and as you turn it pull very gently downwards (not too hard as you can easily pull all the guttering down) and this should release it from the running outlet or stop end outlet that it’s attached to.
In a very small percentage of cases the original installer may have glued the downpipe to the running outlet or stop end outlet it’s attached to. In this case the most suitable solution is to take down the who section and then saw off the downpipe using a hacksaw or handsaw at the end of the outlet adaptor.
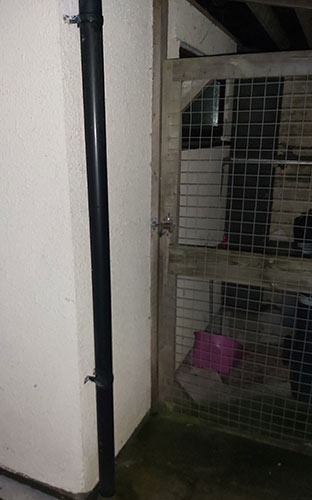
Traditional black plastic downpipe
Secure top of Rain Chain or Rain Cups
With the old downpipe out of the way the next job is to now fit our new rain chain in its place. As we have mentioned above, guttering is relatively fragile and a decent chunky chain can weigh a fair amount so we can’t simply fix the rain chain to the guttering.
Instead it will be fixed through the side of the running outlet and into the facia so the facia can provide all the required support.
Next, use a ladder to access the top side of the guttering. Using ladders can be dangerous so ensure the ladder you use is sturdy (such as a decent step ladder) and on a solid base (see our project here on ladder safety for more information)
To fix the chain in place we are going to use a sturdy M10 coach screw. Using a drill/driver, drill a 10mm hole through the side of the running outlet that’s next to the facia but don’t drill into the facia. Once through the gutter use a 4mm drill bit to drill a pilot hole in the facia.
As in our example here there are 3 lengths of chain running from the outlet. Using 3 sections of chain provides a great surface area for any water to run down so using 2 or 3 chain lengths is preferred.
In this instance we have used a single length of chain that has effectively been doubled up (or tripled up in this case).
Take the first link in the chain and run it up through the running outlet and run your coach screw through it. Roughly screw the screw in a few turns to hold it in place.
Now climb down the ladder and go to the end of the chain and at the point you want the chain to end, have a second pair of hands to hold this link so that it doesn’t move and then take the rest of the chain back up through the running outlet, unscrew the coach screw and run it through the nearest chain link and then screw it back in, this time screw it right up.
Allow the remaining chain to dangle back down to the floor and here you have your 3 lengths of chain in place. If the trailing section is too long use some bolt cutters or if you don’t have a pair use an angle grinder to cut the excess off.
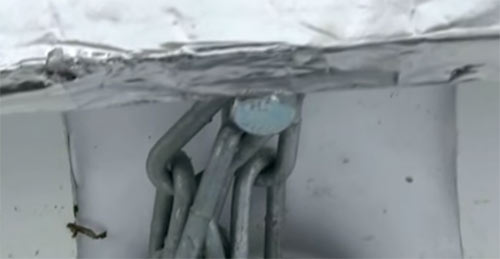
Coach screw securing rain chain in place
Next use a 8mm drill bit to drill a hole through the side of your running outlet at 90° to the coach screw at the point any water will run out, so that it runs down the chain. Next use a 3 inch M8 bolt and insert it through the side of the running outlet and also through a chain link of each of the 3 sections, put a large washer on the end and then screw on a nut.
This bolt will be used as an adjuster so that you can move the rain chain to and from the face of the running outlet to ensure that all water running through the guttering runs down the chain and doesn’t simply fall through the hole.
Adjuster bolt to adjust rain chain
Secure Base of Rain Chain or Cups
As we have mentioned above, wind is the sworn enemy of the rain chain and to prevent the chain from getting blown all over the place it needs to be securely anchored at the base.
How it’s anchored will depend on where it’s running to e.g. into the ground or as in our example here into a water butt.
If it’s running into the ground then a good solution is to use a large ground staple to anchor the base of the chain to the floor.
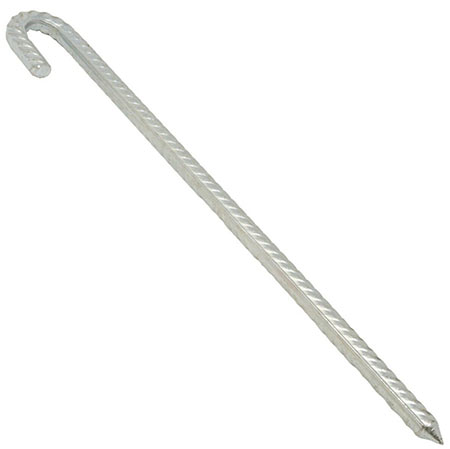
Galvanised steel J-Pin or ground staple
Another solution, if you allow a few feet of slack in the chain at the base you can wrap this around a concrete block and use the block to hold the chain firmly on the ground.
In our example here we are running our rain chain into a water butt so we are going to use a heavy concrete block to hold the chain in the base of the butt. To keep the chain in place we also screwed a large 4 inch screw through the chain links once they were wrapped around the concrete block with a large washer to hold it all in place.
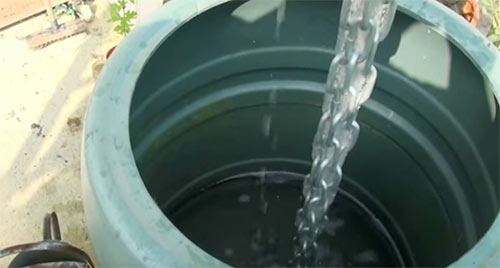
Rain chain running into water butt
Test Rain Chain Installation
With Your rain chain now run correctly from the running outlet of your gutter to your drain point, in this case a water butt the last job to do is to test it all out.
You can obviously wait until the next downpour to test it all out but if it’s the middle of summer this may be a while. If you want to test it now you can simply run a hose pipe into the gutter there you have it a ready made rain storm!
If all is well and good all the water should be nicely running down your rain chain. If however you have a fair bit of spillage then use the adjuster bolt and pull the chain closer to the side of the running outlet so that the water can access the chain much easier.
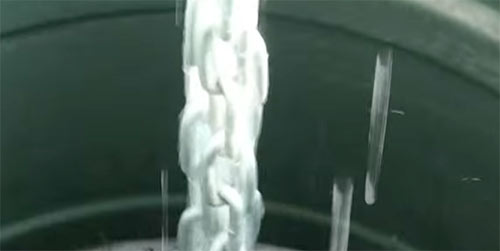
Water running down rain chain
Installing a rain chain in place of a traditional downpipe provides a much more visually attractive solution to storm water run off than an old downpipe, however if you live in an area that’s subject to heavy wind and rain then this may not be the best solution for you and may end up causing other more costly issues.