Plastic guttering is so versatile these days it can be installed to look exactly the same as cast iron guttering. Adapters and couplings can be used to join it to existing cast iron gutters. It can be diverted to rainwater butts and different depth gutters be installed to deal with draining the most expansive roofs.
Installing or replacing a gutter is pretty straightforward as long as you remember, in the first place, to keep yourself safe so viewing our project on ladder safety is a good idea.
Once you have the outline of your gutter planned and measured you can buy all of the necessary pipes and fittings. This project is a general guide to installing plastic gutters but some gutters require different spacing for brackets etc so it’s a good idea to check out the requirements for your particular choice of guttering with the merchant or manufacturer.
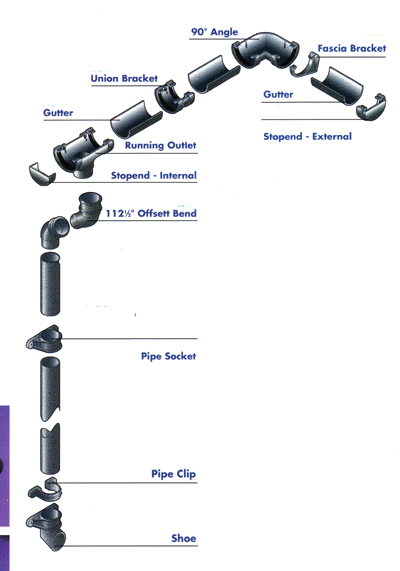
Guttering components: Whichever style of Gutter they will have all these parts
Removing Existing Guttering
Unless the guttering is for a new building you will need to remove any old guttering. Plastic Guttering should be relatively simple to remove.
Care should be taken when removing iron guttering as it would be heavy and could have sharp edges. Because of the weight we recommend that you have help whilst removing any iron guttering.
There is every possibility that, if your old guttering needs replacing, then so will your fascia boards and soffit boards. New, plastic (uPVC) fascia and soffit boards can also be bought from most builders merchants or DIY stores.
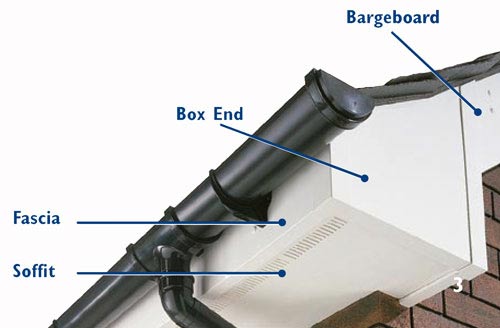
When replacing gutters, it is worth considering replacing Fascias and Soffits – Image courtesy of Swish Building Products
The screws holding the old guttering, brackets or clips may be rusted into place; if this is the case you will need to saw the screws off using a mini hack saw with a thin cutting blade. If thick bolts have been used to connect the guttering you will need to use a hacksaw to saw the bolts.
While you are up there, assuming you are not replacing them, you should give the fascias and soffits a good clean.
The Parts and Guttering Styles
The most commonly used parts for a guttering project are shown in this picture below and we will describe how to use them in this project.
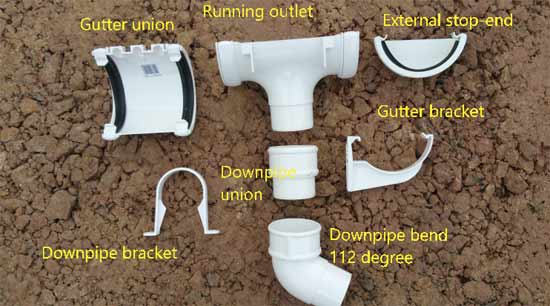
Main elements of a guttering system
There are other guttering parts which you might need or use from time to time. Click on the images below to buy them from Amazon, or you can get them from most builders merchants.

Round guttering section

Guttering union for joining guttering sections

Running Outlet

Stop End

Stop End Outlet

Gutter Bracket
Gutter pipe socket

Down Pipe Hopper

Downpipe

Down Pipe Bracket
Downpipe shoe for base of downpipe

Gutter Bend (90 Degree)
These parts are common to all or most the different styles of guttering. There are a lot of different varieties for the shape or style, which basically the cross sectional profile, however there are typically only a relatively limited number that are commonly used and available:
- Half round
- Square
- Ogee (apparently called K-Style in North America)
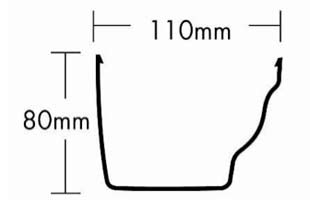
- Deep Flow
- Mini Guttering:
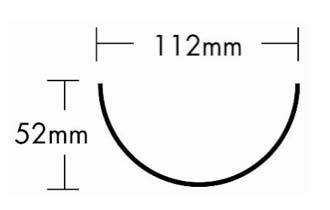
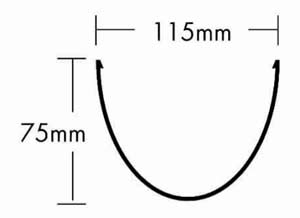
Cross section of half round gutter and dimensions
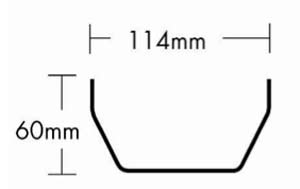
Cross section of square gutter section and dimensions
Cross section of Ogee gutter and dimensions
Depp flow gutter cross section and dimensions
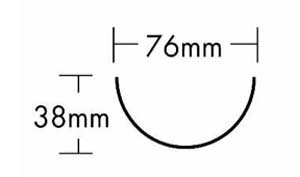
Cross section of mini gutter and dimensions
Choose the style that is most in keeping with your home.
The other factor that you will need to consider is the material that the gutter is made from. Here we are really discussing plastic guttering but as we have already mentioned there is cast iron guttering which can be used interchangeably with plastic guttering. You can also get copper and aluminium guttering. When it comes to seamless aluminium guttering this requires specialist equipment and techniques which you can read about in this project.
For aesthetic or planning reasons you might use non-plastic guttering, but because of it’s durability, low cost and ease to use (light weight) plastic gutters are far and away the most popular.
Calculating the Size of Gutting Required
The size of the gutter required is determined by the amount of water that will be running off the roof. Obviously the size of the roof is critical. The gutters need to be big enough to carry all this water away.
There are complex calculations that can be used to measure this accurately; however our preferred method is to use this calculation as it is simple but accurate enough:
Roof Length X Half Roof Width X Roof Height ÷ 2 = Roof Area
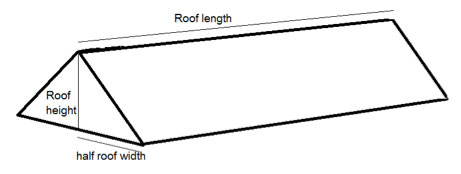
Calculating the area of a roof
For example:
Roof Length = 5
Half Roof Width = 3
Roof Height = 3
5 x 3 x (3/2) = 22.5m2
Having calculated the effective area of the roof, you can see what the maximum effective roof area which your chosen guttering will drain efficiently. The manufacturers will publish tables or be able to advise you.
For example, you can see the roof areas for the Floplast gutter systems in the table below, which are fairly typical:

Floplast gutter systems effective roof area drainage for gutter types
You will see that there are several things that you can do to increase the drainage capacity of your guttering:
- Add a fall to the gutter
- Move the outlet to the centre of the gutter
- Change the gutter style to one with greater capacity
Rules of Thumb for Putting Up Gutters
When you plan your gutter the following points should be considered:
- Gutter (Fascia) brackets should never be more than 1m apart
- Gutter angles, Stop-ends, Running Outlets, Unions and other gutter fittings should have a bracket (both sides of the fitting where appropriate) within 150mm of the fitting
- A supporting pipe clip should be used on all Shoes, Branches and Bends of the down pipes where necessary and in all cases these pipe brackets should be no more than 1.8m apart
- Silicone spray lubricant should be used on all joints to allow for expansion and contraction

A general purpose silicone spray will do the trick
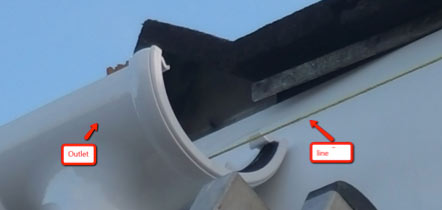
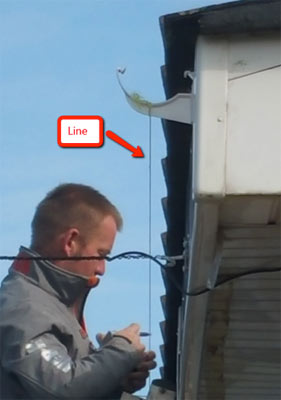
Establish the position of the Outlets
The running outlet or stop end outlets, should be fitted directly above the drain position; a plumb-line should be used to ensure that the outlet is positioned accurately. You might consider fitting a new gulley with a 4-inch pipe running down into a new soakaway but you will probably run the new gutter into the old gulley (it’s easier). You can find out about creating a soakaway here.
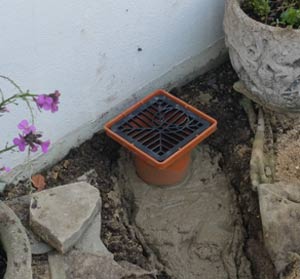
Drain in place ready for downpipe to be installed
The mark or line you have made represents the centre line of the downpipe and the outlet hole
As this outlet is the point where all the water needs to get to, it has to be the lowest point in your gutter run so let’s see how we make sure it is.
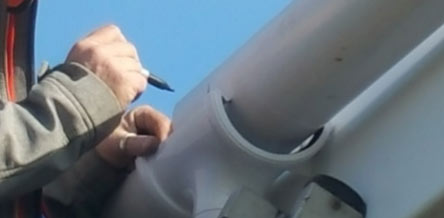
Firstly put a spirit level on the underside of the facia board to make sure it is level. Then Measure down 40mm from the top of the facia and make a mark.
Check the level of the facia board
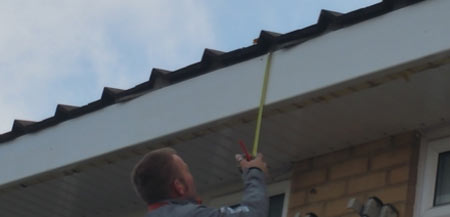
Make a mark 40mm down from the top
Fix the running outlet into place
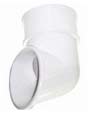
Having fixed the running outlet in position it makes sense to fix the downpipe at this point. In this scenario we have photographed, we have an overhanging soffit to contend with so we have to make what is called a “swan-neck” to get the downpipe from the outlet, under the overhang and back to the wall where it can meet up with the downpipe. This is done by positioning the downpipe and placing two 112 degree bends as you can see from the image below.
Fixing the downpipe into place from the running outlet
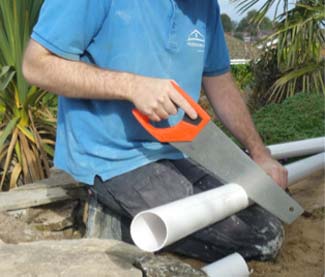
Cutting downpipe with a hand saw
The downpipe is then cut to length using and ordinary hand saw
The downpipe is fixed in position by using the downpipe brackets which are plugged and screwed to the wall. See our project on fixing to masonry for more information on this.
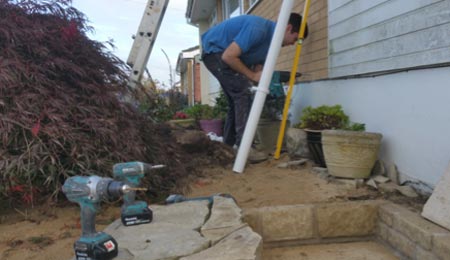
Drilling fixing holes for brackets
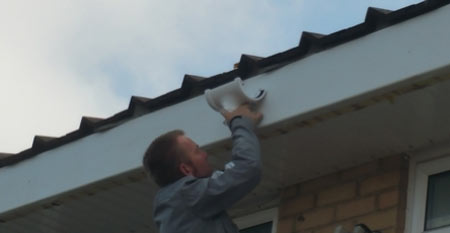
The bottom of the downpipe has a “shoe” placed at the bottom to direct the water into the gulley grid.
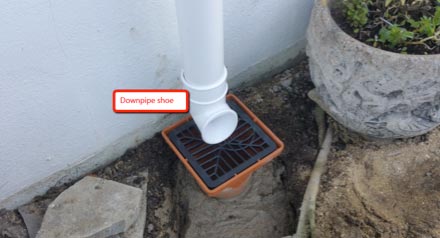
Shoe fitted to end of downpipe
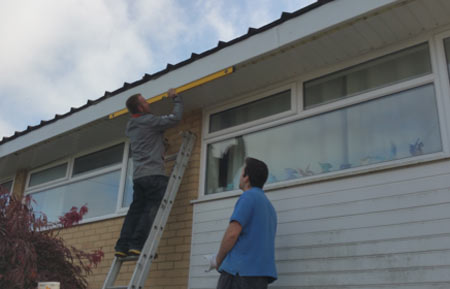
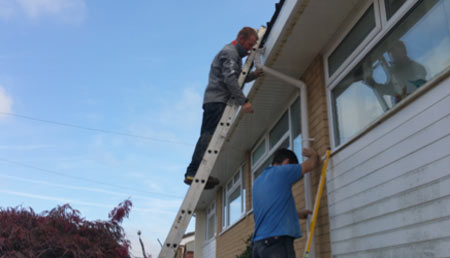
Some guys leave the downpipe until last but we think it’s easiest to do as much as possible in each position you place the ladder. On a long stretch of gutter it gets a bit wearing moving the ladder up and down!
Installing the Guttering
For every 20 feet (6.1m) of gutter you have it should slope half an inch (12mm) so your brackets should be fixed to this fall.
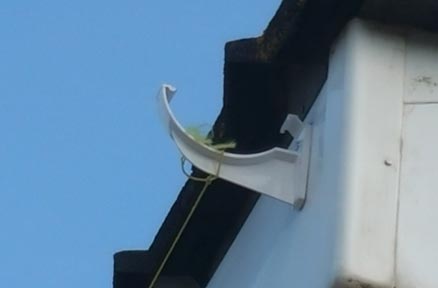
You should now fix the end fascia bracket to the fascia board, taking into account the fall. If the outlet is positioned in the middle of the gutter fix a fascias bracket at the other end.
Tie a string line from the outlet to the end fascia bracket; Use this line to establish where to fix the intermediary fascia brackets. These fascia brackets should be fixed no more than 1 metre apart.
Once this bracket was fitted you can tie a string line between the bracket and the downpipe so that you can fit the remaining brackets at the right level to join into the outlet.
Gutter bracket fixed into place and string level attached
Line level in place from running outlet
Line level running from end bracket

All gutter brackets fixed into place ready for gutter
Next, fit all the brackets placing them no more than 1000mm apart sown by X in the image below.

Leave enough overhang to collect water from the edge of the roof
Having fitted the gutter brackets it is time to fit the guttering. Take the first length and clip it into the running outlet, then into the facia board brackets. It’s easier to start by clipping in the back first.
Join the next length of gutter to the first with a union bracket. Clip the two ends in and fix to the facia with a suitable screw.
Measure and cut the gutters ready to fit corner pieces if appropriate.
Again, the gutter can be cut with a normal hand saw.
Mark section of gutter to be cutt off

Cut off and remove unwanted section of gutter
Push the gutter clips firmly over the gutter after you have fixed the stop end onto the gutter.
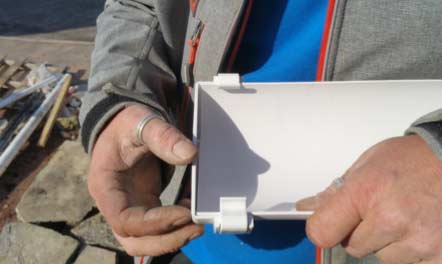
Fix section of end cap to the end of the gutter run
Fit an external stop end to the end of the length of gutter and make sure the gutter sticks out from the end of the facia board by about 25mm. If you are joining to existing gutters you will need a gutter adapter.
The distance between the gutter and the wall may need to be bridged using two offset bends and an appropriate off cut of downpipe cut to size. The offset bends can be push-fit using a pipe clip, ensure a pipe clip is fitted under the socket on the pipe immediately below the offset. Ensure a 6mm gap is left at the top of the downpipe for expansion.
Guttering should use either a round or square Downpipe. To attach Round Downpipes to square gutters you must use a SQ/RD Downpipe Adaptor.
Hopefully now you will see that putting up gutters is a relatively easy task so long as you are methodical and are safe on your ladder. Working with plastic guttering makes the job much easier to achieve on your own. Happy gutting fitting!
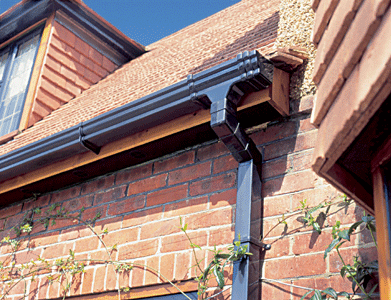
Newly installed gutting and downpipe
Fix the first length of downpipe with its socket uppermost into the outlet, fixing it to the wall with a pipe clip at the top holding the pipe to the wall.
Fit the rest of the downpipes using a pipe socket to connect each pipe together. At the base of the pipe, fit a Shoe secured with a Pipe Clip.
Diverted rainwater is great for your garden, slim line water butts are very useful where space is at a premium.