Acrylic plastic is a light-weight material weighing far less than glass; it is not affected by continuous exposure to sun light or contact with sea spray/water hence the extensive use of this material in marine vessels. It is a flexible material, a good insulator and resistant to most chemicals.
Today, it has a huge number of uses and comes in a vast range of different types, so at some point if your DIY career it’s likely that you will come into contact with it, so in this guide you will learn all about methods of cutting and gluing it.
What is Acrylic or Perspex?
Acrylic and Perspex refer to the same material, with Perspex being a brand name for acrylic. In 1934, Chemical Industries, a major UK plastics manufacturer, began branding their acrylic products as Perspex. Its widespread popularity led to the material being commonly referred to by the actual brand name.
So, what is acrylic or Perspex? It’s crafted from a polymer known in the industry as Polymethyl Methacrylate, or PMMA.
Acrylic’s popularity stems from its numerous advantages, including exceptional clarity, durability, easy manufacturing, versatile shaping capabilities, shatter resistance, UV resistance, and as a superb glass substitute.
Today, a variety of acrylic brands are produced globally for diverse applications, leading to highly competitive prices. It’s affordability and availability now often makes acrylic the preferred alternative to traditional glass.
Methods for Cutting Acrylic or Perspex
When working with acrylic or Perspex, you often need to cut it to the right size for your specific project. There are various methods to achieve this, and the most common ones include:
- Hand saw
- Scoring and breaking with a sharp knife
- Jigsaw or multitool
- Bandsaw
- Fret saw
- CNC laser cutting
The choice of method depends on the volume of Perspex you need to cut. For small projects like replacing a greenhouse pane, one of the first 3 methods listed above is the way to go, depending on what tools you have available.
If you’re dealing with a larger quantity or intricate shapes, a more substantial tool such as a bandsaw or fret saw offers greater accuracy and efficiency.
For industrial-level precision, CNC laser cutting is the way to go. While this method ensures near-perfect results for intricate designs, it comes at a higher cost. CNC laser cutting is computer-controlled based on a pre-programmed design, guaranteeing highly accurate cuts for large volumes and complex shapes.
Choose the method that best suits your project’s scale and intricacy, keeping in mind the tools and resources at your disposal.
How to Cut Acrylic or Perspex
As we have mentioned, the methods you choose to cut your acrylic will depend on the how much you’re doing and whether you’re making any intricate cuts and the level of accuracy these need to be made to.
Below, we have outlined the process of how to cut acrylic using using the most popular and accessible methods stated in the section above and the steps you need to follow to reach a successful outcome.
As most of the methods listed below use some sort of blade to make their cut, here follows some tips that apply to all solutions:
- Always use a fine tooth saw blade. One with about 10 teeth per inch is ideal
- Never force a cut as this can overheat the acrylic and cause it to melt, always let the tool do the work
- If using a power tool, ensure the cutting speed is set to high
- If you want to cut perfectly straight lines, always use a straight edge as a guide
- If you can, use a jigsaw as the higher cutting speed will give a smoother, cleaner finished edge
- Always keep the protective film on the acrylic as long as possible to protect it
- Once finished, use fine grit sandpaper or a metal file to smooth cut edges
How to Cut Acrylic with a Jigsaw
Using a jigsaw is one of the most effective methods for cutting acrylic, offering a clean cut and the ability to tackle curves and intricate shapes. Here’s a step-by-step guide to help you achieve the best results:
- Step 1: Mark Cutting Line: Begin by accurately marking your cutting line on the acrylic using a suitable pen or marker.
- Step 2: Clamp Up: Secure your workpiece with clamps to prevent movement, ensuring there’s enough space for the jigsaw blade to manoeuvre up and down.
- Step 3: Fix Guide Edge: If you’re cutting a straight line, fix a guide edge to maintain a straight cut. This allows you to run the saw’s sole plate along it for precision.
- Step 4: Make Cut: Position the sole plate of the jigsaw at the beginning of your cut, starting the saw at its fastest cutting speed. Gently guide the blade to the sheet until it touches and begins cutting. Follow the cut line to the end and then stop the saw.
- Step 5: Clean Up: After completing the cut, use a suitable grit sandpaper or metal file to clean up the edges, removing any burrs or rough edges.
Remember, use a fine-toothed blade for a cleaner cut, and let the jigsaw’s speed and blade do the work without applying excessive force to avoid melting the edges. Following these steps will help you achieve a precise and polished result.
Note: It’s also possible to use a multitool to cut acrylic in the same way that you would use a jigsaw. Although it’s more of a freehand tool, you can still use straight edges to create straight lines and it does have some advantages when cutting curves and other shapes due to it’s freehand nature and selection of different blades.
Scoring and Breaking Acrylic
Cutting acrylic by scoring and breaking is a straightforward process when done correctly. Follow these steps to achieve precise results using a sharp knife or utility knife:
- Step 1: Mark Cut Line: Start by marking an accurate cut line on the acrylic using a suitable pen or marker.
- Step 2: Clamp Up: Ensure accuracy by clamping the acrylic securely to a solid surface, preventing any movement during the cutting process.
- Step 3: Score First Line: Place a straight edge along the marked cut line and score it using a sharp knife or utility knife. If the line isn’t perfectly straight, proceed slowly free-hand, ensuring you follow the markings accurately.
- Step 4: Repeat Scoring: Repeat the scoring process multiple times, cutting deeper with each pass until you’re almost through the material.
- Step 5: Break Scored Edge: Unclamp the acrylic and position the scored line over the edge of a solid object. Re-clamp it, and with a decisive motion, apply downward pressure on the scored edge to achieve a clean break.
- Step 6: Tidy Up: Use fine-grit sandpaper or a metal file to smooth and flatten the broken edge, creating a neat and polished finish.
By following these steps carefully, you’ll be able to score and break acrylic efficiently, resulting in accurate and clean cuts.
How to Cut Acrylic Using a Hand Saw
If you don’t have a jigsaw, a hand saw is a reliable alternative for cutting acrylic. Follow these steps for clean and accurate cuts, whether straight or intricate and detailed:
- Step 1: Mark the Cut Line: Begin by marking a precise cutting line on the acrylic using a pen or pencil.
- Step 2: Clamp Up: Securely clamp your acrylic sheet to a stable work surface, ensuring the clamping location allows the saw blade to move freely up and down during the cut.
- Step 3: Fix a Straight Edge: Clamp a straight edge along the marked cut line to guide the saw blade, ensuring a straight cut (unless intentionally creating an uneven cut).
- Step 4: Make the Cut: Position the saw blade on the cutting line and initiate the cut. Follow the line until you reach the end. For intricate or uneven cuts, proceed slowly and use both hands to guide the blade accurately.
- Step 5: Clean Up: Use suitable sandpaper or a metal file to smooth and refine all cut edges for a polished finish.
Cutting Acrylic with a Bandsaw or Fretsaw
When it comes to industrial or detailed cuts in acrylic, using a bandsaw or fretsaw is the way to go. These tools, equipped with high-speed blades and versatile cutting beds, make quick work of both straight and undulating cuts.
While these tools may require a bit of practice, once you get the hang of them, you’ll be cutting acrylic sheets quickly and accurately every time.
Keep in mind that various blades are available for both band and fret saws, and the type and size of the cut will determine the appropriate blade to use.
Whether you opt for a bandsaw or fretsaw, the cutting process is pretty much the same:
- Step 1: Mark the Cut: Begin by accurately marking your cut line on the surface of the acrylic. Use a suitable pen or marker for clear visibility.
- Step 2: Choose the Correct Blade: Before initiating any cutting, ensure that you have the right blade fitted to your saw, matching the type of cut you’re planning to make.
- Step 3: Attachments and Guides: For straight cuts, fix the fence guide to the saw bed, adjusting it to the correct distance that allows the blade to cut precisely along the marked line.
- Step 4: Make the Cut: Start the saw and position the acrylic sheet on the cutting bed. Gently guide it toward the blade until it touches the marked cutting line. Proceed to make your cut, working slowly and steadily. If making intricate cuts, you’ll be working freehand, so take your time and maintain control.
- Step 5: Clean Up: After completing the cut, use suitable sandpaper or a metal file to tidy up the cut edge, ensuring a smooth and polished finish.
CNC Cutting for Acrylic
When you require large-scale or highly intricate cuts, there’s no better option than utilising a CNC (computer numerical control) machine.
A CNC machine operates as a computer-controlled cutting system. Using pre-programmed instructions generated from CAD or similar design software, it employs various cutting tools such as lasers, routers, and even water jets to execute precise cuts in materials like acrylic, often with tolerances as fine as 0.1 millimetres.
Thanks to the flexibility offered by computer-aided design, the possibilities with CNC cutting are virtually limitless.
Operating such a machine requires extensive training and skill, making it inaccessible to individuals without proper training. Consequently, it’s not a DIY solution.
However, numerous companies across the UK specialise in CNC cutting services, albeit at a considerable cost, however if your requirements are precision and quality, investing in CNC cutting is well worth the expense.
How to Drill Holes in Acrylic or Perspex
Working with acrylic can be challenging, especially when drilling holes. Applying too much pressure or drilling at the wrong angle can lead to cracks, chips, or even melting of the material.
Using high-quality drill bits, such as HSS (high-speed steel) or titanium-coated ones, is crucial for successful drilling. These bits stay sharp and can handle multiple drilling tasks.
Before drilling, place a wooden block or sheet underneath the acrylic to prevent blowout, which can cause splitting or cracking when the drill bit breaks through.
Follow these steps to drill holes in acrylic:
- Step 1 – Measure and Mark: Use a pen or pencil to accurately mark the point where you want the hole.
- Step 2 – Drill Pilot Hole: Start with a small drill bit, about half the size of the desired hole, and insert it into the drill/driver.
- Step 3 – Lubricate and Drill: Apply WD40 to both the drill bit and the marked spot. Position the drill bit and engage the drill. Let the drill cut under its own weight without forcing it. If it gets stuck, switch to reverse to release it.
- Step 4 – Drill Larger Hole: Once the pilot hole is drilled, switch to a larger drill bit matching the desired hole size. Repeat the drilling process to enlarge the hole.
- Step 5 – Countersink: If the hole is for a screw or bolt, consider countersinking the hole for a flush fit. Apply lubricant, insert a countersink bit into the drill and turn on, allowing the bit to cut and create a bevel around the hole.
Cleaning up Acrylic and Perspex
After completing your cuts or drilling holes, the final step is to tidy up any rough edges. Cutting or drilling often leaves jagged edges or burrs, which not only affect the appearance but also hinder attempts to create solid glued joints.
Here are some popular tools for tidying up edges:
- Sanding: Use medium-grit sandpaper, around 180 grit, along with a flat sanding block if necessary, to sand down rough edges. Avoid using overly rough sandpaper, as it can damage surfaces accidentally brushed against. For a polished smooth finish, wet and dry sandpaper is ideal, as it buffs the sanded edge as you work.
- Metal File: A standard metal file works well for flattening and smoothing edges. Most files have a flat edge and a concave edge, suitable for various surface shapes. The thin side edges help reach tight areas.
After sanding and smoothing, if you need to restore transparency to the acrylic, you can use a buffing wheel attached to an electric drill.
With a high-quality cutting or polishing compound, the high-speed rotation of the wheel, and some elbow grease, you can bring any acrylic surface back to its transparent state.
How to Glue Acrylic or Perspex
When screwing or bolting acrylic isn’t feasible, gluing offers a reliable alternative. This method creates a strong, often permanent bond between two surfaces, making it a popular choice for various applications.
Here are some of the best modern glues used for joining acrylic:
- Tensol Cement: This glue is highly effective for acrylic bonding, creating virtually permanent joints. Apply the glue to the surfaces, press them together, and clamp them for 24 hours to achieve a strong, lasting bond.
- Contact Adhesive: Contact adhesives, like Evostick, provide strong bonds when applied to both surfaces and pressed together. Once dry, separating the bonded pieces becomes nearly impossible.
- Epoxy Resins: Brands like Araldite, a well-known brand of epoxy resin, consist of a two-part compound that hardens upon mixing. This adhesive can bond various materials, including plastics, and creates durable joints when clamped and left to cure.
- Super Glue: Cyanoacrylate, commonly known as super glue, offers quick bonding for plastics. However, it requires caution during use as it can bond skin instantly. Super glue is not recommended for use with children.
- Glue Guns: Glue guns are versatile tools for joining plastics. The melted glue, when cooled, forms a semi-permanent bond. Ensure to choose the right glue stick for the material being glued, as general-purpose sticks are commonly used.
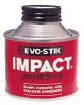
Evostik Contact adhesive for very strong adhesion
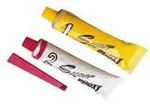
Epoxy resin two-part adhesive

Super glue

Glue gun for use with glue sticks
Ventilation is vital when using all these glues. Ideally an extractor should be used to extract all the dangerous fumes.
Using the right tools and techniques, cutting, drilling and gluing acrylic of any type is a fairly straight forward job, however you should always ensure you take your time and work methodically as this way, you will always achieve top results.