If you are new to DIY, in particular carpentry and joinery then you may never have encountered a jigsaw before or be aware of the unique way in which it operates, so in this guide we take an in-depth look at these very handy tools and how they are used correctly.
What is a Jigsaw?
A jigsaw is a power saw with a blade that moves up and down in a reciprocal or pendulum motion, unlike circular saws which rotate. This motion allows jigsaws to make both curved and straight cuts in various materials, including wood, metal, and plastic. For extensive straight cutting, it is better to use a circular saw.
Jigsaws are not ideal for straight cuts since the blade can bend, leading to beveled rather than square cuts. They excel in making curves and intricate shapes. To achieve a straight cut with a jigsaw, take your time, keep the base (or sole plate) flat, and avoid forcing the tool.
Jigsaws are particularly useful for detailed work and curves. They might sit unused for long periods, but when needed, there’s no better tool for specific jobs. Even if used infrequently, owning a jigsaw saves a lot of effort when intricate cutting is required.
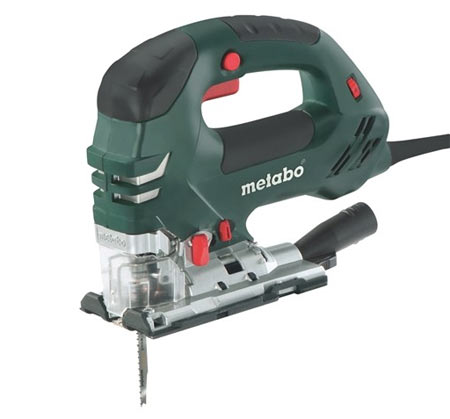
Metabo jigsaw with pendulum action
What to Look for When Buying a Jigsaw
Buying a jigsaw is not the same as buying a quality jigsaw! While jigsaws are versatile tools, the wrong one can complicate your work. Investing in a good jigsaw is worth the extra cost, as it can make your projects much easier and more efficient.
Blade Locks and Attachments
When choosing a jigsaw, the blade attachment method is crucial. Cheaper jigsaws often use a clamp tightened with a screwdriver or an Allen key. Avoid these models. The screw threads can cause sideways movement, making straight cuts difficult even with a guide. Additionally, the screw generally comes loose during use, leading to more movement, blade dropouts, breakage and inaccurate cuts.
Opt for a jigsaw with a blade lock and release system. These secure the blade firmly in place, ensuring better stability and precision during cutting.
Jigsaw with blade lock system
The Base or Sole Plate
The sole plate (or shoe in the US) of your jigsaw must be rock solid. This part is designed to adjust to different angles, but over time, even slight movement can lead to poor blade control.
If the jigsaw allows for angled or beveled cuts, ensure the sole plate locks firmly into position without any wiggle or other movement.
Visibility is crucial. Make sure you can clearly see the blade and cutting line. Some sole plates are joined at the front, limiting your view of the cutting marks. It’s much easier to follow your lines if you have a clear, unobstructed view.

Soleplate fixed to base of a Bosch jigsaw
Reciprocal Cutting vs. Pendulum Cutting
Cheaper jigsaws use a simple reciprocal cutting action, where the blade only moves up and down.
Higher-quality jigsaws feature a pendulum or orbital motion. This allows the blade to move forward and backward at an angle, in addition to the up-and-down motion.
This pendulum motion provides a more aggressive and faster cut. It also helps clear debris from the teeth after each stroke, preventing the saw from binding and burning the material. As a result, the saw cuts more efficiently, delivering cleaner and more accurate cuts.
Pendulum or reciprocal action control
How Powerful Should My Jigsaw Be?
A powerful jigsaw is crucial for maintaining a smooth, consistent cut.
Variable speed control is essential for cutting different materials. For example, cutting timber requires a different speed than cutting perspex, which can melt at higher speeds. The speed difference should be around 1000 strokes per minute.
For most DIY projects, a 600W jigsaw is sufficient. Professionals typically use tools with at least 720W for more demanding tasks.
Different Parts of a Jigsaw
Despite its simplicity, a jigsaw has several components and features that ensure it cuts materials cleanly and accurately. Understanding these elements is key to achieving the best results with your jigsaw.
Here is a rundown of the essential features you should know about:
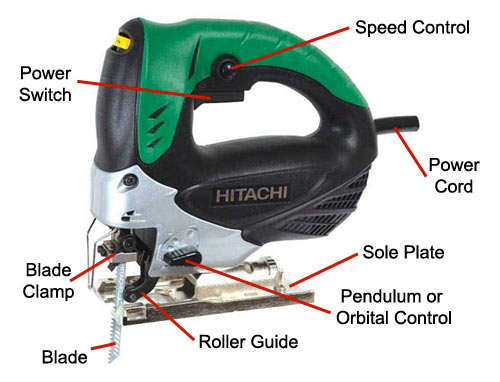
The different parts of a jigsaw
Blade and Blade Clamp
The blade is the cutting component of a jigsaw. It extends downward from the blade clamp, passes through the sole plate, and moves up and down to cut through materials.
Most jigsaw blades have teeth angled upwards, meaning they cut on the upstroke. Reverse cut blades, which cut on the downstroke, are also available but are less common.
To function properly, the blade must be securely attached to the saw’s drive gears and motor. This is achieved through the blade clamp, which comes in two main types: blade lock and screw clamp.
The blade lock system uses a spring-loaded catch to secure the blade. The blade is held firmly in place by internal notches until the catch is released.
The screw-type clamp involves inserting the blade into a slot and tightening it with screws. While this method works, it can loosen over time, leading to instability.
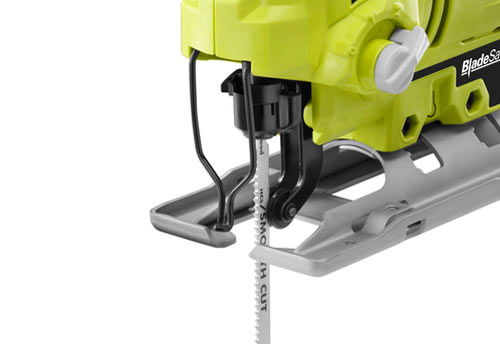
Blade Roller Guide
The blade roller guide is positioned between the sole plate and the blade clamp. It supports the blade, holding it steady during cutting.
This guide typically has a slight concave recess, allowing the blade to fit securely. This design helps keep the blade square to the material, preventing bending and ensuring accurate cuts.
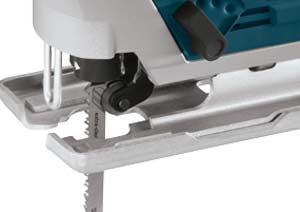
Roller guide and blade support for Bosch jigsaw
Sole Plate
The sole plate, also known as the shoe or baseplate, is the base of the saw that sits on the material being cut.
It keeps the blade at a 90° angle to the material, ensuring straight, efficient cuts.
Higher-end saws allow the sole plate angle to be adjusted for bevel cuts, using either a screw adjustment or a hand-twist lock.
For a quality jigsaw, look for a solid sole plate made of steel or aluminium, which provides durability and allows clear visibility of cutting lines.
Power Switch, Cord, and Speed Control
The power switch, cord, and speed control manage the saw’s motor and its operating speed.
A power cord is essential for mains-powered saws, with a recommended length of at least 1.5m for convenience.
Located below the handle, the power switch simply turns the saw on and off, with some models doubling as speed controls.
In certain saws, the switch also adjusts the speed: tighter grip for faster operation and looser grip for slower speeds.
The speed control dial typically ranges from 1 to 10, allowing adjustment for different materials, crucial for slower cuts like plastic and perspex to prevent melting.
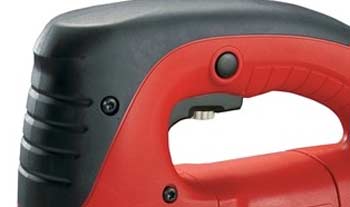
Jigsaw power on and off switch with integrated speed control
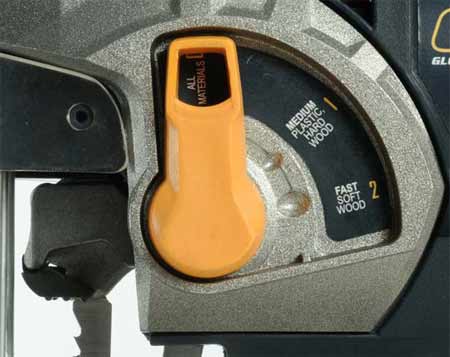
Pendulum or Orbital Action
Pendulum or orbital action, while not standard in every jigsaw, is a valuable feature.
When activated, the blade moves forward and backward in addition to its up-and-down motion, enhancing cutting efficiency.
The control lever typically offers up to 5 settings, determining the extent of the blade’s forward movement per stroke.
This backward movement clears debris, reducing strain on the saw by preventing jamming or binding.
Types of Blades
Blades are crucial. Cheaper ones dull quickly, straining the jigsaw motor and risking damage to both the saw and your workpiece.
Using the right blade matters. Cutting timber with a metal blade can lead to coarse cuts and splintering, compromising the finish.
Blades are designed for use with specific materials:
- Plastic, Perspex, Fiberglass
- Hard and Soft Woods
- Metal (including Aluminium and Steel)
- Masonry, Plaster
- Glass and Ceramics
- Thick Fabrics like Leather
Another thing to consider is the blade length; it should be slightly longer than the material thickness to prevent catching.
Longer blades are thicker and due to this, less suited to sharp curves; shorter blades are thinner and easier to manoeuvre.
The number of teeth per linear inch (TPI) determines cutting efficiency:
- More teeth cut harder materials, while fewer teeth are for softer materials.
- Higher TPI blades offer smoother cuts; lower TPI blades provide rougher cuts.
Blade teeth can be ground or milled; milled teeth are less sharp but cut faster, while ground teeth are sharper, ideal for softer materials.
Here follows the different types of blades available and what they should be used for:
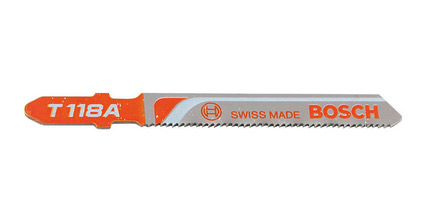
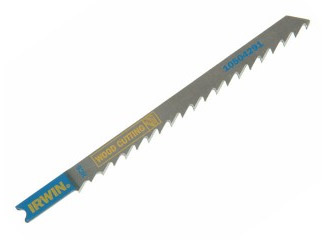
Softwood and Hardwood Blades
For optimal cutting results in softwood or hardwood timber, use the following blade types:
- Bi-metal or high carbon steel blade
- Reverse, side, or taper-shaped teeth
High carbon steel jigsaw blade
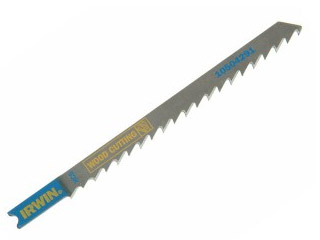
Plastic Cutting Blades
Cutting plastics and acrylics requires special attention to prevent melting and distortion due to high temperatures and friction.
For the best results, use a fine blade with ground teeth, preferably with at least 13 teeth per inch, or opt for a tungsten carbide blade. Set the saw to a slow cutting speed using the speed control dial, and take your time.
Consider applying masking tape over your cutting line to help prevent chipping, which can occur easily.
Jigsaw blade with high TPI count for fine cutting
Steel and Aluminium Blades
Whether cutting steel or aluminium, opt for a high-speed steel or bi-metal blade with a wavy or tapered tooth layout for best results.
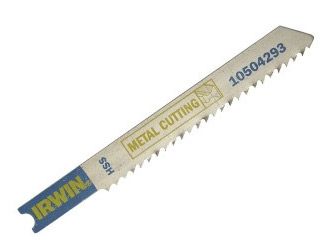
High speed steel jigsaw blade
Ceramic Tiles, Stone, and Masonry Blades
For cutting ceramic tiles or masonry, a specialised tungsten carbide-coated blade is essential. Unlike traditional blades, these feature a tungsten carbide coating resembling grit instead of teeth. This coating helps the blade wear its way through the material, preventing splintering and shattering.
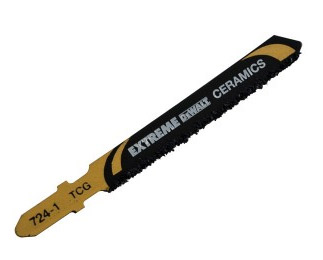
Tungsten carbide coated jigsaw blade
Types of Blade Fittings
There are two main types of blade fittings: the blade lock system and the screw and clamp.
Opt for a tool with a blade lock system (T-shank blades) as it securely holds the blade, unlike the screw-type clamp (U-shank blades) which tends to loosen over time. While the screw clamp may work initially, it wears down with age, requiring frequent tightening.
Below are images of each blade type and their corresponding fitting system for easy identification:
Screw and clamp U-shank type jigsaw blade
Blade lock system T-shank jigsaw blade
How to Use a Jigsaw
With all the essential information covered about jigsaws — how they function, what to consider when purchasing one, and which blade to use — it’s time to delve into how to actually use one.
Step 1: Mark Your Cutting Line
Before operating your jigsaw, accurately mark the cutting lines on your workpiece using a pencil or marker pen.
Measure and draw the lines, ensuring you note their position relative to any measurement marks. This is crucial to avoid cutting the object too small. Clear and visible marking is essential for precision.
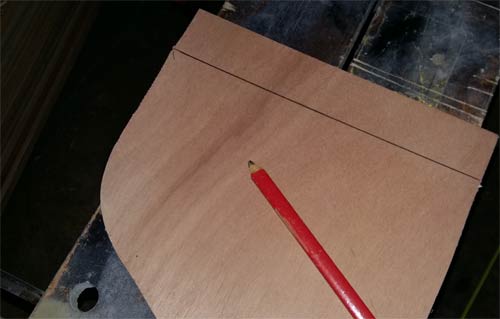
Cutting lines marked out ready for cutting with jigsaw
Step 2: Secure Your Work
To ensure precise cuts without movement or slippage, place your work on a flat, stable surface and secure it firmly with clamps.
Avoid any surface that isn’t completely flat or smooth, as it may cause the cut lines to fold or trap the blade, resulting in burning or splintering.
An ideal setup is a workbench or Workmate. If you don’t have one, consider building your own workbench.
Remember, the blade extends beyond the sole plate, so be cautious of anything below your workpiece to prevent accidents, such as accidentally cutting through your work surface.
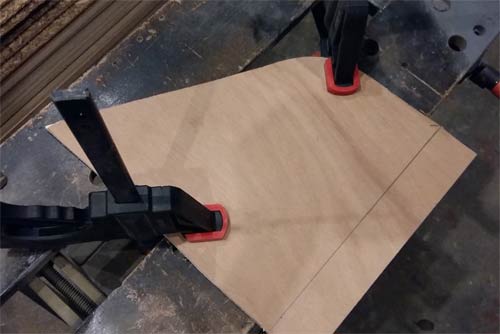
Item ready to cut clamped firmly to work bench
Step 3: Prepare and Position Your Saw
Begin by selecting the appropriate blade for your material and securely inserting it into the saw. Ensure the blade is firmly fixed and doesn’t move. If your saw is cordless, ensure it’s adequately charged.
If your cutting line starts at the edge of your material, position the front tip of the sole plate there, leaving about a 10mm gap between the blade and the start of the line.
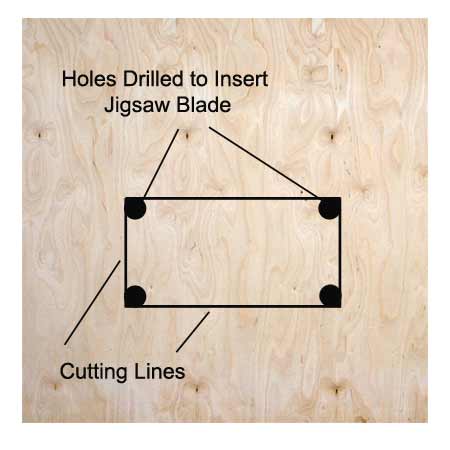
Starting holes drilled to enable jigsaw blade insertion for cutting
For mid-section cuts, drill a hole slightly larger than the blade diameter to insert the blade, making sure the hole is accurately drilled and start cutting.
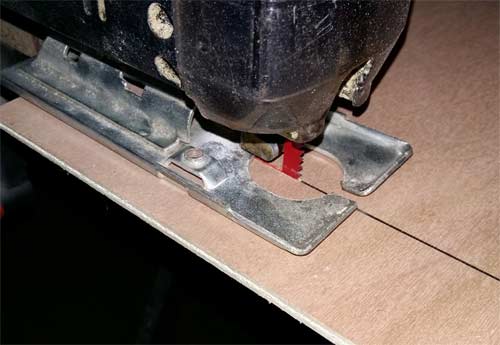
Gently engage the power trigger/switch to start the saw and gradually slide it up to the start of your line, allowing the blade to touch and initiate the cut.

Jigsaw positioned in front of timber ready to start cutting
Apply gentle, forward pressure to the saw, ensuring you follow the cut line accurately. Avoid forcing the saw, as it may lead to poor results.
Cutting along cut line with jigsaw
For sharp curves, make staged cuts by cutting lines through waste sections up to the cutting line, then remove them.
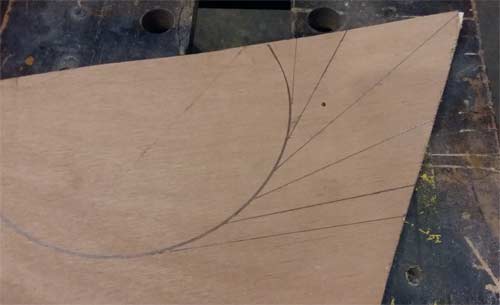
Staged cuts made to cut around complex shape that may be too tight for jigsaw blade
Adjust your workpiece as needed to ease cutting. Clamp it securely after moving.
When cutting plastics, keep the protective film intact to prevent scratches and damage.
Step 4: Finishing Your Cuts
With your cuts complete and your project ready, it’s time for a cleanup.
For timber, use sandpaper to smooth any rough edges. Use coarser grits like 120 for rough cuts and finer grits like 320 or 400 for smoother surfaces.
When working with acrylic or perspex, wet and dry sandpaper is essential for perfect edges. Wet the sandpaper, then sand gently, checking progress frequently to avoid over-sanding.
For metal, a file is the best tool. Start with a fine-grade file and follow proper filing techniques. Learn more about this in our using a hand file project.
Hopefully after reading through the above, you should be well voiced in how to use a jigsaw and select the correct blade for the material you are working with, and as long as you proceed with time and care, you are sure to get a great result.