
Damp and condensation can have several causes, which can sometimes make finding the exact issue and the right fix, a bit challenging.
Fortunately, there are clear visual signs that can help you identify what’s causing the damp. By spotting these early, you can choose the correct damp treatment and solve the problem before it gets out of hand. Below, we break down each individual issue, how to recognise it and then how to resolve it – for good!
Damp Is a Serious Problem Every Homeowner Should Tackle
Damp isn’t just unsightly, it affects your comfort, health and the structure of your home. Mould, mildew, rotting wood, tide marks, and stains are all common signs. Left untreated, damp can lead to costly repairs and ongoing health issues.
The Property Care Association highlights damp and condensation as major causes of property damage. Mould spores, in particular, are linked to allergies, breathing problems and some potentially very serious health issues.
Even if it seems like a minor issue now, damp can cause major long-term damage, like timber decay, full-room replastering, and even subsidence. If you’ve spotted cold spots or damp patches anywhere in your home act now and discover the root cause and fix it before it gets worse.
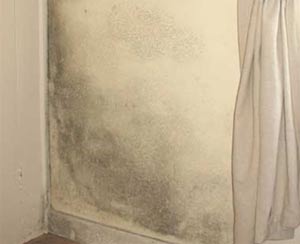
Damp encourages mould growth which can harm your health
Simple and Effective Methods for Testing Damp in Your Home
As we have suggested above, the very first step is to actually confirm that you have damp in your home. This can be done one of the following ways:
- Damp Meter: This is certainly our preferred method. This handheld tool measures moisture in walls, ceilings, and floors. Just press the probes into the surface, if the reading is high, you may have a damp issue. Great for pinpointing the worst areas quickly.
- Hygrometer: A hygrometer measures the moisture level in the air. Readings above 60% indoors can indicate problems with condensation, especially in kitchens, bathrooms, or poorly ventilated rooms.
- Thermal Imaging or Infrared Temperature Gun: These devices detect temperature differences on wall surfaces. Cold patches often signal damp spots, as wet areas lose heat faster than dry ones.
- Back of Your Hand: A basic method if tools aren’t available. Damp areas often feel cooler or clammy to the touch. This is less reliable but can still give a rough idea.
- Visual Clues: Check for mould, bubbling paint, tide marks, black spots, crumbling plaster, or staining, these signs usually indicate damp or moisture problems inside the wall.
- Smell for Mustiness: Damp often creates a musty or earthy smell, especially in closed-off areas like under stairs, behind furniture, or near skirting boards.
- Tape/Tin Foil Test for Condensation: Stick clear tape to the inside of a window or cold wall overnight. If water collects behind it, it’s likely condensation, not rising damp or a leak. The same can be done by taping a piece of aluminium foil to a wall
- Check Exterior Walls and Ground Levels: Look outside for blocked gutters, damaged render, or high soil levels against walls—these can let moisture seep in and mimic rising damp indoors.
- Monitor Over Time: Re-test the same area after a few days or after rainfall. Persistent high readings suggest a deeper, ongoing damp issue that needs proper treatment.
How to Check If a Wall Is Damp Using a Meter
Due to it’s relative cheap costs, the best and most comprehensive method for damp testing is to use a damp meter and a hygrometer.
To accurately check for damp in your home, use a damp meter for walls and a hygrometer to measure air moisture. These tools give clear readings and are far more reliable than guessing by touch.
If you don’t have a meter, as said, you can try using the back of your hand to feel for cold and damp patches, but this method is much less accurate.
Hygrometers are especially useful for spotting condensation problems as they show humidity levels in the air, helping you identify whether damp is coming from excess moisture indoors.
You can also use a wall temperature gun to detect cold spots. Cold areas may indicate damp, as wet walls lose heat up to three times faster than dry ones.
Damp can have multiple causes. One of the best ways to identify the source is to examine the visible signs, like staining, mould, or crumbling plaster and work backwards from what you see.
Each type of damp damage usually points to a specific cause. Below, we’ll walk you through the most common signs and what they likely mean.
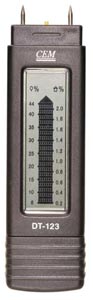
Use a damp meter to find out if your damp patch is actually damp
Once you have run the above suggested tests and have confirmed that you do indeed have a damp issue in your home the next task is to then identify the cause of the issue and get it fixed.
Below we have detailed all of the most common damp issues, their causes and also, more importantly, how to fix them for good – Read on!
Condensation – Causing Black Mould
First on the list and one of the most common occurrences in UK homes due to the amount of rain and humidity we get is condensation and it’s resulting compatriot, back mould.
Understanding the Issue of Black Spot Mould
Black mould is most often caused by condensation. When warm, moist air hits a cold surface, like a wall or window, it cools down, releasing water as condensation.
This moisture collects on surfaces, making them damp. Damp areas lose heat faster, stay colder, and attract even more condensation, creating a cycle that worsens over time.
These damp, cool conditions are perfect for mould growth, especially in places with poor air circulation like corners, behind furniture or near windows. Ensuring every area of a room is well ventilated is absolutely key.
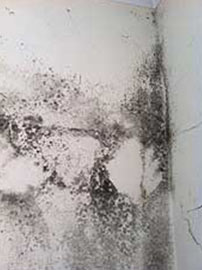
Condensation can cause black mould growth, among other things
How to Get Rid of Black Spot Mould
Start by removing visible mould using a specialist anti-mould cleaner. This quickly tackles the immediate issue on walls and ceilings. Only a good quality cleaner will kill all the spores present.
Next, wipe away any condensation from windows, walls, and other surfaces. Always dry wet cloths outside, drying them indoors adds more moisture to the air and worsens such problems.
Fix the cause of condensation before making permanent repairs. If not, mould will quickly return, even on newly treated surfaces.
For a long-term solution, strip off the affected plaster, clean the bare wall with anti-mould cleaner, and then replaster using appropriate materials.
To stop mould coming back, use anti-mould paint or add a mould-resistant additive to your wallpaper paste during redecoration.
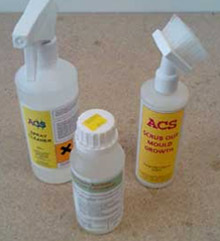
Use some mould cleaner to remove the mould from your walls
High Air Moisture Content
Next up and again a very common occurrence in UK homes is high levels of moisture present in the air. This causes a whole range of issues, so pin-pointing the exact cause can sometimes be a little tricky. This is also a key-cause of condensation issues!
As stated, first test with a hygrometer to prove the existence of increased moisture. Once you know this, you can focus your efforts on getting to the root cause!
Here below we have listed out the most common causes of high air moisture content and how to effectively reduce them:
Improve Ventilation and Add Draught Proofing
For a long-term solution to condensation, proper ventilation and draught proofing are essential.
Install trickle vents in your windows and keep one open to allow fresh air to circulate. They’re simple to fit, see our Trickle Vents guide for step-by-step instructions.
If trickle vents aren’t an option, open a window slightly whenever possible to keep air moving. If you can do this on opposing sides of you home this will create a through-draught, improving air flow.
Check for blocked air bricks or vents. If they’re covered or sealed, uncover them to improve airflow throughout the room.
Unused chimneys can also cause condensation. Avoid leaving them fully open or completely sealed. Instead, install a chimney cowl to allow airflow while keeping rain out, or replace chimney pots with a raised slab to achieve the same effect.
If your fireplace is bricked up, fit an airbrick into the wall above floor level, ideally around 30cm up, to ventilate the chimney void and prevent damp and moisture buildup.
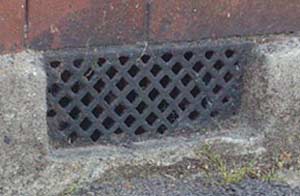
Uncover or install air bricks to increase airflow in your room
Insulation and draught proofing also reduce condensation by keeping internal walls warmer, which makes surfaces less likely to attract moisture.
Start with your loft and loft hatch. Correctly installed insulation here is one of the most cost-effective ways to keep heat in and bills down.
Use the right insulation thickness and seal the hatch with suitable draught-proofing strips (see more at the Energy Saving Trust.
Draught proof windows and doors too. Gaps here can cause cold spots, leading to condensation. Use appropriate draught-proofing materials to seal these areas, but make sure windows have trickle vents or other forms of controlled ventilation to maintain airflow.
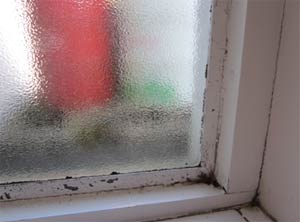
Draught proof your windows and doors to reduce condensation
Add Cavity Wall Insulation
Cavity wall insulation helps reduce heat loss, keeps rooms warmer, and lowers the risk of condensation by ensuring your walls maintain a set temperature.
First, check if your home has cavity walls, properties built after the 1930s usually do. If unsure, consult a professional.
Only hire qualified, reputable installers. Poor insulation work can lead to damp issues and costly repairs.
To find trusted professionals offering a 25-year guarantee, visit the Cavity Insulation Guarantee Agency (CIGA) website.
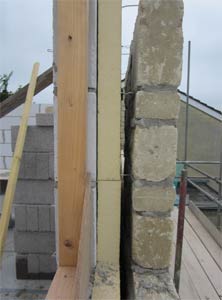
Insulate your cavity walls to minimise condensation
Maintain a Low, Steady Heat in Colder Months
Keeping your home warm during winter can help prevent damp and moisture problems. OFTEC offers expert advice on heating systems.
Use low-level background heating in all rooms, even unused ones. This keeps indoor temperatures stable and stops any condensation from forming on cold surfaces.
Modern heating systems are efficient and can actually save money. In many cases, maintaining a steady temperature is cheaper than heating a cold home from scratch.
If you don’t have a modern system, consider a thermostatic electric heater. Avoid bottled gas or paraffin heaters, they release excess moisture into the air and make damp problems worse.
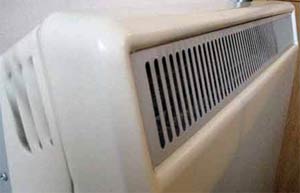
Having the heating on consistently will minimise condensation
Reduce Moisture from Everyday Activities
Daily routines like cooking, showering, and drying clothes add a lot of moisture to your home, leading to damp and condensation.
When cooking, keep lids on pans and kitchen doors closed to trap steam. Use an extractor fan if available to vent it externally.
Dry clothes outside whenever possible. If drying indoors, use one room (like the bathroom), keep the door shut, and open a window for ventilation.
Ensure tumble dryers vent outside, either through a window or a wall vent.
For showers and baths, keep the bathroom door closed and the window slightly open. Always use an extractor fan and check it’s clean and working efficiently.
Rearrange Your Furniture to Improve Airflow
Good air circulation helps stop condensation. When air sits still, especially in cold areas, moisture is more likely to settle and cause damp.
Keep furniture like wardrobes, sofas, and dressers at least a few inches away from walls. This small gap allows air to flow and reduces cold spots where mould can form, sometimes even inside cupboards and wardrobes.
Low Air Moisture Content – Issues Isolated to Specific Areas
If condensation appears only in certain spots, it’s often because those areas are colder than the rest of the room. Moisture in the air naturally settles on cold surfaces.
Draught-proofing windows and doors helps, but cold patches on walls can be harder to fix and usually happen for several reasons.
To check, use a thermal or infrared thermometer. Compare the suspected cold spot with a warmer part of the wall. If there’s a noticeable difference, it could be a cold bridge or poor insulation.
Rusty or Blocked Wall Ties
Wall ties are metal connectors inside cavity walls that hold the inner and outer layers of the wall together. If they get clogged with mortar during construction, or collect debris over time, they can transfer moisture from the outer to the inner wall, making it cold and damp.
Rust is another issue. As wall ties corrode, they expand and can crack the mortar they’re embedded in. These cracks let cold air into the cavity, cooling the internal wall and increasing the risk of condensation and damp.
You can check for wall ties behind cold patches using a metal detector. If you find one, carefully remove a brick nearby (never more than two without professional advice). Follow our step-by-step guide on how to safely remove a brick.
If the tie is dirty, clean it and replace the brick. If it’s rusty, it must be replaced. See our full guide on how to replace a wall tie.
Debris Inside Your Cavity Wall
Cavity walls must stay clear of debris. During construction, leftover rubble or waste is sometimes trapped inside. This can allow moisture to pass from the outer external wall to the inner wall, leading to internal damp patches.
To check, remove one or two bricks from the external wall opposite the damp area indoors (never remove more than two without expert advice). Follow our step-by-step guide on how to remove a brick.
Shine a torch into the cavity. Carefully remove large debris by hand, wear thick gloves for safety. For smaller particles or dust, use an old vacuum cleaner to clean out the entire area.
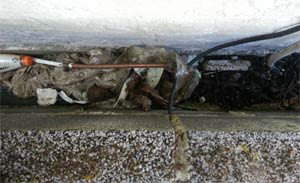
Debris in your cavity is a common cause of cold spots and condensation
Poor or Missing Cavity Wall Insulation
Gaps or missing sections in cavity wall insulation can cause cold spots, making walls more prone to condensation and damp.
If you suspect this is the issue, contact a qualified installer to assess it. You can find trusted professionals on the CIGA website.
Unfortunately, patching rarely works. In most cases, the existing insulation must be fully removed and replaced to solve the problem properly.
Cracked Mortar or Damaged Bricks
Cracks in mortar or damaged bricks can let in cold air and moisture, leading to damp and cold walls indoors.
Bricks can also suffer from spalling, this happens when water soaks into the bricks and then freezes, causing the surface to flake off over time. As the brick erodes, your walls become more vulnerable to rain and damp.
To fix this, repoint any cracked or missing mortar. You can do this yourself using our Brick Repointing Guide, or hire a professional.
If bricks are broken or spalling, replace them. Follow our Brick Replacement Guide for step-by-step instructions.
To prevent future spalling, apply a breathable brick waterproofer to protect against moisture without sealing in damp. Note, it has to be breathable!
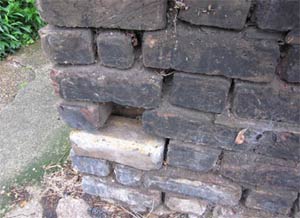
Missing or broken mortar can allow water into your wall, causing damp
Excess Water Soaking Into Exterior Walls
Even solid brickwork can let water in if exposed to heavy or constant rain. Over time, this moisture can seep through to your internal walls.
To protect your home, apply a high-quality, breathable brick waterproofer. This blocks new moisture from entering while still allowing trapped damp to escape safely.
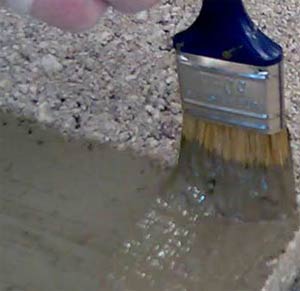
Apply a breathable waterproofer to protect your bricks or masonry from damp
Low-Level Damp – Rotting Skirting, Tide Lines etc (no more than 1.4m from ground level)
We now get on to low-level damp issues. These are damp issues that occur on or around the skirting board area,or low level on walls, no higher than 1.4m from ground level.
This is the limit of capillary action, where water and moisture can naturally rise up a wall, so indicates that the origin of the issue resides low down on or around floor level.
Issue With Rotting Skirting, Damp Stain or Tide Line
If you’re seeing tide marks, damp stains, or decaying skirting boards, your damp-proof course (DPC) may be failing.
The DPC is a waterproof barrier, typically fitted about 150 mm (6 in) above ground, to block moisture rising through walls.
Older homes (pre‑20th century) often lack a DPC. As buildings became more airtight, rising damp that could once evaporate now stays trapped.
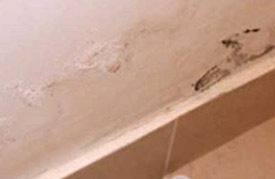
Rising damp often leaves a tide mark above the skirting boards
Early DPCs were made from slate or stone, later replaced by polythene, bitumen, felt, or even engineering bricks. These barriers stop moisture and salt from climbing up through walls.
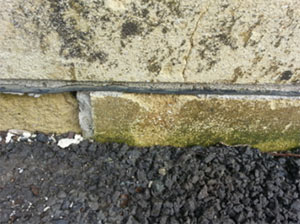
A sound damp-proof course protects your walls from rising damp
DPC failure happens in two main ways:
- Material damage: Old DPC layers can crack or split with age.
- Bridging: Soil, decking, paving, or debris touching the wall can bypass the DPC—letting moisture flow directly up, around and into your home.
This issue is worse in modern, airtight homes since moisture can be trapped inside materials and without the natural airflow that occurs in many older homes, making it difficult to remove.
Fix for Rotting Skirting, Damp Stain or Tide Line
Seeing damp stains or rotting skirting? It’s likely due to a damaged or bridged damp-proof course (DPC). Here’s how to check and fix it.
Step 1: Inspect the DPC
Check your external walls for a visible DPC about 150mm (6 inches) above ground. Look for cracks, splits, or missing sections. If it’s damaged or absent, it could be the cause.
Step 2: Fixing a Faulty DPC
- Traditional replacement: Bricks are removed and the DPC is replaced, best done by professionals due to cost and complexity.
- DIY chemical DPC: Drill holes at 125mm intervals in affected walls and inject DPC cream (e.g. Permaguard, Twistfix). The cream spreads and sets to form a new waterproof barrier.
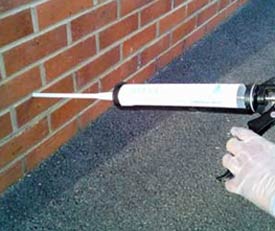
Inject a new DPC easily yourself using a chemical DPC cream
Step 3: Check for DPC Bridging
Ensure the ground level is at least 150mm below your DPC. Soil, paving, steps, or even conservatories can bridge the DPC and allow moisture to rise.
If lowering the obstruction isn’t possible, install a new chemical DPC just above it to block moisture.
Step 4: Investigate the Wall Cavity
If no external bridge is found, debris inside the cavity may be the issue. Remove 1–2 bricks at ground level opposite the internal damp area (see our How to Remove a Brick guide) and inspect the cavity using a camera or phone.
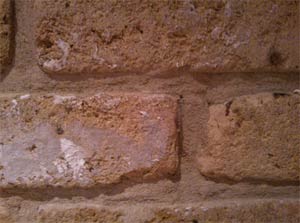
Remove bricks to check for debris in the cavity
Wear thick gloves and remove any debris by hand or with a scraper. Refit bricks with mortar once the cavity is clear.
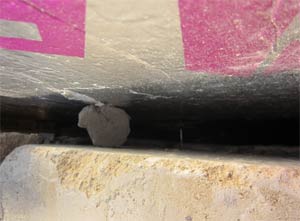
Clear out any debris using gloves and basic tools
Step 5: Check Neighbouring Properties
Damp can also come from adjacent buildings. Ask neighbours if they’ve raised floor levels, filled basements, or built extensions. These changes might bridge your DPC and be the cause of your problems.
As you are or maybe dealing with neighbours, it goes without saying that you should tread carefully as the slightest disagreement can cause huge issues.
Step 6: Repair Internal Damage
Once the source is fixed, strip any damaged plaster and let the wall fully dry. Use salt-neutraliser on bare walls and consider anti-mould primer or emulsion before repainting.
White Salting – On Walls, Lifting Wallpaper, Flaking Paint
Next up is white salting appearing on your walls that lifts your wallpaper and also blows and damages paint and plaster.
These salts are often naturally occurring salts that are drawn out through the wall by water and moisture or as many of them are hygroscopic (moisture attracting), actually such water and moisture from the surrounding air.
Issue With Patches and/or White Salts
Noticing white salts or damp patches across your wall, not just at the bottom? This usually points to penetrating damp from outside damage, not rising damp.
When water gets into walls, it draws out natural salts found in bricks and plaster. As the moisture dries, white powdery or crystalline deposits are left on the surface.
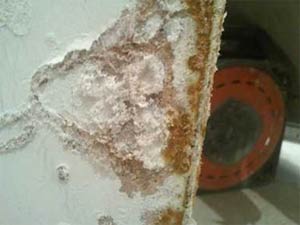
Salt crystals are a sign that moisture is entering your walls
There are a few different types of salts and these are as follows:
- Crystalline salts: Large, crunchy deposits caused by penetrating damp.
- Hygroscopic salts: Smooth white stains that pull moisture from the air, often found around chimney breasts.
If patches appear and disappear with humidity, they’re likely hygroscopic salts. These attract moisture from the air and can keep walls looking damp, even when there’s no active leak.
As they are often caused through the burning of fossil fuels, they are most commonly found on or around chimney breasts.
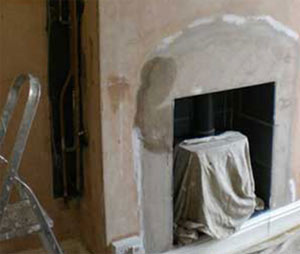
Hygroscopic salts in chimney breasts can create persistent damp patches
In order to resolve salting issues, work through the following steps:
1. Check Brickwork and Mortar
Look at the external wall opposite the affected area. Cracked bricks or crumbling mortar can let water in. If mortar is damaged near a wall tie, it may have rusted and expanded.
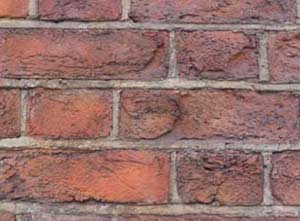
Cracked mortar or bricks are common entry points for damp
Use a metal detector to locate wall ties. If they’re near cracks, remove one or two bricks (no more) to inspect the tie for rust or debris. See our brick removal guide.
If ties are rusty, follow our wall tie replacement guide. Clean off any debris that may be bridging the cavity.
2. Inspect Your Roof, Chimney, and Gutters
Roof damage and faulty gutters are often common causes of penetrating damp. Look for:
- Missing or broken roof tiles
- Cracked flashing around the chimney
- Leaking gutters or joints
Use binoculars or a drone for a safe ground-level inspection. Avoid climbing unless you’re trained, as falls can be dangerous and costly.
Tip: Inspect gutters during rain, you’ll spot leaks and overflows more easily.
Fix for Patches and/or White Salts
If you find cracks, splits, or damage to your walls, roof, or guttering, they’ll need repairing to stop moisture from getting in and causing damp and salting issues.
1. Repair Brickwork and Mortar
Cracked mortar can be raked out using a small chisel or mortar rake and refilled with fresh mortar. For step-by-step help, see our How to Replace a Brick guide.
2. Replace Broken Roof Tiles
Any cracked or missing tiles should be replaced. A helpful roof tile repair video by Russ Richards covers the basics.
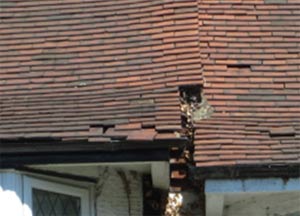
Replace damaged roof tiles to prevent water ingress
3. Fix or Replace Damaged Flashing
If your roof flashing is cracked or missing, it can be repaired with waterproof flashing tape. For long-term results, full replacement is best, though more costly due to the price of lead.
Full repair instructions can be found in our Repairing Lead Flashing project.
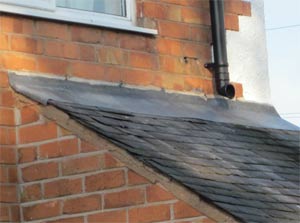
Seal or replace flashing to stop water seeping into walls
4. Repair or Replace Leaking Gutters
Gutters often snap together, making parts easy to remove and replace. For a full breakdown of gutter parts, visit our Plastic Gutters guide.
Leaking joints may be caused by a broken or missing bracket. Adding or replacing brackets helps support the weight of water and prevent joint failure.
While silicone can be used to seal small holes or splits, it’s a short-term fix. For a permanent solution, replace any damaged sections.
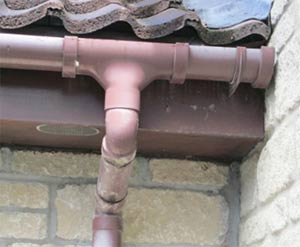
Fix cracked guttering to protect your walls from rain exposure
5. Apply External Wall Waterproofer
If your walls are sound but exposed to heavy rain, apply a breathable waterproofing treatment. This allows trapped moisture to escape while protecting against new water ingress.
6. Remove and Treat Damaged Internal Plaster
Damp and salt deposits often damage internal plaster. These salts can break through render and paint, ruining the surface.
To fix this properly:
- Strip plaster from the affected area and at least 400mm around it
- Let the wall fully dry
- Apply a salt neutraliser (some plasters also include this)
- Replaster once the wall is completely dry
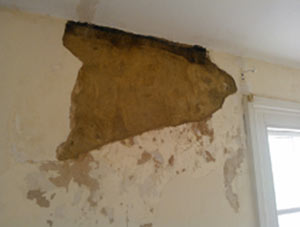
Strip and treat plaster affected by salts for a lasting fix
Allow new plaster to dry thoroughly, this may take 2 to 3 months. Painting too soon can cause the finish to fail.
7. Add a Membrane for Persistent Salt Issues
Note: If heavy salt build-up returns even after using a neutraliser, you may need to install a mesh membrane before replastering. This forms a barrier between salts and your new surface. Learn how in our How to Line Damp Walls guide.
Damp Around Chimney Breast – Yellowy Brown Stains Appearing and Disappearing
If you are experiencing yellowy-brown staining on or around your chimney breast, this can often be mistaken for salting or some other similar issues that we have detailed above, however when present around a chimney, there can be several other potential causes that may need investigating.
Issue With Damp around Chimney Breast
Damp patches near a chimney breast often look similar to rising or penetrating damp, but they have a few unique causes, mainly linked to tars and salts left behind through the act of burning fossil fuels like coal or wood.
When fuels burn, they release minerals and tar residues. These sticky byproducts settle inside the chimney and, over time, can seep or be drawn through the chimney breast, especially if moisture gets in.
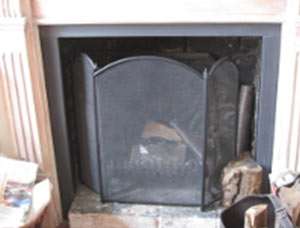
Tar stains caused by burning fossil fuels can soak through chimney walls
The most common sign is brown or yellowish staining on internal walls near the chimney. These marks are often worse during damp or humid weather and may fade when the air is dry.
This change suggests the presence of hygroscopic salts, salts that pull moisture from the air, making the damp issue look worse in certain conditions.
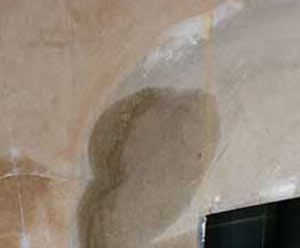
Hygroscopic salts draw moisture from the air, causing temporary damp patches
These salts may also be left over from past building use. Properties that were once butchers, coal stores, or had open fireplaces are more likely to have salt-contaminated walls and be subject to issues such as these.
Fix for Damp around Chimney Breast
Start by checking for external leaks. Look for cracked roof tiles, damaged flashing, or gaps in chimney mortar that could be letting in water and causing damp patches or salt stains inside your home.
If you spot damage, repair it first. Then let the affected area dry completely, however this may take several weeks, depending on the severity, weather and time of year.
Once dry, inspect the internal wall. If paint is peeling or the plaster is crumbling, the salts have likely soaked into the wall. In that case, carefully remove all damaged plaster, yes, even if it seems extreme.
After stripping the plaster and allowing the wall to dry fully, apply a salt neutraliser. This helps stop salts from drawing moisture back into your new surface.
Once treated, replaster the area. Make sure it dries completely (which can take 2–3 months) before painting or decorating to prevent future issues.
Isolated Damp Spots on Walls
Occasionally you may be subject to isolated damp spots on your walls and there can be several causes for this.
Issue With Isolated Damp Spots
Noticed a single damp patch on a wall or ceiling? Issues such as these are usually caused by one of two things: either penetrating damp from outside or an internal water leak.
If the issue is on an exterior wall, check for cracks, damaged brickwork, or faulty pointing. These can let rainwater seep in, see our Salts section above for tips on diagnosing and fixing this.
If the wall is internal or near plumbing, it could be a leaking pipe or joint. In that case, trace the water source and repair the leak promptly to prevent further damage.
Fix for Isolated Damp Spots
To fix a single damp spot, first check for a hidden water leak, either underground or within your drainage system.
Contact your local water authority to inspect your mains supply. They can often run a free pressure test to detect leaks, even from neighbouring or uphill properties. They may also test the water to confirm whether it’s from mains, waste, sewage, or natural groundwater.
If it’s a mains water leak, your water authority will need to handle repairs, but the process can vary depending on their terms and responsibility.
You can also carry out simple checks yourself:
- Check foul drainage: Find your inspection chamber (manhole), lift the cover, and run a tap to identify your drainage channel. Block it with a bung (available from hire shops), fill a sink, and mark the water level. Leave it overnight, if the level drops, there may be a leak. Don’t forget to remove the bung afterward!
- Use a drainage dye test: Add non-toxic dye (available from DIY stores) to external drains following the instructions. Then flush with water. After dark, inspect your property, glowing dye outside drain routes can reveal the leak’s location.
To accurately locate a damaged pipe, hire a professional drainage surveyor. They use cameras to inspect underground pipes and pinpoint leaks quickly and precisely.
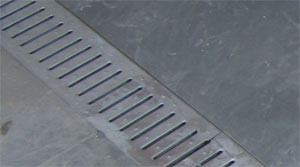
Add dye to your surface drain to detect any leaks in your system
Damp Floors
A damp floor in your home is an absolute nightmare to have to deal with and as you may imagine, often the cause comes from the ground below, so this is often a good place to start.
Issue With Damp Floors
Damp floors can range from slight moisture to full-blown puddles. To find the cause, start by checking outside your home.
Look for signs of water pooling near your external walls, especially after rain. Check if your damp-proof course (DPC) is damaged or blocked. If you live on a slope, water runoff from uphill properties could be a factor to consider.
Also, inspect neighbouring buildings, excess water from their property could be affecting yours. Identifying the source is the first step in fixing floor damp effectively.
Fix for Damp Floors
If your damp-proof course (DPC) is damaged or missing, install a new one using a chemical DPC cream. This involves injecting the cream into drilled holes along both internal and external walls. See our guide on fixing rising damp for full instructions.
Damp floors can also be caused by underground leaks. Water may seep up through the soil from broken pipes under your home or from a leak in a neighbouring property.
To check, follow the leak detection steps outlined earlier. Identifying and fixing the source is key to solving floor damp for good.
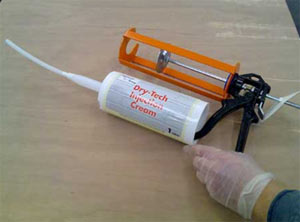
Inject a chemical DPC cream into your walls to install a new Damp Proof Course
Damp Area Around Window and Door Frames
Any form of opening in a building can be allow water, moisture and cold to enter so it’s essential that any doors or windows are maintained to a high level.
Issue With Damp Around Windows and Doors
Damp, mould or cold patches near windows or doors often point to water entering your wall. A common cause is gaps between the frame and wall, allowing moisture to get inside.
If your window or door is installed in a cavity wall, the issue may be due to a missing vertical damp-proof course (DPC).
A vertical DPC acts like a waterproof barrier. It’s fitted between the inner and outer layers of a wall, especially where the cavity is closed around window or door frames, to stop water from the outer wall soaking into the inner wall.
Without this barrier, moisture can bypass the cavity and cause damp problems indoors.
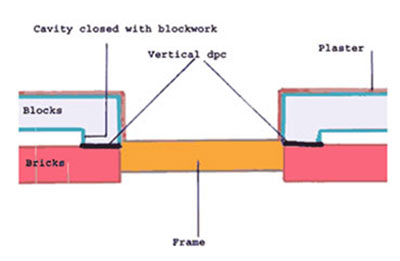
A vertical DPC stops damp from crossing a closed cavity around a window or door frame
Fix for Damp Around Windows and Doors
If damp is caused by gaps between the window or door frame and the wall, seal them with exterior-grade filler or sealant to block water entry.
To maintain airflow, install a trickle vent in your window. This helps prevent condensation without needing to open the window.
If the problem is due to a missing vertical damp-proof course (DPC), you’ll need to fit one retroactively. This is a complex job and usually requires the skills of a professional tradesperson.
For better protection, choose a vertical DPC with built-in insulation. This not only blocks moisture but also reduces cold spots that cause condensation and mould.
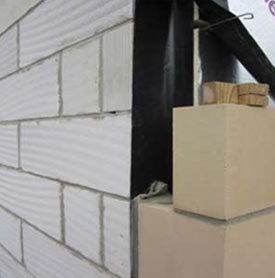
Fit a vertical DPC around your windows or doors if you don’t already have them fitted
It can sometimes be a very tricky job to diagnose damp and the causes of damp issues but once you get to the bottom of it and get the root cause fixed, this will help to ensure your home is safe and dry and free from any future damp and the problems that problems that they bring.

 DIY Doctor Ltd,
  0845 6342 179


