
Mortice latches are one of the most widely used types of door hardware for both internal and external doors. They work as a simple catch mechanism, operated by handles on either side, to keep a door securely closed and easy to open.
Also known as a tubular latch, this type of fitting is straightforward to install, making it ideal for DIY projects. However, you will need basic carpentry skills to accurately cut recesses into both the door and frame for a neat, secure fit.
Mortice latches are typically installed when fitting a new door. If you’re working on a full door installation, read our step-by-step guide on how to hang a door for additional help.
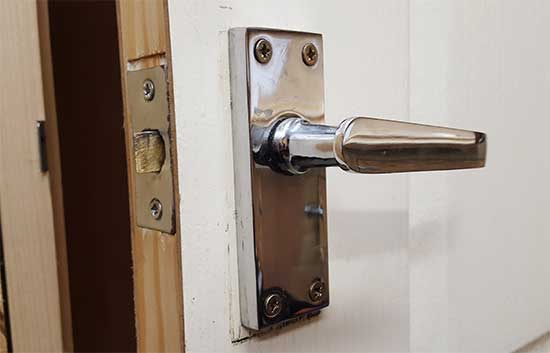
Example of a standard mortice (tubular) latch installed on an interior door
What is a Mortice Latch and How Does it Work?
A mortice latch (also called a tubular latch) is a simple mechanism that keeps a door closed using a spring-loaded catch and a metal plate, known as a keep, fixed to the door frame.
When the door shuts, the angled edge of the latch slides over the keep and clicks into place. A spring inside the latch pushes the catch outward, holding the door firmly closed without needing a lock.
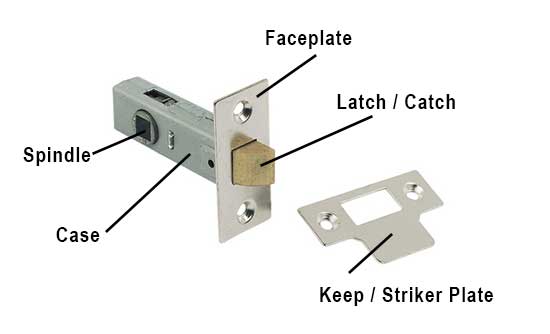
Key parts of a mortice latch, including the casing, latch bolt (catch) and spindle hole
To open the door, turning the handle or knob rotates a spindle (a square metal bar) inside the latch. This action pulls the latch back into the casing, releasing it from the keep so the door can open.
When the handle is released, the spring pushes the latch back out, ready to hold the door closed again.
The latch is designed with a sloped back edge for smooth closing and a flat front edge to stop the door from being pulled open without using the handle.
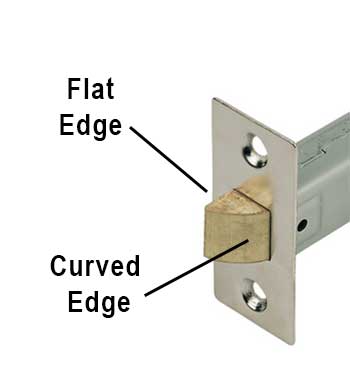
Curved and flat edge of a door latch or catch
What Different Types of Door Latch are There?
Now you understand how a mortice (tubular) latch works, it’s important to know the different types available before you choose one for your project.
At first glance, most door latches look very similar. In many cases, the size and shape are almost identical, which can make choosing the right one confusing for beginners.
The key differences come down to build quality and internal components. These affect how smooth the latch operates, how long it lasts and how well it holds the door closed over time.
Budget / Economy Door Latch
Budget door latches are the most affordable option, but they offer the lowest performance in terms of strength and lifespan.
They are typically made from lower-grade metals and may include plastic parts, which can wear out or fail much more quickly with regular use.
If you need a low-cost, short-term solution, these latches can do the job. However, for long-term reliability, it’s often worth investing in a higher-quality option.
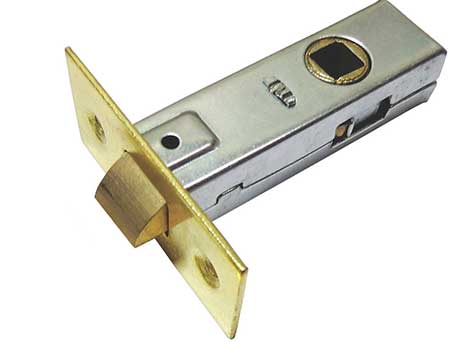
Budget quality door latch
Standard Quality Door Latch
A standard door latch is a reliable, all-round choice for most home and DIY projects. It offers a good balance between cost, durability and performance.
Made from better-quality materials than budget options, these latches are designed to last considerably longer and cope with regular daily use.
While they may not be as smooth or long-lasting as premium models, they provide dependable performance for most internal doors.
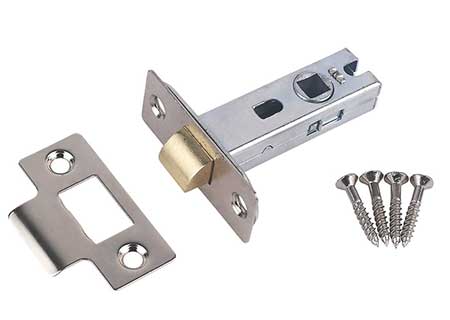
Middle of the road or standard quality door latch
Dual Spring (Double Sprung) Door Latch
A dual spring door latch is a high-quality option designed for smoother operation and longer life. It uses stronger materials and improved internal parts compared to standard and budget latches.
This type of latch features two springs, one for the latch and one for the spindle. This design allows the door to close more smoothly and ensures the handle returns neatly to its original position after use.
The result is a more solid feel, quieter closing action and improved reliability, making it ideal for doors in high traffic area.

Dual spring or double sprung door latch
Top Quality Heavy Spring Door Latch
A heavy spring door latch is a premium choice, built for maximum durability, strength and smooth performance. It uses high-grade materials and robust construction for long-term reliability.
The key feature is a powerful return spring, which delivers a firm, smooth closing action and keeps the latch working consistently over time.
This stronger spring also ensures door handles and knobs always return to a straight, level position, even if the handles themselves don’t include a return spring.
Ideal for high-traffic areas, this type of latch offers the best performance and longest lifespan of all the numerous latch options.
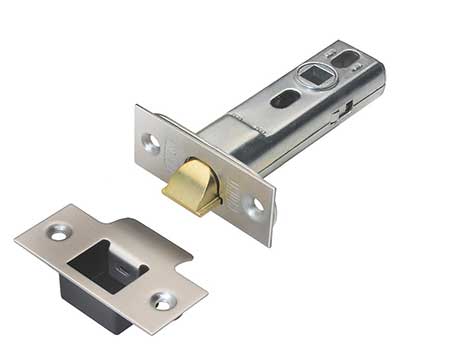
Top quality heavy spring door latch
What Sizes of Door Latches are There?
Choosing the right door latch size is key to a good fit, smooth operation and a good job, especially if you’re new to DIY door projects.
In the UK, the two most common latch sizes are:
- 63mm (2 1/2 inches)
- 76mm (3 inches)
Other sizes such as 102mm, 127mm and 152mm are available, but these are typically used for specialist or less common installations.
If you’re replacing an existing latch, the easiest option is like-for-like, simply match the same size across both. In most homes, this will be 63mm.
For new installations, a 76mm latch is often the better choice. It positions the handle slightly further from the door edge, giving a more balanced, professional finish.
If you’re fitting door knobs, use at least a 76mm latch (ideally 102mm). This helps prevent your hand hitting the door frame when turning the knob.
Latch sizes (e.g. 63mm or 76mm) refer to the overall case length, measured from the faceplate to the back of the latch.
In some cases, the internal structure of the door (the lock block) may limit latch size, but for most standard doors, either size will fit without issue.
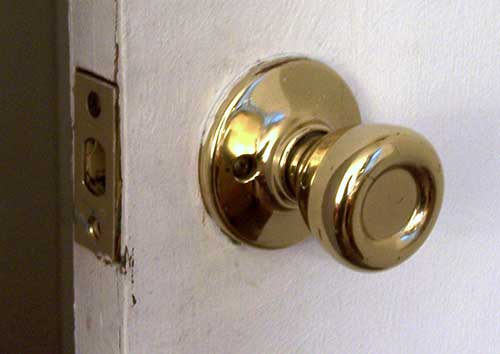
Door knob fitted using 76mm latch to ensure knob located further in from the edge of the door
How to Measure a Latch
Measuring a door latch correctly ensures you buy the right replacement and avoid extra work.
If you’re replacing an existing latch, remove it first and take a simple measurement. Measure from the back of the faceplate to the end of the latch case, this is the case size.

Measure from the faceplate to the back of the latch to find the case size
Once you have this measurement, choose a replacement with the same case size (clearly shown on the packaging) for a quick, hassle-free fit.
You should also check the backset, the distance from the faceplate to the centre of the spindle hole. This must match your existing latch to ensure your door handle lines up correctly.
If the backset is different, you may need to drill new holes, and old ones could remain visible if not fully covered by the handle.

Measuring backset size of door latch
How to Fit a Mortice Latch to a Door
Now that you know the different types, sizes and how to measure a door latch, you’re ready to install one.
The below step-by-step guide shows you how to fit a mortice latch correctly, helping you achieve a secure fit, smooth operation and a clean, professional finish.
Step 1 – Mark the Position of the Door Latch and Spindle Hole
Start by identifying which edge of the door will hold the latch. For a new door, one side is for the hinges and the opposite side is for the latch and handle. Look for a “Lock Block” stamp at the top edge of the door, this marks the side for the latch.
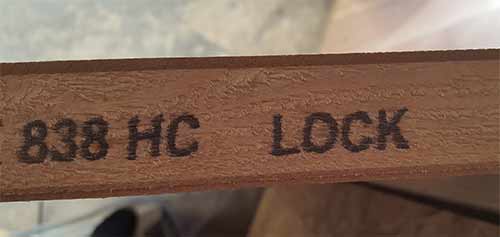
Lock block stamp shows which side the door latch should be fitted to
Place the latch on the door edge so the faceplate sits about 1mm in from the front edge. This allows the latch to recess neatly, with the faceplate flush with the door surface. Center it along the door’s lock rail for a balanced fit.
Mark the top and bottom edges of the faceplate and the center of the spindle hole using a pencil. Remove the latch and draw a level line across the edge to indicate the area to chisel for recessing the latch.
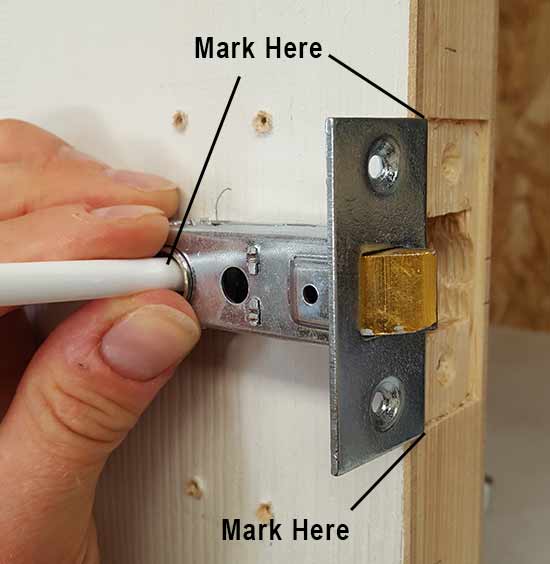
Top and bottom edges of latch marked along with the spindle hole
Check that the faceplate aligns with the full width of the door edge. If not, mark the faceplate size in the center of the timber to ensure a precise, gap-free fit. Proper marking at this stage ensures a clean, professional installation and smooth operation.
Step 2 – Chisel Out a Recess for the Latch
With your markings in place, create a shallow recess (about 1mm deep) on the door edge so the faceplate sits flush and won’t catch on the frame.
Use a sharp chisel and lightly tap with a hammer to score the edges, going about 1mm deep. Keep the beveled side flat against the door and work down in small 5mm sections until you reach your bottom mark.
Remove the bulk of the timber by gently pushing the chisel or tapping it with your hand rather than the hammer, this helps avoid cutting too deep.
Finish by smoothing any raised areas until the recess is flat and level, providing a clean, professional fit for the latch.
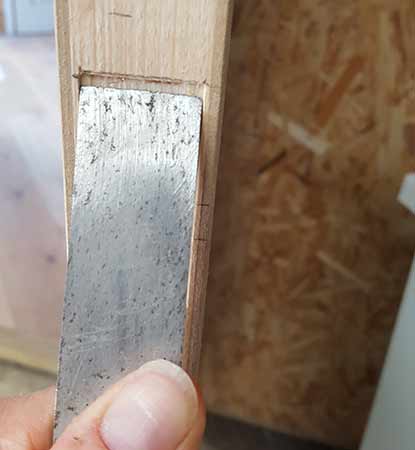
Chiselling out recess for latch faceplate to fit into
Step 3 – Drill the Hole for the Door Latch Case
After cutting the faceplate recess, the next step is drilling the hole for the latch case. Marking the correct position first ensures a precise fit.
Measure the full height of the latch faceplate and divide by two to find the center. Hold the latch side-on to verify this aligns with the center of the case. Adjust if necessary. Transfer this measurement to the door, marking the center of the hole within the recess and along the door width.
Use a cordless drill with a flat or auger bit slightly larger than the latch case. For example, a 25mm square case works best with a 28–30mm bit. This allows room for the square case while keeping the door edge strong.
Mark the drilling depth by adding 2–3mm to the latch case depth, and wrap tape around the drill bit at this point to avoid over-drilling.
Drill carefully, keeping the drill level, then vacuum out dust and test-fit the latch. If the latch is tight, use a small chisel to square the hole gradually until the latch slides in smoothly.
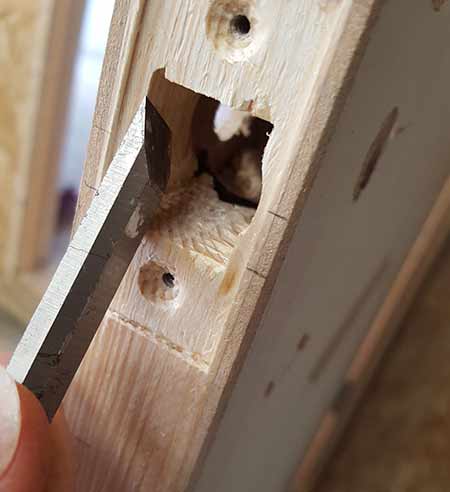
Squaring a circular hole to fit a square door latch
Work slowly, test frequently, and adjust until the latch fits perfectly and operates smoothly.
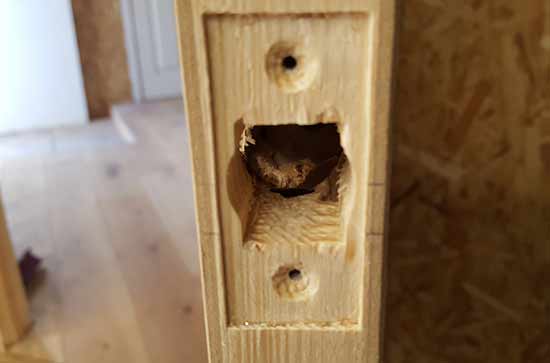
Latch recess and case hole drilled and chiseled in edge of door ready for fitting
Step 4 – Drill Hole Through Door for Spindle
With the latch hole drilled out, the next job is to drill out the spindle hole.
As with the latch, measure the sides of the spindle (should be around 7-8mm) and then select a drill bit that’s a few mm bigger e.g. if spindle is 8mm per side, select a 13mm flat drill bit.
This is allow enough room for the spindle to turn in the hole when the handle is turned and prevent it binding on the door that will then in turn cause it to stick.
Position the centre of the drill bit on the point that you previously marked and start drilling.
As before, hold the drill both horizontally and vertically dead level to ensure not only that your first hole is level, but when the bit passes through the first door panel and starts drilling into the second on the opposite side of the door, that both holes then line up.
On this point, as soon as the drill bit starts on the opposing door panel, stop drilling as soon as the centre point starts to break through.
Once it does, move around to the opposite side and drill in from this side.
If you kept on drilling from the opposing side, when the flat part of the drill bit breaks through, in most cases this will cause break out or burst out e.g. the edges of the hole burst outwards and this can cause a fair amount of damage!
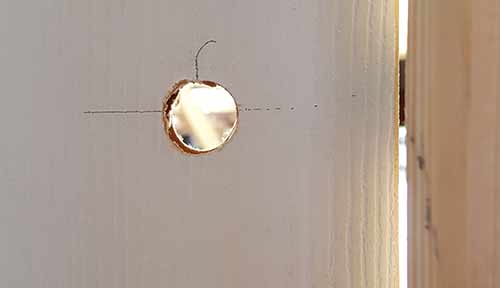
Door handle spindle drilled through door
Once the spindle holes have been drilled, insert the latch to make sure the holes line up nicely
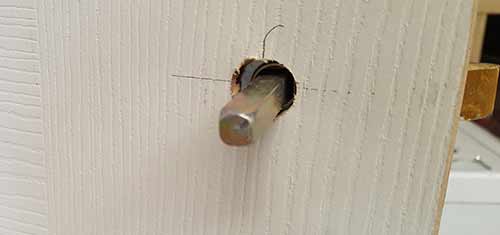
Door latch and spindle holes lining up nicely
Step 5 – Countersink Latch Screw Holes and Fit the Latch
To make the latch sit flush with the edge of the door, you need to countersink the screw holes so the screw heads sit below the surface.
Place the latch in its recess and hold it flat. Mark each screw hole with a pencil, then remove the latch.
Drill a pilot hole in each mark using the correct size bit. Then switch to a countersink bit and widen the top of each hole so the screw heads will sit neatly inside (see our guide to pilot holes and countersinking).
Refit the latch and check it sits flush. If it doesn’t, remove it and deepen the countersinks slightly until it fits properly.
When everything lines up, insert and tighten the screws to secure the latch in place.
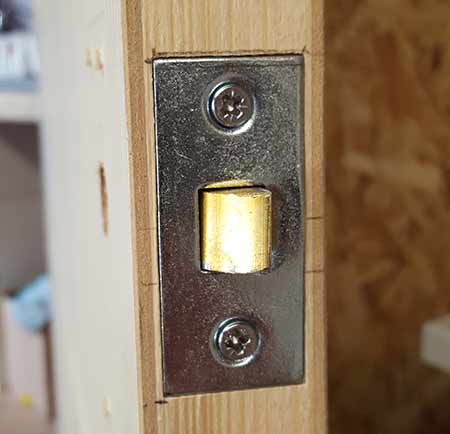
Door latch screwed up firmly on to door
Step 6 – Fit Door Handles
With the latch installed, you’re ready to fit the door handles.
Starting on either side of the door, your choice, insert the spindle (door bar) through the latch so it sits centrally, then slide the correct handle onto it. Check its orientation as when pressed down, the handle should retract the latch.
Hold the handle in position and use a spirit level to align it straight, both horizontally and vertically.

Use a spirit level to ensure the handle is straight
Once level, mark the screw holes with a pencil. Remove the handle and set it aside.
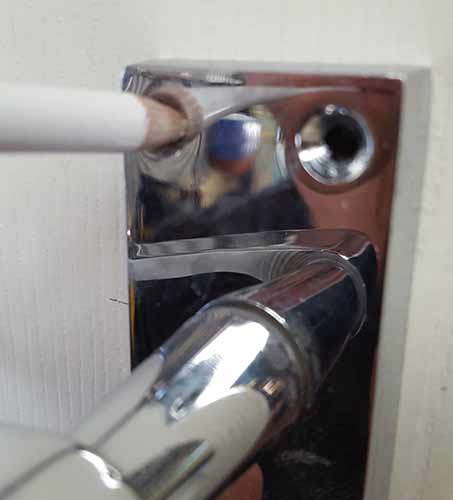
Mark screw hole positions before drilling
Drill pilot holes using the correct bit size. Refit the handle and secure it with screws, tightening each one evenly.
Repeat the same steps on the opposite side of the door.
If using a new spindle, you may need to trim it to size. Measure carefully and cut it with a hacksaw if required.
Finally, test both handles to ensure smooth movement and that the latch fully retracts.
Step 7 – Fit Latch Keep/Striker Plate on Door Frame
With the latch and handles installed, the final step is to fit the keep (striker plate) so the door closes securely.
Gently push the door closed until the latch touches the frame but do not shut it fully. Mark the top and bottom of the latch on the frame with a pencil.
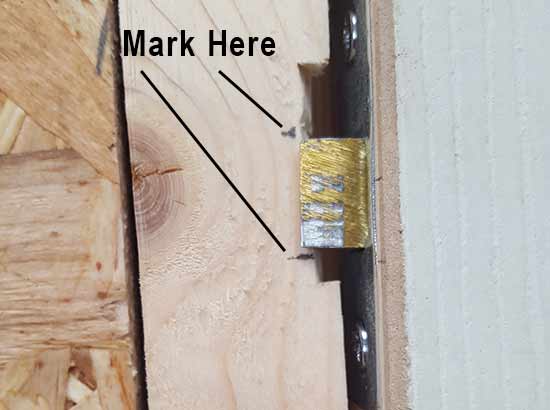
Mark the latch position on the door frame
Next, measure the distance from the front edge of the latch to the edge of the door.
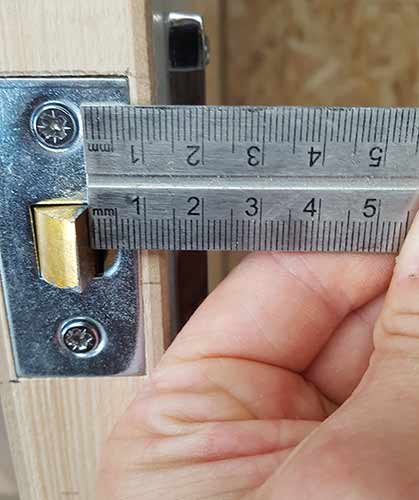
Measure latch depth to position the keep correctly
Transfer this measurement onto the frame at both pencil marks, then draw a vertical line between them. This line shows where the keep opening must align for a flush fit.
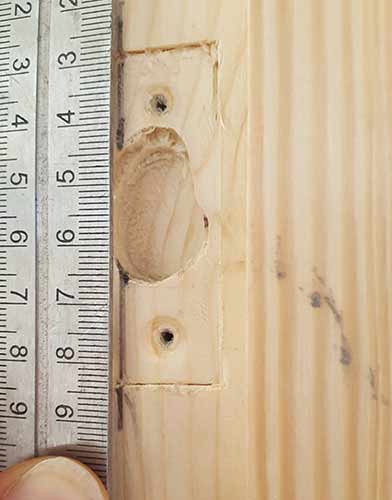
Draw a guide line to align the striker plate
Place the keep on the frame, aligning its opening with your marks and the edge with the vertical line. Once positioned, draw around it.

Outline the keep before cutting the recess
Use a chisel to cut a shallow recess (around 1mm deep) so the plate sits flush. Test fit and adjust until flat and even.
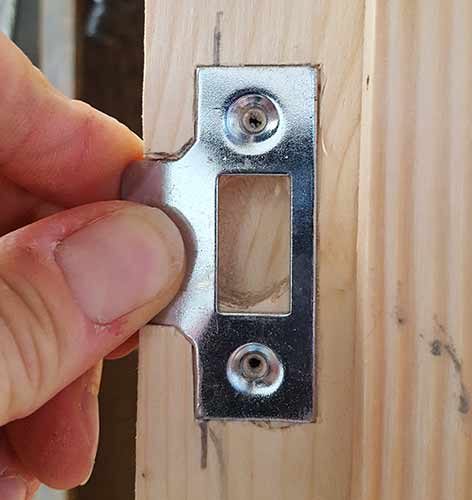
Check the fit before final fixing
Mark the screw holes and the centre opening. Drill pilot holes for the screws, then drill out the latch hole to around 10–15mm deep. Square the edges with a chisel if needed.
Fix the keep in place with screws, ensuring it sits tight and flush.
Finally, close the door to test. The latch should engage smoothly and release easily without sticking, however if it doesn’t you may need to make a few adjustments as it’s essential that everything fits correctly to achieve a great finish.
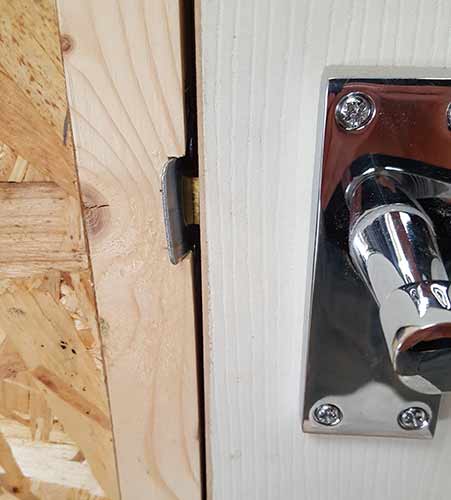
Door closed and latch successfully engaged with keep fixed to door frame
Fitting a new door latch and keep to a door is a fairly straightforward job, however to achieve a great finish it’s important that you take your time and work methodically and if so, you can be sure to get a top job!

 DIY Doctor Ltd,
  0845 6342 179


