Dry rot is a wood-destroying fungus that can seriously weaken timber if left untreated. Early detection is key, it’s far easier to fix and prevent than repair once damage has been caused and spread.
This how-to guide explains how to spot, treat and repair dry rot, including its main causes and helpful dry rot images.
If you’re unsure whether it’s dry rot or another type of wood rot, always get expert advice. You can find a qualified specialist near you via the PCA website.
Dry rot can colonise your timber and damage its structure
What is Dry Rot?
Dry rot is a type of wood-decaying fungus that damages timber when moisture levels are too high. Despite the name, dry rot only grows in damp conditions, typically when timber has a moisture content of 28–30%.
Once established, the fungus can survive with moisture levels above 20%. It spreads through brick and stone to reach more wood, without damaging the masonry itself.
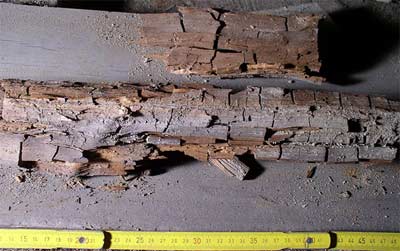
The most common dry rot fungus in the UK is Serpula lacrymans. It breaks down the timber by feeding on cellulose and hemicellulose, leaving wood dry, cracked, crumbly and brown in colour, eventually turning it to dust.
Dry rot often spreads unseen behind walls for months or years before signs appear. Even if you don’t see visible fungal growth, there could still be hidden damage.
If you suspect hidden rot, use a non-invasive tool like a Dry Rot Detection Stick to check for moisture and decay in timber.
Dry rot if left untreated can cause your wood to crumble away – early detection of the rot is key to saving the timber
What Causes Dry Rot?
Dry rot starts when timber stays damp for too long. There are two common causes:
- Older homes with untreated timber: Houses built before modern standards often used wood that wasn’t kiln-dried. This timber holds more moisture and when combined with outdated materials like clay tiles or non-British Standard products, can let water in more easily.
- Moisture from damp problems: Leaks, rising damp or poor roof flashing can allow water to soak into timber, creating the perfect conditions for dry rot.
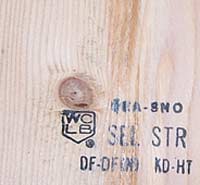
Timber marked with a KD symbol has been kiln dried and is less likely to develop dry rot—unless damp is present.
Even if you’ve already fixed a damp issue, dry rot may still remain in the timber if it had time to take hold.
Common damp sources include rising damp, penetrating damp and damaged roof or chimney flashing. If you suspect dry rot but haven’t found visible damp, it likely means moisture is hidden somewhere in the home.
The rot’s location can help identify the type of damp issue. Always fix the moisture source before treating dry rot, if the timber gets wet again any treatment will be weakened or washed away and the fungus can come back.
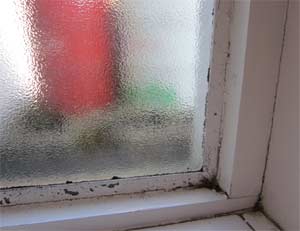
Damp problems can make your timber damp enough for Dry Rot to colonise
What’s the Difference Between Dry Rot and Wet Rot?
Dry rot and wet rot are both fungal issues that damage wood but they behave very differently and require different treatments.
Wet rot only affects damp wood and stays in one place. It can’t spread through dry materials, so it’s usually easier to treat and control.
Dry rot is much more invasive. It can spread through brick and plaster to reach other areas of your home. It grows in wood with moderate moisture, too dry for wet rot but just damp enough for dry rot to thrive.
If your timber dries out slightly after being very wet, wet rot will stop, but dry rot may take over. That’s why it’s vital to treat and dry affected areas properly to prevent further spread.
Dry Rot Pictures and Images
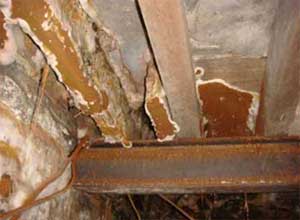
Dry rot fungal body on an outside wall
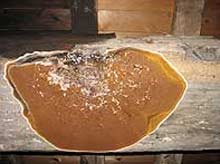
Dry rot fruiting body on a timber beam
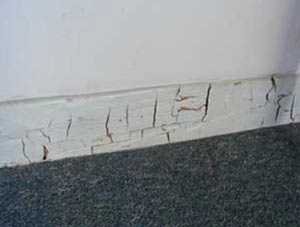
Dry rot causes cube shaped cracks in your wood
How to Identify Wet Rot vs. Dry Rot
| Dry Rot | Wet Rot |
| Wood feels hard | Wood feels soft |
| Grey strands (hyphae) or skin-like layer (mycelium) | Black, dark brown or white hyphae/mycelium |
| Orange or rusty-brown mushroom-like growth | Yellow, brown or white mushroom-like growth |
These signs can help spot rot, but damage often starts long before anything is visible. That’s why early detection is key.
Surveyors may need to remove parts of walls to check how far rot has spread, but there’s a simpler way to detect it early without the mess.
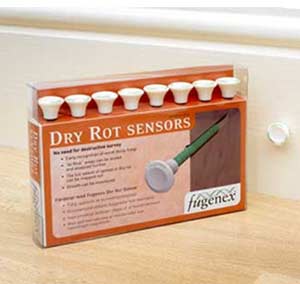
Dry Rot Sensor Sticks offer a clean solution. Insert them into small holes in your walls to detect rot without removing plaster or timber.
The sensor contains a blue dye that turns yellow when it comes into contact with oxalic acid, a substance dry rot produces in high levels. Wet rot doesn’t, so this makes identifying the type of rot easy and accurate.
Even better, dry rot produces oxalic acid early in the infection process, so using these sticks can alert you before major damage occurs, giving you the chance to treat rather than replace timber.
How to Use Dry Rot Sensor Sticks
- Drill a hole: 8mm wide and 110mm deep.
- Insert the stick fully into the hole (depth matters).
- Leave it in place for 2 weeks.
- You can insert sticks along or across the wood grain.
- They can be used in internal or external walls.
- In internal walls, leave a small gap for swelling.
- In external walls, avoid large gaps to prevent water ingress.
The stick can also be read using a damp meter to detect moisture levels, helping you identify broader damp issues in your home.
Insert Dry Rot sensor sticks into your wall to detect Dry Rot
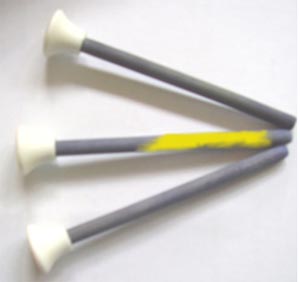
The dye on the sensor stick turns yellow when it is exposed to Dry Rot

A close-up of the dye change that indicates the presence of Dry Rot
For expert advice on identifying and treating rot, consider contacting a professional surveyor or specialist (see the PCA link above for more details).
How to Treat and Repair Dry Rot
Dry rot in timber needs prompt treatment to stop it from spreading. Before starting, always fix the source of any damp. Treating dry rot without solving moisture issues first won’t work—water will dilute the treatment because most rot treatments are water-soluble and need dry conditions to be effective.
Start by using Dry Rot Sensor Sticks (see section above) to check how far the rot has spread. This helps you know where to treat and whether the damage is just on the surface or inside walls too.
If rot is only affecting exposed wood, like joists, you’ll need to treat both the timber and any brick or masonry it touches. Severely damaged wood should be replaced by a qualified professional. For guidance on timber types, visit the Timber Trade Federation website.
Even after removing damaged timber, treat surrounding areas, fungal spores and strands can spread into nearby materials and may not be visible yet.
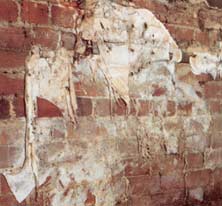
If dry rot is inside a wall or behind plaster (as shown in the images above), or if your sensor sticks show it’s present, you’ll need to remove the plaster, treat the bare wall and only then replaster the area.
How to Treat Dry Rot in Brick and Stone Walls
The most effective treatment for dry rot in masonry was Boron powder mixed with water. However, since September 1, 2022, it can only be used by licensed professionals due to new post-Brexit regulations.
Hiring a professional is the most reliable option, they have access to stronger treatments and often offer a guarantee. While it costs more, it ensures the rot is properly removed and won’t return.
If you’re tackling it yourself, use a DIY masonry dry rot treatment. Wash down any affected stone or brick to kill spores. Don’t just treat visibly infected areas, always treat surrounding surfaces too. Spores can spread silently and trigger future outbreaks if left untreated.
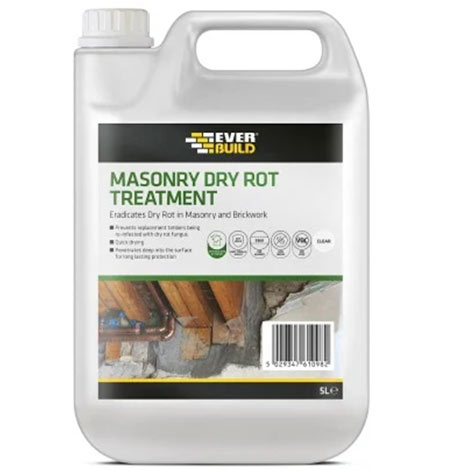
Everbuild dry rot masonry treatment
How to Treat Dry Rot in Timber
If you can afford it, hiring a professional is the most reliable way to treat dry rot in wood. It ensures a long-term solution using advanced products and techniques.
For DIY treatment, there are effective timber dry rot products available. But first, you must fix the source of moisture. Dry rot only grows in damp conditions, usually caused by leaks. Identify and stop the leak before doing anything else.
Once the area is dry:
- Remove large fungal growths and dispose of them in a sealed plastic bag. Always wear gloves, goggles, a mask and old clothes, as spores can be harmful.
- Scrub the affected timber thoroughly with a stiff brush to remove remaining spores.
- Wash the area with a strong fungicidal solution, including all nearby wood. Let everything dry fully.
- Once dry, apply a high-quality wood preservative to all affected and surrounding timber. This prevents future rot from forming.
If any wood is too damaged to save, it must be cut out. Cut at least 500mm past the last visible sign of damage. Replace it with pre-treated timber and treat the new wood with preservative too.
Need help replacing timber joists? Follow this structural timber repair guide.
For added protection, especially after replastering or where surface treatments weren’t used, apply a specialist Rot Barrier paint. This creates a protective layer that stops dry rot from spreading across timber, plaster, or masonry surfaces.
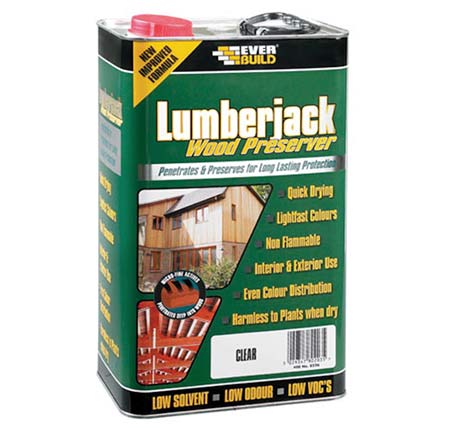
Everbuild Lumberjack wood preserver
If you find dry rot in your home, it is absolutely essential to act quickly to stop more damage. Hiring a professional is the safest option, but if that’s not possible, there are effective DIY treatments you can use and apply yourself that are equally as effective.