The contract was to replace a timber, boarded floor. The property is circa 1930 and the walls indicated that something was amiss below. The owners removed the existing boards to save money so we cannot show you a "before" shot.
We measured the floor, ordered the new timber for them and insisted that it was kept indoors for at least 3 weeks before we laid it. The humidity in any room has an effect on timber and if at all possible, the timber should be allowed to acclimatise to the room
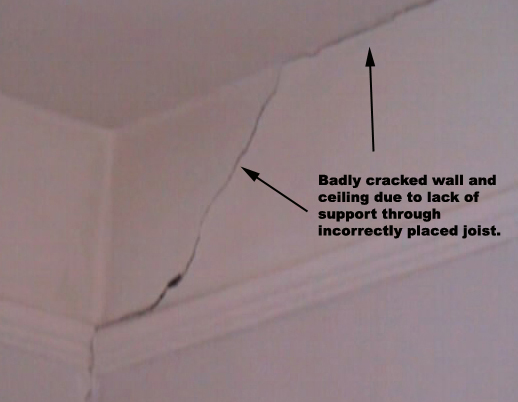
Cracks in and along the wall indicate the wall has dropped
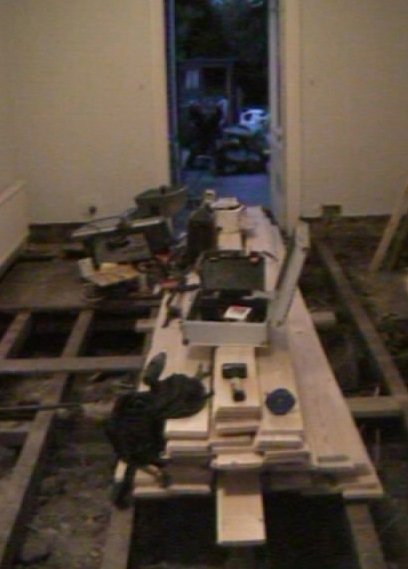
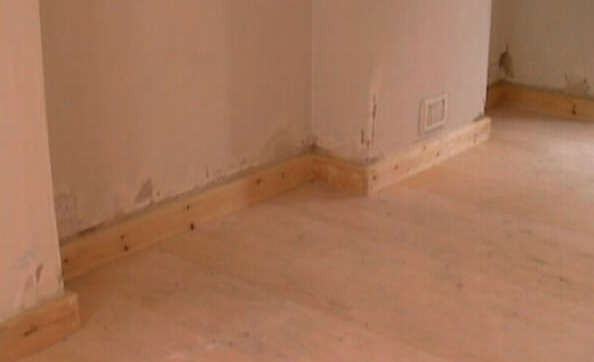
Timber stored in room to be laid
This avoids a lot of shrinkage and or warping later.
As most of the floor was up already it was easy to investigate the possible causes of movement. Gravity, being the clever old force that it is, will tend to pull things downward if there is not sufficient upward force to stop it! Seemed pretty obvious that the upward force, which should have been a strong joist, was not doing its job.
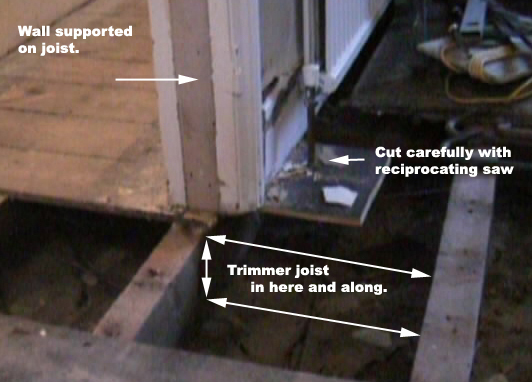
Floor removed and wall sitting on joist
How it should be, or at least how it was built in those days. The wall sitting right on top of the joist.
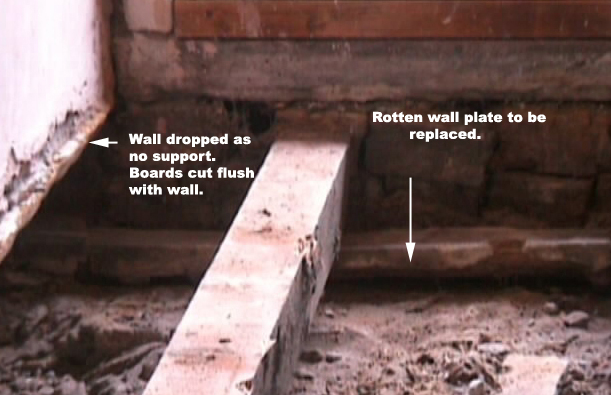
Rotten wall plate to be replaced
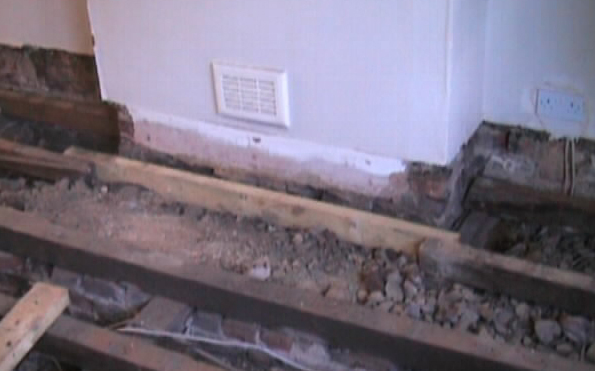
How it was under the cracked wall…The joist is nowhere near the wall and at the moment (don’t forget we didn’t take up the existing floor) the wall is just sitting on the floorboards that have been cut at the edge of the wall!! Drastic action needed quite quickly as these walls were heavy blockwork!
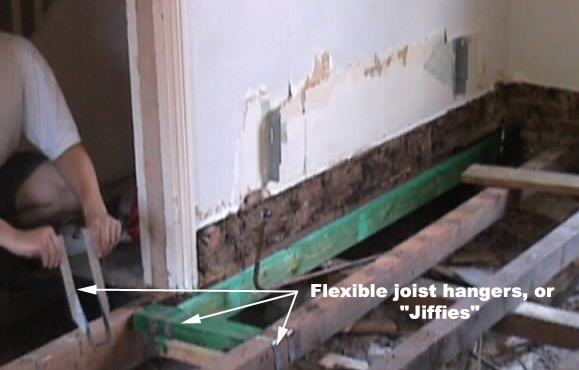
Flexible joist hangers and new timber added under wall
New wall plate in position
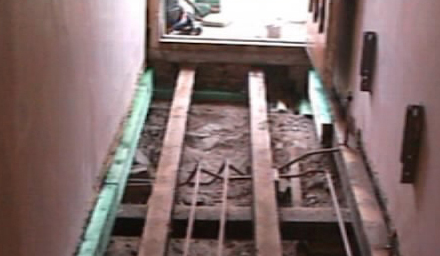
Using flexible joist hangers, or "jiffies" as they are known, we inserted a treated timber joist either side of the wall and shorter joists at right angles to them, underneath the wall. The wall now had something to sit on and we breathed a sigh of relief! Several other timbers in the floor showed signs of being past the sell by date so we replaced them as well.
Wall plate with floor boards removed
As you can see, a timber "hollow" floor sits on floor joists which run the length, or width of the property.
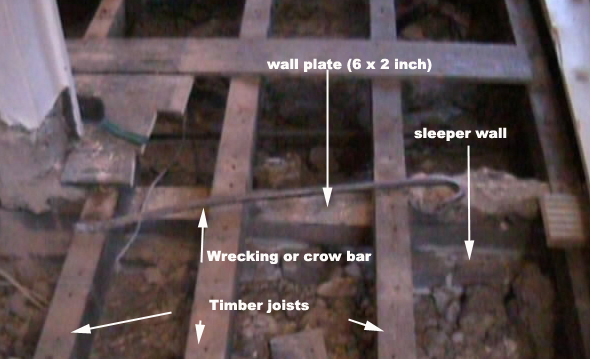
Obviously, if the joists were too long, they would bow under the weight of the floor or the imposed load that will be placed on it (people, furniture etc). To avoid this happening, the joists are supported, at reasonably regular intervals by brick walls know as "sleeper walls".
If the timbers need to be joined, the joints will be made on a sleeper wall to give it the greatest strength.
A timber of the appropriate size (for a 9 inch wide sleeper wall, a 6 inch x 2 inch timber is normally used and for a 4½ inch sleeper wall, a 4 inch x 2 inch timer is just the job) is normally laid flat on the sleeper wall and the joists fixed to it.
These timbers are called "wall plates". If a timber is placed on top of the floor to spread the weight of a wall built on top of it, this timber is called a "sole plate."
Timber batten fixed to existing joist
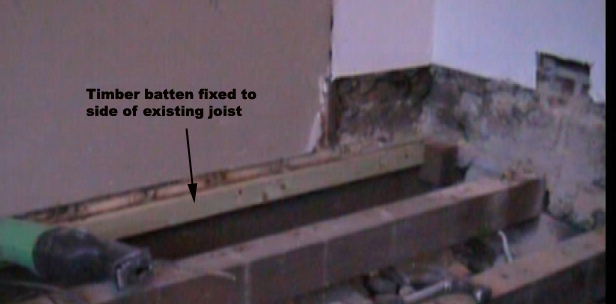
The joist under this wall was right on the very edge. This meant that the floorboards had to be cut flush with the face of the wall and there was nothing to fix the ends of the new floorboards to. A 3 inch x 1 inch batten was treated and screwed to the side of the exposed joist giving some bearing to the end of the new boards.

Hearth
Hearth removed
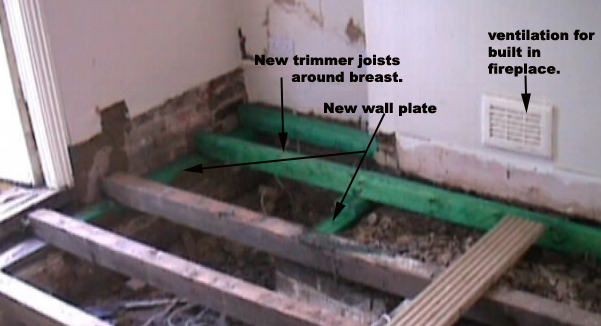
The room had contained two fireplaces which had been blocked up (See our fireplaces project for how this is done). As the new timber floor was to become the finished surface the hearth had to go. Using the same principle with joist hangers and new treated joists, we removed the hearth and laid new "trimmer" joists around the chimney breast. The new floorboards could be laid right up to the wall. The vents into the old fireplaces will be removed and exchanged for something a little less obvious later.
Radiators removed from the wall
Removal of the radiators is a must for this job. This is not difficult and is covered by our removing radiators project. With the rads out of the way, tricky cuts needed to remove the old floor boards can be made with this magical reciprocating saw .
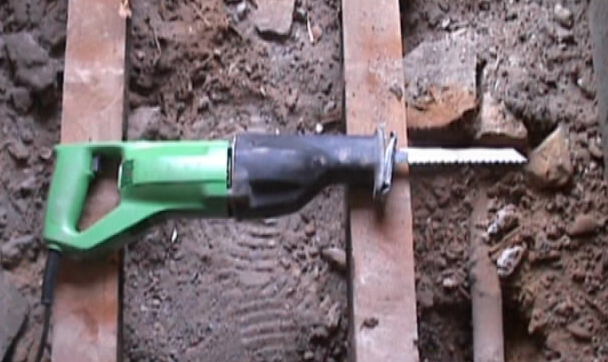
Reciprocating saw
It is an invaluable piece of hardware
Replace all floor boards
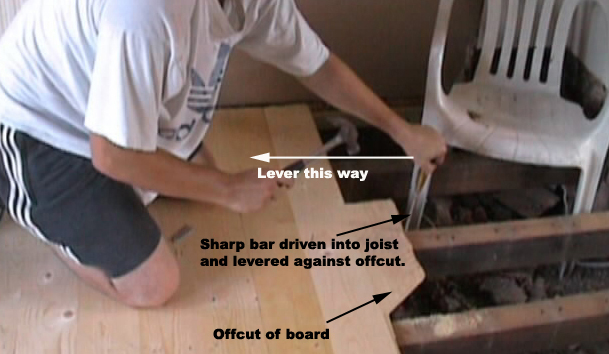
At last, with all joists etc renewed where necessary, we can start putting the boards down. Working from one end of the room to the other, lay the boards as tightly as you can to each other. Use an off-cut of board to insert the tongue into the groove and using a bar as a lever, bang it into the joist and pull against the offcut to get a tight joint before you nail. Nails should be "lost head" nails, with the length determined by one third in the surface board and 2 thirds in the joist.
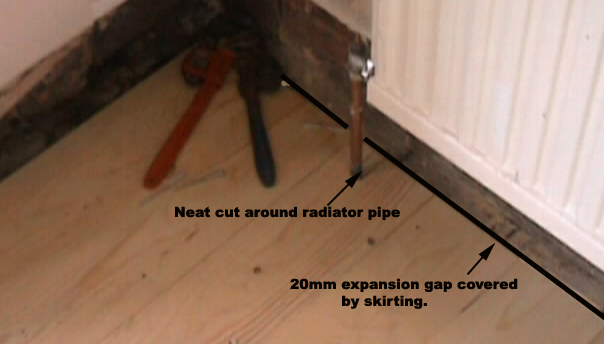
New floor boards cut neatly around radiator pipes
Boards cut neatly round radiator pipe by cutting U shape out of board, sliding into place and then gluing back the piece cut out. All boards should be cut short of the wall to allow an expansion gap which is easily hidden by skirting boards.
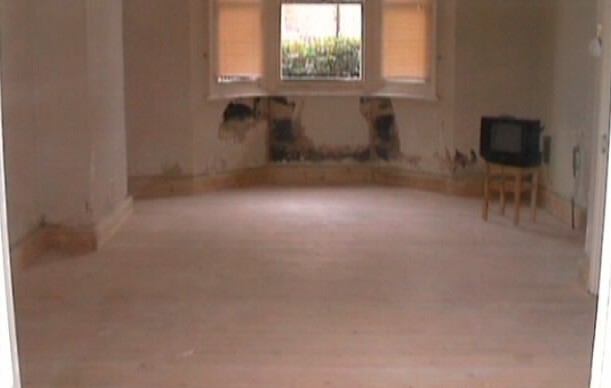
All floor boards now replaced
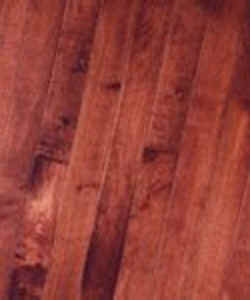
This floor was done in softwood. The customer (by their own admission) spent a fortune finding the right stain, wax and varnish to get a hardwood looking finish.
Because the floor needed so many new joist sections, we allowed an average of 20mm expansion most of the way round. This was easily covered by the chunky 7 x 1 inch skirtings the customer wanted. The customer then sanded the floor and put the carpet back to protect it while all the other work in the house was progressing. See also our timber floor finishes project.