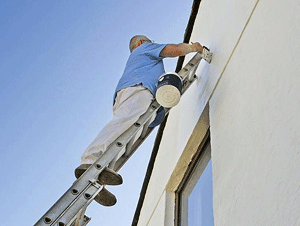
A fresh coat of paint can really improve the exterior of your property, brightening it up and making it look much tidier.
Choosing the Right Paint for Exterior Walls
You need to use specialist exterior masonry paint, which is available in a range of colours. If your property is attached to another, it’s worth discussing colour with your neighbour – depending on how the buildings are joined, if they are different colours it can look a bit strange.
White and cream are the most common colours to use, and if you are having trouble deciding between the two remember that white can be very unforgiving – not only will it show every speck of dirt, but it can be blinding in bright sunlight.

Painting the exterior of a house
Try to buy enough paint at the start – check the square metre coverage on the container. New render will soak up a lot more paint though so allow for this if necessary.
If you live in a listed building, or if your property is in a Conservation Area, you may need to get permission to alter the exterior, so make sure you check this before you start.
Preparation for Painting Outside Walls
As with most painting jobs, the preparation is the most important part of the job – if a surface is not adequately prepared then the paint will not adhere and you will end up having to start again from scratch. Walls must be clean and dry before you start painting.
If there is any mould on the walls, use a wire brush to scrub it off with a bleach and water solution. Brush down the walls to remove any dust, dirt and cobwebs.
If the walls have been painted previously, remove any flaking paint with a pressure washer or wire brush. Use exterior filler to repair any cracks, and move any climbing plants and trellises out of the way as much as possible. Be sure to let the surface dry completely before you start painting.
If the surface is flaky or powdery, use a stabilising primer (for exterior masonry) first. There are quite a few different varieties available, but we tend to use the Everbuild 406 stabilising solution found here.
If however the walls you’re working on are solid, sound rendered or stonework walls then a stabilising solution should not be used. Instead you should use a thinned or watered down coat of masonry paint as your primer.
One further point to remember is that if the property is fairly old then you may be dealing with single skinned, solid walls. In this case you will need to ensure that it can breathe fully so that no moisture gets trapped.
With this in mind, a stabilising solution such as the one mentioned above should not be used, instead a lime based render should be used.
Make sure you have a nice, dry day and as much time as possible – this is not a job that can be rushed. Make sure the area around the house is clear of pots and anything else that might get in the way. If you have water butts, make sure you can reach behind them or empty and move them.
Mask window and door frames, and any other areas that you need to avoid getting paint on, such as faschia board – see our Masking Up project for help with this. If your house faces directly onto the street, make sure you put cones and signs up so that people will avoid the wet paint and ladders.
Equipment for Painting Exterior Walls
If you have space for it, a scaffold tower will make life much easier and is a lot safer than using a ladder – contact your local tool hire company. If your house is very tall you may even need full scaffolding; if this is the case it may be worth getting a quote from a professional decorator. If you are going to be using a ladder, make sure you read our Ladder Safety project before you start.
A roller is the quickest tool to use for coating large areas, but if the surface is rough then a wide brush may be easier. Long extension handles are available for rollers which will make the job much easier.
You’ll need a small brush for getting into hard-to-reach areas such as behind down-pipes. A paint canister is very helpful if you are up a ladder, as exterior paint containers tend to be very large and unwieldy.
Make sure you have flat, comfortable shoes on and old clothes or a coverall as you are bound to get splashed with paint, no matter how careful you are.
Get Painting Your House Walls
After all that preparation, at last it’s time for the easy and fun part! Always start at the top and work your way down – this way you can be sure to catch any drips and runs.
Cut-in around the edges with a small brush first, then get to work with your roller or large brush. Try to follow the sun around the building, giving it a head-start to dry off the walls, and make sure you have enough time to complete a wall in one go otherwise you may see a visible line where you stopped then started again.
Work your way across the wall in metre-square sections, making sure you don’t over-reach. Ensure you load your roller or brush enough to give a good thick coat of paint, but not so much that it drips and runs.
If you are using a roller, be prepared to be splashed and splattered with specks of paint!
When it comes to painting behind downpipes, wrap an old newspaper around the pipe so that you don’t get paint on it
Most exterior paints require at least two coats, but check the manufacturer’s instructions regarding second coat and drying time.

