One of the most challenging things about large scale wiring in an existing property, especially large rewire projects is running new cables.
Methods to get around this age old issue often involve chasing out walls which is a messy and time consuming job or running cables in trunking over a walls surface which on the whole completely ruins a finish.
The ideal solution to this problem is often to pull new cables in under floors and down through stud walls so in this guide we are going to look at how to fish wire through walls and ceiling and other internal surfaces.
Methods for Running Cables Under Floors and Through Walls
If you need to run a new electrical cable from one side of a room to another there are essentially two ways to do this; either to fish it through using electricians fish tape or fishing rods or through a crawl space.
In terms of electrical fishing tape or rods this particular product is essentially a long thin (around 7 or 8mm diameter) fibreglass pole that is wound around a circular cable reel.
A small access hole is drilled or cut in the location that you want your new cable run to end and the same is done at the other end where your cable will be fed from. The fish tape is then pushed through the first hole and through the void in the ceiling or under the floor over to the second hole. The new cable is then attached and pulled through.
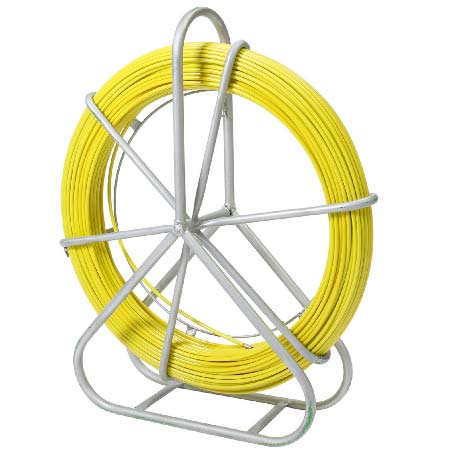
Electricians fish tape on cable reel
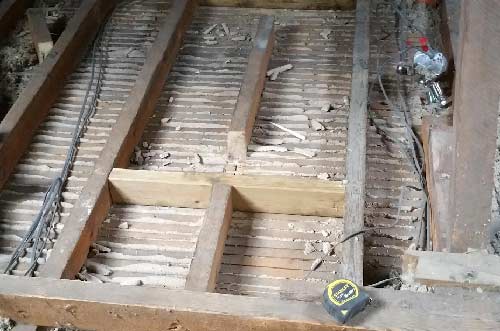
The second method is generally reserved for ground floors and also lofts. In some properties that feature a floating timber floor there is often a gap between the underside of the floor and ground level of sometimes a couple of feet.
In these instances it’s possible to cut a small hole in the floor and crawl through this space to run your cables. When using this method you also have to remember to clip your new cables up to the floor joists and not allow them to simply lay on the ground.
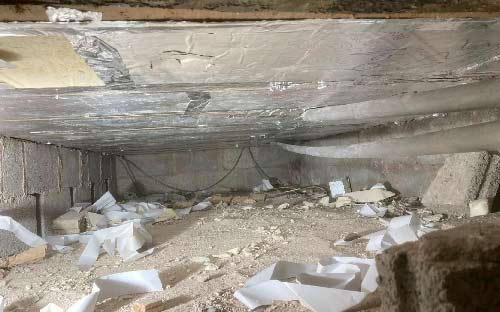
Crawl space under floating timber floor
How to Inspect Floors and Walls
Before we go into the different ways of inspecting floor and wall voids it’s a good idea to look at why we might want to do so.
Before simply trying to cut an access hole in a floor or fish a cable through a wall you need to know what potential obstructions your are likely to run into that will hinder your work.
In terms of inspecting there are a few different way to check what’s behind walls and under floors, the first being to cut a hole in the given surface either big enough to get your head in so you can have a look or to cut a smaller hole and use a small inspection mirror and torch to see what’s going on in there.
Once you have completed your inspection you will then need to make repairs to the holes that have been created.
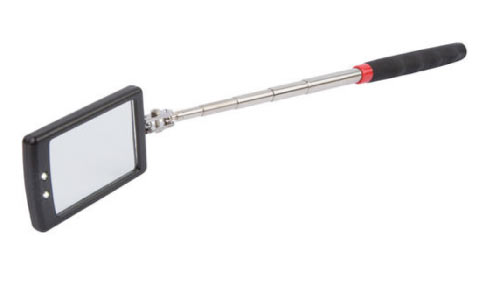
Inspection mirror with LED lights ideal for inspecting under floor and behind walls
The second and arguably best method is to use a modern inspection camera (endoscope or borescope as they are also known) that can be inserted through a tiny 10 or 12mm hole that has its own torch and in pretty much all cases good quality high definition camera or with new models a 4K camera and fully inspect the void in question in great detail.
Although the top quality cameras of this type are quite expensive and for just one inspection job, not worth the overall outlay (unless you intend to use it for other projects also) it is possible to still get cheaper versions that still provide a great quality image for as little as around £30.
However if you want the best image possible you can certainly hire a top quality version from your local hire store for a reasonable daily fee.
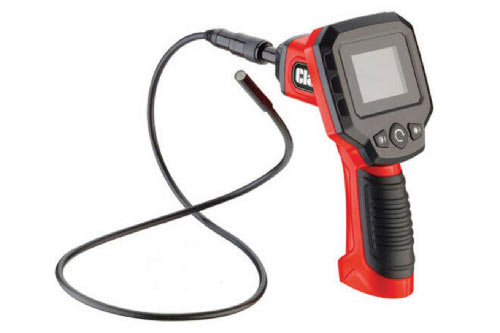
Good quality endoscope or borescope inspection camera
Requirements for Laying Cables Under Floors and Through Walls
There is only really one requirement when it comes to pulling or fishing cables under floors or down through walls and that is that the floor joists or studwork must run in the same direction as you are running the cables.
For example If you need to run a new 2.5mm twin and earth from one side of your house to the other across its width but after some inspection you find that the floor joists are running length ways then you are not going to be able to physically push the cable through the joist, that’s impossible.
Floor joist running in opposite way to cable direction
If however after some inspection you can see that the floor joists are running in the same direction that your cable is running then you can easily run your cable down the gap between two joists.
This is also the case when running a cable down through a stud wall, it’s worth checking first to ensure
What to do About Noggins?
One of the main obstacles you are likely to face when trying to run cables, pipes etc. through walls and under floors or ceilings is the humble noggin.
What is a noggin you may ask? Well a noggin is a small length of timber that runs between 2 parallel floor or ceiling joists or 2 upright stud timbers that helps to tie a floor, ceiling or wall structure together.
Noggins between ceiling joists
Not only do they help tie a structure together and provide additional strength they also provide an additional fixing area for ply board, plasterboard or what ever covering the framework is finished with.
There are several techniques for getting around noggins, one is to use a flexible extension and a flat dill bit and the other is to cut a section of floor/ceiling out around the noggin, create a notch and pass your fishing tape through the notch.
When using a flexible extension, pop the flat bit in the end of the flexible extension and then maneuver it down into the given void and position it in the location you want to make your hole and then attach the other end to a drill and drill a hole through the noggin.
This technique isn’t ideal to be honest and can result in a fair bit of damage if the flat bit jumps and skips about inside the wall and is almost impossible to do when working horizontally in a floor or ceiling so it’s best to go with the cut out option.
What About Insulation?
If you find that insulation is present in the wall, ceiling or floor you intend to pull your cable through this may indeed scupper your plans of doing so.
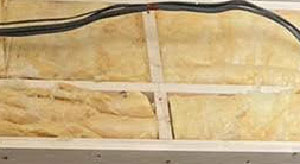
If you are working with a ceiling and Rockwool insulation is present there are certain rules that need to be adhered to when it comes to covering cables in insulation.
If however you are working in a wall or ceiling with solid insulation then it’s almost impossible to actually push a cable or fishing tape through a piece of solid insulation so this is essentially a no go!
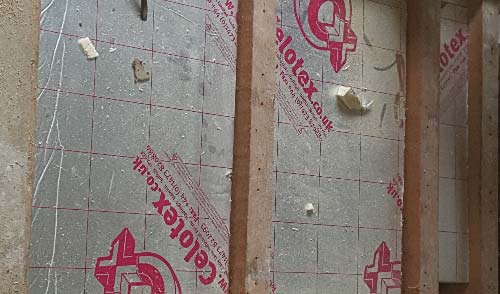
Solid insulation in a ceiling void
Should I go Through the Floor or Ceiling?
With all of the above in mind before you start making any holes anywhere you first need to decide which route is the best to take; through the ceiling or down through the floor.
This is ultimately a decision as to whether the remedial work to the ceiling after making holes e.g. filling and repairing the hole sand then re-plastering is going to incur more hassle or expense than simply pulling the floor up.
In most cases the ceiling route just edges it however if the majority of rooms are empty then the floor may be the better option.
How to Run New Cables Through Floors and Walls
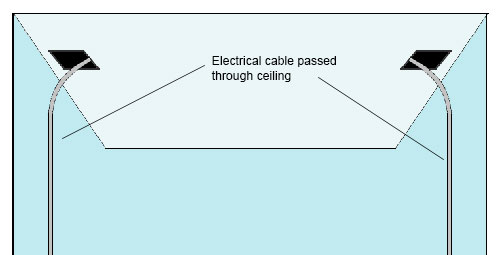
For the purposes of this example we are going to pull a new length of 1mm lighting cable through a ceiling void so that it can be used to wire a new light. We will be gaining access above the void in the loft for our start and exit points but as this is in a property with a loft conversion we only have limited access either side.
Step 1 – Create Entry and Exit Holes
The first task is to make and entry and exit hole for your fishing tape and cable to run through. Depending on what you are working on (floor, ceiling etc.) and where will depend on how this is done.
In our case as we are in a loft with a loft conversion we only have a small amount of space in the voids at either side of the loft rooms but this is just enough to feed our cable through and out.
As the whole floor area was boarded we first had to use a reciprocating saw to cut a section of the floor away at either side to create entry and exit points for our cable. A stud, cable and pipe detector was first used to check for the presence of any cable or pipes.
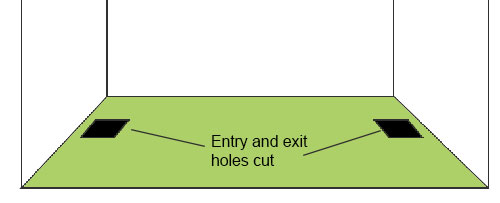
Entry and exit holes created for cable and fishing tape
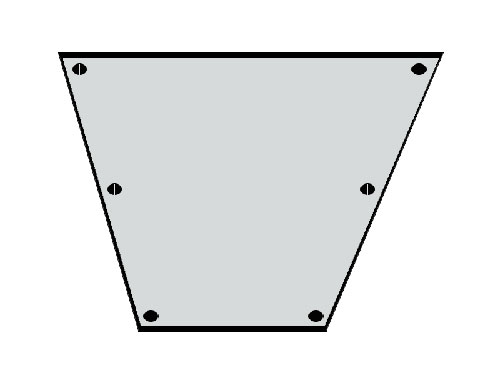
Step 2 – Mark Noggin Positions
To get a cable around any noggins that are present in the ceiling void, the first task is to find out exactly where along your proposed cable run noggins actually reside. To do this use a stud detector and run it over the proposed cable route on the below ceiling and use a pencil or pen to mark the start and end of each noggin along the run.
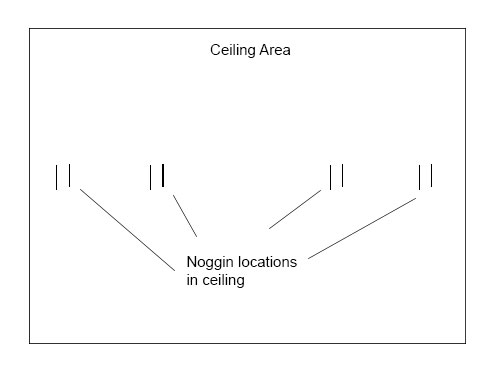
Marking noggins along cable run in ceiling
Next use a pencil and straight edge to mark a rectangle around each set of marks roughly 4 inches wide and 10-12 inches either side of the start and finish of the joist, enough to get a drill in there to drill through the joist
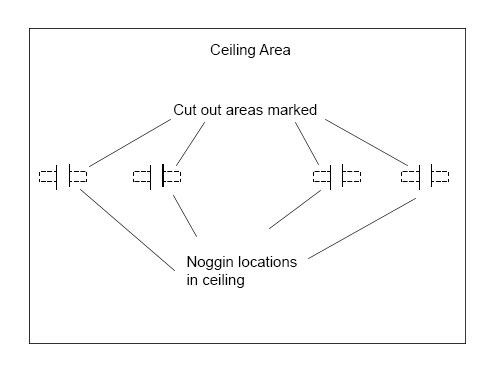
Cutting area marked around ceiling joist
Before cutting just check around the marks you made with a pipe and cable detector to ensure there are no pipes or cables running anywhere near your lines and then use a plasterboard saw, keyhole saw or a multi tool to gently cut the rectangle out and then put it to one side.
Now, using a small cordless drill and the correct sized drill bit for the size of joist or noggin you are working with (see our joist notching project here for more information) drill a hole through the centre of the joist/noggin.
Repeat the above process for any remaining noggins but for any further ones try to keep them all in as straight a line as possible as this will make pulling the cable through much easier
Step 3 – Push Fishing Tape Through
With the holes created in any noggins or joists gently push your fishing tape through from your entry hole and wiggle it through the void. It’s a great idea to have some extra help at this stage to watch the hole and grab the fishing tape when it passes over the hole. Trying to do this on your own is nigh on impossible.
Once you have a hold of it pass it through the hole and on into the other side of the void.
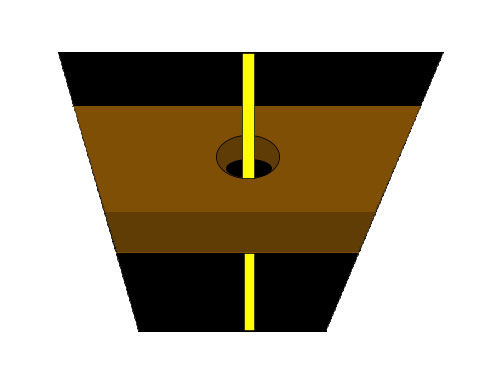
Fishing tape passed through hole in joist
Continue this process until you have passed through all of the holes and your fishing tape has reached your exit hole.
As commented this step is much easier to complete with 2 of you doing it so get some help!
Step 4 – Attach Electrical Cable and Pull Through
Once you have bypassed all noggins and your fishing tape has reached the exit hole pull a good few feet through the hole.
Next attach the cable you want to draw through the void to the end of the fishing tape. To do this first strip off a good 6 – 8 inches of the cable outer sheath and then pair up a good 6 – 8 inches of the cable and fishing tape, spreading the 3 cores of the cable evenly around the fishing tape to reduce any acute edges.
Now tape them together using electrical tape, ensuring that you fully cover the end of each cable to create a nice slope to prevent and of the cores from snagging on anything.
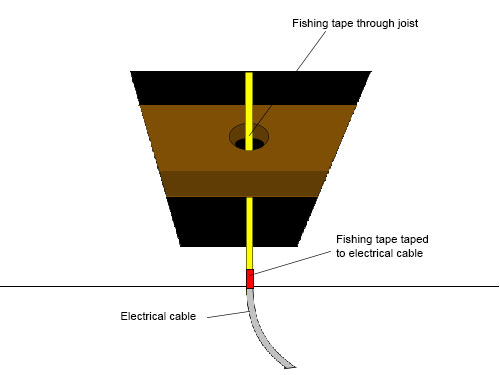
Electrical cable taped to end of fishing tape
With the assistance of a helping hand, one of you start gently pulling the fishing tape back through while the other helps to feed the cable in. The key here is to be slow and smooth, any jerky actions can cause snags.
If you do experience any snags, gently pull back the opposite way and try again, this normally frees things up.
Also pay close attention to when the cable reaches the noggin holes as one of you will probably need to help feed the cable through these sections.
Once you have successfully pulled the cable all the way through leave a good foot or so worth of cable hanging out to prevent it getting pulled back through, this can be trimmed up later.
Also as you pull through ensure you don’t run out of cable! It would be a total nightmare to go to all the effort of getting the cable pulled through just to have it run out and disappear back into the void.
Cable successfully pulled through void
Step 5 – Make any Repairs
The final job is to now repair any damage, particularly the holes that you created in your ceiling. This can normally be done using the sections that you cut out earlier.
Simply use a plasterboard rasp to tidy up the edges and then pop the section back in to the ceiling and screw it in place using plasterboard screws.
Section of plasterboard replaced in ceiling ready for plastering and finishing
Next use a suitable filler such as Gyproc Easyfill or Everbuild Fill Once to fill around and over the patch and then allow it to fully cure.
Once fully cured use 120 grit sandpaper and a flat sanding block to sand the area over until it’s smooth and flush with its surroundings and then paint over it to finish.
Depending on the size and number of holes you have had to cut in order to drill your holes in the joists, instead of using filler it’s well worth getting any repaired patches re-plastered, as plastering will give pretty much a seamless finish once dried and decorated.
If you need to pull a new length of cable through a ceiling or floor void or down a wall, using electricians fishing tape is one of the best, quickest and most cost effective ways of doing this as the only other alternative is really just to rip the floor up or wall down and this is a huge amount of work and expense.