A metal back box or pattress box as it’s also known is a small metal galvanised box that’s used to hold electrical sockets and light switches on to a wall.
In the majority of cases, metal back boxes are sunk or chased (more information here on chasing) into the wall so that once fitted, the socket face plate is flush with the walls surface. This is so that it doesn’t protrude out too far and risk being knocked and damaged.
Installing a metal back box is a fairly straight forward job so read on below to find out how.
Rules and Regulations Governing Electrical Work
One of the most important things to remember when working around electricity is that if you treat it with the slightest bit of disrespect then it can seriously injury you or worse!
So with this in mind, only those that have been trained to work around it safely should ever attempt to do any electrical work. Essentially this only includes professional Part P registered electricians that have the skills and knowledge to carry out the work to regulations standard, test the work once complete and then issue a minor works certificate.
When it comes to any DIY electrical work this is pretty much just limited to changing existing sockets and switch face plates, existing light fixtures and also, if your electrician allows, installing back boxes and running cables. This is solely at their discretion though.
What are Metal Back Boxes Used for?
As we have touched on above, metal back boxes are primarily used to fix an electrical socket on to a wall, however they can also be used to fix FCU’s (fused connection units), isolation switches, light switches, cooker switches, shaver sockets and really any other similar objects, as long as they are the correct size.
In most cases they are used when installing electrical sockets into solid walls that include brick, stone and breeze block as they allow the socket to be recessed back into the wall so that the face plate sits flush on top of the walls surface.
Once the back box has been chased into the wall it is then screwed in place to hold it securely and the socket, switch etc. faceplate is then screwed on holding it in place.
Metal back boxes are not suitable for use if you are surface mounting the back box e.g. not chasing it into the wall or if you are fixing electrical sockets to a plasterboard wall.
In these instances you should use a plastic back box for surface mounting or a dry line back box for plasterboard surfaces.
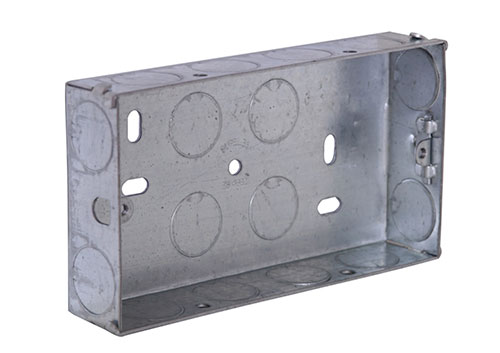
Metal back boxes used to fix electrical socket to a solid wall
Types and Sizes of Metal Back Boxes
Essentially there two different types of metal back box; the single gang or 1 gang and the double gang or 2 gang back box. Single or 1 gang boxes should be used for single sockets, switches or the similar and double or 2 gang boxes for double sockets and the like.
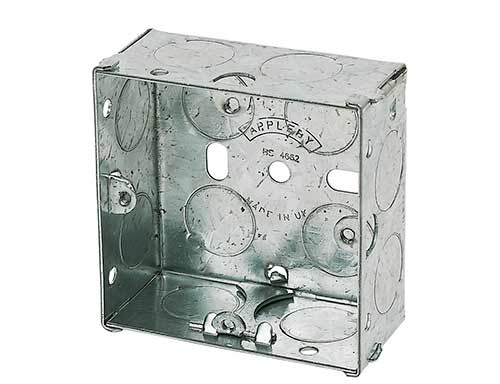
Single or 1 gang metal back box
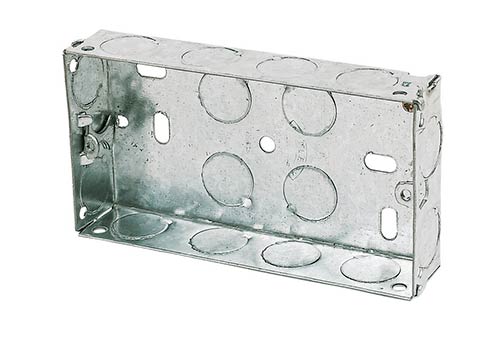
Double or 2 gang metal back box
Each of the above different types of metal back box are also available in a range of different depths, with each being suited towards a different installation application:
- 16mm – Normally used for lighting applications where only one wire is present
- 25mm – Mostly used for lighting applications and occasionally for sockets
- 35mm – Mostly used for installing electrical sockets
- 47mm – Normally used when large diameter wires are used e.g. electric shower isolators, cooker switches etc
- 67mm – Extra deep and used mostly for home automation installs
Methods of Installing Metal Back Boxes
There are several different methods for installing a metal back box into a solid wall and the method that you choose to use will very much depend on the tools that you have available to you.
Using a Hammer Drill, Masonry Drill Bit and Hammer and Bolster
With this method you first mark out the exterior outline of the metal back box on the wall where it will be installed, making sure that the markings are straight and level.
Next, a hammer drill with a 6mm or 8mm masonry drill bit is used to drill around the internal perimeter of the markings to the correct depth of the back box, marked by wrapping a piece of insulation tape around it at the correct depth and once done a hammer and bolster chisel is then used to remove the remaining masonry so that a nice clean and square recess with a flat base is left.
Using an Angle Grinder and Hammer, Bolster/Concrete Breaker
As above the outline of the back box is marked on the walls surface so that it is straight and level but this time instead of drilling around the perimeter you use an angle grinder with a diamond cutting disc to cut along each line to the correct depth.
Once your lines are cut you can then use a hammer and bolster chisel or even a concrete breaker/Kango hammer if you have one to remove the unwanted masonry inside your cut line.
If you have an SDS drill, quite often you will get a chisel attachment with it. Simply insert the chisel, disable drilling mode and enable hammer action and you can use it in the same way as a breaker.
Using a Wall Chasing Machine
A wall chasing machine is similar to an angle grinder but as opposed to having just one cutting disc it has two and sometimes even more.
Depending on the type of chasing machine you have, the cutting discs may be fixed or adjustable. To use a chasing machine to cut a recess for your back box, ideally you would need to use one with many cutting blades so that not only do they cut the perimeter lines of your back box but they also chop out the unwanted masonry.
Multi-blade chasing machines can be very expensive and it’s really only professional electricians that can warrant buying them as they would use them day in day out so this method isn’t really practical on a DIY basis, but worth mentioning nonetheless.
To learn all about how to chase out a wall, see our wall chasing project here.
Tools and Products for Fitting Plastic Back Boxes
To install a metal back box in to a solid wall for a switch or socket, you will need the following tools and products:
- Desired number of metal back boxes
- Pen/pencil
- Spirit level
- SDS drill with 6mm or 8mm drill bit
- Lump hammer (if using this method)
- 2 inch bolster (if using this method)
- Cold chisel (if using this method)
- Flat blade screw driver
- Chasing machine (if using this method)
- Breaker (if using this method)
- Drill/driver
- 6mm masonry drill bit
- Wall plugs
- 8x 30mm screws
How to Install a Metal Back Box
In this example we are going to use the first method mentioned above, using a hammer drill, masonry bit, bolster and hammer.
In the majority of cases, anyone attempting to do this job should have all of these required tools and if not they can be purchased fairly cheaply.
Step 1 – Measure and Mark Socket Position on Wall
The first job is to measure and mark the position of the back box on the wall and then draw around it to that you know exactly where the recess for the back box is going to be created.
To do this you can either hold it on the wall and draw around it whilst trying to hold it level (using a spirit level placed on the top edge) or you can position it, level it up with the spirit level and just mark each corner. Make sure your marks are slightly bigger than the back box itself.
Once marked remove it and then use a straight edge to join each corner mark up.
One point to be aware of is that there are minimum heights that sockets need to be above floors, kitchen units etc. so you need to ensure any new sockets meet these requirements – Find out more in our socket height project here
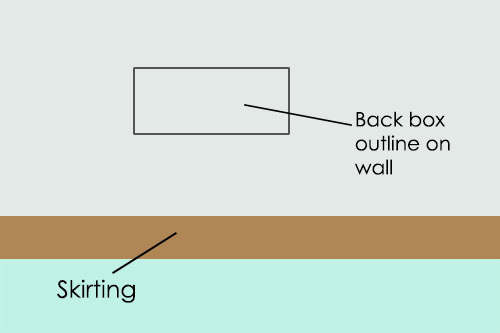
Back box outline marked on wall
Step 2 – Measure Depth of Back Box and Mark Drill Bit
So that the recess is cut to the correct depth of your chosen back box you need to know exactly when to stop drilling when you start to drill out your perimeter holes.
The best way to do this is to measure the depth of the metal back box and once you know its depth take a masonry drill bit, measure the depth up form the tip and then wrap a piece of insulation tape around it at this point.
Now that the depth is marked as you drill into the wall you will know exactly when to stop at the correct depth.
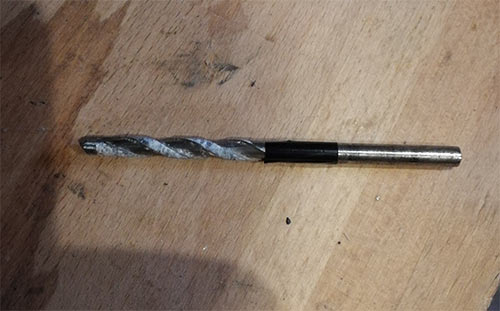
Depth marked on drill bit
Step 3 – Drill Around Outline
Once you have marked the drilling depth on your drill bit, pop it into your hammer drill and tighten the chuck to hold it firmly in place.
Place the tip of the drill bit on your chosen starting point (anywhere is fine) and drill to the depth of the tape. With your first hole drilled repeat drilling all the way around the internal edge of your markings, keeping the holes as close together as possible and also as close to or ideally on your perimeter lines.
Don’t worry too much if you go outside the lines or knock any chunks of mortar out, any repairs can be done easily afterwards.
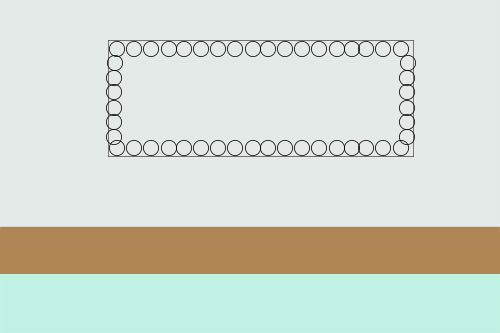
Holes drilled around back box outline
Step 4 – Remove Remaining Masonry With Hammer and Bolster
To save yourself a bit of time and hassle it’s well worth also drilling out as much of the internal masonry as you can as this will make the job of chiseling it away with your hammer and bolster that much easier.
Once you have done as much drilling as you can handle, take your bolster chisel (2 inch bolster should be fine), position the blade against the mortar and start tapping away with your hammer.
Don’t hit too hard with the hammer as this can do more damage than good as you can knock out huge chunks of mortar meaning unnecessary repairs.
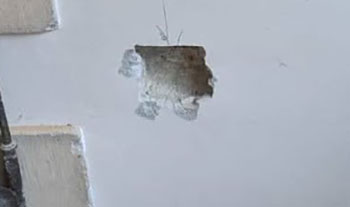
Single gang back box recess
Step 5 – Test Fit Back Box and Fine Tune if Needed
With the majority of masonry removed from the recess hole the next job is to test fit the metal back box and see how it actually fits.
If it slots straight in with the front edges flush with the walls surface, great news you’re pretty much done, however if it doesn’t then you will need to get stuck in with the bolster and remove any masonry that’s fouling it.
Check the fit regularly so that you don’t remove too much and once it’s fitting nicely you’re ready to secure it in place.
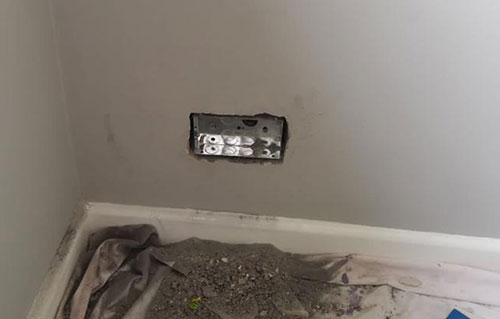
Test fitting 2 gang metal back box
Step 6 – Remove Knockouts and Cut Chase for Cables
Before fixing the back box in place you now need to decide where your cables are going to run. In most cases this will either be down from the top or up from the floor.
Which ever is the case for you, the next job is to remove the small knockouts (small circular discs) in the top or bottom of the box, depending on where your cables are going to run.
Removing these knockouts will then allow the electrical cables to run into the back box so they can be connected to the socket, light switch or similar.
Next, mark the chase for your cables on the walls surface from the back box location. In most cases the width of a large spirit level will more than accommodate the cables and also any capping.
Once marked use the above technique to remove the masonry between your marks and create the chase.
In almost all cases it’s much easier to cut the chase lines using an angle grinder and diamond cutting disc than to drill and chisel out.
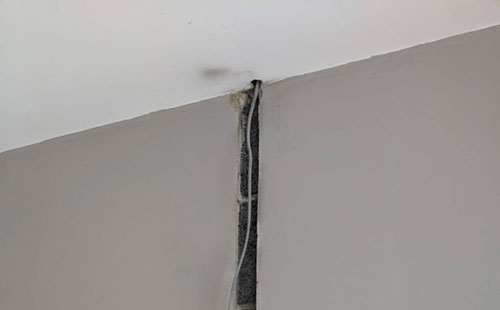
Chase cut in wall for cables
Step 7 – Fix Metal Back Box in Place
Once the back box is fitting nicely in the recess or chase it’s time to fix it in place. If you look at the internal rear of the box you will notice several screw fixing holes.
Essentially what you need to do it place the back box in place, mark through 2 of the holes, drill them out, insert some wall plugs and then screw the back box in place.
Use a decent marker such as a Sharpie to mark the holes and then use a 6mm masonry bit to drill the holes. Push in the wall plugs and then sit the back box in the recess and secure it in place using 8 x 30mm screws or similar.
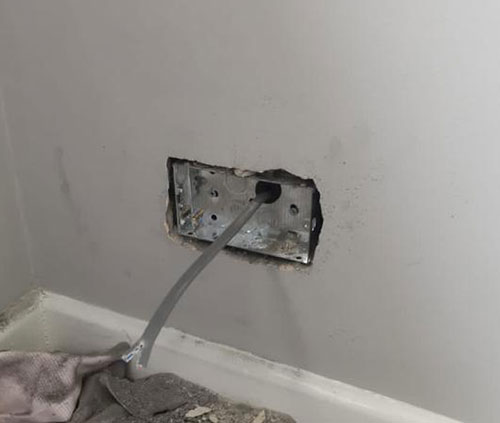
Metal back box fixed in chase recess in solid wall
Fitting a metal back box is a pretty straight forward job and one that can be certainly be done by anyone.

