There is no “one size fits all” solution when it comes to fitting kitchen base units. The only real hard and fast rules are that any and all base units in a kitchen need to be flat and level, all at the same height and also square and inline across all front edges.
Worktops should also sit square and level on top of any base unit, not overhang too far at the front or rear and again sit square to the front edge of any base unit it sits on.
Successfully fitting kitchen base units and getting a good finish is not an easy job and to complicate matters even more, in 99% of cases the floor and walls you will be fitting them on or against will not be in any way flat, square or level.
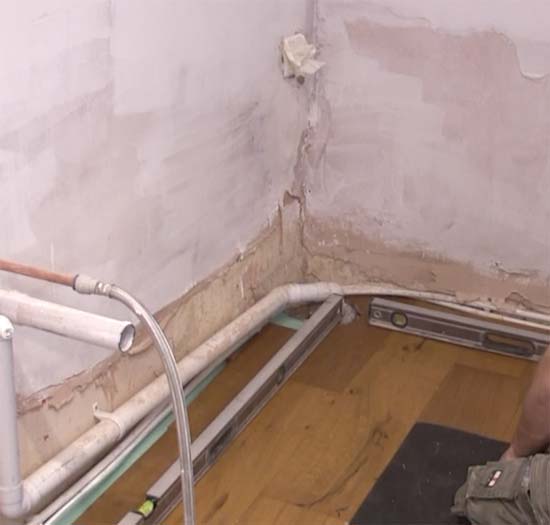
Uneven walls for kitchen base units to be fitted against
Points to Think About When Fitting Kitchen Base Units
There are a few points to consider before fitting kitchen base units, these are as follows:
- Pretty much every kitchen base unit has a service gap or service void at the rear. This gap varies but should be somewhere between 42mm and 60mm (depending on manufacturer). This gap allows for waste pipes and water supplies and also provides a surface that can be cut and shaped so the unit fits tightly to any irregular shaped surfaces
- When fitting kitchen base units you should always start in a corner and work outwards as required
- It’s a good idea to seal any cut or bare edges of a kitchen base unit to prevent water ingress from damaging it. You can use either PVA glue, silicone sealant, varnish or similar
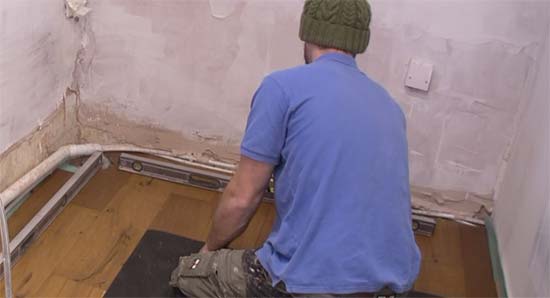
Step 1 – Check Level of Floor and Mark Unit Heights
It’s important that any base units are installed on as flat and level a floor surface as possible so first job is to check the slope and level of your floor. Small slight slopes can be taken up and dealt with through the adjustment in the feet.
Check floors to see how level they are before installing kitchen base units
However, if the floor is way off level or very uneven then it’s a good idea to level it first. See our project here on levelling concrete floors if you have a concrete floor or our project here on levelling timber floors if you have a timber floor.
In this case the floor was fairly level with only a difference of 8mm across the span so we found the highest point and used this as the reference to mark our base unit height mark on the wall.
Marking base unit height on wall
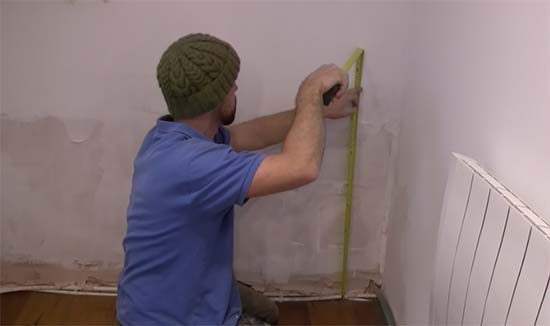
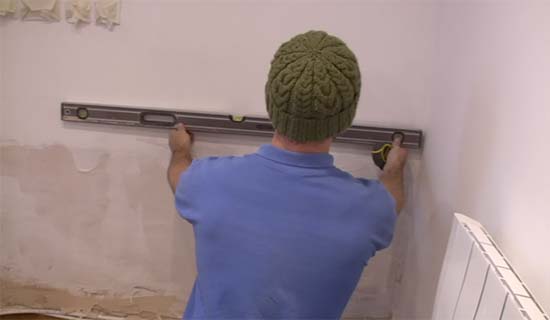
The next job is to then mark a level line all the way around the walls surface that can then be used to ensure all units are at the same height.
Depending on manufacturer, base units vary in height but will be somewhere around 720mm in height.
The best method to use to measure the height of a kitchen base unit is to measure the height of the plinth (usually 100-150mm), add 10mm (allow you to pull plinth off if needed) then add the height of the base unit carcass which is normally around 720mm.
In this example the plinths were 150mm and the units were 720mm giving us a total height of 880mm. We measured up this distance from the floors high point and marked our line from there.
Marking base unit level on wall to set height across all units
Once unit carcass height line marked onto the wall, measure thickness of the worktop and then mark a point on the wall for the finished height of the worktop also.
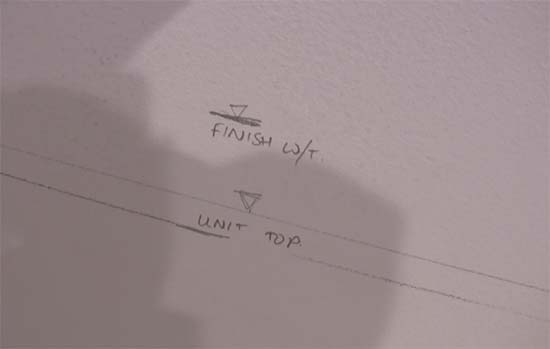
Worktop final height marked onto wall
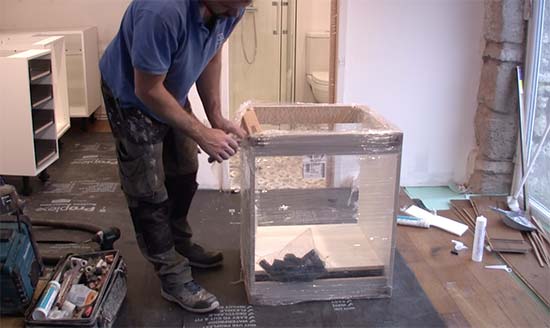
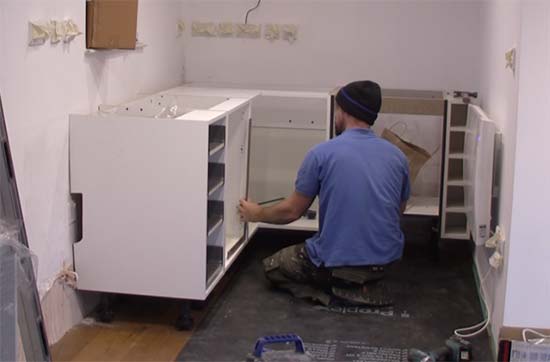
Step 2 – Unpack Kitchen Units Fit in Place
Unpack all the kitchen units and inspect them for damage and to also identify which unit is which e.g. cupboard unit, drawer unit, sink unit etc.
Unpack all of your kitchen base units
If your units are supplied “flat packed” then they will first need to be fully assembled, including the support legs.
While unpacking/assembling check all the fixtures and fittings (hinges, handles etc) to make sure they are all present.
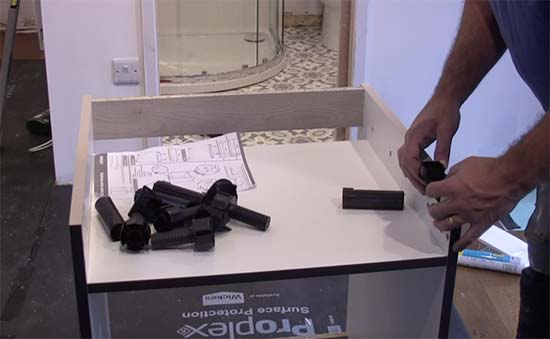
Check all required fixtures and fittings are included with your base units
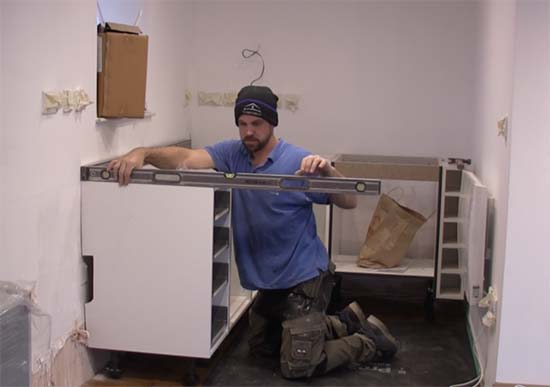
Once fully assembled, move each unit into its rough position within the kitchen area and then use the adjusters on each leg to get each unit level and flush with the unit height line you marked on the wall above.
Use a spirit level to ensure the unit is total level. This should be done in 6 directions – across front and back edges, both side edges and also corner to corner across both diagonals.
This needs to be done for every unit when it’s in place.
Step 3 – Cut Pipework Channels and Fit Flush to Walls
While positioning units look out for any existing pipework such as water supplies, gas supplies, waste etc and take care not to damaged them.
When fitting units around existing pipework and supplies you may need to cut some holes or channels in the units for the pipework to run through. If so, use a pencil to mark the top and bottom of each pipe on the unit at the point they meet.
Next, measure the distance from the walls surface to the back edge of the pipe and mark this depth on the unit. Use a suitable sized hole saw and drill/driver to cut out a semi-circular notch for the pipe to sit in and allow the unit to sit flush with surface of the wall.
This will also need to be done for hot and cold feeds and waste for the sink unit as you will need to cut a hole in the back of the unit for each.
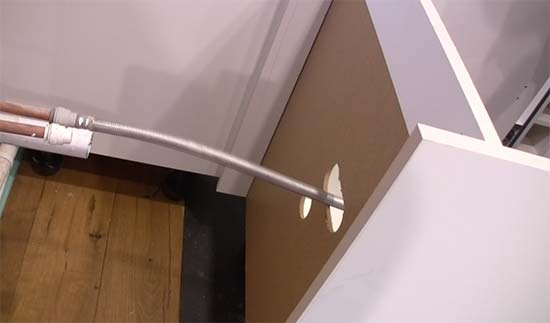
Holes cut in rear of base unit to allow for hot and cold feed and waste pipe
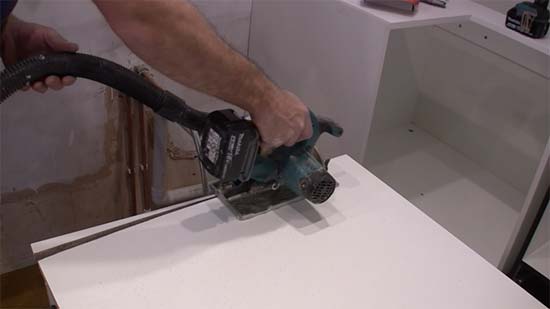
Step 4 – Scribe and Cut Units to Fit Flush to Wall
Unfortunately there is no such thing as a totally flat, level and square wall so it’s likely that when you push a unit carcass up to a given wall, one edge will touch and the other won’t. In this case you will need to scribe and cut the unit to fit.
See our project here on how to scribe and cut timber to fit odd shapes for information on how to do this.
You will probably need to make a cut on both the rear edges of the unit so ensure both are marked correctly.
Once you have marked your cutting line along the side of the base unit, lay the unit on it’s side (on a sheet as not to mark it) and cut along the line. The best tool to use is a circular saw but you can also use a hand saw or jigsaw.
Trimming base unit service void to fit to an uneven wall
Once both cuts have been made, move the base unit back into position and check it now fits to the contour of the wall and also that it’s level with the front edge of any base units next to it.
You will also find that as soon as you have to cut one unit, the remaining base units will also have to be cut also.
Step 5 – Existing Electrical Sockets and Other Fixtures
When fitting new kitchen base units into an existing room you are always going to face challenges with existing fittings such as sockets. You can almost guarantee there will be one that falls right on the edge of where a base unit needs to go.
If this is the case the choices you have are to either:
- Cut a section out of the back edge of the base unit so that it fits around the socket or fixture, allowing access for it to be used still
- Disconnect the socket or fixture and blank it off
- Move the socket or fixture from its current location to somewhere where it doesn’t foul the unit
In this example, 2 appliances were to be fitted close by an existing wall socket so a section of the rear of the unit was cut out to allow it to still be used.
Trimming out service void of base unit to access electrical socket for appliances
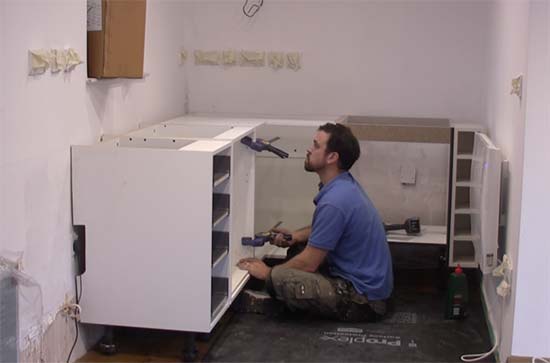
Step 6 – Fixing Kitchen Base Units into Place
If your kitchen base units are standing next to each other they should be fixed to each other as well as to the wall and, at the front of the unit, this can be done by placing the fixing screw behind the hinges. Once fitted, the hinges will hide them and keep things tidy.
Note: Before any fixing is done, it is essential that every unit sits totally square and level in its place independently of anything around it.
Checking levels of base units before screwing together
If this is not the case you need to make any adjustments necessary to ensure they do. If this means pulling one or more out and making more cuts to the rear then it has to be done.
If you screw base units together that don’t sit square it will pull them out of line. Even if it’s out by only a fraction you will probably find that when you go to fit the door it won’t sit square and will be obvious from a mile off!
When screwing units together, ensure the front edges are flat and level with each other and then clamp them up to prevent any movement. Once set, screw them together.
Base units clamped together ready for screwing up
While fixing kitchen base units in place, constantly check all your levels with a spirit level to ensure nothing is moving or being pulled out of line or off level. Check levels at the unit rear, along both side edges, at the front and also diagonally across the unit.
Any movement or level adjustment can often be done by adjusting the feet. Simply screw each foot in or out to raise or lower the unit as required.
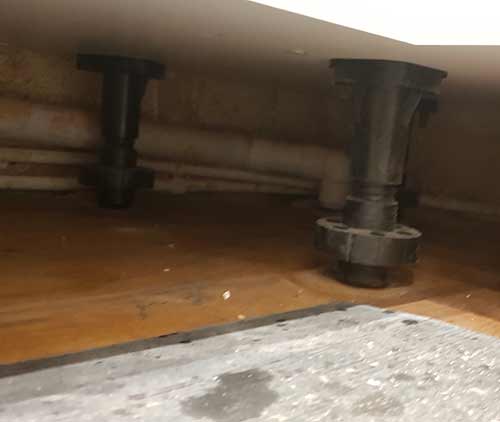
Base unit adjustable feet
Additionally, don’t forget about checking that the unit itself it square. Any pressure applied to the sides can cause it to lean, pushing it off square. To check if a given base unit is square you can use a framing square (or roofing square as it’s also known) is ideal for this.
Using a framing square to check kitchen base unit is square
With all base units now sitting square and level to the surface behind them and to any other units around them they are then screwed to the surface behind them, preventing any movement at all.
Kitchen base units are normally fixed to a wall using an angle bracket. One end of the bracket is fixed to the wall while the other end is then screwed to the unit holding it firmly in place.
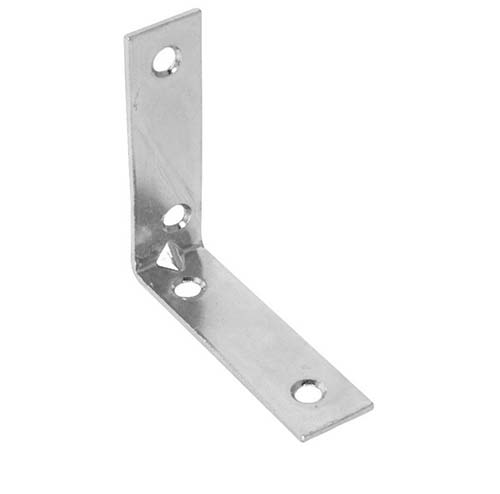
Angle bracket used to fix kitchen base units to a wall
If the surface you’re fixing to is either bricks or blocks then you will need to drill a hole and use a wall plug (more information on this can be found in our fixing to masonry project here).
If fixing to a stud wall e.g. timber and plasterboard it’s best to locate a stud and fix to this. If you can’t find one use a heavy duty plasterboard fixing such as a Redidive or similar (more information on fixing to plasterboard can be found in our project here).
When it comes to how often base units should be fixed, opinions vary greatly. Some say only the first and last units should be fixed, others say every other unit or either side of an appliance.
Taking the belt and braces approach we say every kitchen base unit should be fixed to the surface behind it. Over time things gets knocked, support legs move etc and if one unit starts to move then it won’t take long for the others to come loose also.
Once everything is fixed securely you’re pretty much done, top job! You can now move on to cutting and fitting your worktop. For help with cutting worktop mitre joints check out our project here.
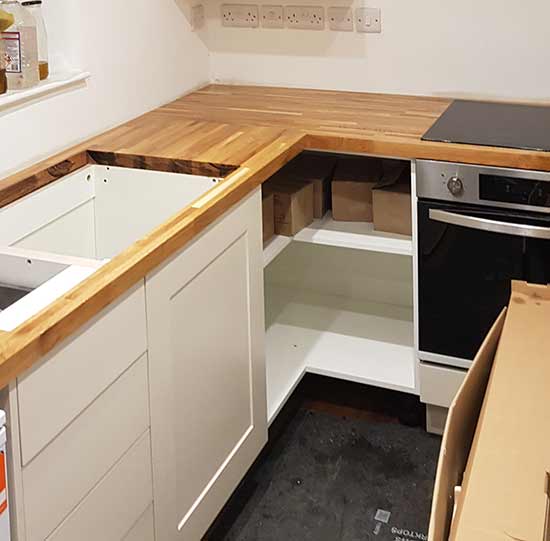
Base units successfully fixed in place and secured to the wall
Installing kitchen base units and getting a great finish can be a tricky job if you’ve never done it before.
If you have read any other information online I’m sure you’ll be aware that there is a lot of conflicting advice on how base units should be fitted, but essentially, as long as they are all totally flat and level to each other and any surfaces and fixed securely in place and all inline and square along the font edge that’s the main goal.