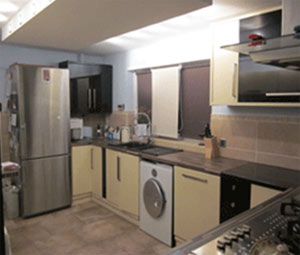
Complete and installed kitchen and wall units
Fitting kitchen cupboards is a DIY task that requires some carpentry skills, the rest is mostly some common sense, and being able to follow manufacturer’s instructions! If you are planning a fitted kitchen good preparation and understanding of layout is essential, head over to our fitted kitchen project for an overview on planning and fitting kitchen units.
You will need to work out how high to hang wall units and how to get your wall units level, even on walls where the floor or ceiling are not level, and we give you the information you need in this DIY project.
Actually putting the kitchen units together requires that you know the basics of how and why you are doing what you are told to do by the instructions. This is because most units are put together in the same way or at least using the same principles. So as long as you are aware of this, you can cope quite easily with any of the slight variances that exist between all the different kitchen suppliers.
Make sure you read the instructions through completely before you start to put the kitchen cupboard together. Also you should check that all the component parts of the unit have been supplied.
Wall Unit Styles and Sizes
Standard wall units are usually supplied in 300mm, 400mm, 500mm, 600mm, 800mm, 1000mm and 1200mm wide, depending on the manufacturer.
It is worth noting that base units come in similar sizes, and it makes good design sense to match the sizes of the wall units with the base units below them if you can. The size of the carcass might differ between top and bottom, but try to match up the sizes of the doors between wall and base units.
There are also corner cupboards and these come in different styles, one which is ‘L’ shaped and has either two doors or one concertina door (see middle image below), or a normal wall unit but with just one door (see left hand image below), the other is a quadrant style that creates a diagonal in the corner, and may have one or two doors, but they also come as open shelving units.
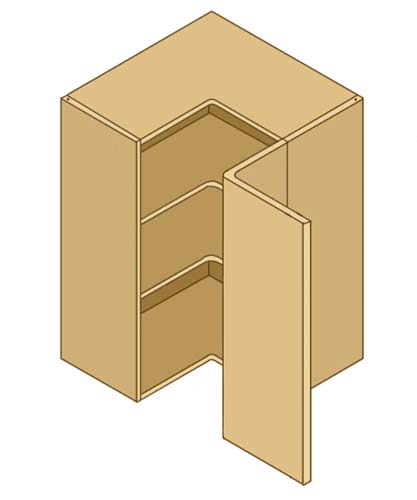
Bi-fold corner kitchen wall unit
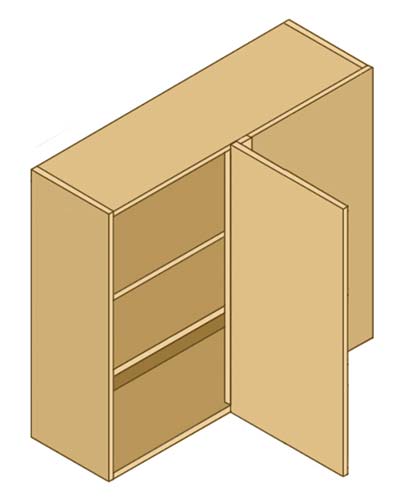
Straight corner kitchen wall unit
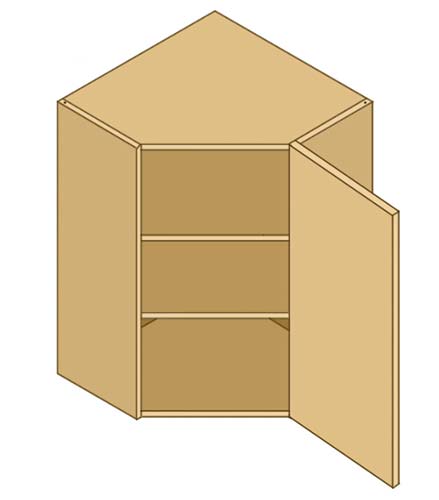
Angled corner kitchen wall unit
Hanging Kitchen Wall Units
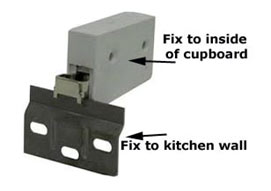
Some kitchen wall units are hung onto brackets and others are screwed through the back or sides.
The ones that are supposed to be screwed through the back or sides will always have special strengthening timbers fitted or they will be made up of 15mm boards. You should never attempt to hold up a unit by screwing through a flimsy hardboard back, because if the weight of the cupboard itself doesn’t pull it off the wall, then putting anything in it certainly will do. It is likely that the screws will simply pull through the hardboard, if not immediately then at some point in the future!

A Group of Complete and Installed Kitchen Wall Units with protective covers
In this project we are going to show you how to install both types of kitchen wall units – with brackets and without – so you can see the different methods of hanging each type of wall unit.
For the purposes of this project we are fitting two units with hanging brackets at each side and two (horizontal) units which screw directly to the wall. These horizontal units are also fixed to the units which are hung on brackets to form a group of units. See the picture above.
The featured kitchen units have a high gloss finish and they come with a protective film to prevent scratching while in transit, we left this on while fitting to make sure they remained protected during the construction and hanging process. The blue colour is the protective wrapping these units come with.
How High to Hang Wall Units?
The first job is to set out your units properly. Wall units are usually fitted or hung with the bottom of the unit 600mm above the worktop to give enough head height for working on the worktop. 600mm is not “a golden rule” and some wall units are placed at around 450mm to 500mm above the top of the worktop. The important thing is to work out how close to the ceiling you want the top of the wall unit. If there is a cornice on the top you will need at least 200mm to allow you to fit the cornice easily
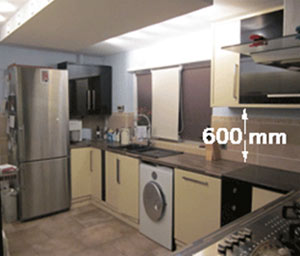
Allow about 600 mm between Kitchen Worktops and the bottom of the Kitchen Wall Units to give yourself enough room to work
The standard height for kitchen base units is 870mm from the floor to the top of your base cabinets. This measurement includes 150mm to allow for plinths and legs. The important thing here is of course, the height of the appliances going under the worktop. There is always adjustment on the legs of the base units and there are no actual rules to follow although we would not suggest that the kitchen worktop itself was much more than 900mm off the floor.
The worktop will sit on top of the kitchen base units so add in the measurement for your chosen kitchen worktops, before measuring up the distance you are going to allow between worktop and wall unit.
Usually wall units are fitted at between 450 to 485mm above the worktop. This is so that the wall units are the same finished height of a tall appliance housing which is usually around 2117mm high.
Altering the Height of Kitchen Units
If you have very high ceilings or the person who spends most time in the kitchen is tall you may want to adjust the height that you hang your wall units, to suit your own preference. All you need to be sure of is that the units are at the same height and are level all around the room.
You can also adjust the height of the base units slightly to suit your needs. Kitchen base units have adjustable legs to alter the height. These will only give you a few centimetres difference. If you want major changes in height you will need to prop up the legs or cut down the units. However if you need to reduce the height significantly you must make sure you can buy smaller doors to fit the units, otherwise you may need to make bespoke doors.
Fixing Kitchen Wall Units on Brackets
The first job with wall units that are hung onto brackets is to work out where the wall brackets will go. The manufacturer’s instructions will show you the distance from the bottom of the unit to the hanging bracket on the unit and this can be marked on the wall, along with the distance between each of the brackets.
If you have a lot of wall units to hang it’s a great idea to mark the height of the wall unit brackets at both ends of the wall and ping a line between them using a chalk line.
Fix the brackets in place at the correct distance apart for each wall unit and directly onto the line you marked. See our fixing to masonry project for more information on how to securely attach the brackets.
Once the wall brackets are fixed you can fix the cupboard hanging brackets inside the cupboard. The back board of the wall unit will have two cut–outs for the hanging arm of the bracket to fit through. There are two screws at the back of the internal wall unit bracket. One adjusts the height of the bracket for fine tuning on the wall and the other pulls the unit in towards the wall to keep it tight against it. This reduces the strain on the fixings once the cupboards are filled.
Once you have the height of the wall brackets marked, refer to our projects on fixing to plasterboard or our project on how to fix to masonry depending on your wall type and fix them in position.
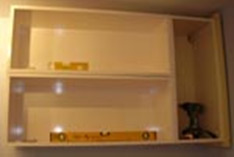
Step By Step Guide to Hanging Kitchen Wall Units
- Mark out on the wall where the top of the units will go, this line will be covered when the wall units are hung. Use a spirit level or a laser level to get the units straight and level
- Mark out where the brackets should be fixed on the wall – refer to the manufacturer’s instructions for this
- Fix the brackets onto the wall making sure they are straight on the line you marked
- Secure the hanging bracket inside the kitchen cupboards – refer to the manufacturer’s instruction for how and where to do this
- Hang the wall unit on the securely fitted brackets
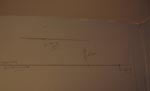
Mark out on the wall the position of the Kitchen Wall Units

Wall brackets fixed in position on wall
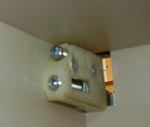
Kitchen Wall Cupboard Bracket seen from inside the Unit

Kitchen Unit Hanging Bracket seen from the rear of the Cupboard
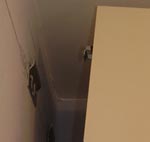
Hanging cupboard wall unit on wall
How the hanging unit inside the cupboard fits onto the wall bracket
Fixing Kitchen Wall Units without Wall Brackets
For this project we now had to fit two horizontal units which did not come with hanging brackets.
To do this we fixed through the back after setting out the height and marking it on the wall in exactly the same way as we did with the wall unit brackets. They were then fixed as shown in our fixing to masonry project.
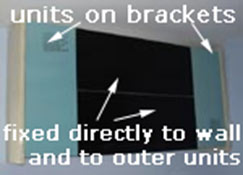
A Group of Kitchen Wall Units Gives Flexible Storage Space
Vertical Wall Units fixed to Horizontal Units on Brackets
Because these two horizontal units were planned to be part of a group of units they sit in-between the two wall units that we hung on brackets (see above). So for additional strength we fixed screws into the horizontal units through the inside of the vertical units, but to make sure this did not look unsightly we put the screws in behind the hinges where they won’t be seen (see below).
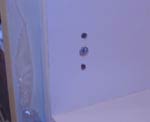
Hinge holes for wall unit door
This Image (above) shows the two holes which are put in place by the manufacturers ready for the cupboard door hinge to be fixed to. You can see we have placed a screw in between these to fix through to the vertical unit.
Using simple tricks like this keeps every job neat and tidy, to give a professional finish, as well as doubling up on safety and strength.
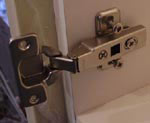
Door Hinge fixed to Wall Unit – This completely covers the securing screws we put in
Screwing and Fixing to Kitchen Units
When it comes to what screws to use when fixing kitchen wall units in place, this will depend on how and where they are being fixed.
For example if you are fixing into a wall then you will want to use the correct 30mm – 40mm screw and wall plugs to ensure the object you are fixing is solid.
If however you are screwing or fixing into a wall unit or even a floor standing unit then you will need to use the correct size screw to ensure that you don’t go through the carcass and ruin it.
There’s nothing worse that screwing through the side of a unit and blowing the laminate coating off, it will stand out a mile off!
Additionally when fixing items such as door hinges in place to both a carcass or the door itself then you will need to use special screws known as hinge screws. These screws are designed specifically for fixing items to kitchen units as they are short enough not to penetrate the carcass itself and have quite course threads, ideal for holding firmly in chipboard.

Hinge screw for fixing to kitchen units
Tips and Tricks
- Use a chalk line if you are hanging lots of wall units
- Use a laser level to get level lines right around a room
- Always make sure your units are plumb and level with a spirit level. If they are not it makes fitting the doors properly very hard work indeed
- Place the cupboards on a piece of carpet or cardboard packaging while you put them together to prevent them getting damaged while you are working on them
- Leave the doors off the wall units until they are secured on the wall – this makes them easier to lift
- Kitchen wall units with brackets are easier to hang if you are working on your own. You will need two people to be able to secure kitchen wall units without brackets