A sturdy workbench is essential in any workshop or shed for successful DIY projects. A solid and stable surface makes a significant difference.
However, traditional workbenches are often heavy and large, which isn’t ideal for small work areas.
The solution? A folding workbench. This guide will show you exactly how to build your own.
Other Workbench Solutions
Before we show you how to build a folding workbench, let’s explore other workbench options to see if one might better suit your needs.
Fixed Solid Workbench
Fixed workbenches are large and bulky, making them ideal if you have enough space. They come in various styles, sizes, and price ranges. Some are DIY flatpack kits, while others come fully assembled.
An example of an affordable fixed workbench with tool storage is this one from Etsy, priced around £200.
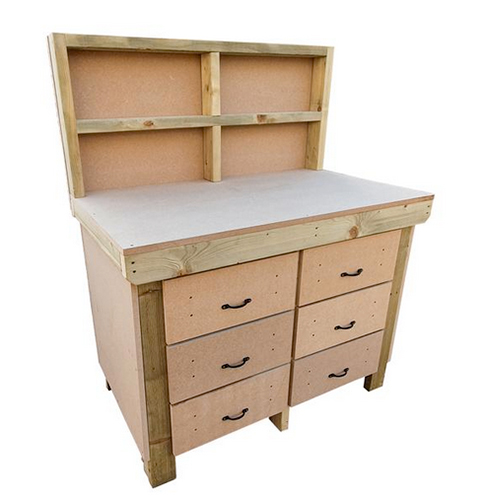
Fixed workbench available from Etsy here
If you prefer a DIY kit, consider the Simply Build-It Workbench Kit. See our guide on building a workbench here for more information about the kit and how to use it.
Another great solution, if you are looking for a pre-built work bench is to scour one of the many market places available online today such as the Facebook market place. There are often loads of second hand and pre-used options available at very good prices, certainly something to consider.
WorkMates and Small Folding Benches
The original and arguably one of the best folding work benches, the WorkMate is a versatile and popular workbench, available in various designs with unique features. It folds into a compact size and includes an in-built vice that doubles as a work surface—ideal for small spaces and on-site work.
While it may be too small for everyday use in a workshop, it is extremely handy for a range of smaller projects.
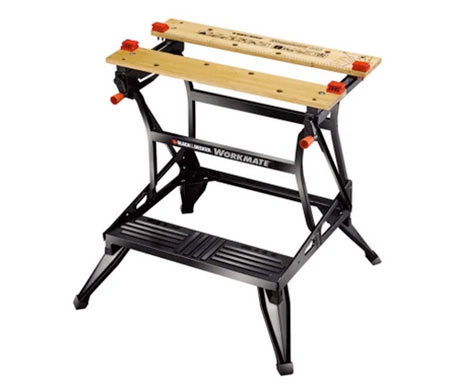
The versatile Black & Decker WorkMate
Many companies have replicated the WorkMate, adding their own features, so there are plenty of small portable workbenches to choose from.
How to Build a Portable Folding Workbench
If you prefer a custom-built portable folding workbench, follow the steps below. Our example workbench is 800mm wide and 1300mm long, but you can adjust the dimensions to fit your needs. We’ll use a 25mm thick plywood for the top, though any sturdy material will work. Just ensure thinner materials are strong enough for your projects.
This workbench size fits easily in a small van. For smaller vehicles, adjust the dimensions accordingly.
Step 1 – Cut the Worktop to Size
Start by cutting your worktop material to size, as this will determine the frame dimensions. A circular saw works best, but a jigsaw or handsaw can also do the job.
Measure and mark your cutting points along the edge of the worktop. Use a straight edge to draw lines connecting these points.
Clamp a straight edge (e.g., a spirit level) along your cutting line, adjusted for the saw’s shoe width (27mm in this example). Secure it to use as a cutting fence, ensuring a perfectly straight edge.
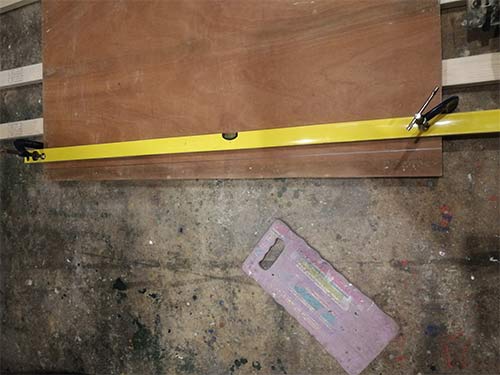
Cut workbench worktop to correct size
Step 2 – Cut and Assemble the Workbench Frame
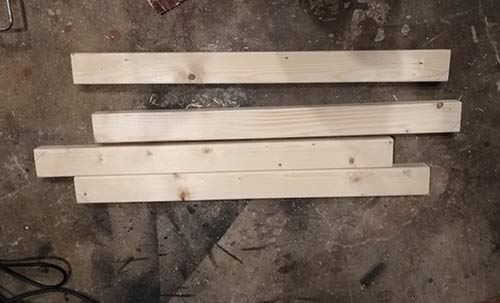
Next, cut and assemble the framework to support the worktop. Measure and cut four pieces of 3×2 inch timber to match your worktop dimensions. For this example, two pieces are 1300mm and two are 800mm.
Mitre each end to 45 degrees and sand off any rough edges.
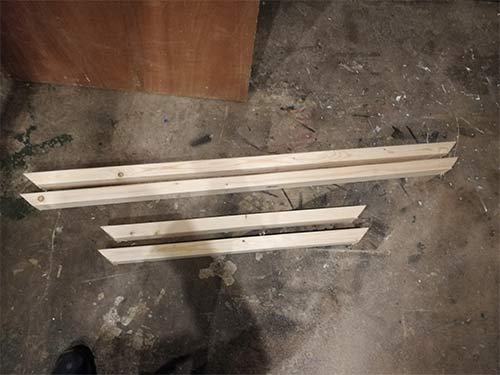
Framework timber cut to size and mitred at each end
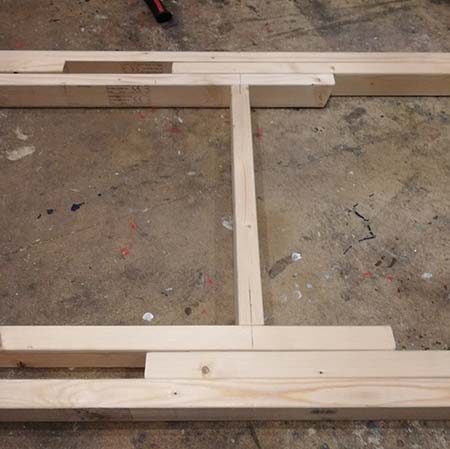
Lay out the timbers to form a rectangular base, ensuring all joints are tight.
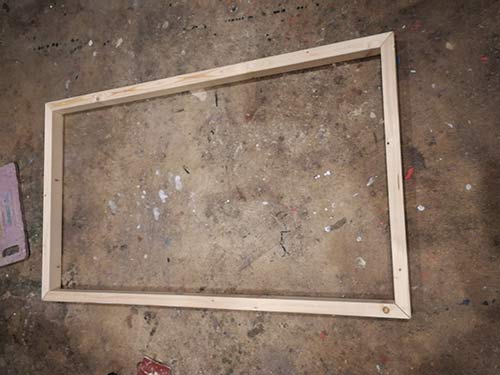
Main workbench framework laid out ready for fixing
Drill pilot holes and countersink them at the top and bottom of each longer timber piece. Screw each corner together, ensuring tight joints. Learn more about drilling pilot holes and countersinking here.

Workbench framework screwed together
Step 3 – Cut the Workbench Legs
After assembling the frame, cut the legs to your desired height. For this example, the workbench will be 760mm high, which is a comfortable height for most users, however, you may need to adjust to your own particular requirements.
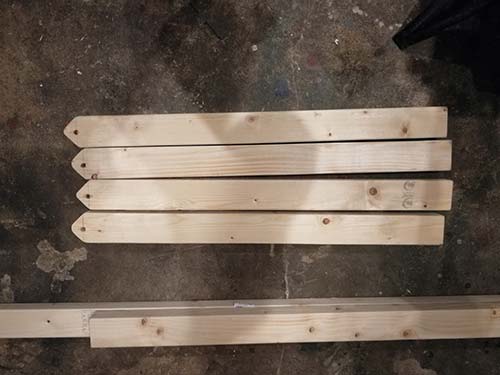
Cut four pieces of timber to 775mm each. When combined with the 25mm thick worktop, this will make the workbench 800mm. Angling the legs out for stability will reduce the height to 760mm.
Workbench legs cut to 775mm
Next, cut a 25mm x 25mm mitre at the top of each leg. Sand the edges to prevent the legs from binding against the underside of the worktop when opened out.
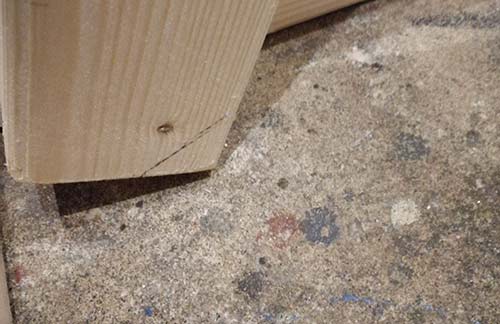
Mitred top of workbench legs
Finally, measure and mark the centre between the mitred corners, 30mm from the top. Drill a 10mm hole at this mark. This hole will be used to bolt the legs to the workbench frame.
Fixing hole drilled in top of worktop leg
Step 4 – Install Chocks for Folding Legs
Since the legs are nearly 800mm long, there’s not enough space for both pairs to fold together. One pair will need to fold inside the other.
To achieve this, attach small chocks at one end of the frame to bring one pair of legs inward.
Secure two 250mm pieces of timber inside the frame at one end.
Timber chocks screwed at one end of frame to allow legs to fold up
Step 5 – Attach Leg Fixing Bolts
To attach the legs and allow them to swing, we’ll bolt them to the frame.
Turn the workbench frame on its side. Measure and mark 105mm down from each end, then mark the centre of these lines.
We’ll use M10 coach bolts (also known as carriage bolts), which require 10mm holes. Drill a 10mm hole at each centre mark, then use a 13mm drill bit or flat bit to countersink the holes. This will allow the square section under the bolt head to sit flush in the timber.
Repeat this process for all four corners. Insert a bolt and two washers into each hole.
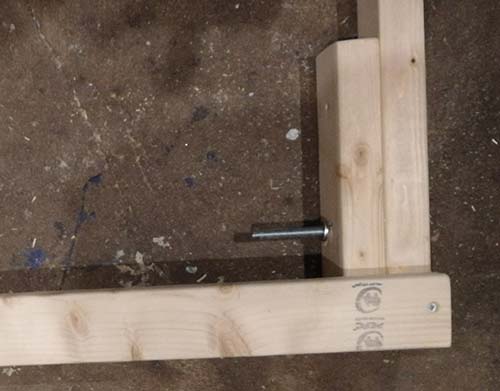
Bolt added to each corner of the workbench frame
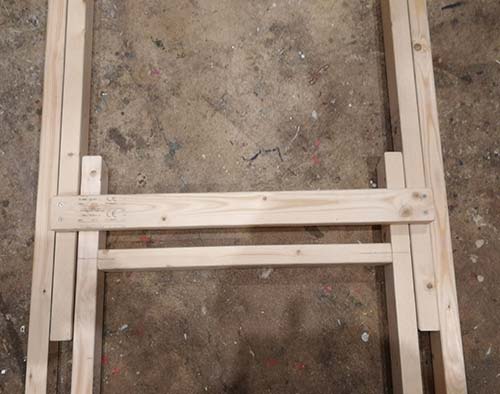
Step 6 – Attach Leg Stay to Workbench Frame
To secure each leg once the workbench is open, we need to attach a leg stay. This is a piece of timber fixed at each end that the legs rest against, preventing them from opening too far and causing the bench to collapse.
Measure and cut two pieces of timber to the full width of the bench. Fix each piece in place at either end of the frame so that the outside edge is flush with the edge of the workbench frame.
Secure both timbers firmly in place by screwing them every 150mm or so.
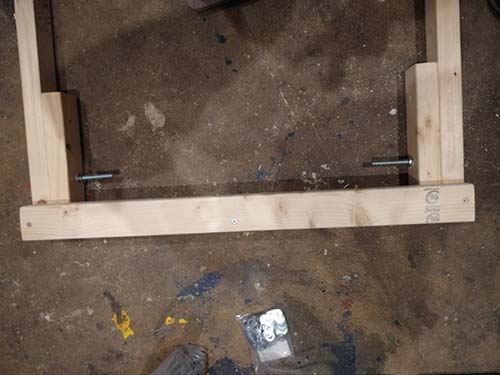
Leg stay screwed to underside of workbench
Step 7 – Angle Legs Outward
Each leg will slightly splay outwards at each end to enhance stability and prevent unexpected folding, ensuring the bench remains secure under downward pressure.
To precisely determine the angle for the mitre cuts and ensure each leg sits flat on the floor surface when opened, follow these steps:
- Slide one leg onto the bolt at a corner and extend it until it touches the leg stay.
- Clamp a straight edge, like a spirit level, to the back edge of the frame, ensuring it’s square.
- Using a carpenter’s square, align it with the straight edge and extend it to the leg’s endpoint. Draw a horizontal line on the leg along the square’s blade.
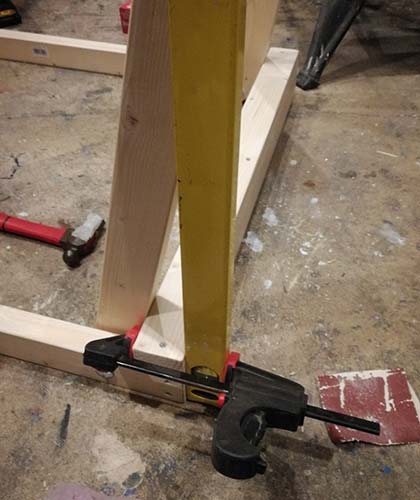
Straight edge clamped to back of frame

Working out exact angle to cut base of worktop leg
This line indicates the precise angle for cutting the end of each leg. You can now mark it using an angled bevel and transfer it to the base of all the other legs.
Precise angle to cut base of workbench leg to, to ensure it sits flush with floor
Step 8 – Secure Legs to Frame
Now that each leg is prepared, it’s time to secure them. Slide each leg onto its bolt and add two additional washers. This setup allows tightening while maintaining free leg movement.
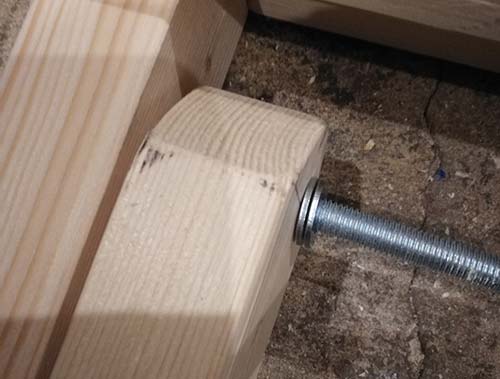
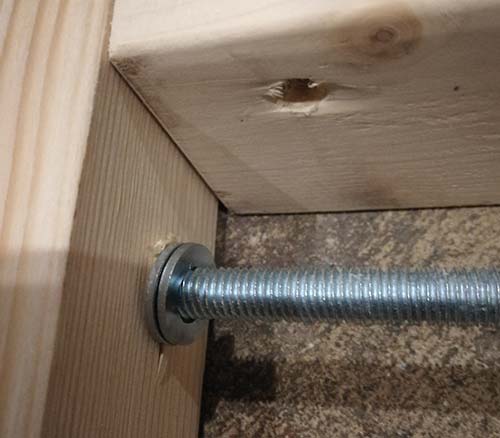
Leg slipped on to fixing bolt and washers added
Once each leg is in place, screw on two nuts. Tighten the first nut until snug. Then, using a spanner, tighten the second nut against the first. Finally, secure both nuts tightly together.
Adding the second nut ensures each leg remains securely fixed, preventing loosening with repeated opening.
Repeat this process for the remaining legs.
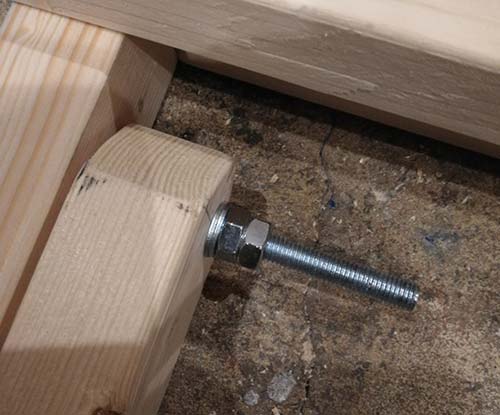
Workbench leg fully bolted in place
Step 9 – Install Leg Supports
Now, let’s add some support to the legs for extra strength. With the assembled frame on the floor and the legs folded up, measure the gap between the narrower pair of legs and cut a timber to fit.
Screw it into place on both sides, positioned around 200mm from the base of each leg.
Leg bracing support added to narrower pair of workbench legs for structural support
Since the narrow pair of legs sit inside the wider pair and extend down, adding bracing this high up each leg could cause flexing. To avoid this, fix the bracing for the wider pair on top.
Cut a piece of timber the width of the wider pair of legs and position it, again around 200mm from the base of each leg. Secure it into place on both sides.
Bracing fixed across wider pair of legs
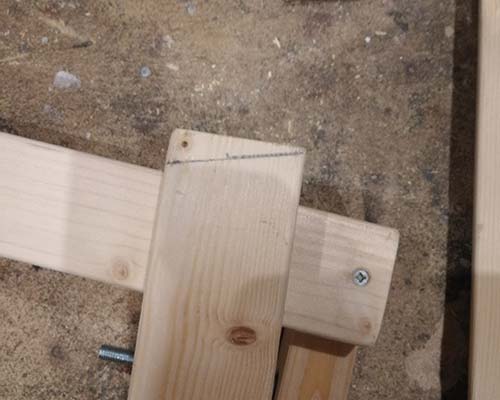
Step 10 – Install Leg Lock
Before securing the top, let’s add a small locking mechanism to keep the legs closed.
Cut a piece of timber large enough to span from the frame’s edge across both pairs of legs. Drill a small hole and screw it beneath the frame to hold it in place.
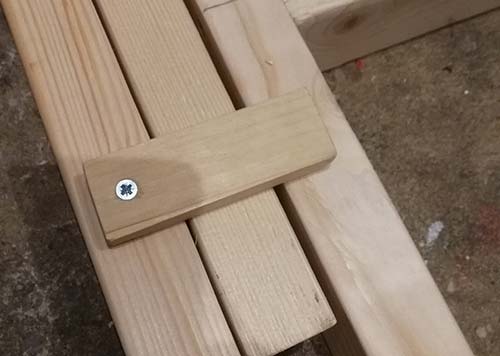
Leg lock screwed to frame
Step 11 – Attach Top to Workbench Frame
Now that the frame is complete, it’s time to attach the top. Flip the bench onto its side, extend the legs, and then lift it onto its feet. Ensure it’s stable with each leg firmly on the floor.
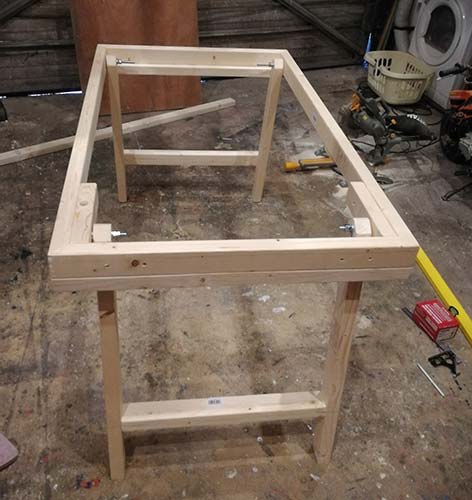
Workbench frame standing on its legs
Place the top onto the frame, aligning it flush with all edges. Drill pilot holes in four spots along the shorter edges and 6-8 spots along the longer ones, and then countersink each hole.
Once completed, screw the worktop onto the bench frame, and you’re almost finished!
If desired, smooth out the top edges with sandpaper or use a router with a rounding off bit for a polished look.
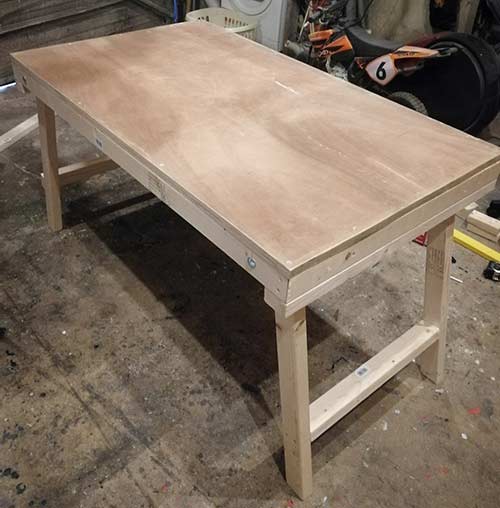
Completed folding workbench
Building your own work bench is a great DIY project and not only do you learn and develop numerous carpentry skills but you also come out of it with your very own strong and sturdy work bench that can help with a great range of jobs.