Bedroom storage is an absolute necessity in every home. Having a decent amount of hanging space, cupboard space or drawer space to store all of your clothes is essential to ensure everything is kept neat and tidy.
Wardrobes and chests of drawers are the normal solutions when it comes to packing and storing clothes and these are fine in a standard sized room, but what if the bedroom you are dealing with is on the small side or an odd shape?
In these cases standard sized wardrobes or cupboards may not be suitable as the floor or wall space available to locate them will probably not be ideal and also their size might severally impact the usable space in the room.
This is particularly true for bedrooms in loft conversions, especially when room height is limited.
If this sounds familiar to you then the best solution is to build your very own bespoke fitted wardrobe as you can construct it to fit the space available.

Bespoke oak built-in wardrobe
Offsite or Onsite Construction
Before staring any wardrobe construction the first thing you need to think about is where you’re going to construct your wardrobe. In this example we opted to build it offsite and then install it later once the framework was completed.
The main reason for this was that the bedroom the fitted wardrobe was going to be installed in was in use and as realistically it would be a few days before it was finished, building it in the room would mean removing all the existing furniture to create some space which would have been rather impractical.
Building it offsite also meant that time was not much of an issue and we could take a little longer to get things exactly right.
One disadvantage however is that no wall, floor or ceiling in any house is totally straight or level so building from a set of plans and measurements to fit a space that in all likelihood won’t be square will mean that it will need to be adjusted at the point of installation.
There are pros and cons to either method and it’s totally up to you which route you choose.
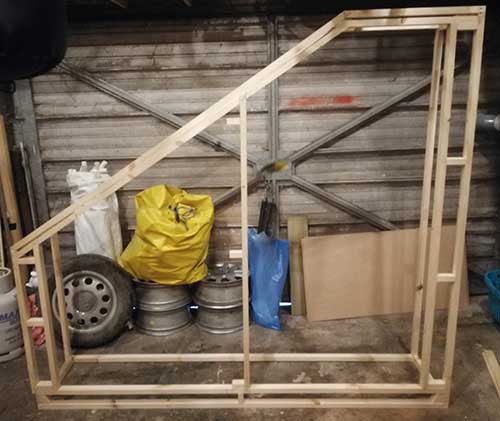
Building a fitted wardrobe offsite to install later once completed
How to Build a Fitted Wardrobe
In this guide we are going to build a fitted wardrobe in a loft conversion bedroom that has fairly limited head height. The size and shape of wardrobe is specific to the size and shape of the room so your wardrobe will likely be different so please adjust the measurements accordingly.
Despite the size and possible shape differences the principles and methods of construction should be the same.
Additionally to keep costs as low as possible we have used smaller timbers for the framework and also MDF for the doors and cladding. If you have more of a substantial budget feel free to go for different materials such as Oak, Walnut etc.
Measure up and Draw a Wardrobe Construction Plan
Before cutting or building anything, the first job is to accurately measure everything up and draw a detailed plan including all measurements and existing fittings and their locations as you don’t want to cover over things like light switches or sockets if you can avoid it.
If there are any skirting boards present include heights and depths of these also as when building offsite you will need to cut sections of timber to fit around them.
On your plan you will also need to include any angle measurements that are present. If you are working in a loft conversion as we are here there will most likely be at least one sloping ceiling to build around so you will need to know any angles around objects like these so you can cut mitre joints in your timbers so they meet accurately.
The best way to do this is to use an angled bevel to set the exact shape of the angle and then use a protractor to measure the angle in degrees. For more tips on how to use an angled or sliding bevel see our project here.
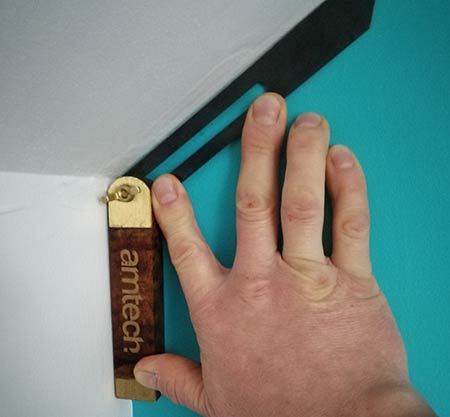
Using a sliding angled bevel to measure ceiling angle
It’s also a very good idea to locate any existing floor, wall and ceiling joists if you can. Once your wardrobe is in place it will need to be secured to something and it you can screw directly into an existing joist this it much easier than having to install fixings, especially if they need to be installed into plasterboard.
Finally at this point it’s also a good idea to think about what type of wardrobe doors you are going to have. In most cases this will simply be open out doors, but you may also want to consider sliding doors, bi-fold doors or even doors that open upwards.
Also consider how deep your wardrobe will be and how much space in front is available for opening the doors to access the inside.
Build Fitted Wardrobe Framework
With a plan fully drawn up and all measurements and angles calculated construction can now begin. There are umpteen different ways to build your fitted wardrobe but the method we are going to use is to construct two frames to the dimensions of the space we’re installing in and then joint them with timbers to form the wardrobe and then clad it with MDF and finally attaching MDF doors.
Once painted and finished you will be left with a modern looking wardrobe that will suit pretty much any room.
The first job is to build the two frame sections so using the measurements on our plan we cut our five sections of timber to size.
Where mitres had to be cut to form an angle we referred to our plan and noted the relevant angle. To ensure cuts were accurate the total size of the angle was divided by two to provide the angle that each meeting edge of the timbers needed to be cut at.
Note: As with any cuts always measure twice and cut once! Make sure they are totally accurate!
For example if the total angle is 130°, divided by two is 65° so each meeting edge of the timber needs to be cut to 65° to form a perfect 130° total angle.
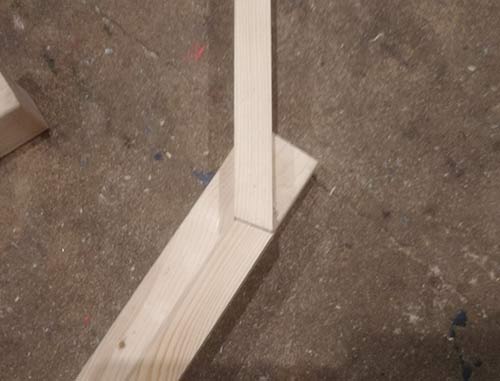
Accurately cut mitre joint to form angle
With all timbers cut for the first frame they were then laid out, pilot holes were drilled and countersunk and then it was screwed together (more information on pilot holes and countersinking can be found in our project here).
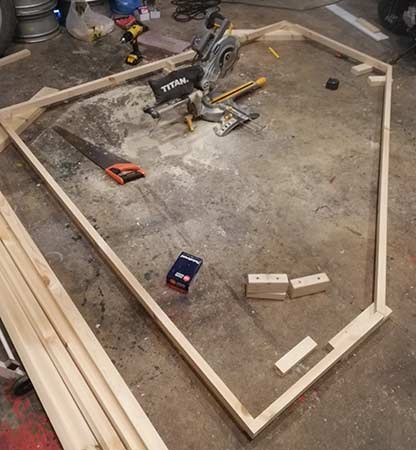
First fitted wardrobe frame section cut and assembled
With the first frame cut and assembled repeat for the second frame, constantly checking your measurements against the first frame and also your plans.
Once everything’s cut, again, lay all the timbers out and then drill pilot holes and countersinks and screw it together.
Construct Frame Inside First Frame
With both frames fully built we next need to build a frame inside the first frame which will be the outer frame. This then provide two surfaces that we can then screw our MDF cladding to.
In terms of the cladding, we don’t want to make it too big as this will restrict the access that we have into the wardrobe itself so the internal frame was set to allow 60mm of cladding around the top edges, 150mm on the right edge and left sides (more about this below) and 90mm at the base.
As before all timbers and mitres were measured and cut acurately and then screwed in place.

Frame built inside outer frame to allow fixing of cladding
To add some structural strength to the internal frame, small chocks were cut and then fixed between the inner and outer frames.
Chocks fixed between frames to add structural strength
Fix Both Fitted Wardrobe Frames Together
With the frames formed it’s now time to fix them together. When drawing out the plan you should have at that point decided on how deep the wardrobe is going to be. This in some ways will be dictated by the size of the room but also by the clothes you’ll be hanging in it.
Why is this you may ask? Well, the majority of coat hangers are around 400mm in length so when hung on a clothes rail you will need at least 400mm plus some wiggle room resulting in a depth of around 500mm.
So with this in mind 500mm was set as the depth to both provide enough room to hang clothes and not to take up unnecessary space in the room.
To joint the frames timbers would be cut and fixed between them but the timbers would need to be cut to the correct length to ensure the total depth of the wardrobe finished at 500mm.
The timbers used to create the frame were 27x40mm so with two timbers from and back at 40mm, this totaled 80mm. 500mm minus 80mm meant that timbers needed to be cut to 420mm. Five were cut in total so that we could fix one at every corner joint.
Again pilot holes were drilled and counter sunk, the timbers were screwed in place on the rear frame, the whole lot was then laid flat on the floor and the outer frame placed on top and screwed in place.
Two fitted wardrobe frames being screwed together
Notch out Timbers for Skirting
In a rather counterproductive manner, before progressing any further the rear frame and another edges that touch any skirting will need to be trimmed to fit around the skirting so this will mean unscrewing some of the timbers we’ve just screwed up to cut them out.
As skirting was present on both the rear and left edges all timbers around these areas would need to be trimmed.
The easiest way to do this is to find a short length (if you have any spares) of skirting and place it at the point the timber butts up to it and the height that it rises above the floor and trace around the profile. This can then be cut out using a hand saw or jigsaw.

Marking skirting profile for cutting
In all honesty as it will be covered over with MDF cladding you don’t need to follow the profile exactly but if you want to be fully precise then this is the best way to do it.
Once marked out, remove any screws, trim the timbers up as needed and then screw them back in place.
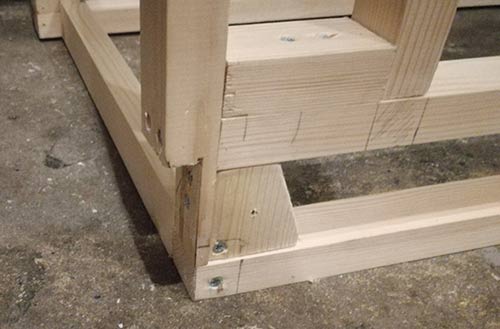
Timbers notched out to fit around skirting
As the rear corner needed two cut as it butted up to skirting on two edges, this only left a very thin section of timber left after cutting out the notches so to strengthen it we then added a bracing timber.
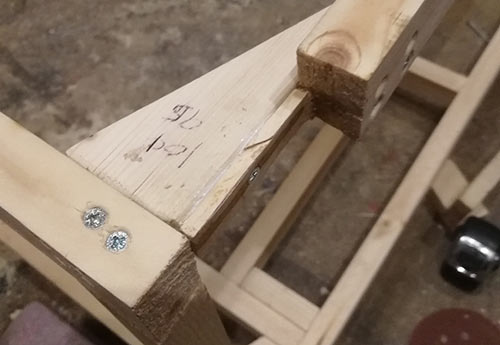
Brace timber to strengthen timber with two skirting notches
When any lengths of wardrobe frame timber run along the skirting itself e.g. the rear base of the frame and left side frame joining timber in this case you can either trim these down the width of the skirting (in this case 20mm) or as we did here simply move them in 20mm.
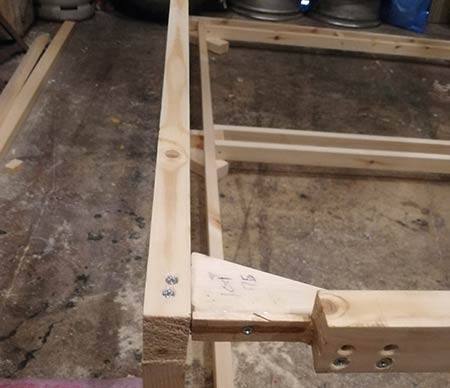
Moving wardrobe frame timbers in to fit around skirting
Add Centre Door Pillars to Wardrobe Framework
To access our wardrobe we are going to feature two sets of outward opening double doors so in order to hang the two doors in the centre the next job was to install some door pillars.
As space at the front of the wardrobe was rather limited we needed to reduce the depth that the doors would extend when open but at the same time provide enough actual accessible space to the inside.
With this in mind we decided to make each door 4500mm wide as two doors together would produce a total opening of 900mm which is plenty.
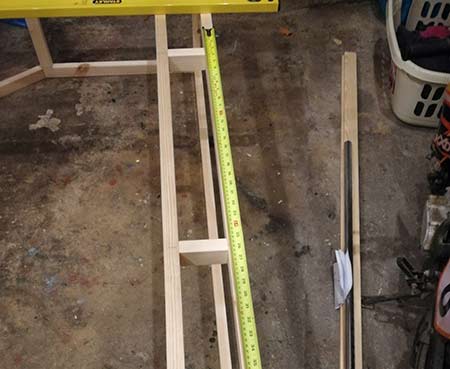
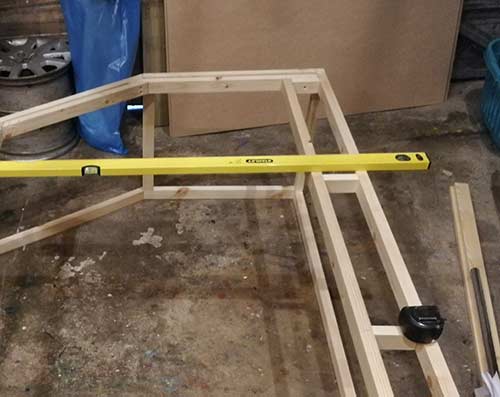
Next, we led the framework on its side and placed a spirit level from top to bottom spacing it roughly 900mm from the right side inner frame. We then used a tape measure to position the spirit level at exactly 900mm from the right and marked the frame top and bottom. This would now mark the first door post.
Next a piece of timber was laid on the marks and then we marked the timber so that it could be cut to fit. Once cut it was then screwed into position.
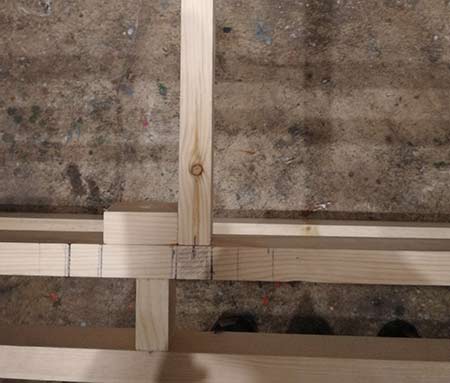
First door pillar fixed in place
With the first pillar in place the same was then done for the left hand side. Once fixed, chocks or noggins were added to provide strength.
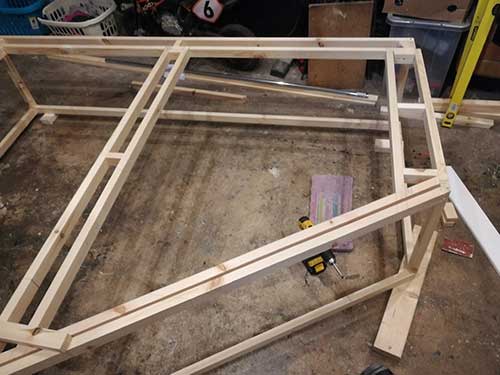
Second door pillar fixed in place
Fix Clothes Rail In place
With the frame now pretty much there the next task is to work out where the clothes rail will be fixed. For this there are a few things you need to think about first.
The majority of adult clothing hangs to around 800mm once hung on a rail so the rail needs to be placed to allow for this.
Also, as we are installing against a sloping ceiling the clothes rail needs to be positioned low enough to make the most of the horizontal space available to maximize the amount of clothing that could be hung up.
With the frame still on it’s side a spirit level was positioned in place of the rail and we then measured down 800mm from the base of the level and moved the level down until we arrived at the sweet spot – enough hanging space at the base, enough room for a storage shelf at the bottom and a decent horizontal length of 1550mm.
Next we leveled the spirit level up so that the hanging rail would sit level by measuring up from the frame base in two positions until level and then marked its position on the frame.

Level up hanging rail and mark its position
We then transferred the marks around the frame to mark the exact position that the clothes rail needed to be fixed at.
Two timbers were then cut to fix across the frame, their centres were marked and a 25mm hole was drilled dead centre. They were then screwed in place in the frame with the centre of the timber lined up with the clothes rail position marks made earlier.
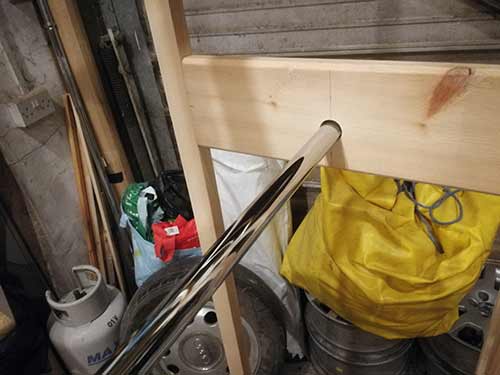
Clothes rail mounting timber fixed to wardrobe frame
One final task was to mitre cut the rail mounting timber to match the slope of the roof. With it screwed in place use a pencil to mark the slope of the cut, remove the timber and use a protractor to calculate the angle and then set it on a table saw for cutting.
Once done it was then fixed firmly back in place and an additional small piece of timber fixed over the back of the clothes rail hole to stop it sliding out.
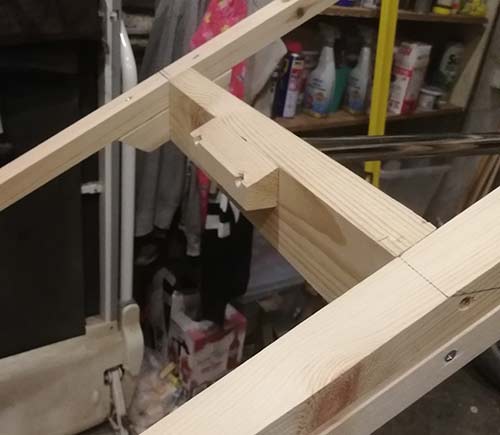
Clothes rail hanging timber mitered to fit roof slope
The clothes rail was then marked and cut to length and inserted in place between the hanging timbers.
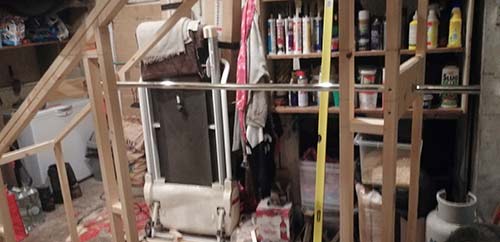
Clothes rail installed into wardrobe framework
Construct Shelves for Wardrobe
With the rail installed the next job was to cut and fix timbers in place to form the shelves. Two timbers measuring 2200mm, the full length of the wardrobe, were cut and fixed front and back 350mm up from the base. This would allow more than enough access for the bottom shelf.
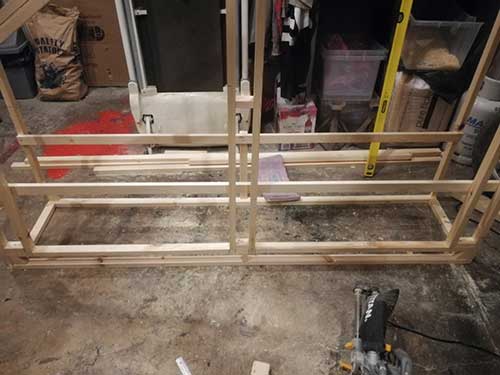
Wardrobe shelf support timbers fixed to frame
A further two timbers were then cut and fixed 80mm above hanging rail to form the supports for the top shelf. Once fixed in place the sloping ends were marked with a pencil and cut to match the roof slope.

Wardrobe top shelf fixed in place
Next, support timbers were cut and fixed in place across both shelves at either end, in the centres and at the centre of each half. These timbers would both provide structural rigidity to the frame and also help increase the load capacity of the wardrobe shelves.
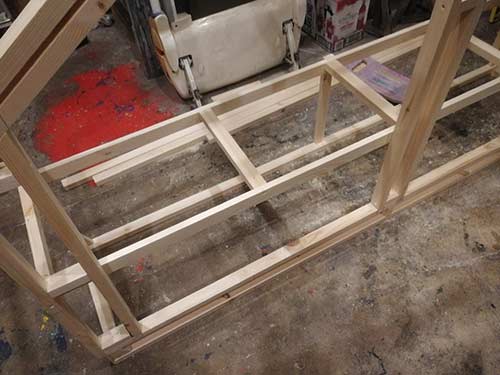
Structural supports added to shelves to help with load support
Prepare Wardrobe Framework for Installation
With the fitted wardrobe frame now complete, the clothes hanging rail installed and shelves already the time has now come to install the wardrobe framework in place.
As it needs to be moved to its installation location there are several ways to do this, the first being to totally dismantle it and then reassemble or if it’s only a short transportation distance do the minimum deconstruction, just enough to move it to the room it’s to be installed in.
As we were only moving from the assembly area in the garage to a bedroom in the house the second option was chosen.
After inspecting the wardrobe frame for the most effective way to do this it was decided that the door pillar posts would be removed, the lower side of the frame slope would be unscrewed and as the opposite end the uprights would be cut through to be later braced with additional timbers.
Any evidence of the cuts would also be hidden when the MDF end panel was screwed in place so it wouldn’t ruin the appearance.
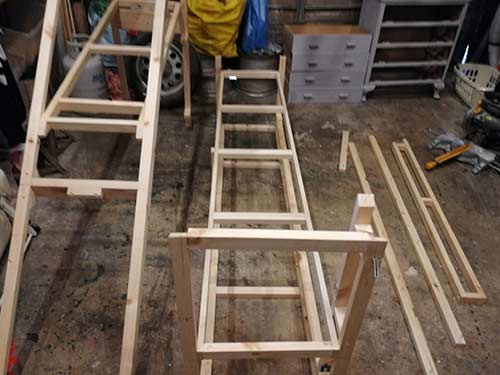
Fitted wardrobe frame split into two separate pieces ready for installation
Fix Wardrobe Framework in Place
Once in two pieces the wardrobe framework was them moved to the room it was to be installed in and then reassembled and moved into place to check the fit which was pretty good however would require some small adjustments.
Two timbers were then cut to be screwed in place on the right of the frame to repair the cuts.
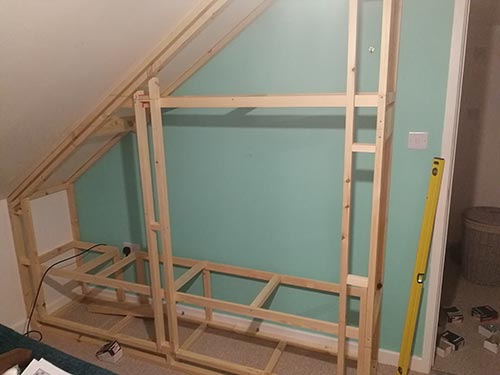
Fitted wardrobe frame reassembled and fixed in place
The wardrobe frame was then secured firmly in place to the skirting using some small brackets, to the wall at either end using brackets and Redidrive fixings (more can be found on different types of plasterboard fixings in our project here)

Bracket and Redidrive fixing used to secure wardrobe frame to wall
The frame was also then screwed into the ceiling along the rear sloping edge into an existing ceiling joist and the same for the front sloping timber, however no joists were present here so we had to use Redidrive fixings. To access the timber for fixing the sloping section of the inner frame had to be removed and was then replaced once complete.
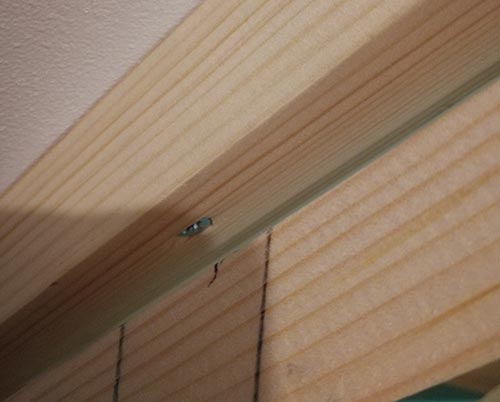
Front edge sloping timber fixed into ceiling
In terms of the adjustment, after securing the sloping timbers to the ceiling, as the ceiling was not totally level, this pulled the frame up slightly, about 12mm resulting in the centre wardrobe door hanging timbers no longer fitting correctly so we had to remake these again.
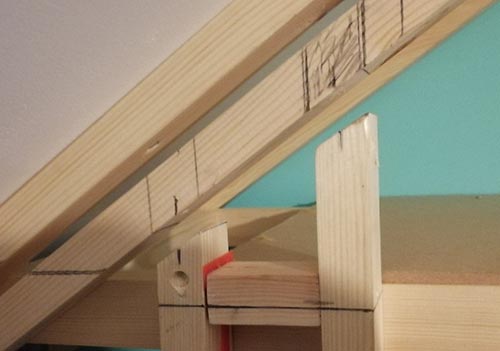
Door hanging pillars no longer fitting after screwing wardrobe frame to the ceiling
With the wardrobe frame now firmly fixed in place the next task was to cut and fix some sheet material on top of the shelves. For this we used some 5.5mm MDF sheets
Once measured up and all notches measured so the shelves would fit around the framework the MDF was cut to fit and then screwed in place on top of the shelf frames. All screw heads were countersunk to prevent them shagging.
Note: When cutting MDF, ensure you are in a well ventilated space but can contain or capture any dust and are wearing appropriate PPE gear, including at minimum an FFP3 face mask. MDF is carcinogenic so make sure you protect yourself!
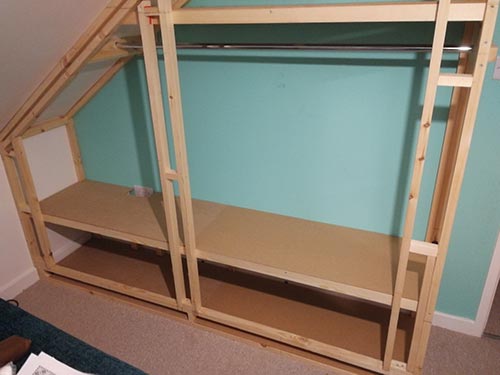
MDF sheets cut and screwed to framework to create shelves
Cut and Fix Cladding to Wardrobe Exterior
With the fitted wardrobe frame now fully installed the penultimate task is to now clad the outside of the frame with some sheet timber, in this case 18mm MDF.
Sticking with the theme of accuracy, a plan was drawn of the installed wardrobe frame and then the areas to be covered were measured and marked on the plan, including the size of any angles that would need to be mitered.
To reduce costs a little and also help to recycle, the MDF was sources from an old wardrobe that was pulled out of a property that was undergoing a full renovation. It was all in good condition, bar a few holes that needed filling so was the obvious choice to use.
The MDF sheeting was then trimmed down to the required heights using a table saw. As stated above ensure you wear the correct PPE and an FFP3 mask.
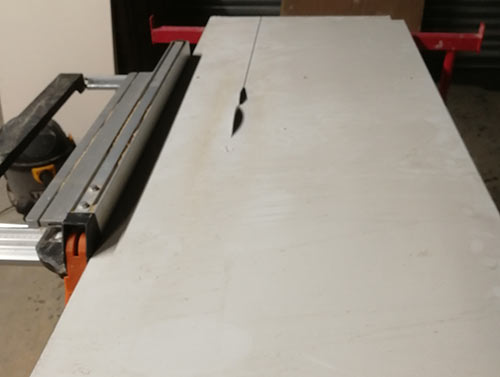
Cutting down MDF sheeting using a table saw
Once cut to the correct heights, each section of MDF was then cut to the correct length, pilot holes were drilled and countersunk and then they were screwed in place on to the frame.
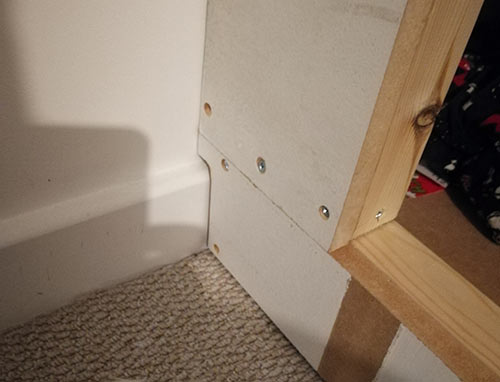
MDF sheeting cut down to size and screwed to the wardrobe frame to cover it in
One final item to note is cutting the MDF sections to fit around the skirting, again to do this we used a small spare piece of the same skirting that was positioned at the required point at the height of the skirting in the room and then the profile was drawn around.
A jigsaw was them used to accurately cut the shape out for an exact fit.
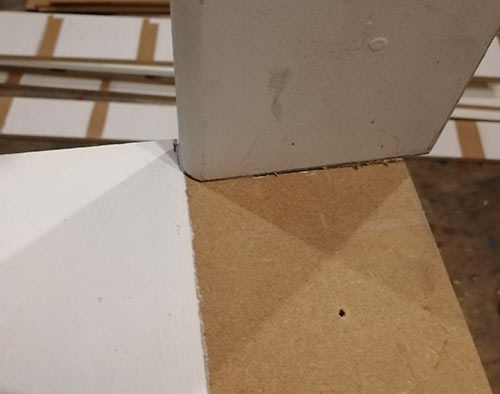
Skirting cut marked on wardrobe side panel
Fix Doors to Wardrobe
With the framework now all nicely covered in the final job is to now create some doors and fix them to the front of the wardrobe.
As we have mentioned, to allow decent access to the interior it’s best to keep the area between any doors as open as possible and if you can hang each pair of doors left and right this will allow one door to open left and the other to open right giving a nice wide access area.
However in this case as we are working around a sloping roof and the tops of three of the doors were sloped they would need to all open to the right so that they actually opened correctly.
With this in mind we added two further uprights at the centre of each opening side for each left hand door to hang from.
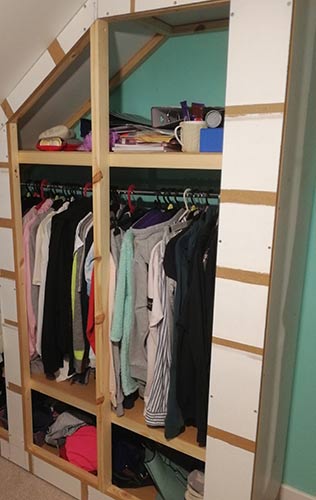
Additional upright added to hang cupboard door so that it opens away from sloping roof
With the uprights in place the next job was to fit the hinges and hang the doors. To allow a decent opening angle for each door and to also hide the hinges for a clean minimal look concealed cabinet hinges were chosen.
Each door was measured and marked for the precise point that the hinge cup recess would be drilled out and then the same measurements were then transferred onto the cupboard framework where the mounting plates were then fixed in place.
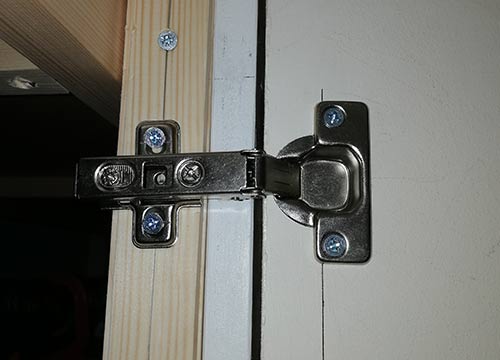
Concealed hinge fixed in place on door and frame
For a full detailed run down on how to measure and fit concealed hinges see our project here.
Once the doors are hung in place that’s pretty much it in terms of construction.
The only job left to door to the doors is to fit some handles or knobs. At this stage as they need to be painted still we measured and marked out exactly where each knob was going to go and then drilled a hole for the fixing screw.
It’s entirely up to you what handles or knobs you decide to use and the fixing method may differ so just follow the manufacturers fitting instructions.

Doors hung on wardrobe framework using concealed hinges
The only jobs left to do now is to paint the doors and any other exposed woodwork and then fill any screw heads. As we are using reclaimed MDF in this project, the old paint needed sanding back before repainting with a finishing coat.
As we are dealing with MDF any sanding will need to be done away from the install location so the doors and cladding were all removed to do this.
If you have painting to do then you may also find it easier to do this offsite.
Painting and Finishing a Fitted Wardrobe
As we have stated above in this project we used MDF and as MDF is extremely porous it first needs to be sealed before it can be painted. For full details on exactly how to seal, prime and paint MDF please see our project here.
Also as we have mentioned we needed to sand down the old paint on our MDF. By nature, MDF can be carcinogenic and contain many fibres and chemicals that can be extremely harmful to your health so please ensure you are wearing a suitable grade respirator or mask, can contain and easily capture any dust and also are wearing old clothes etc.
Once all has been sealed and painted, refit everything back in place, fill any screw heads with filler and once dried sand off and paint.
When refitting hinges and hanging the doors back on you may find that the concealed hinges need adjusting to get the doors fitting perfectly. To find out how to adjust concealed hinges see our project here.
Once the hinges have been adjusted successfully and everything painted up the final job is to then fill any gaps where the wardrobe meets walls or the ceiling.
To do this you can either fill the gaps using decorators caulk or cut strips of timber MDF and fix them over the gaps flush to the wall or ceiling.
With everything now painted, refitted and adjusted you have now pretty much finished building your own built-in wardrobe, great work!
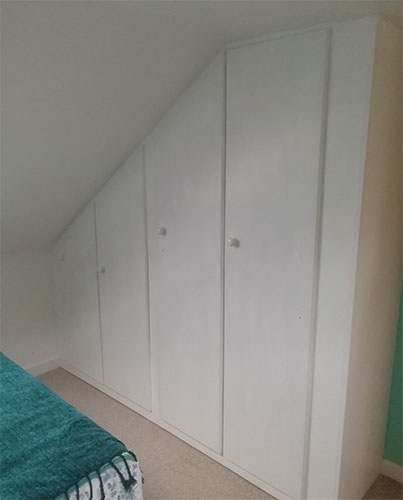
Finished and painted built-in sloping ceiling wardrobe

