The Options for Building a Wooden Workbench or Shelving
There are a number of options that are available for you to build a robust shelving unit or a work bench in your shed or garage. The most important thing is that these pieces of furniture are rugged and durable. Aesthetics aren’t quite so important here as you need something strong, and often quickly. The options as we see them are if you want a wooden bench or shelving:
- Build your own with mortise joints: This will depend of your skill level, but it is typically more time consuming, but the joint will be strong and robust, making a tough piece of furniture. If you are keen to give this a go, please have a look at our timber joints projects as this will ensure that you get this critical part of the project right. Have a look at how to join timber in out timber joints project.
- Use metal brackets to connect the timber: This is a very quick way of achieving a very strong joint. You will need to buy the correct metal joints or even better a purpose made kit, but then all you have to do is cut the timber to size and assemble the furniture, be it shelving or a workbench. Potentially you will lose some flexibility as you have to use the parts of the kit, but it is quick and solid.
- Build your own without mortise joints using bolts, nails or threaded bars: This is probably the cheapest route to take. Preferably you should drill and bolt the legs and struts together. Always remember to drill pilot holes when screwing timbers together; however they could be nailed if you are in a real hurry. While this will be quick, it is the least robust solution and highly prone to wobbling. This would not be suitable for a workbench and you may split the timber in the nailing process.
Of course, the choice of the solution that you use is really down to the time you have and how long you would want your piece of furniture to last. The timber for a set of garage shelves or a workbench will soon add up, so we suggest that it is worth taking the extra time to make something that will last.
Make sure that if you opt for either using metal brackets or bolts, nails or threaded bars that they are galvanised. If you don’t they are likely to rust and cause your workbench or shelving to become weak, potentially falling apart under a little pressure.
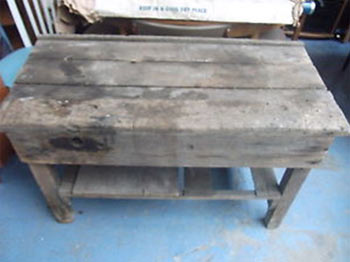
Make a Workbench that will survive in your garage unlike this rickety old work bench
The Other Option for Garage Storage or Work Benches
There are a number of other options that are available that will provide strong and long lasting storage or a tough workbench. The most common form of storage is to use metal ‘snap fit’ shelve. These are incredibly quick to make but are not flexible. They can be fairly weak and you cannot make a workbench from one of these.
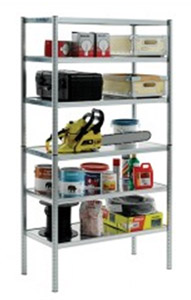
Multi Purpose Garage Shelving – quick to build but can be ‘wobbly’
If you need a bench, then you might consider a ‘workmate’ style bench. They’re portable, quick to erect and generally relatively inexpensive. They are not a tough solution for a longer term outlook.
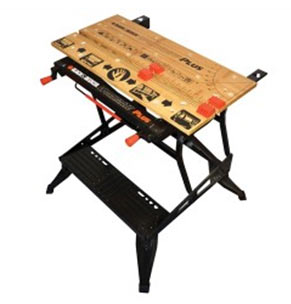
A ‘workmate’ can be used as a workbench but this is a temporary and portable solution
Make a Wooden Workbench or Shelves Yourself with Metal Brackets
There is a wide range of metal brackets, fixing plates threaded bars and bolts that can be used for the construction of the various parts of your bench or shelving. Time spent planning is critical here as these brackets are varied and designed so that they can fulfil many roles which does mean that they will not, by definition, be purpose built for your project. Here are a number of the common types you might consider:
- Shelf Brackets – these come in a variety of shapes, sizes and colours
- Fixing Plates and Brackets – These are considerably more varied in size and shape and will add extra strength and rigidity to your construction. Fixing plates always seem to be the obvious solution for the DIYer or home improver as even at a glance it is obvious to see what they achieve and how they achieve it. However, things are not always as they seem! While brackets like these look very strong, they do not cover much of a surface area and the screws are all in a line. This is in fact a big weakness and after the bench has been used a couple of times, or the shelves have been shifted around, you may well find the joints are moving a little and the whole structure is becoming a little wobbly
- Bolts and Treaded Bars or Rods – These can be use in conjunction with the brackets and fixing plates above or not, depending on your design. Please have a look at the project on treaded bars and bolts for more ideas about what you can use. Long threaded bars give you the option of "pulling" two joints against each other which gives a lot of strength to a unit, be it a work-bench or a shelf. You will however need a wood bit to drill the 8mm or 10mm hole required for the bar to pass through.
- Purpose built Kit – These are kits which have purpose built metal brackets which allow you to easily join the timber struts and supports of your bench or shelf. We have had a little experience of a building a kit provided by Simply Built It (from Simpson Strong-tie, who are better known to the trade for supplying heavy duty steel ties that typically are used in the structure of a house construction, tying joists and rafters into the main framework or masonry of the building.
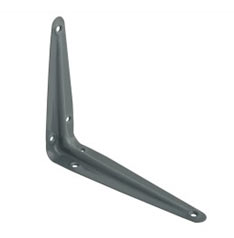
Traditional shelving bracket
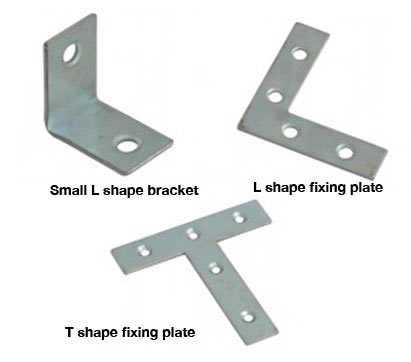
Selection of brackets for building shelves and workbenches
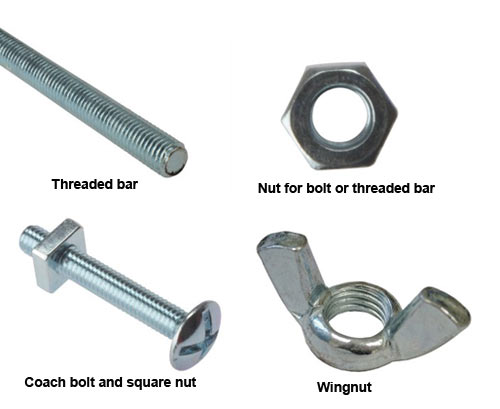
A range of the types of nuts, bolts and threaded bars your might use to make your garage workbench or shelving
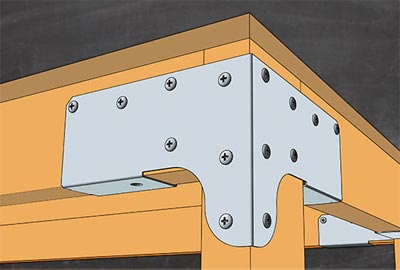
This is a connector or metal bracket designed for building shelves or a workbench
How to make a Workbench or Shelves with a Purpose Built Kit
We are going to be talking about the Simpson Strong-Tie Simply Build It Kit in this section as this is the kit that we used and if you want more details please have a look at their website. Most kits that you can find are broadly speaking similar but we feel that this is one of the better ones, and so it should be with Simpson’s pedigree in the construction industry.
The kit should have everything that you need, except the timber and tools. At the bottom of this page we will give you a list of the tools (with pictures and links) required in case you don’t have them but here’s a summary:
- Saw
- Screw driver (a powered one will make life much easier – and quicker)
- Spirit level
- Tape measure
- Carpenters square
- Pencil
- Sandpaper
The timber that you need will depend on what you are building. You will need to order for the four posts (or legs) and the eight rails, typically 4 shorter ones on the ends and 4 longer ones for the sides. You will also need some ply for the shelf and the work top. There are a wide range of designs on the Simply Build It website and imagination is your only limitation when it comes to work out what you should build
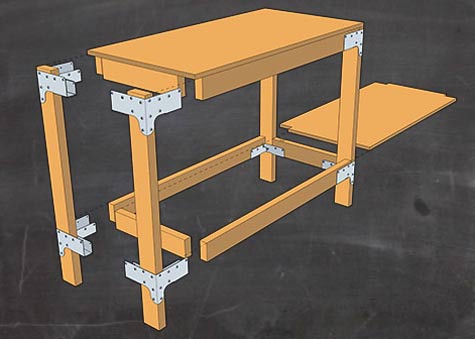
Components for DIY workbench with shelf
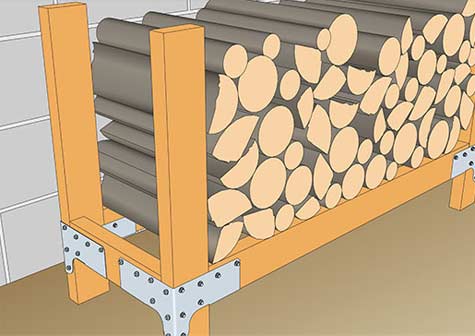
Heavy duty log storage unit
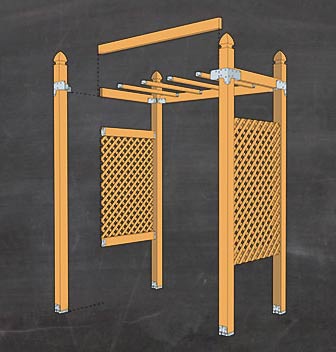
Garden pergola
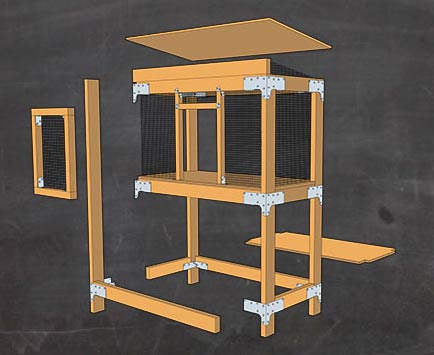
Pet hutch or house
Kits will have comprehensive instructions and you can have a look at our video of making a work bench below. You can start your build once you have your tools and timber (please look in the instruction for the right sizes as these might not be the usual dimensions that you are used to buying.)
Follow These Steps to Build Your Workbench
- Cut the timber to the sizes required. These will be provided in the instructions if you’re following a standard design, or you can design your own. When you have the timber cut the right sizes mark up the timber so that it is clear where the brackets will fit onto each post (or leg). It is useful to use your square to mark up the timber.
- Fit the brackets to the posts. Start with the bottom brackets and slide them on to the post up to the line that you have marked. Ensure that the front side on the bench has the short width of the timber facing outwards. This will mean that you can get maximum access to the shelf from the front of the bench without the post getting in the way.
- Fit the rails. Don’t screw the rails on until you’re happy that everything is square and level – this is where the spirit level and square come in handy. Then add one screw to each connector on the outside so that there is still a little play to move things about and make sure it is square before you add any more screws. As you and happier that things are square fit the remaining screws on the outside of the connector.
- Now you are ready to fit the inside screws – with the Simply Build It kit there are 2 screws on each connector that they recommend fitting first. These two screws which go into the tabs are critical to pulling the timber in tight and ensuring a true corner, the remaining screws on the inside face simply secure the rail to the bracket.
- Fit the bottom shelf. First of all you will need to mark out where the post will go and this is easiest done by placing an off cut of the timber used for the rail on the face of the ply that will become the shelf and draw around it. Cut out the area that you have marked and then drop the shelf into place and screw it down. Ideally these screws should be countersunk (you can see what we mean in the video below).
- Fit the top brackets and rails. Repeating the process you followed for the bottom brackets and rails fit the top ones.
- Fit the top of the workbench or top shelf. As before these should be screwed down using a countersunk screw so that the screw head is flush.
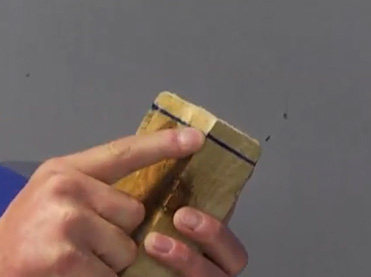
Mark up where the connectors will sit on your timber
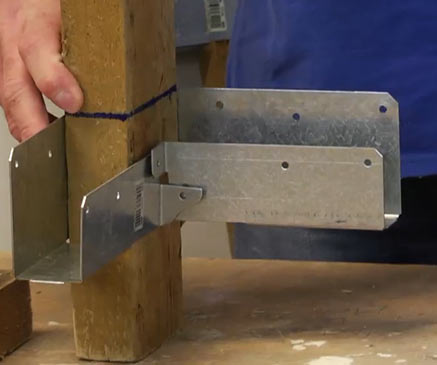
Slide the connector on to the post or leg of your workbench or shelves
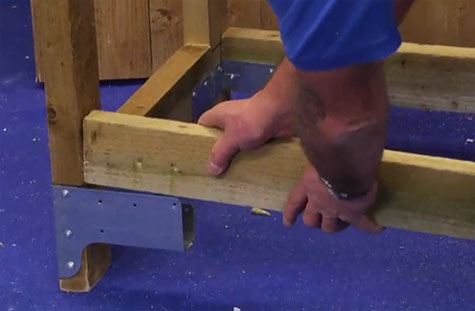
Slot in the rails that will give the workbench it’s rigidity
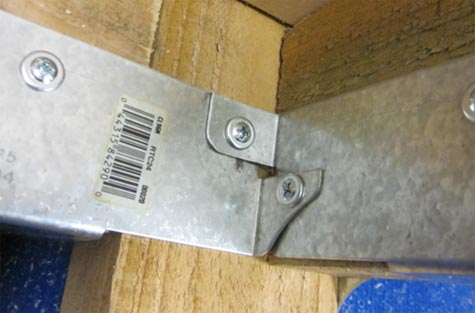
These screws are critical to making the corner between the post and rail
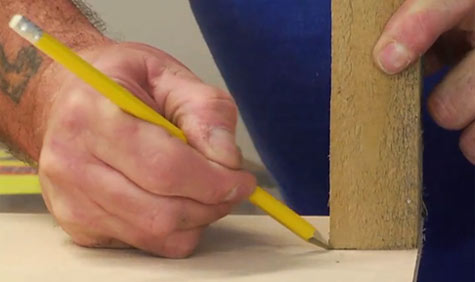
Mark out where the posts will go on the shelf before cutting out
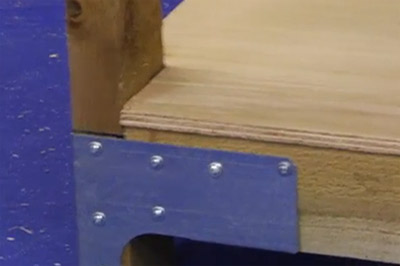
Fit the shelf and screw it down to the rail with counter sunk screws
DIY Doctors Top Tips
To save a little money it is possible to use a thinner ply than recommended. You might need to screw in a cross member or noggin between the front and back rails to give the shelf extra support and rigidity, which is particularly important if you’re going to be using it as a workbench.
The Simpson Strong-tie engineers have worked out (somehow!) that a bench of 1200×600 dimensions with a shelf made with 18mm plywood can support 450kg load, loaded on 50mm square area in the centre of the bench. This gives you an idea of how strong this sort of work bench can be.
Again on the money saving front you can choose un-planed timber over this kits recommended CLS timber which will save you a little. We actually opted to go with the un-planed timber because we quite like the look as it’s ideal for garage or workshop furniture. Just remember to get some sandpaper to tidy up the edges and avoid the potential for splinters. (As a point of interests CLS refers to "Canadian Lumber System" which is used in construction for stud partitions and has had all the sides dressed and the corners rounded).
It is not necessary to build the bottom shelf before stating on the top one. You might find it easier to fit all the posts and rails and then come back and fit the selves. This is your preference, but you might need to bang the shelf into place if there is a tight fit.
We recommend leaving a little extra when cutting the top and shelf. It is really difficult to get a really tight joint between the posts and rails and there will always be a millimetre or two typically because your cut isn’t absolutely square. Have a look at our cutting timber project for tips on how to get a square cut. You can always plane the shelf down to size, but if it too small, it’ll always be too small!
The Simpson Strong Tie, Simply Build It kit is very versatile as mentioned in the video below. The brackets can be moved up, down and along the timbers to create a shelving system, larger workbench or even log stores as the image above shows.
One very useful way of using the Simply Build It kit is to make up the top (bench section) with just the legs. Ignore the middle shelf all together. Then turn it upside down and fix the legs to the rafters in the garage. This gives you a very useful rack which will stay solidly over the car and make great use of space that would otherwise be wasted. This rack can even be used to carry your ladders which are always a problem to site. Over to you – what can you come up with?!

