From large, solid estate type gates to decorative wrought iron garden gates, there are a number of things to consider when hanging a gate. The size, weight, material and location of the gate all have an impact on the best way to hang your gate.

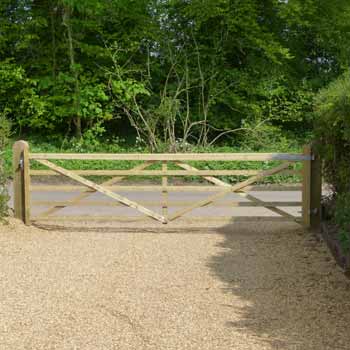
Large 5 bar wooden gate
Types of Garden Gate
Estate Gates
These are typically double gates – both wide and tall, and usually solid wood or heavy duty steel in a wrought-iron style. Designed for both security and privacy, estate gates are very heavy and require specialist fittings.
Field Gates
Or 5-bar gates are usually used to create an opening in a fenced or hedged field, but are often seen on driveways in the country, and smaller versions can be used as garden gates. Field gates are quite easy to hang, but depending on the size of the gate special hinges may be required.
Driveway Gates
These vary greatly, from a simple single 5-bar gate as mentioned above, to a smaller version of estate gates. Like estate gates, these can be very heavy and require specialist fittings.
Side Gates
Side gates are usually tall, solid gates designed to fit in the side entrance to a garden – usually between 76cm-107cm (2ft 6”-3ft 6”) wide. They are designed for security and privacy and wooden versions can resemble doors, while wrought-iron styles are more decorative.
Garden Gates
These have the greatest variety in style. Generally 92cm (3ft) or 122cm (4ft) high, standard widths are available between 76cm (2ft 6”) and 122cm (4ft).
Gate Posts
If you are replacing an old gate, you will need to ensure that the existing gate posts are secure and suitable for your new gate. Estate, field and driveway gates require very sturdy posts to take the weight of the gate – the wider the gate, the more pressure on the post.
Wooden gates are easily affixed to a wooden post, but metal gates generally require hinged or latched metal posts to go with them – sometimes these are supplied as a kit with the gate, if not then the gate supplier will sell them separately and can advise on the size you require.
If you are fixing your gate onto a wall you still need a post or ‘wall fillet’ to allow space for the gate to hinge.
Gate posts can be concreted into the ground, fixed to a wall or bolted to an existing concrete base.

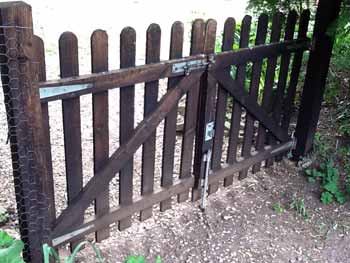
Double wooden picket garden gate
Hinges and Latches
The type of gate and the way you want it to open will dictate the type of hinges you need. Metal gates almost always have the hinge and latch built in.
For a wooden gate you need to decide on how to hinge it – there are three ways to hang a wooden gate:
- Centred on the Posts: If you want it to open both inwards and out, you need to centre the gate between the posts and use double-strap hinges. You need to ensure enough space is left between the gate and the posts to accommodate the hinge and latch.
- Flush with the Posts: With this method the gate sits between the posts, but it site flush with the back of the posts and the hinge and latch are on the back of the gate so no extra gap is required to accommodate the fittings. This is the most common way of hanging garden gates, and the gate will only open one way.
- Behind the Posts: Sometimes it is necessary to hang a gate on the back of the posts, overlapping slightly on each side. This method is usually used for a pair of gates, or for a wide single gate. Ensure any hinges and latches you buy are suitable for this type of hanging.
Hanging Your Gate
Firstly, check that the gate is the right way around. This may sound silly, but depending on the design of the gate there may well be a front and back, and a hinge-side and latch-side. If your gate has any supporting timber (ie top, bottom or diagonal supports), this should be on the inside of the gate, so that the good side faces out. If there is a diagonal support, the bottom of the diagonal should be on the hinge side of the gate.
If you are replacing an old gate and keeping the original posts, you need to find a gate the same size as the old one. Gates tend to be sold in standard sizes so you may be lucky, however depending on the age of the gate you are replacing (it could be home-made or using old-fashioned measurements), you may need to either have a gate specially-made or cut down a slightly larger gate. If you are cutting down a wider gate, ensure that you choose a design which allows for this – there must be enough wood left to safely affix the hinges and latch.
If you are concreting new posts into the ground, see our Concreting Fence Posts project for more information. Make sure you check that the gap between the posts is the correct width before leaving the concrete to set.
Fix the hinges to the gate first, then hold the gate in place between the posts, lifting it off the ground a little to give enough clearance. Wedge a couple of pieces of wood or tile underneath the gate to hold it in place the correct distance off the ground. Make sure the gate is level and in line with the post, then screw the hinges to the post. Remove your wedges and test the gate to make sure that it opens smoothly and closes well, fitting snugly in place. Lastly, fix your chosen latch in place.
If you are fixing your gate to a wall or bolting the fence posts into place, fix the hinges to the wall or one post before putting the second post into place. This will ensure that the gap between posts is exactly the right size.
Metal gates usually come with their own set of hanging instructions.

