Essentially, concreting in a fence post is as simple as digging a hole to the correct size, mixing up some concrete to the correct ratio, popping your post in the hole and then filling it with concrete, whilst ensuring the post is level.
This may sound like a pretty simple job but there is a fair bit more to it than just this, esepcially if you want your fence posts and ultimately your fence to last more than just a few years.
The information below can be used for any type of post and any type of fence.
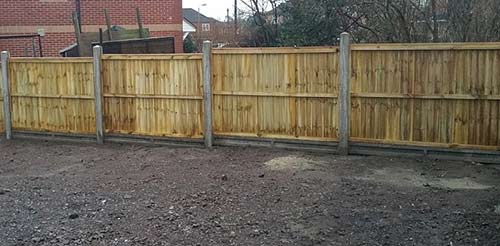
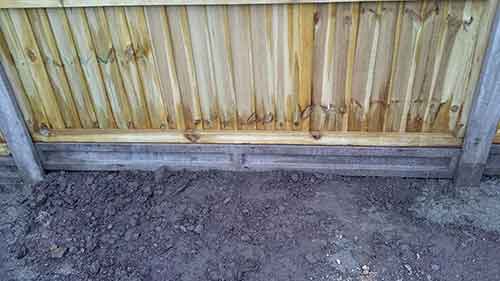
Newly installed fencing run built using concrete fence posts and gravel boards
How to Concrete Fence Posts
For the puposes of this example we will be using 4×4 inch fence posts that are 8 feet long and 6×4 foot fence panels. You will need to adjust your measurements accordingly depending on the size of posts or panels you are using.
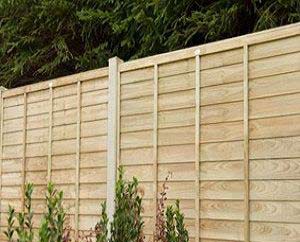
New fence constructed using 4×4 inch fence posts and 6×6 foot fence panels – Image courtesy of travisperkins.co.uk
A common question we hear is; How do I keep my fence posts from rotting? To ensure as long a life as possible, all posts should be pressure treated timber to avoid rot and wood boring insects.
You should also try to avoid fence posts made using sapwood (the lighter outer part of the tree). If you can use posts made from heart wood (the darker wood at the centre of the tree).
Step 1 – Measure and Mark new Post Locations
Accuratly measuring and marking where your posts are going to go is key to the success of your fencing job as a whole. Too close or too far apart and panels etc won’t fit and the whole job will look sloppy and unprofessional.
The exact spacings will be determined by the length of the fence panel or type of fence your going for.
First, measure the length of one of your fence panels as this will tell us how far apart our posts need to be. In most cases, this will be around 1.83m or 6 feet.
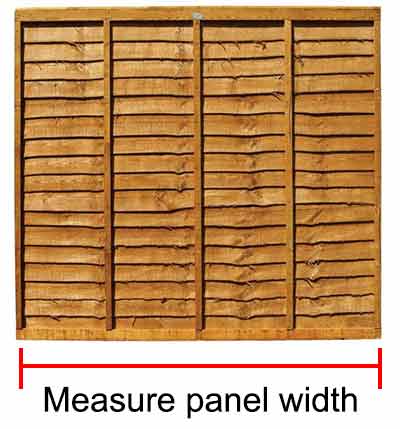
Measure the total width of a fence panel to see how far apart posts will need to be placed
If you are installing feather edge fencing or similar where you don’t have any specific width panels as yet, go with 6 foot spacings as fence posts should ideally be spaced 6 or 8 feet apart to provide the best levels of support.
Starting at one corner or the beginning of your fence run, hammer in a stake to mark the location of the first post. Make sure the stake is hammered in at the centre point of where your post will be.
Next measure out from the centre point of the stake, the length of your fence panel (or other chosen length) to the location of the next post and add a further 4 inches or 100mm.
As we are measuring effectively from post centre to post centre we need to account for the further 2 inches of post (based on 4 inch posts). If we don’t then the gap from post to post will be 4 inches too narrow and our fence panel won’t fit.
Once you have measured to your second post hammer in a stake to mark its position.
Repeat these steps for any further posts required.
Step 2 – Check Fence Post Levels
With all our post locations now defined by our stakes we need to check that they are all inline.
Tie a piece of string around one of your corner posts and run it all the way along to the corner post at the other end. Pull it tight and tie it off.
Look down the string line from one corner post to the other and the string should be in a direct line with all the stakes in between running along the line.
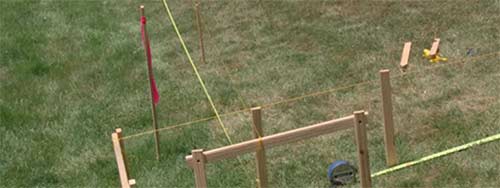
Stakes are knocked into the ground to mark the locations of each fence post and then string is tied to first and last post to keep all posts inline
If any stakes are slightly off move them so they are back inline.
The final linear adjustments will be made when the posts are actually installed, but it’s a good idea to be as accurate as you can be from the off.
Step 3 – Dig Fence Post Holes
The next job is to dig out all of our fence post holes, but first we need to know how big they need to be.
As a general rule of thumb, the hole should be 3 times as wide as the post, so for our 4×4 inch post, the hole should be at least 12 inches wide.
In terms of how deep our fence post holes need to be, again the rule of thumb is to allow at least 25% of the posts length to be in the ground. A 6 foot high fence should have an 8 foot post with at least 2 feet in the ground, a 5 foot fence should have a 6 foot 6 inch post with 1 foot 6 inches in the ground etc.
So, now that we know we need to dig out a 12 inch wide by 2 foot deep hole it’s time to get our hands dirty!
To dig the holes you can use a spade and trowels for when you get too deep and cant use the spade effetively or you can use some post hole diggers if you have them. If you have quite a few holes to dig it’s worth considering hiring some from your local hire shop.
Pull out the stake before starting but try to keep the stake hole (that’s left when you pull it out) as central to your hole as you can to keep our measurements as accurate as possible.
Regularly check how deep your hole is until you get to your desired depth.
Repeat this until all of your holes have been dug out.
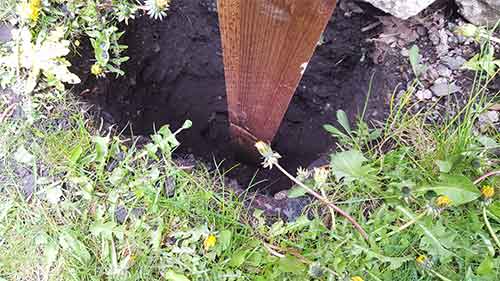
Fence post hole dug out in ground and fence post inserted to check fit and depth
For more information on fence post hole sizes and how to work them out, visit our fence post hole size project.
Step 4 – Add Aggregate to Base of Fence Post Holes
Next we need to add about 4-6 or so inches of aggregate to the base of the hole to allow for drainage.
If the fence post is totally encased in concrete, any water and moisture that finds its way down to the base will become trapped and over time will rot the post out from the bottom.
To stop this happening it’s important that water and moisture can drain away which it will be able to do through the loose aggregate.
Step 5 – Treat the Bottom of Each Fence Post
To add even more protection to each fence post (aside form the drainage and the fact that it’s already pressure treated) we are also going to coat the base of the post in wood preserver.
Use a good quality water based presever from a reputable brand and generously coat the area that will be down in the ground.
If you have time to wait, let the first coat dry and apply a second.

Cuprinol wood treatment for treating exterior timber
Step 6 – Place Posts in Holes and Fix in Position
For this you are going to need the stakes you used earlier and some further lengths of batten around 2 feet in length (1×2 inch will do).
Screw a piece of batten to the front face of the post and another on the face to the side so that they are at 90° to eachother at around 12-18 inches up from ground level (around 3-3 1/2 feet from the base).
Starting with the first corner post of the run, pop the post in the hole and bed it down around an inch into the aggregate and let the sections of batten rest on the ground. Ensure the post is square in the hole.
Knock a stake into the ground at the point where each batten touches the ground.
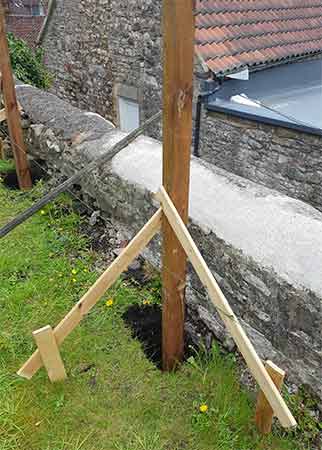
Stakes and battens fixed in place and holding posts up to keep them level until concrete has cured
Next, use a spirit level or post level to get the post absolutly vertically level and then screw the end of each batten to each stake as can be seen in the image below.
With the post level, tamp down the aggregate in the base to compact it. This will help hold the post and also ensure it doesn’t sink causing gaps.
This will hold the post square and level in the hole while you fill it with concrete and until it sets.
Next, repeat the above steps for the opposite corner post e.g. the last post in the run and once fixed, run your piece of string from earlier between the two and tie it off keeping it taught. This will provide a dead straight line for you to follow and keep your remaining posts in line.
You can then repeat the above for your remaining posts, making sure they are in a straight line.
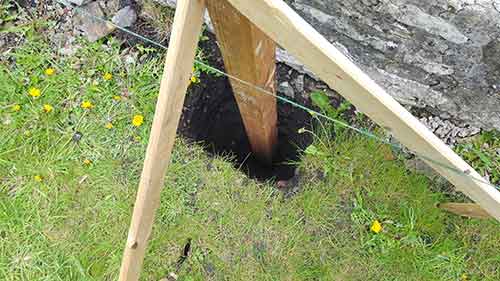
String level attached to first and last post to keep all posts inline
Step 7 – Mix Concrete and add to Fence Post Hole
First we need to mix up our concrete. A general mix (See our mixing concrete project) should be used and placed in the hole and settled into place by poking with a stick or broom handle to make sure no air voids are present.
In terms of the ratio to use for a concreting fence posts, the best mix is a mix of 1:2:4 (1 cement, 2 sand, 4 aggregate).
Concrete is always best mixed using a cement mixer to ensure it’s even, but if you only need to mix a little, hand mixing is ok (see mixing concrete project above for tips on how to do this).
150mm should be left from top of concrete to top of hole for backfilling with soil and turf if required and the top of the concrete should be sloped away from the post to allow water to run away from the timber.
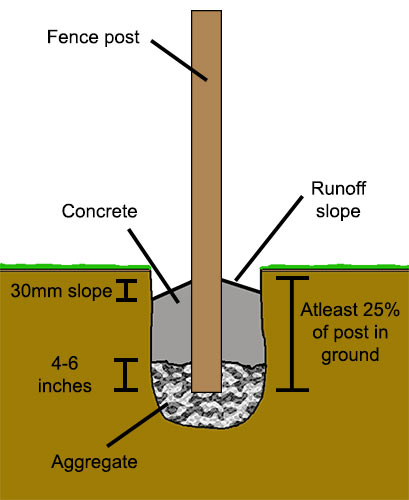
Cross section of fence post concreted in hole also showing depth of post, aggregate and water runoff slope
Fill each post hole as described, mixing more concrete as required.
If you do not have the means to mix concrete from scratch, you might consider using Postcrete or a similar post fix mix. Take a look at our project on concreting posts using Postcrete for more information.
The post should be vertically checked and levelled periodically with a spirit level or post level once all holes have been filled to ensure the post remains vertically level while the concrete cures.

A post level is used to ensure the fence post is kept vertically level on all sides
With all your holes now filled it’s a case of waiting for the concrete or Postcret to set. The concrete should be left at least 24 hours to cure where Postcrete or similar usually sets much quicker (check the manufacturers instructions for full info).
Once cured, you can go ahead and install you fence panels. For help and tips on how to do this, see our project on installing fence panels here.
Fence panel installed between concrete fence posts
One important point to note is that to ensure as long a life as possible for you fence posts and fence run as a whole, it will require a little running maintenance.
If you have treated any of your posts or fence with either preservative or paint then, ideally, they should be retreated annually.
One final point to be aware of is that overtime the posts can shrink a little which causes slight gaps around it and the concrete. Water can then travel down the side of the post and down into the concrete which can cause rot and decay.
To help prevent this you can add some preservative around any gaps or even apply some sealant.
Concreting fence posts may seem like quite a daunting task if you have never done it before but as long as you work systematically and take your time there is no reason at all why you shouldn’t end up with a professional looking job.