If you are an avid DIY’er or work in the trades then the chances are at some point you will have to have broken up some concrete, removed rocks or broken large rocks into smaller chunks, created a chase for some electric cables or even chiseled back sections of walls to make space for other items.
Undertaking this as a DIY’er would traditionally have meant using a good old sledge hammer to to the bulk of the work and then a smaller club hammer and bolster where some fine tuning is needed.
This method is totally fine and can also be a great workout, but on that note is also really hard work and very time consuming and when time is of the essence, finding and having to break up a large bolder that’s stuck right in your way can play havoc if you are keen to get cracking.
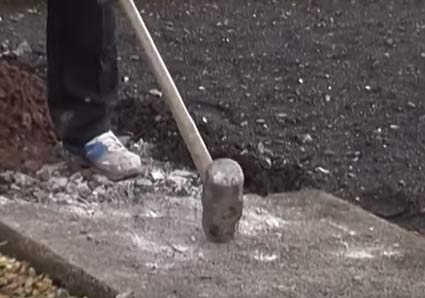
Using a sledge hammer to break up a concrete path
Fortunately over the years the development in tool technology has come on leaps and bounds and the traditional pneumatic drill commonly seen breaking up tarmac on a road or sometimes heard waking you up at an ungodly hour in the morning is now available on a smaller scale; enter the Kango Hammer (or heavy duty breaker, concrete breaker, demolition hammer or jack hammer as they are also known).
Types of Kango Hammer and Heavy Duty Breaker
Large Air Breakers, Petrol Breakers and Electric Breakers
These are really the daddies of the breaker world and are in most instances are more commonly used by the trades and other construction professionals due to their size, weight and expense and also the nature of the tasks they are used for e.g. breaking up asphalt and concrete.
In most cases they weigh in at a minimum of 20kgs, which if you are not used to handling, can be a real handful to keep upright when operating.
The petrol breaker varieties are mostly powered by an in-built 2-stroke petrol engine that creates the up/down hammering action for the chisel.
Air breakers, unlike their above counterparts are, as you’ve probably guessed, powered by air as opposed to a petrol engine. A compressor is needed to generate compressed air that is then fed to the breaker through a pipe. The compressed air is then used to create the up/down hammering action for the chisel.
Similar to the above, the electric breaker is powered by an electric motor that gives the chisel its hammering motion. As these are mostly site tools, they are normally 110 volt as opposed to 240 volt mains and due to this need a step down transformer to power them.
In terms of jobs, these breakers are really suited to the heavy duty end of the scale, such as breaking up roads, concrete slabs and bases, pavements, driveways, paths etc…. What would have been a few days work with sledge hammers, pick axes and several workers can now be done in less that a day by a single person!
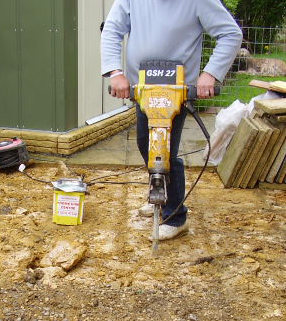
Large 110V electric breaker
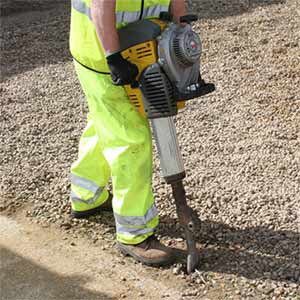
Large 2-stroke petrol powered breaker
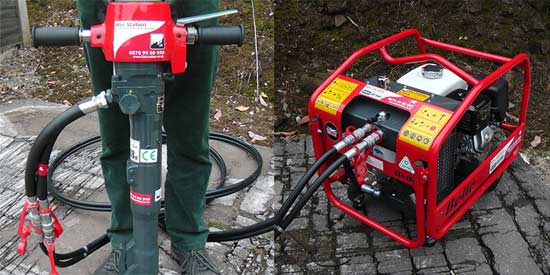
Large air powered breaker and compressor
Medium Sized Electric Kango Hammers and Breakers
These types of kango breaker tend to be smaller and more manageable that their larger siblings above, making them a bit more accessible on a domestic level.
Most makes and models will be 240v and will not need a converter to convert to a more site safe 110v so can be plugged directly into the mains.
When it comes to workload, these breakers are not really suitable for very heavy duty work such as breaking up concrete pads, but are more than capable of taking down small walls, demolishing masonry, removing wall and floor tiles, raking out old mortar for re-pointing and chasing out walls for electric cables, removing plaster etc….
When it comes to weight, they normally tend to fall between 6 and 10kgs depending on manufacturer, build quality, motor size and power etc…. so can be comfortably used from floor level up to waist height and in some cases a little higher, but not for prolonged periods of time.
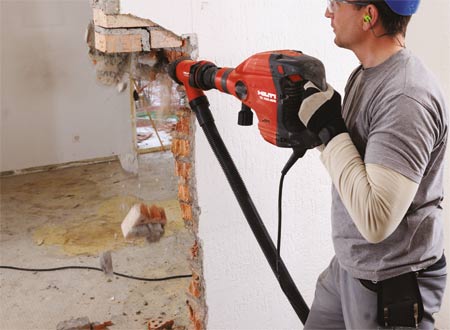
Medium sized 7kg Hilti electric breaker – Image courtesy of hilti.co.uk
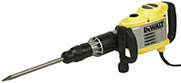
10kg demolition hammer
Small Breakers, Chipping Hammers, Combi Hammers and Kango’s
As the name suggests, these kango breakers are generally much smaller than the above types and in most cases are really hammer drills with the ability to turn off the rotary drilling action and just use the hammer action.
Due to their relatively small, compact size and light weight (generally around 3-6kgs) they are great for working above head height.
When it comes to their job suitability, they are ideal for chasing out walls, removing plaster, raking out old mortar for pointing and removing old wall and floor tiles.
As mentioned, most are heavy duty hammer drills so they have the added bonus of being able to be used as a drill also, with most being capable of drilling holes up to 30mm in masonry.
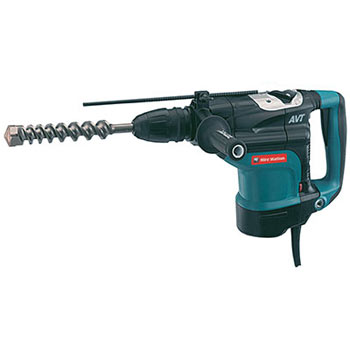
Makita demolition hammer and hammer drill for light to medium demolition and drilling
What Different Types of Demolition Chisels and Points for Kango’s and Breakers are There?
The actual breaker or kango hammer is old one piece of the puzzle. In order to actually break, hack, chip or smash the object to are trying to remove, your kango will need a chisel of some kind and depending on the object or objects you are removing, will depend on the type of chisel you use.
There are quite a few different types of breaker chisel, each with a specific purpose. Here follows some of the most common types:
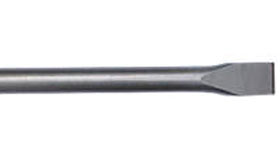
Pointed Breaker Chisel or Moil Chisel
The pointed chisel or moil point as it is also known is in most cases a conical pointed chisel (tapers down to a point) but is can also be four-sided or four-sided with dust grooves.
This type of chisel is ideally suited for hydraulic hammers and for breaking up stone and rock.
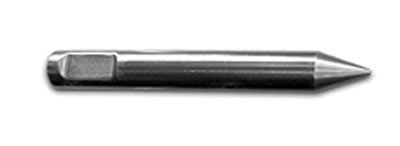
Demolition point chisel or moil chisel
Blunt Breaker Chisel
This particular chisel as the name suggests is blunt. Instead of tapering down to a point or spade, it stops with a flat end.
The main purpose of the blunt tool is for smashing and demolishing large solid items such as rocks, slabs etc…. through crushing them in to smaller items
Blunt breaker chisel
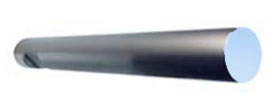
Wide Demolition Chisel
This type of chisel features a wide, flat edge that tapers down into flat point.
This is typically a general use chisel and can be used for a wide variety of jobs such as breaking up asphalt, breaking up concrete and mortar and breaking up small walls.
Wide breaker chisel
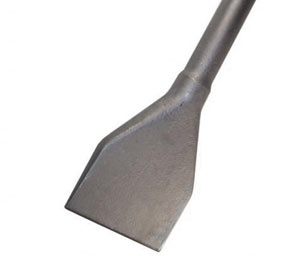
Flat/Spade Breaker Chisel
Quite similar in appearance to the wide chisel above, the flat chisel tapers down to a flat edge, but the edge itself, in most cases, is only the same width as the chisels shaft.
The flat chisel is again a bit of a general use chisel and can be used for cutting and shaping rock, cutting channels and depressions, breaking up concrete and for splitting slabs.
Flat breaker chisel
One very important thing to be aware of when it comes to both chisels and other accessories is that most manufacturers have their own specific fitment so you can only use chisels made to fit, for example, a JCB breaker in a JCB breaker. In most cases they are not interchangeable.
What About Health and Safety When Using Kango Hammers and Breakers?
As is the case with most power tools, they can be very dangerous and cause serious injury if not used correctly and also without wearing the correct safety equipment.
Regardless of the size and how it’s powered, kango hammers and breakers are noisy and through the nature of the tasks they undertake e.g. smashing and demolishing, can cause shards and chunks of mortar, concrete, rock etc…. to go flying in all directions.
Depending on the type of material you are demolishing a huge amount of dust can also be thrown in to the air, coating anything and everything in its path, including your lungs if you breathe it in.
When it comes to power supplies, these are equally as risky. We all know the dangers that electricity poses and also the dangers of using fuels such as petrol but compressed air is also very dangerous with the potential for explosions if there are weaknesses in pipes etc…., even relatively low pressure levels can cause serious injuries!
With the above in mind it is essential that when using equipment such as this that you wear:
- Old clothes e.g. overalls, boiler suit etc….
- Safety boots that feature steel (or similar) toe caps, reinforced sole etc.
- Tough, hardwearing gloves that also provide good grip
- At minimum, a decent pair of impact resistant safety goggles but ideally a full face impact resistant safety mask
- Ear defenders – Hammers and breakers are loud and when working in close proximity to them for long periods, this can really affect your hearing
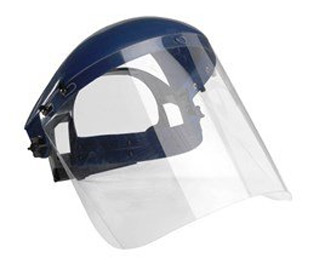
Full face adjustable safety mask
Okay, so with all of that safety gear on you will look like the creature form the deep, but you will be safe and have minimized any potential health effects as much as possible – Don’t be tempted to cut corners!
Before we move on, there is one final health and safety point that we need to look at, that’s associated with these types of tools – HAVS (Hand Arm Vibration Syndrome).
This is a condition associated with using vibrating/moving/rotating (in some cases) tools over periods of time and can cause neurological (damage to nerves), vascular (damage to blood vessels) and also musculoskeletal injuries (damage to muscle, tendons etc….). It should also be noted that long term exposure can cause permanent damage.
With the above in mind it is essential that you take regular breaks when using tools such as these. More information on preventing injury and reducing the risks of HAVS can be found on the Health and Safety Executive website here.
Should you Hire or Buy a Kango Hammer?
The answer to this question really depends on a few things:
- The cost of buying the tool compared to hiring
- The length of time you will need it for
- Will it be used regularly or just once in a while
- Will it be used for other jobs in the future
For example, if you need a combi drill and driver to drill holes and screw in screws to put up a shelf, this might cost you £8 to hire for a day, whereas you could buy a pretty decent one for about £35 – £40 that you could then use in the future for other jobs around the home. In this instance, buying would probably be the best way to go.
However, if you need a mini digger to dig out some tree roots in your garden or to dig a trench, it certainly doesn’t make economic sense to go out and spend £12,000 on a new digger just to make a few holes. In this case, hiring a digger for a day or few days for a couple hundred pounds makes much more sense.
The decision to hire or buy really depends on the funds that you have and are willing to spend, the cost of buying the tools/equipment compared to hiring and how often you are going to use it, so ultimately, the decision is up to you.
How Should I use a Demolition Breaker or Kango Hammer?
As we have established above, there are quite a few different types of breakers and they range a fair bit in size, so in terms of specific use of an individual tool, you should certainly read the manufacturers guidelines in full and make sure that you fully understand them.
If you have hired the tool of your choice from a reputable hire company, when it is delivered or you pick it up, the store staff or delivery driver should give you full instructions on how to power up the tool, refuel it (if needed), what safety equipment you should be wearing/using and also how to actually use it.
The manufacturers user manual should also be provided and as stated above, you should give it a full and comprehensive read.
Before you actually get started on demolishing your chosen object, it’s a good idea to get familiar with the tool by practicing first. You may not be too bothered where you practice if you are breaking up your object in its entirety, but if any areas are going to remain then keep this in mind and don’t practice on these.
To use a breaker or kango hammer to break up a concrete base:
- After reading the manual and putting on all of your safety gear, position your breaker on an edge or at a corner of your demolition area
- Insert the correct bit or chisel (using the guide above) into the breaker for the material you are working with. In this case a pointed chisel or flat chisel should be suitable
- Pick the tool up and position the chisel about 8 inches in from the edge. We are assuming that you are using a larger 15-20kg breaker so it should be able to break up quite a large section at a time, but if you are using a medium or small breaker or chipping hammer you will probably want to reduce this to a few inches
- Pick the demolition hammer up in an upright position and stand behind it with your feet positioned either side and flat on the floor and then tilt it back towards you so that the chisel is pointing away from you. Make sure that any power cables or air lines are behind you and away from the tools chisel
- Apply a little downward pressure on the tool and gently squeeze the trigger, ensuring that the chisel tip is pressed into the face of the concrete, but not forced. This will help to prevent the chisel bouncing up and down when it should be burrowing in to the concrete surface
- As the tool hammers into the surface, keep and eye on it and when it breaks through fully, take you finger off the trigger and stop the tool
- Clear any broken concrete away and repeat the above until all the concrete has been broken up
- Ensure that you work on small sections at a time, don’t be tempted to try and break up large sections in one go as this is very inefficient
As we have mentioned, the above steps are for using a large kango hammer or breaker to break up a concrete pad, but the same principles are applied when using medium and small breakers and chipping hammers.
You can watch a very useful short video on how to load a wheelbarrow correctly by clicking here.
If you are looking to purchase breakers, there should be a good selection available in your local DIY store. Alternatively, if you are looking to hire, then get in touch with your local hire store and they should be able to help you out.