There is a great many different ways to build a compost bin, one of the most common methods is to use some old pallets of equal size to build a square box and then use the inside of the box to store garden and other waste for composting.
One other method is to build a series of timber frames that stack on top of each other so that the compost bin can be raised or lowered as needed. Full instructions on how to build a stackable compost bin can be seen in our project here.
You can of course also buy pre-made compost bin kits, plastic compost bins and also a variety of different types of compost tumbler.
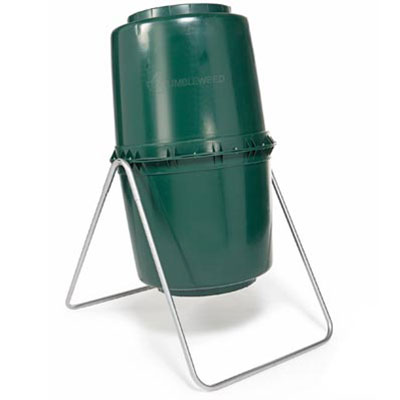
Compost tumbler
Building a compost bin from timber is a great way to go as it uses natural materials and is also fairlry cheap to do, but it does have one drawback in that timber will rot over time, especially when constantly in contact with the wet and moist compost it’s holding.
One solution to this is to build a compost bin using box profile metal roofing sheets, read on below for how to do this.
Alternatively if you have a timber compost bin that has rotten beyond repair then you can use the information below to build your metal compost bin around the your old timber one!
Pros and cons of using box profile metal roofing sheets for a compost bin
Before we get into exactly how to build our roofing sheet compost bin it’s a good idea to look at the advantages and disadvantages of building a compost bin this way so that you can decide whether using this method or the pallet or framework methods mentioned above may be a better way to go.
Firstly, we’ll start with the advantages:
- Metal roofing sheets last much much longer than timber
- Construction is much quicker due to the sizes and lengths roofing sheets can be bought in
- Metal helps to lock in heat and moisture helping your compost mature much quicker
- Unlike corrugated galvanised roofing sheets that can oxidise over time, releasing Zinc into the soil, box profile sheets often come coated with a polymer coating instead
And now for a few disadvantages of using box profile roofing sheets for a compost bin:
- Box profile roofing sheets are quite hard to handle, the edges are sharp and the corners like daggers!!
- You will need to cut them using a hacksaw or preferably an angle grinder (see our project here on how to use an angle grinder)
- Once cut, the cut edges are like razors!
- Not a great fit if your are going for an “au naturel” garden
As you can see from the above there are arguments for and against using roofing sheets to build your compost bin so it’s really up to you which particular method you use.
Tools needed for building a box profile roofing sheet compost bin
To build your roofing sheet compost bin you will need the following tools and materials:
- 5.6m of box profile roofing sheet
- 4x 1.8m by 80mm posts
- Pack of 38mm Tek Screws or similar self cutting roofing screws
- Drill/driver
- Hex drive bit
- Selection of drill bits
- Sledge hammer or large lump hammer
- 12 pallet slats or around 13m of 3×1 or 4×1 treated timber
- Mitre saw (desired but not necessary)
- Handsaw
- 50mm wood screws
- Angle grinder and metal cutting disc
- Marker pen
- Tape measure
- Spirit level or post level
- Timber chock for hitting in posts
If you don’t happen to have an angle grinder you can make do with a hacksaw or some metal shears but it will take an awfully long time, so it’s worth considering borrowing one from a friend or neighbour or possibly even hiring one as it will save a great deal of time.
Repairing broken and rotted timber compost bins
As we have established, one of the big problems with a timber-based compost bin is that over time it will rot and fall apart.
This can be a real pain especially if your compost bin is fairly large as eventually the timber won’t be able to cope with the outward pressure from the compost inside and it will effectively burst, spilling all the compost out all over your garden.
At this point you then have to either build a new one and transfer everything over or remove enough compost to be able to repair the existing one and then shovel everything back in.
Fortunately there is a solution to this. Before your existing timber compost bin degrades too much you can build a new one around it and then simply remove the rotten timber leaving you with a brand new bin!
For the purposes of this guide, this is exactly what we will be doing. As the existing bin was built 1200mm square using 1200mm pallets, rebuilding the bin using pallets of the same size would mean practically digging the bin out and starting again.
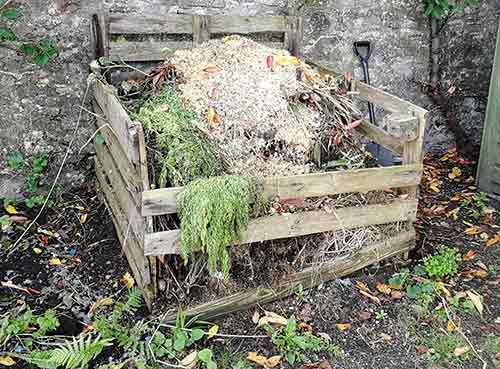
Rotten timber pallet compost bin needing repair
Fortunately as box profile roofing sheets come in long lengths (generally around 5.9’ish metres long) they can be cut to any size required, making building a new bin around an existing one easy!
How to build a compost bin using box profile roofing sheets
As we have stated, for this project we are going to build a brand new compost bin around an existing rotten timber bin. If this is not the case for you, you can still use the exact same construction principles to build a brand new compost bin for your garden.
Once you have assembled all of your tools and materials and are ready to get going, first clear a space around your existing bin so that you have plenty of clear space to work in.
Decide how big your compost bin should be
The first job is to decide how big you want to make your compost bin. If you have plenty of space then go fairly large as over time it will all get used if your garden generates a fair amount of waste.
In a way there is a minimum size for an effective compost bin, it should be at least 3 feet square, ideally for a medium sized garden 4 feet square is just about right.
The general rule of thumb when it comes to compost bin size, especially for hot composting, is the bigger the better as a larger bin will retain heat much better than a smaller one.
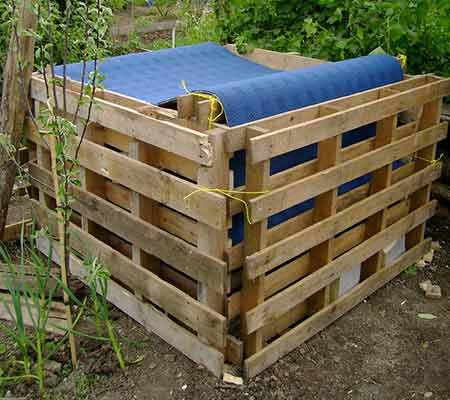
4 foot square pallet compost bin – Image courtesy of compostmagazine.com
If you have a large garden and will generate enough waste to fill it then you may want to consider going for a a double bin. A double compost bin is normally 8 feet wide and 4 feet deep with a divider placed in the middle that splits the bin in two.
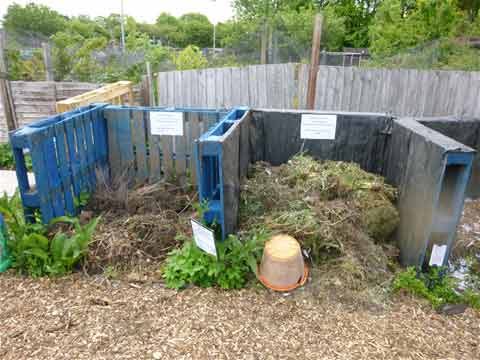
Double bin compost bin – Image courtesy of carryoncomposting.com
This is a great solution for either splitting up materials that decompose quickly or slowly or even having an area to store composted material that’s ready for use.
In this example our existing compost container is 4 feet square due to using 1200mm pallets, so we are going to make our roofing sheet compost bin slightly larger so that we can easily build it around the existing one.
As most box profile roofing comes in lengths of around 5.9m, to save slightly on material costs we are going to make our compost bin 1400mm square, giving us 100mm either side and also allowing us to get all four sides out of one roofing sheet.
One final point to consider is if you are building a brand new compost bin, where should you put it? Depending on the size of your garden you may only have one place it can go, but if you have plenty of room then try to place it where it will get plenty of sun, especially if you are hot composting.
The heat from the sun will help to maintain the temperature in the bin and keep it at the required temperature.
Treating timber posts?
Despite the fact we are using metal roofing sheets we still need to join them at the corners to form our box shape, and the best material to use is; you’ve guessed it timber!
You can use metal posts if you wish, but the cost of purchasing 4 decent solid metal posts such as gate posts can be huge. If you can afford it, go for it, but as we are trying to keep costs to a minimum, we are going to use round timber fence posts.
Contrary to what we are trying to achieve here e.g. a long life, low maintenance compost bin, we are going to use untreated fence posts.
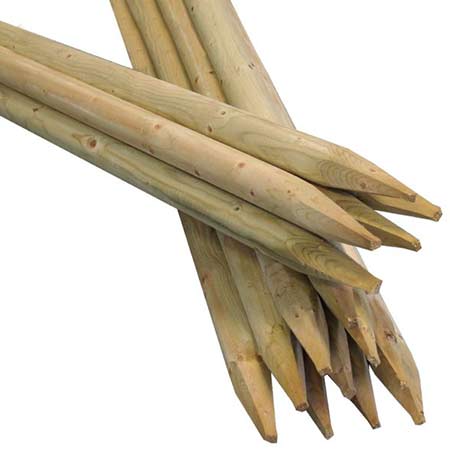
Untreated round fence posts
Unfortunately it’s almost impossible to confirm what chemicals have been used to treat pressure treated timber these days and the general consensus is that the chemicals used are certainly no good when it comes to composting and gardening as they can easily leach into your compost contaminating it.
As we will be screwing our roofing sheets to our posts, when the posts inevitably start to degrade to the point they need replacing we can simply unscrew a corner at a time and replace each post quickly and easily.
If you wish, you can add a natural timber treatment to your posts, information on which treatments to use and which to avoid can be seen in this guide here.
Measure, mark and site timber posts
Before installing any posts, the first job is to accurately mark out where each post is going to go. As we will be cutting our roofing sheets to exactly 1400mm, each post needs to be spaced precisely at the corner of our box shape.
To do this, first hammer in a timber stake at the rear left corner of your bin. As we are building around an existing compost bin and we know this bin is 1200mm square, we need to come up and out 100mm from the corner of the existing bin as we are allowing an additional 100mm either side for our new bin.
If you are building a brand new compost bin, knock the stake in at the point you want the rear left corner to start.
With your first stake in, now measure and add stakes for the three remaining corners.
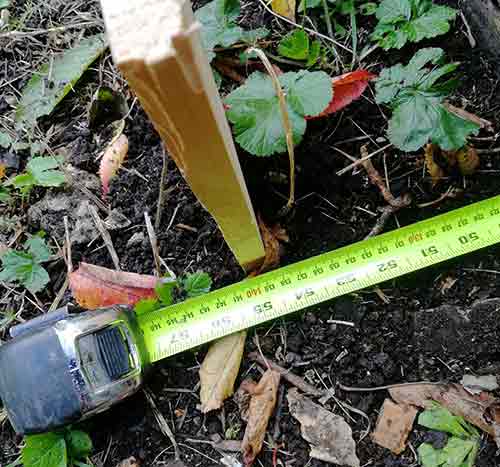
Stakes added to mark out post positions
Once all stakes have been added, the next job is then to replace each, one at a time with the actual posts we are going to use to form the corners of our compost bin.
As the posts we are using are relatively thin (only 80mm), on soft ground you should be able to knock them in using a lump hammer, otherwise use a sledge hammer.
To ensure the post is solid and stable it needs to go down 450mm or more into the ground. As we are using 1800mm posts we can knock them down in to the ground 500mm leaving us 1300mm above the ground to fix our roofing sheets to.
As the ground we are working in is known to be very stony (as it was ex-council back filled land) we are going to have to dig out our post holes to the correct depth.
Once dug out, position and level the post before backfilling the hole with soil. Add around 150mm of soil at a time and tamp it down so that it is compacted fully.
However, if you know that your ground is nice and soft and free of debris etc you should be fine to knock each post in using a sledge hammer.
With your hole dug out, pop a post in the hole and add some soil or rocks to the base of the hole to hold it roughly in place.
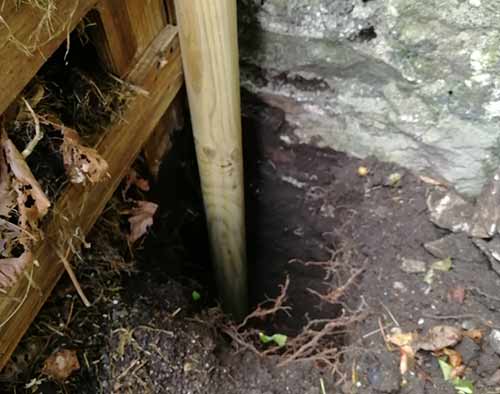
Post hole dug to 500mm depth and fence post positioned in hole
Level it up using a spirit level or post level and once level start backfilling the hole with soil to hold the post firmly in place. Add around 150mm of soil at a time and them tamp it down to compact it using a scrap piece of timber or similar.
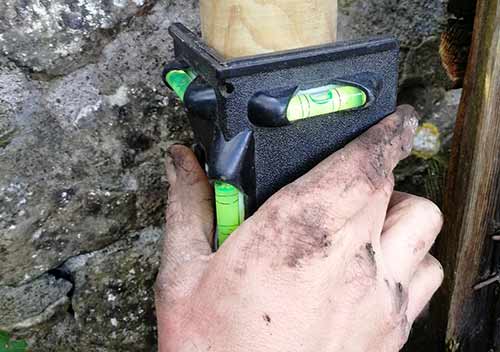
Leveling up fence post using a post level
If hitting your posts in, stop every few blows to check the level of you post and adjust finely if needed. Keep going until 1300mm is above ground.
As mentioned if the ground you are hitting your posts down into is tough and littered with rocks and stones, hitting your posts in will be a nightmare so you may find it a lot easier to dig post holes and install your posts this way.
Once the first post is in place, repeat for the remaining posts ensuring that they are all square, level and spaced accurately to 1400mm to the outside edge of each post.
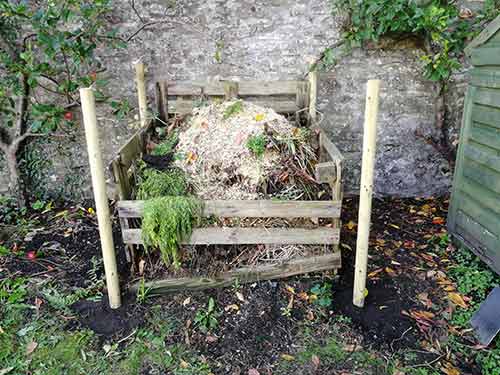
All 4 compost bin posts in place
Cut roofing sheets to size
Once all the posts are in place the next job is to cut the roofing sheets to size, for this we are going to use an angle grinder with a cutting wheel.
Lay the roofing sheet down so that it is propped off the ground. Some old pallets are ideal for this but if you don’t have any some lengths of timber will do.
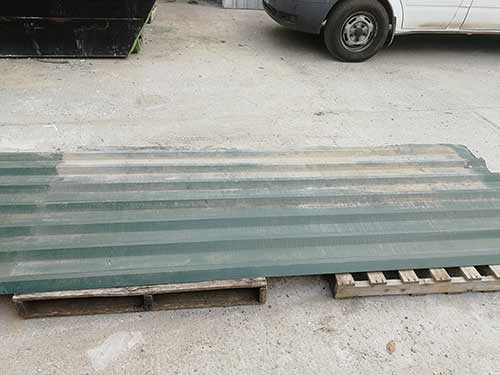
Roofing sheet laying down flat on top of old pallets
At the bottom edge of the sheet, measure and mark with a marker pen 1400mm in from the edge and then do the same along the top edge and then use a straight edge to join marks together.
Position the roof sheet so that the cutting line is over the gap between the 2 pallets it’s laying on.
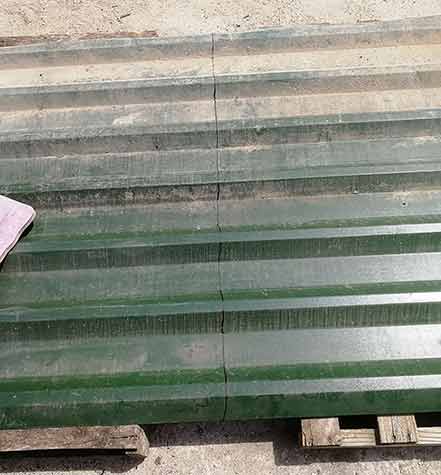
Roofing sheet with cutting line marked and positioned over gap between pallets
Before using the grinder ensure that it features the correct metal cutting disc, if not change it. Using the wrong disc can be very dangerous!
Make sure you are wearing the correct protective equipment e.g. gloves, ideally full face protection but at a minimum goggles, old clothes, boots etc and position the cutting wheel over your line.
Holding the grinder firmly firmly, start it up and lower it down to your cutting line. As it hits the surface it will bite slightly so be aware of this!
Take your time while cutting and follow your line closely until you reach the end. Once finished, put your first section to one side and repeat for the remaining 3 sections.
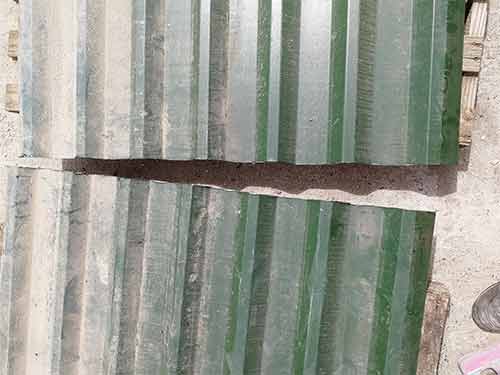
First box profile roofing sheet cut to size
Fix roofing sheets to timber posts
Once all of the sides of your compost bin have been cut to size from your box profile roofing sheet it’s time to start fixing them in place.
The first side that was fixed was the front as in order to remove the timber at the rear, the bin needed to be dug out so installing the front sheet first would allow the bin to be pushed forwards.
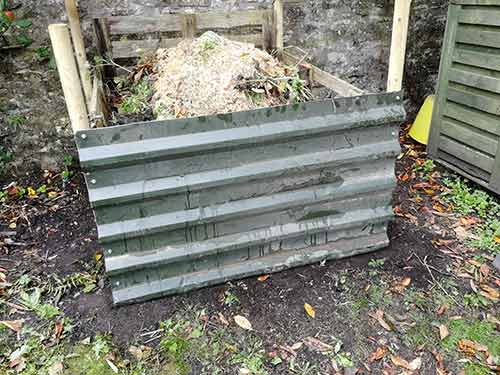
Front roofing sheet of compost bin fixed in place
We then fixed each side in place, removing the old pallets first. As the ground was slightly sloped, to level the bin up, level channels were dug from the front post to the back, allowing each roofing sheet to sit flat and square with each post.
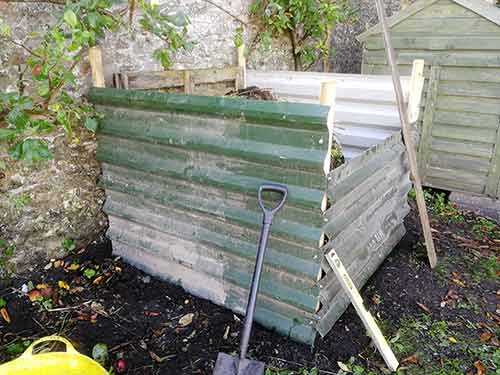
Both sides of compost bin fixed in place, sitting in channels cut in the ground so they sit level with posts
In this case as we are building around and existing bin the rear had a wall behind it which would make it tricky to insert roofing screws as they are self-cutting and need to be screwed in straight and level so that they cut through the metal surface.
As access was so tight we made up eight 150mm x 40mm brackets using some left over roofing sheet and then drilled a 6mm hole on each side, roughly 30mm in from the square edge of the bracket.
We then drilled four equally spaced 6mm holes either side of the rear sheet and then bolted each bracket in place using an M6 nut and bolt. This would allow us to then screw through each of the bracket into the post, firmly holding the rear sheet to each post.
Before the rear sheet was fixed in place we firstly removed the old rotten pallet timbers.

Brackets made up for rear roofing sheet and then screwed to each post to hold rear roofing sheet in place
If you have plenty of rear access then just screw the sheet in place using your Tek Screws as you did for the other three sides.
Add capping around top and corners of roofing sheets
Once all the sides had been fixed to the posts the new compost bin was pretty much completed, but as we have mentioned already above, the cut edges of box profile roofing sheets can be razor sharp, along with the uncut edges around the top, so we need to do something about these to prevent any potential injuries, especially if you have kids around.
To fix this potential issue, we decided to add some capping around the top edges and corners that would cover these sharp edges. For this we would use some 3 inch x 1 inch and 4 inch x 1 inch timbers. As they are on the outside of the bin we used treated timber.
First we cut two lengths of 4×1 inch timber to 1100mm and then the same for the 3×1 inch and then nailed each together at 90°. These were then fixed vertically around the front two corners.
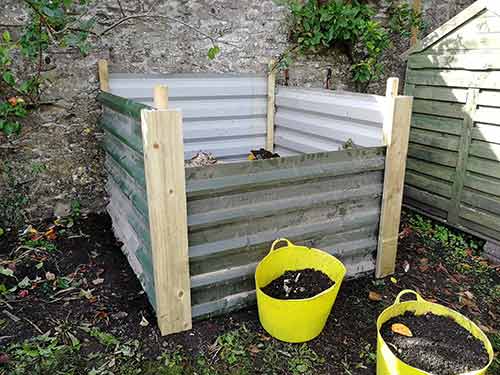
Front edges of compost bin covered over with timber
We then repeated this for the rear two corners.
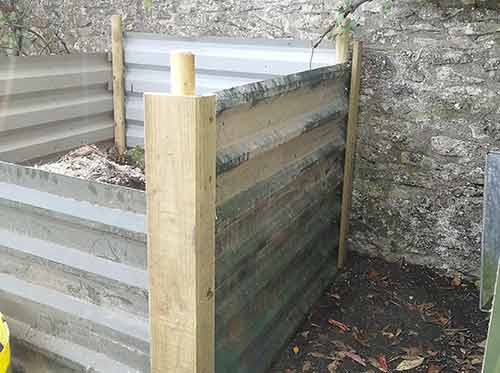
Rear corners of compost bin covered with timber
Two further timbers were then cut to 1400mm in length and placed between the front and back posts and then screwed down in to the corner upright timbers. We also had to notch these slightly so they sat around each post.
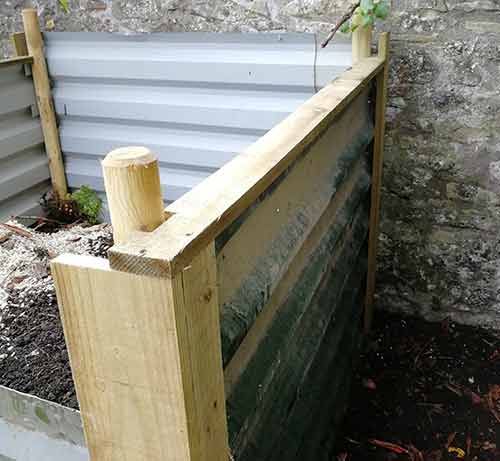
Side capping timbers fixed in place over compost bin
The same was then done for the front edge and also for the rear edge.
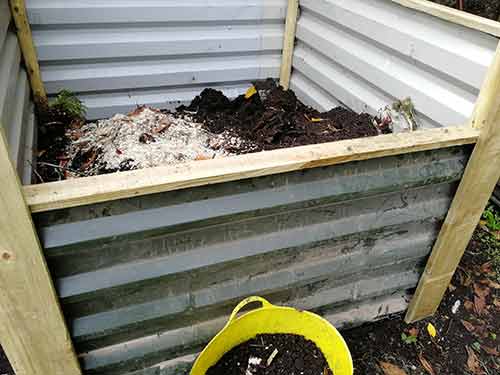
Front and rear top edges of compost bin covered over
Once all the edges of each roofing sheet had been covered over our brand new compost bin was now complete!
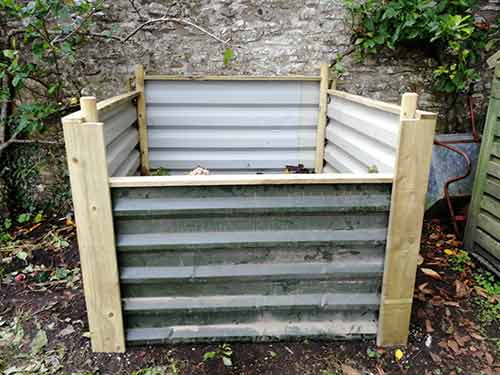
Brand new metal roofing sheet compost bin built around old timber pallet bin
Although we set out to build a new compost bin using box profile roofing sheets for the simple reason that they will last much longer than timber we have in fact used a fair bit of timber in our design.
Fortunately all of the timbers are fairly easy to get to, in time as they degrade they can simply be unscrewed or removed and replaced as and when required.

