In today’s modern work environment, many jobs require long hours of sitting at a computer or desk.
This sedentary lifestyle has been linked to various chronic health issues like heart disease, diabetes, cancers, and notably, back pain.
Sitting in an uncomfortable or poorly supportive chair can exert pressure on your spine and lower back, leading to pain and other health problems over time.
Therefore, it’s crucial to use a comfortable and fully supportive seat if you find yourself sitting for extended periods.
Common Issues with Office Chairs
While many office chairs available today are decent, it’s true that quality often correlates with price.
Cheaper options may lack adequate support, leading to discomfort and potentially serious issues over time.

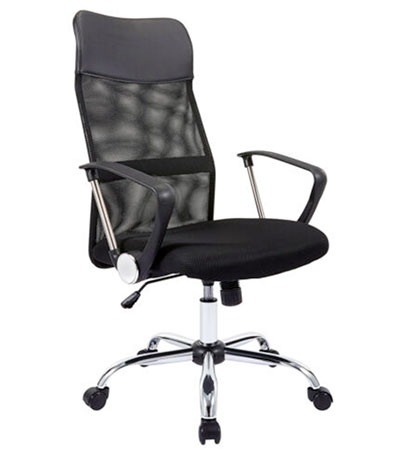
Budget office chair
On the flip side, pricier office chairs offer excellent support, promoting good posture and reducing pressure on your back and other body parts, thus safeguarding your health.
You might have encountered the term “ergonomic” while exploring office chairs. This indicates a design focused on comfort and reducing pressure to prevent health issues.
Ergonomic office chair
Regardless of chair type, age also matters. Even top-quality chairs wear out over time, leading to compressed padding and reduced support.
Another issue arises when the seat’s support system weakens, placing excessive pressure on your lower back and bottom.
So, what’s the solution?
While buying a new chair seems ideal, high-quality ergonomic options can be pricey, often exceeding £200.
Considering this dilemma, and facing discomfort with our own office chairs nearing the end of their lifespan, we pondered: What’s the most comfortable yet affordable option?
That’s when it hit us: car seats. These seats offer excellent support, often with adjustable lumbar support and sprung bases.

Modern car seat
Designed for comfort and support during long drives and even accidents, car seats typically use thicker, more durable padding and foam compared to standard office chairs.
Inspired by this realisation, we decided to put it to the test by building an office chair from a car seat. Keep reading to learn how.
Choosing the Right Car Seat for Your Office Chair
As we hunted for the perfect car seat for our office chair project, we explored various seat types and designs.
Car seats come in diverse designs, tailored to fit specific car models, accommodating bodywork bulges, transmission tunnels, and other obstacles.
Moreover, seat bases vary in pitch, with some flat and others sloping towards the back, lifting your knees.
After analysing different layouts, we concluded that the best car seat features flat runners that bolt to a level floor pan.
Flat and level runners on the base of a car seat
While a flat base is preferable, if unavailable, you can adjust the design accordingly.
Look for a seat with adjustable lumbar support, allowing you to fine-tune your seating arrangement.
Before finalising your choice, sit in the seat to assess comfort and check underneath to ensure it’s sprung. Generally, sprung seats offer better comfort than those with only foam on a steel base.
Sprung car seat
After scouring numerous scrap yards and trying out various car seats, we settled on one from a 2006 Saab 93.
Safety Considerations When Using a Car Seat as an Office Chair
It might sound unusual, but if you’ve examined modern car seats closely, you may have noticed that many come equipped with built-in airbags on the sides.
While these airbags are designed to deflect explosions and debris away from the occupant during a collision, they still pose a potential risk, especially if you’re seated beside them.
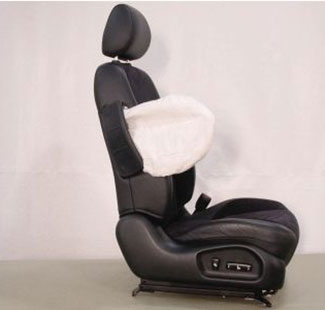
Air bag on side of car seat
To mitigate this risk, opt for a car seat without side airbags. If that’s not possible, consider reaching out to a local mechanic or the manufacturer to have the airbag disarmed and removed. Ideally, though, aim to find a car seat that doesn’t feature side airbags.
How to Build an Office Chair From an Old Car Seat
Now that you have selected the ideal car seat for you it’s time to start constructing your office chair.
Step 1: Disassembling the Car Seat
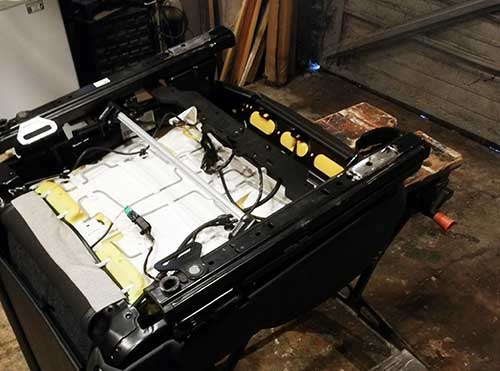
The first task is to remove all the unnecessary components from your car seat.
Place the car seat on a bench, Work Mate, or any flat surface, and closely examine the underside. Use wire snips to cut away any unnecessary wiring. Many modern car seats come with heating elements, electric adjusters, and other features that we won’t need for this project, so they can all be removed.
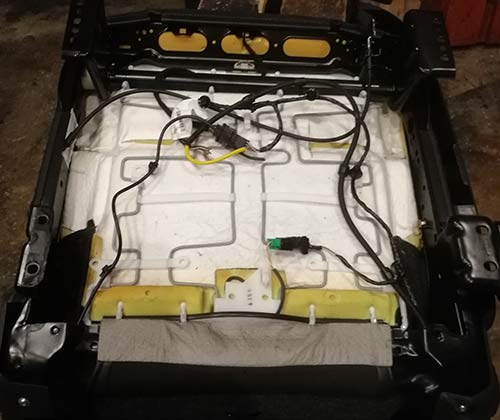
Removing all unnecessary parts from the car seat
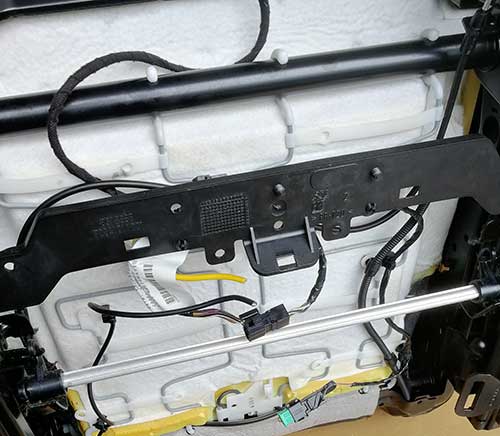
Once all the wiring is removed, unbolt the runners and any other parts that won’t be necessary for this project.
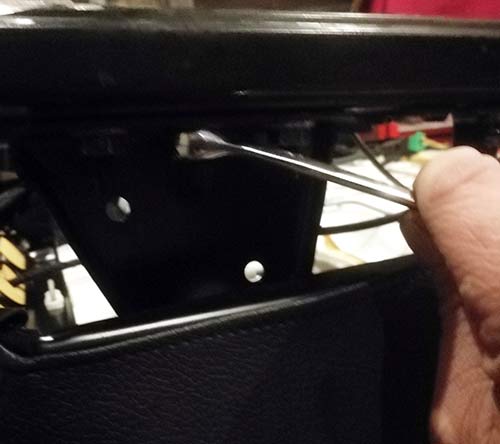
Unbolting car seat runners from the base of the car seat
Step 2: Creating the Base for Your Office Chair
Let’s construct the base for our office chair using a straightforward “X” type design, where two timbers intersect at 90-degree angles using a halving joint.
Begin by cutting two timbers to a length of 650mm each. Mark the centre of each timber and draw a line across it using a carpenter’s square to define the centre point.
Measure the width of each timber, which should be 4 inches, but in reality, it’s 90 mm. Mark 45mm on either side of the centre line, then draw lines across the timber. Repeat this for both timbers.
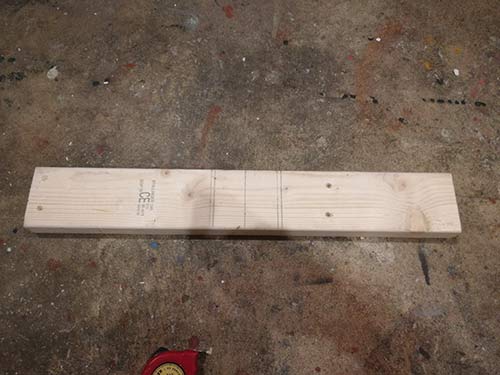
Marking out base timbers for cutting out to create a halving joint
Measure the depth of one timber, which should be 2 inches, but in reality, it’s 42mm. Measure and mark 21 mm from either side of the centre line, then draw a line between these marks. This defines the area you need to cut away to create the halving joint.
Using a mitre saw or a hand saw and chisel if you don’t have one, set the cutting depth to 21mm. Cut away the unwanted timber, ensuring you cut inside the marking lines to create a tight joint. Repeat this process for the second timber, then tidy up both joints using a sharp chisel and sandpaper.
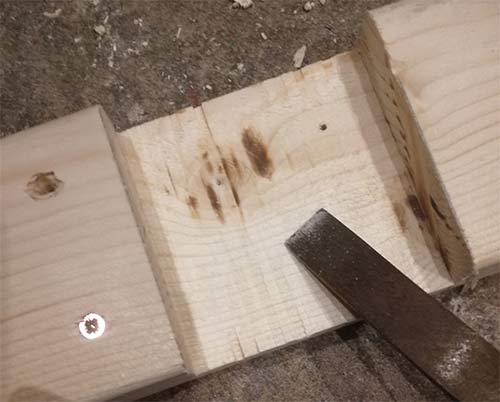
Tidying up halving joints
To finish the base, mitre the ends of each timber for a more refined appearance.
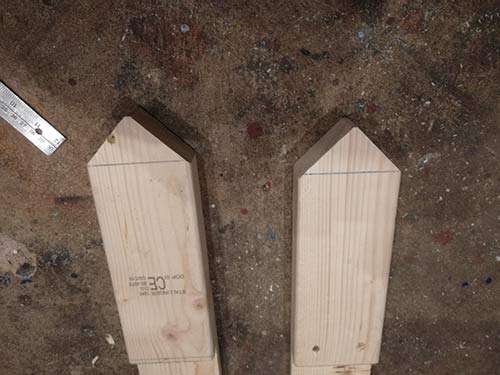
Ends of seat base mitred
Test the fit of the joints; they should be snug. Apply a generous amount of timber glue to both joints, then position them back together and knock them using a hammer and a scrap piece of wood as a drift to prevent damage.
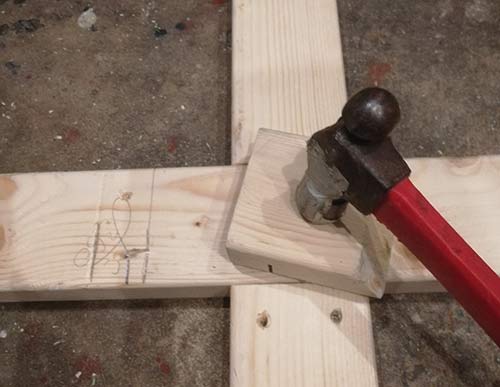
Knocking together halving joints to form office chair base
Simply attaching the support upright to the base won’t be sufficient, as it will experience significant pressure when someone is seated and moving. To reinforce it, create a dowel that runs through the base and into the upright support.
For the dowel, use a length of old broom handle. Cut two 80mm lengths, then sand down the cut edges for a smooth fit.
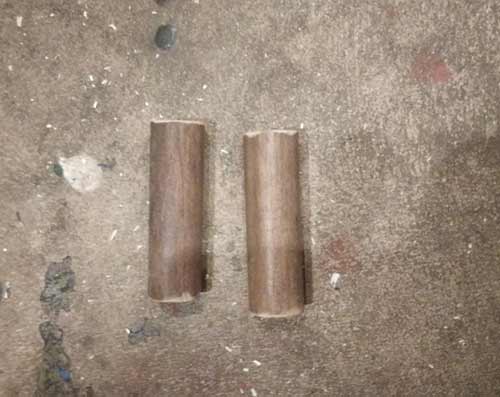
Broom handle dowels cut to length and sanded
Measure the diameter of the broom handle and select a flat drill bit or auger bit of the same size. Drill a hole through the centre of the base, ensuring the drill is held upright to create a square hole.
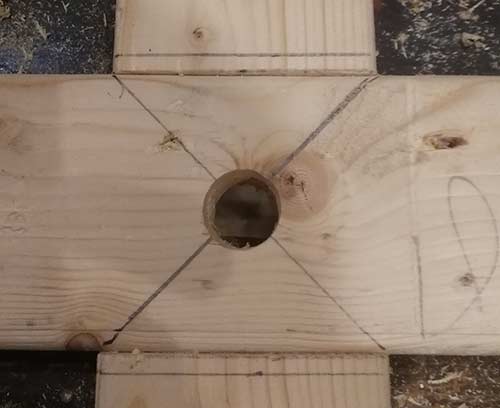
Hole drilled in base for dowel
Test fit the dowel, and sand it down if needed for a perfect fit. Then, sand the entire base to smooth out any rough edges using an orbital sander.

Office chair base fully sanded down and all sharp and acute edges smoothed off
Once sanded, spread wood glue in the hole and over the dowel, then push it into place. Allow it to dry completely for several hours.
Wooden dowel glued into office chair base
Step 3: Building the Mounting Base for the Car Seat
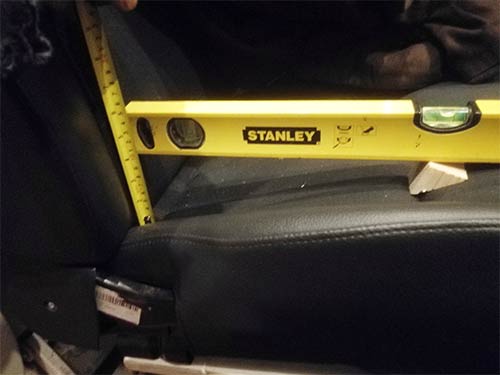
Constructing the base for your car seat depends on its design. If your seat is flat, creating a flat base is straightforward. However, if your seat slants, as ours does, we need to level it.
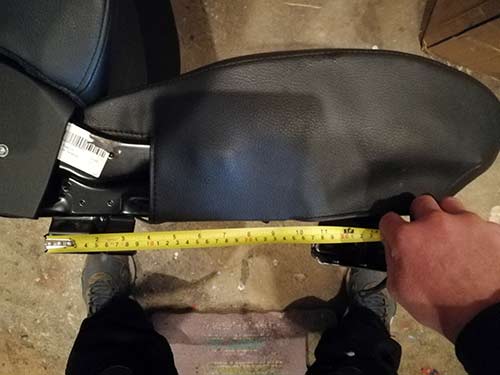
Begin by determining how much you need to level the seat. Place a spirit level on the front (the highest point) and adjust until level. Measure from the base of the level to the top of the seat; this is the amount to level up by, in our case, 90mm.
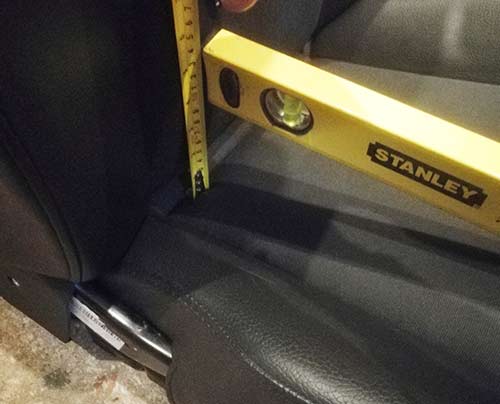
Measuring the drop on the car seat to determine the level-up height
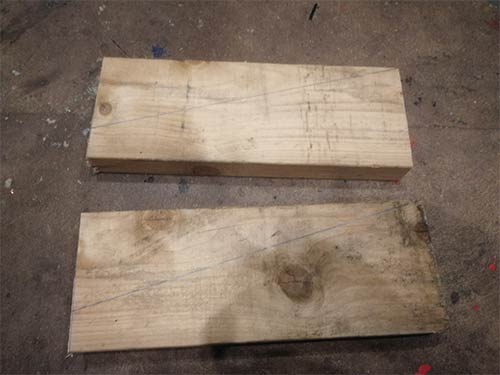
For substantial levelling, use 6×2 timbers. Cut two pieces to the distance between the front and back mounts on the seat base, in our case, 390mm.
Mark 90mm down from the front edge on each timber and draw a line to the top corner of the opposing side. Cut along these lines to create angled pieces.
Marking timbers for cutting to level the car seat
Measure from the back mount to the centre of the first third of the seat, in our case, 140mm. Mark this distance on one timber.
From this mark, measure and mark 45mm on either side for the width of the seat mount, then mark 42mm up and cut out the timber between these lines.
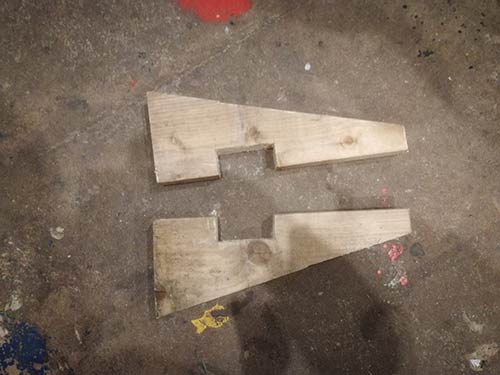
Timber marked and cut to fit the seat mount
Next, measure form the back edge of the seat bracket to around its centre. This is so ensure the base upright sits underneath the part of the seat taking the most weight.
Measuring from rear mounting bracket to the first 3rd of the seat
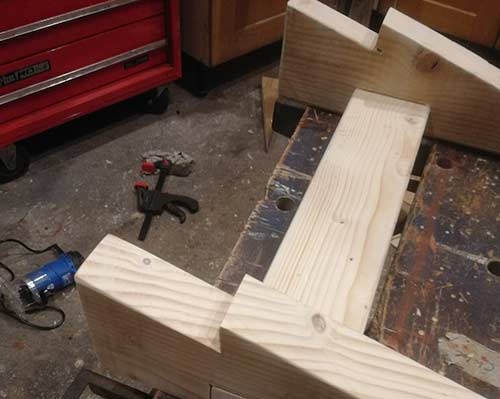
The next task is to then notch out each timber side bracket by 42mm so that you can mount each on a piece of 4×2 timber that will then sit on top of the base upright and join the base to seat bracket. Ensure that each notch is exactly the same on each bracket and that it sits directly under the area of the seat taking the most weight.
Mounting timber marked out and cut to fit horizontal seat mount
Once notched out, measure and cut another timber to the width between the two front mounts of the seat, in our case, 390mm. Mark its centre and create a 8mm recess using a router or hammer and chisel to locate the upright post.
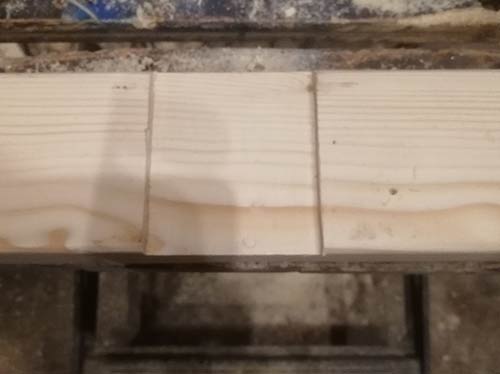
Timber with recess for the seat mount
Position the angled timbers with the recessed side down and fit the 390mm cross piece into the recesses. Secure it in place by applying wood glue and screws.
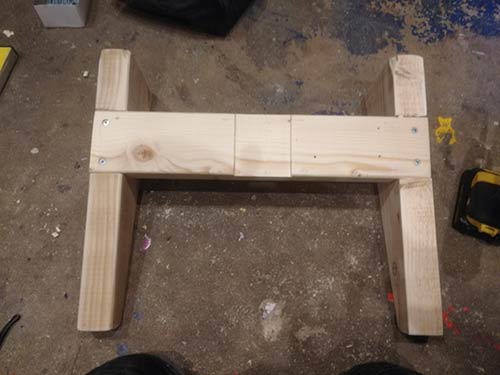
Cross piece fixed into seat mounting timbers
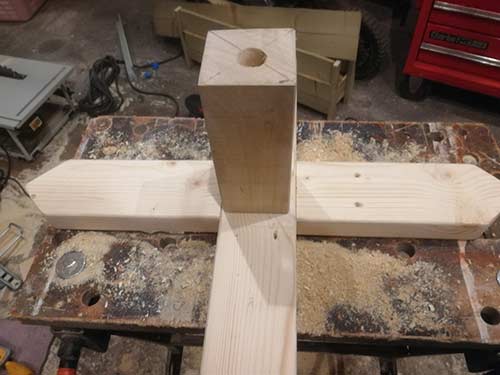
Find the centre of the cross piece and drill a hole using the same size flat/auger bit as previously used for the dowel hole.
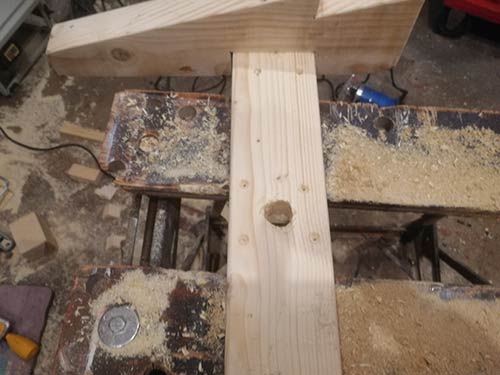
Drilling a dowel hole in the cross piece
Step 4 – Check the Fit of the Car Seat
Now that our seat mounting base is finished, it’s time to check if the seat mounting brackets fit snugly on the base and if the seat itself sits level.
Start by placing the mounting base on a flat surface, then position the seat on top of it. Adjust the seat until all four mounting brackets are evenly placed on the mounting base.
Once the seat is in position, use a spirit level to ensure it is level.
During our project, we noticed a slight issue: the seat was tilting forward slightly, not sitting level. This calls for further adjustments.
Using a spirit level, place one end on the front of the seat and adjust until the bubble is centered. Then, use a tape measure to determine the distance from the base of the level to the front edge of the seat.
Recalculating the height of the seat mounting bracket to bring it back to level
In our case, this distance is 30mm, indicating that the back of the seat needs to be lowered by 30mm.
On the back edge of the seat mount, measure and mark down 30mm. Then, using an angle bevel set to the slope of the mount, draw a line down to the mark.
Measure the length of the rear mounting bracket on the seat and transfer this measurement onto the line. Draw a vertical line up to the sloping face.
Using a saw, carefully cut away the marked piece of timber on both sides.
Cut outs created in seat mounting to drop the seat down to level
Once done, sand everything down again and place the seats back on the mount to ensure they are now level.
Step 5 – Determine the Ideal Height for Your Office Chair
Ensuring your chair is the right height is crucial for comfort. If it’s too high, your feet might dangle or knock against the desk. If it’s too low, reaching your desk becomes a stretch.
The perfect chair height varies based on your height.
To find your ideal chair height, sit in your current chair and adjust it to the right level. Then, measure from the floor to the top of the seat.
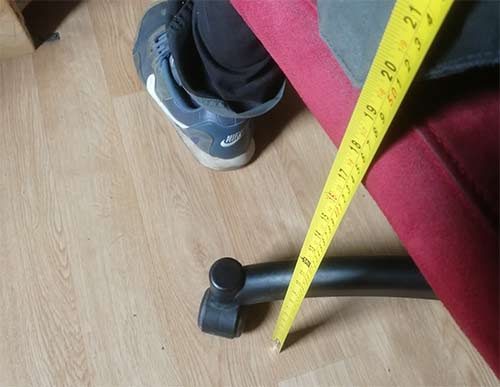
Measure the height of your existing office chair from floor level to the top of the seat
In our test, the measurement was 475mm from the floor to the seat’s top, which is our target height.
It’s important to determine this now because we need it to cut our centre support post.
Considering the heights of the various components:
- Caster height = 50mm
- Base timber thickness = 42mm
- Base of mounting bracket to top of car seat = 200mm
Adding these up gives us 292mm. Thus, our centre post needs to be cut at 183mm to achieve the desired overall seat height of 475mm.
Step 6 – Adjusting the Centre Support Post
Now it’s time to make sure our centre support post is the right height for the job. We’ll need a strong piece of timber, like a 100 x 100mm fence post.
First, cut a section from the bottom of the post to make sure it’s perfectly level. Then, measure and mark a point 183mm from the bottom, and cut the post to this length.
Once cut, use sandpaper or an orbital sander to smooth out any rough edges.
Stand the post upright and then calculate and mark the centre point on both ends. Then, using a flat drill bit, drill a hole 45mm deep at each end. This will allow the post to fit securely over the dowel in the base.
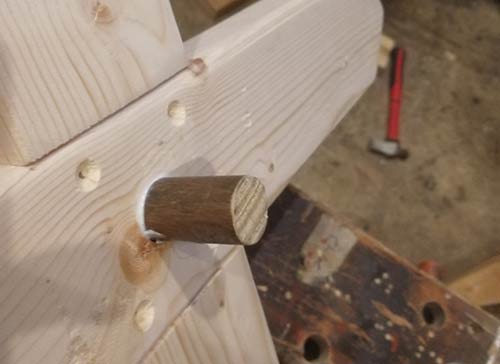
Slide the post over the dowel to test the fit. Make sure it sits flat and square on the base. If it fits well, remove it and apply wood glue inside the hole and around the dowel. Then, put it back in place and make sure it’s square.
Centre mounting post cut to length and dowel hole drilled at its centre and placed on top of dowel on base.
Next, flip the base over and drill four pilot holes. Then, insert 8 by 3-inch screws to secure the post in place.
Step 7 – Attaching the Mounting Bracket to the Base
With the base prepared, it’s time to attach the seat mounting bracket.
Insert another dowel into the top of the centre support post, applying wood glue first. Then, add wood glue to the hole in the mounting bracket and slide it over the dowel.
Similar to securing the base, drill four pilot holes and insert 3-inch screws to clamp the mounting bracket onto the base securely.

Mounting bracket screwed and fixed on to centre support post.
Step 8: Attaching Caster Wheels to the Base
Before securing the car seat to the mounting base, it’s important to attach the caster wheels to the bottom.
Flip the entire structure over and screw a caster wheel onto each of the four corners.
Consider the surface you’ll be using your new office chair on. For solid hardwood floors, opt for small caster wheels. However, if you’ll be using it on softer surfaces like carpet, larger wheels are advisable. Smaller wheels can get stuck in the carpet pile.
Caster wheels fixed to office chair base
Step 9: Strengthening with Support Brackets
To ensure stability and prevent loosening over time due to chair usage, we need to add support brackets between the base and the centre support.
Start by crafting timber angle brackets from 6×2 timber offcuts. Cut four 100 x 100mm blocks and then mark and cut a diagonal line through the middle of each, resulting in four triangular chocks.
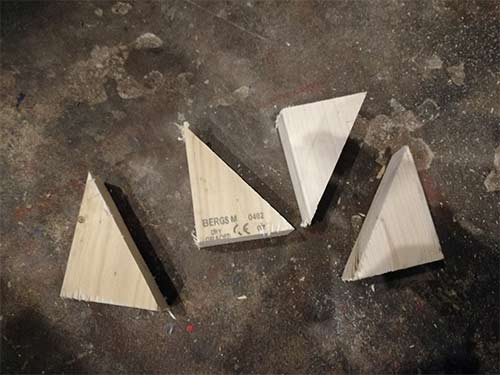
Timber brackets made out of scrap timber
Smooth out any rough edges using an orbital sander or sandpaper.
Measure and mark 35mm up from the base of each bracket’s centre, and then mark 30mm down from the top on two brackets and 50mm down on the other two, ensuring bolts won’t collide.
Measuring and marking recess holes on timber brackets
Using a 16mm flat bit, cut horizontal and vertical recesses on the sloping face of two brackets, and drill holes using an 8mm wood drill bit. Repeat for the remaining brackets, adjusting hole positions as needed.
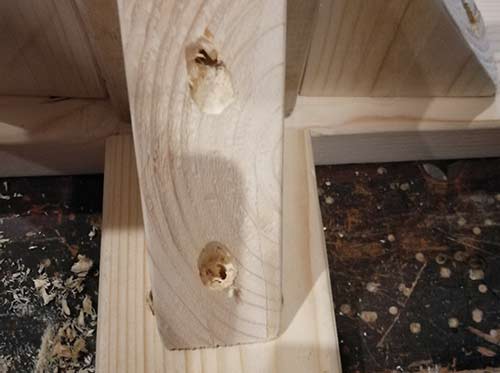
Recess and holes drilled in timber support bracket
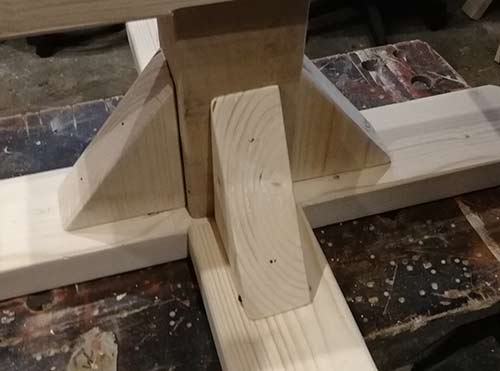
Position each chock between the base and centre support, marking hole positions with a pencil. Drill holes using an 8mm drill bit.
Secure the brackets with four 60mm M8 coach bolts for the base and two 160mm coach bolts for the support. Insert bolts, add washers, and tighten using a 13mm spanner.
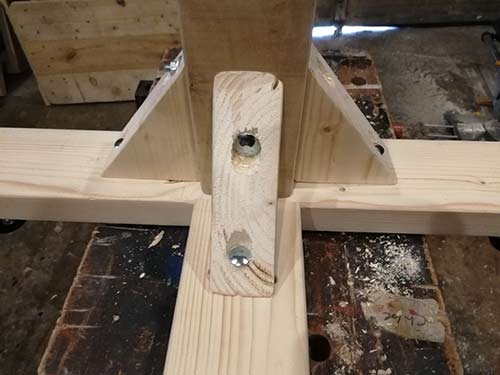
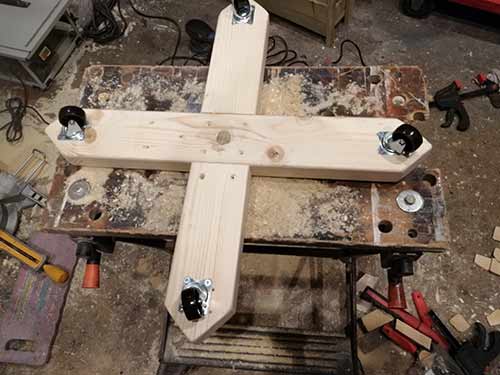
Timber support brackets fixed to office chair base and centre support
Step 10: Attaching Car Seat to Office Chair Base
Now that our base is fully prepared, it’s time to attach the car seat.
Place the base upright on a flat surface, then position the car seat on top of the mounting brackets.
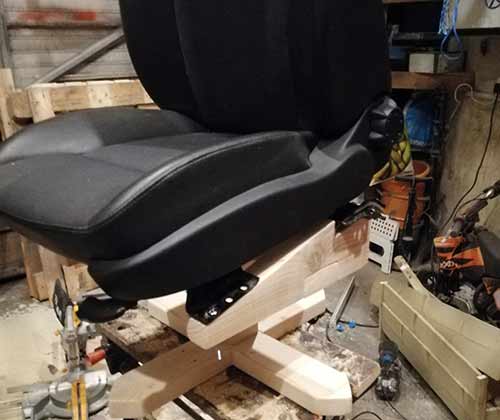
Car seat placed on top of office chair structure
Ensure the mounting brackets on the seat base align evenly with the seat mounting bracket. Use a sturdy pen to mark through the fixing holes onto the chair framework, then remove the car seat.
Using an 8mm wood drill bit, drill straight down through each marked point on the mounting base. Clear the holes fully to prevent bolt binding.
Place the car seat back on top of the mounts. Insert two M8 160mm coach bolts at the back and two M8 60mm coach bolts at the front through the base of the mounting brackets and the seat mounting brackets.
Place a washer over each bolt, then screw on an M8 nut and tighten using a 13mm spanner.
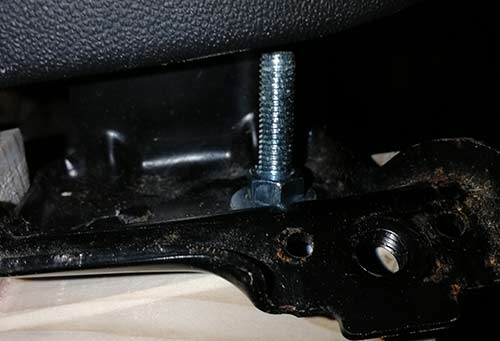
Nut screwed onto bolt and tightened down, fixing car seat to mounting
With the car seat securely fixed to the office chair base, construction of our office chair is now complete.

Completed office chair made using a car seat
Making an office chair out of an old car seat is a fairly interesting project and on the whole pretty worthwhile as we now have very comfortable office chair for very little cost.