This section is all about the different kinds of timber joints and cuts. Below is a summary of the different types of timber cut and when they are most commonly used so that you can decide which is best for your scenario. The different projects above explain in detailed steps how you can make each of the different woodworking joints and cuts.
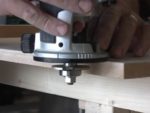
In order to make some of these different timber joints, you will need to know some basic carpentry or joinery techniques or how to use some woodworking tools that will make the project much easier. All these different woodworking skills are explained in our Carpentry Techniques section.
If you are short on inspiration for your next woodworking project or you need help with planning the design, we have a section with lots of useful plans and designs from bird boxes to how to build a workbench. There is even advice for practical projects such as boxing in pipe work and making bath panels. Have a look at our range of Carpentry Plans and Projects here.
You might find it helpful to browse our section of Hand Tools and also our section on Power Tools for more information about buying and using the different types of tool that you will use in your carpentry projects.
Different Types of Woodworking or Timber Joints Explained
There are a number of common joints that are used in all sorts of woodworking, carpentry or cabinet making. Joins in the timber are always a source of weakness so it is important to select the right type of join for the project that you are doing.
There is detailed information how to make each type of joint in the projects above, but here is a summary of the joints and where they are typically used. This should help you select the right type of woodworking joint for project you are working on.
Butt Joints
These are some of the simplest timber joints that you can make. They are made when the end of one piece of wood butts up to the edge of the other to make the join.
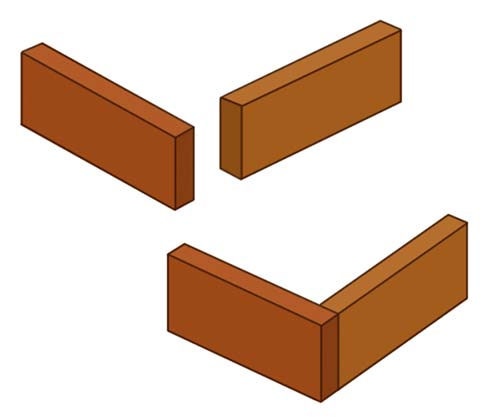
Butt Joints tend to be weak, largely because you are fixing the end grain to the cross grain of the other piece of wood. The screws should be long to provide as much lateral strength as possible.
They are fixed with glue and either nails or screws for very simple butt joints. The screw can either be inserted in the ends or they can be inserted through pocket holes, so that they cannot be seen from the outside of the join.
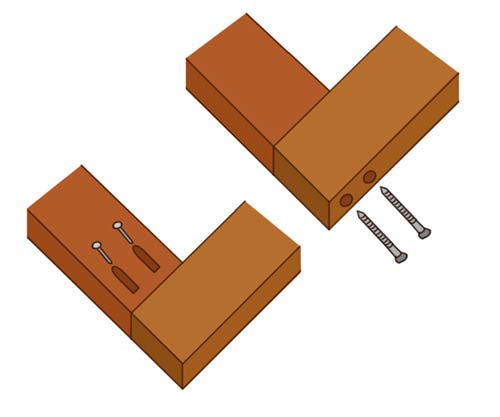
To make them stronger they can be reinforced with dowels or biscuits, in which case they can be called Dowel Joints or Biscuit Joints. Find out more about using a biscuit joiner here.

Butt Joints are used for very wide range of applications as they are simple, quick and robust enough for many applications. They are use for making frames such as door frames and frames for cabinets of carcases.
Mitre Joints
A Mitre joint is a type of Butt Joint, except they are joint at an angle across the grain. The angle of the cut is usually 45o so that the joint is at 90°. It is very hard to achieve a neat looking joint using other than a 45° cut, because the end cuts angles will need to match each other exactly to fit each other; this will mean that the join will not be 90° either.
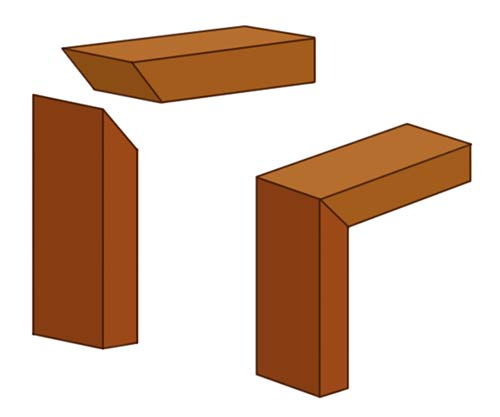
Mitred Joints tend to be weak just like other butt joints, but they are ideal for getting a square joint particularly where there is cornicing. It is very rare to strengthen a mitre joint with screws, but they are reinforced with biscuits, dowels or splines.
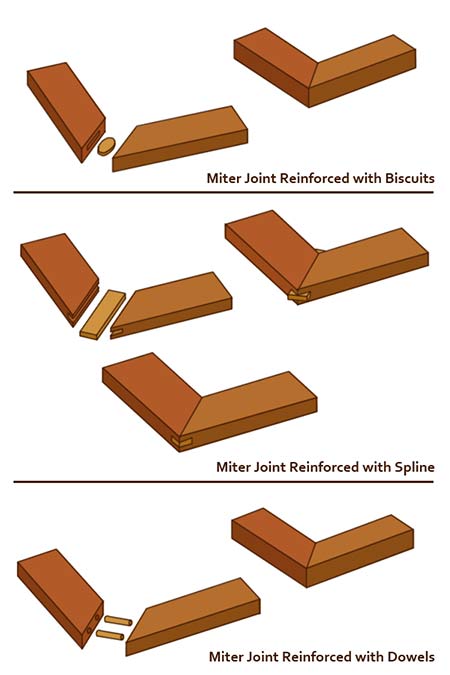
Splines are essentially extended biscuits which tend to be a distinct oval shape. In some instances a feather splines can be used as the strengthening.
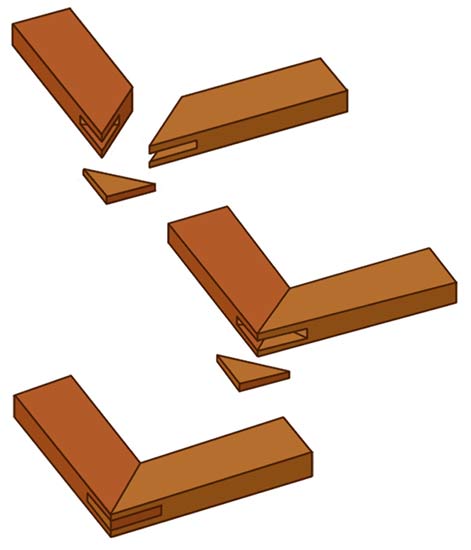
Mitre joints are used for a range of uses from picture frames to architrave around doors. They are typically used where the joint is going to be seen. If the joint needs to be strengthened, then a Biscuit Mitre or a Dowel Mitre can be used.
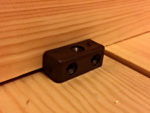
Knockdown Joints
These are again a variation of the Butt Joint, but where the joint has been strengthened with the use of a device called a Knock-down Fastener to make the joint stronger and quicker to build, often without any special tools.
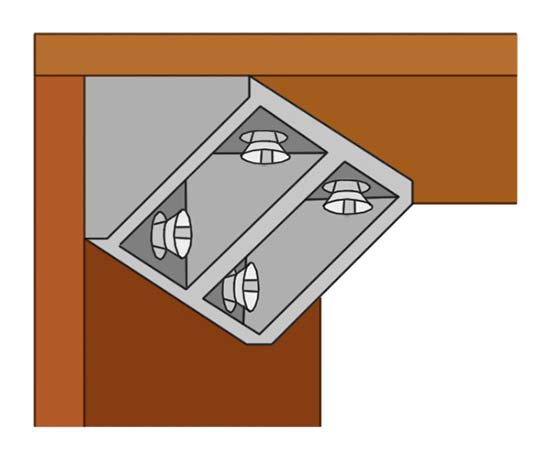
There as a huge range of types of knockdown fasteners and therefore range of knockdown joints, which are covered in detail in the knockdown joint project above.
They are use most commonly in flat-pack furniture now, but you will see them in kitchen frame and carcass assembly and other situations where the parts are manufactured and assembled on site.
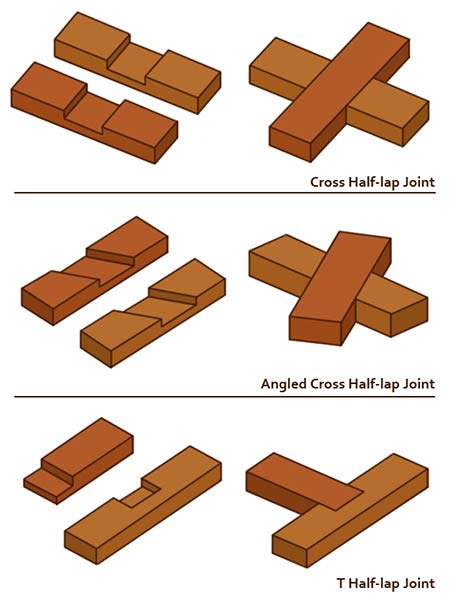
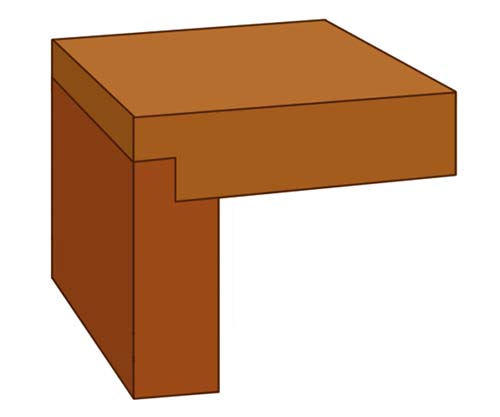
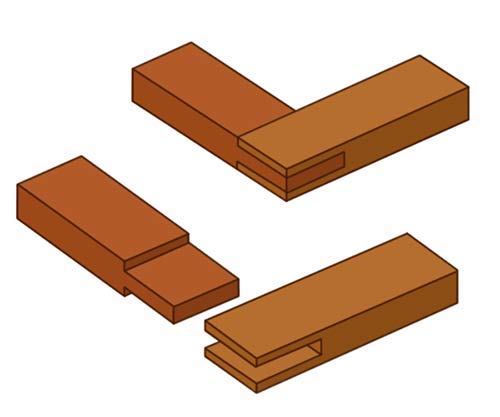
Halving, Halved or Lapped Joints
These are sometimes called Lap or Half Lap Joints too. There are simple joints where half of each of the wood is removed so that the two pieces can join each other flush.
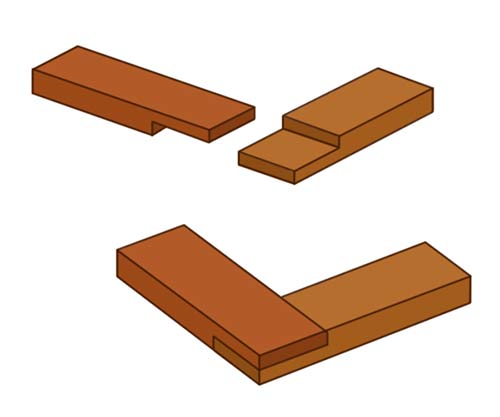
Lapped Joints weaken the pieces of wood that are being joined because they are cut, but they provide two strong surface for the join, and are usually screwed or nailed also for extra strength.
There are different types of Lapped Joints depending on the situation where the joint is formed.
When the lapped Joint is used on the end of a piece of wood, often called a shoulder, the joint is called a Shoulder and Rebate Joint. There is a project specifically about this kind of lapped joint above.
Bridle or Open Mortise and Tenon Joints
This is very similar to a Mortise and Tenon Joint and provides a robust joint two sides (cheeks) of contact to provide more strength.
The joint is generally strengthened further with screws of nails, and they are commonly used for frames of all kinds, particularly when strength is needed.
The main difference between this and a Mortise and Tenon Joint is that the tenon (the projecting piece of wood made for insertion into a mortise – the hole or recess cut into in another piece) is cut to the full width of the tenon piece with a bridle joint, but with a Mortise and Tenon Joint it is cut in from the full width and height of the tenon piece. (see below).
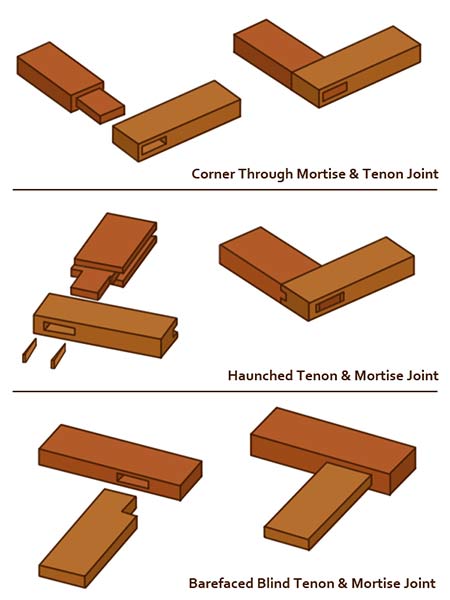
Mortise and Tenon Joint
This is one of the joints that most people will have heard of and these are very similar to the Bridle Joint explained above, except that the tenon (the sticking out piece designed to fit into the mortise) is not the full width of the tenon piece.
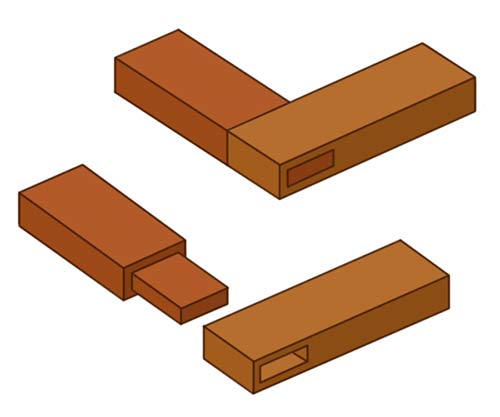
The mortise is the hole into which the tenon fits and it makes one of the strongest timber joints that there is. The tenon is usually about one third the thickness of the tenon piece.
There are a large number of variations of this type of joint (as there are with most of the other types wood joint) which reflect where the joint is to be used. Here are some of the more common examples:
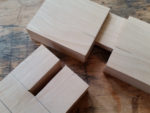
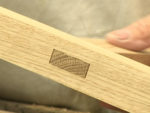
Finger, Box or Comb Joints
These are used for joining wood to make boxes, as the name suggests, or fingers joints are used to join wood in-line. This is a simple form of a dovetailed joint in that the “fingers” are square. It is ideal for joining two piece of wood at right angles.
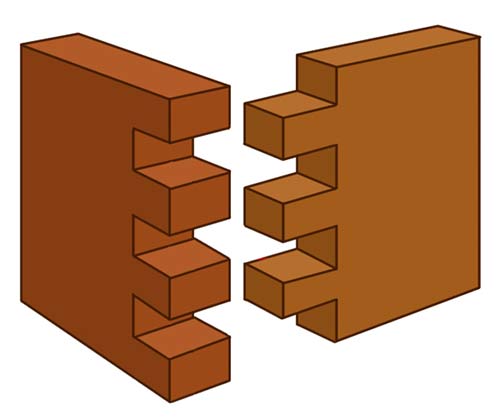
A Finger Joint can be used in-line for join two lengths of wood, although this is unlikely to be a DIY task:
Box Joints are easier to make that a dovetail joint, but do not have their strength. They are held together with glue in the joints, and are very unlikely to have any mechanical fixings (nails or screws).
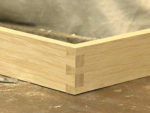
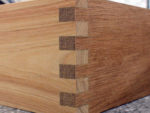
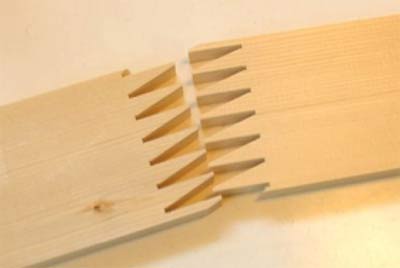
Dovetail Joints
These are the strongest joints for making a right angle join which are used for creating boxes or draws. The joint is held together with interlocking fingers for each piece of wood to be joined. These fingers are not cut square as in the box or finger joint, but at an angle to provide extra strength.
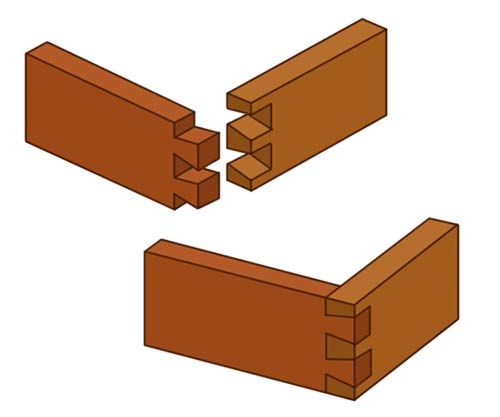
These are tricky joints to master and very time consuming especially if you are not practised, but they are very strong. Like the Finger Joint they are held together with glue, and once fixed will not come apart again without damaging the wood.
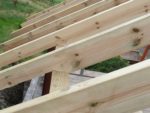
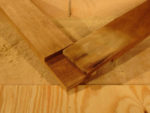
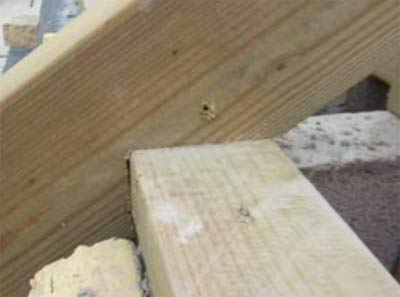
Birdsmouth Joint
This is not a common carpentry joint but it is a very important joint for a self builder. This is the timber join where the rafters meet the top of the wall and the wall plate. This is how the rafters are joined to the rest of your house!
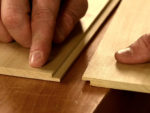
Tongue and Groove Joints
These are joints that are designed to hold boards or planks together side by side. They are typically used for flooring or cladding.
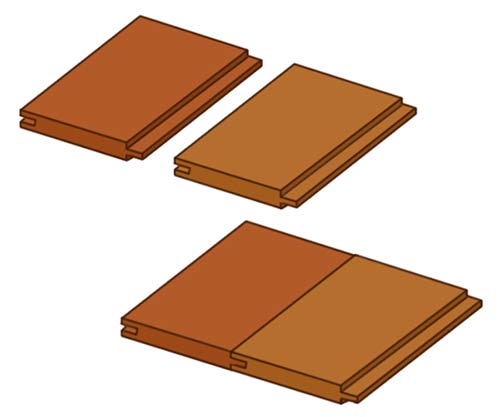
Tongue and Groove joints are almost always manufactured into the boards that you purchase so it is a case of joining them and fixing the boards.
The range and variety of different types of joints is enormous, particularly when features of different types of joint as combined to produce highbred joints. In this section we cover the main ones that you will need or are likely to come across. These are the types of timber joint that you can reasonably be expected to attempt yourself without significant amounts of practice.