How to Hide a Boiler in Your Kitchen

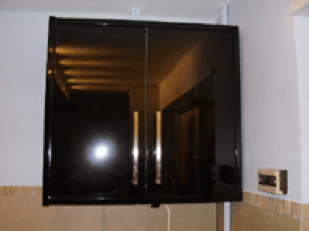
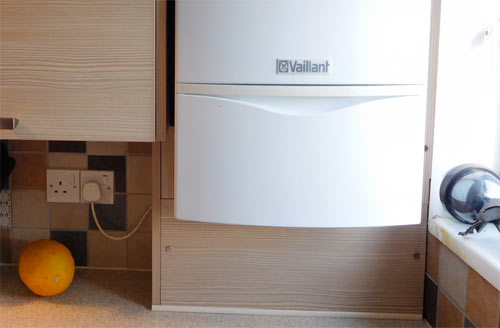
A typical wall mounted combi boiler in a kitchen
Boxing in a boiler or housing a central heating boiler can be done using kitchen units, or spare parts from kitchen units so that it matches your existing kitchens look and feel.
Boilers can be unsightly beasts but with a little thought they can be hidden away by either placing a full kitchen wall unit cupboard around them or using bits and pieces from kitchen end panels, plinth boards, old cupboard doors and even tongue and grooved matchboard.
The kitchen can look a great deal better and it is a relatively inexpensive project to complete with a few basic carpentry skills and a few tips and tricks of the trade which this project will teach you.
It is necessary however to make sure of a couple of things when boxing in a boiler:
- The boiler itself can be opened fully for servicing and repairs
- There is at least 50mm of air gap all round the boiler and the boxing allows plenty of ventilation to allow a fresh airflow all round the boiler
Both of the above can be achieved by using flat-packed kitchen units and units built in a bespoke way for housing your boiler.
How to Box in a Boiler Using a Kitchen Wall Unit
Firstly, measure the boiler and choose a unit which will fit round and meet the conditions described above. Put this unit together and place it somewhere near the boiler to see what adaptations you need to make to get it over the boiler.
There will be cuts round pipes and possibly timers etc. There will also be cut outs required to allow for the air to circulate.
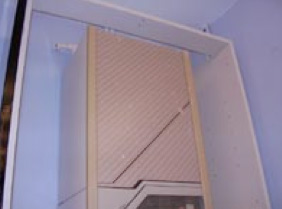
As you can see from the images below we have cut the top half of the unit away and 90mm off the bottom of the unit also.
The right hand side of the unit has been fixed to battens on the wall to keep the unit away from the pipes. The unit has been kept off the back wall to allow for an air flow at the front of the boiler. This also has been done by fixing battens to the wall and the back has been removed from the unit.
You will, almost always need a jigsaw to cut the awkward shapes. You can click on the image below to see an inexpensive Jigsaw available from the DIY Doctor online store and if you would like to understand more about jigsaws go to our project page on using a jigsaw.
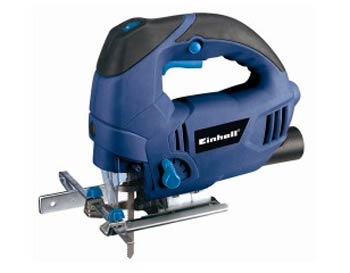
Cutting around pipes is easiest with a jigsaw
The below two sections and their associated steps will take you through the process of how to hide a boiler and its associated pipework.
How to Box in a Boiler Using an Existing Kitchen Wall Unit
- Remove doors from the right-sized kitchen wall unit you are going to use. Offer the unit up to the wall and over the boiler. Make sure you have at least 2 inches (50mm) clear air space all round boiler and that all access panels can be removed easily
- Mark the position of any cuts that need to be made in the kitchen wall unit to allow the passage of pipes and cables
- Cut the holes and slots out for pipes and cables using a jigsaw and offer the unit back to the wall
- Make any fine adjustments to the cuts that are needed to get a nice, uniform fit
- Fix angle brackets to the inside of the units top and bottom to allow the spread of the weight of the unit evenly. You should use a minimum of four brackets
- Use a spirit level to ensure the unit is upright and level before drilling any holes
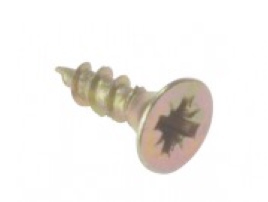
- Use only countersunk screws for the fixing of the brackets. The head of the screw should fit neatly into the countersink of the bracket. If you want to find out more about countersinking, go to our countersinking project page
- With the help of a friend or family member, offer the unit back to the wall in its final resting position and level it up using your spirit level. While your extra pair of hands is holding the unit in place, use a pencil to mark the drill holes for your brackets on the wall and then remove the unit
- Using a decent drill (hammer drill preferably), drill out all of your holes and insert wall plus (red wall plugs should be sufficient). Once complete, use the help of your friend or family member to position the unit back on the wall and then screw it up
- Fix the kitchen wall unit doors back onto the frame and adjust the hinges so they are all square and they open and close properly
Kitchen wall unit with doors removed
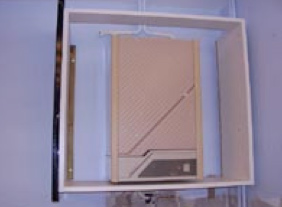
Kitchen wall unit placed on wall to mark any cuts that are needed
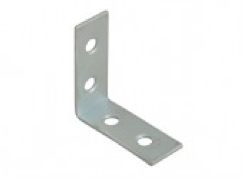
Angle brackets used to fix units to the wall
Countersunk screw
Refit doors to your unit to hide the boiler
Making a Boiler Housing Unit to Hide Visible Pipework From Scratch
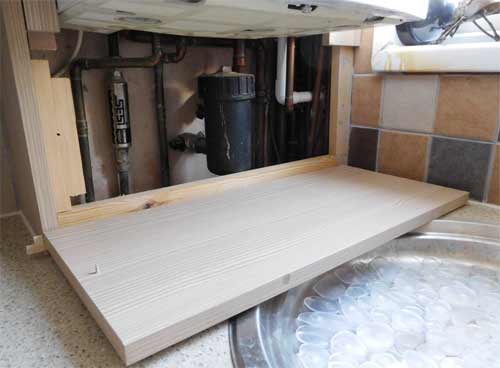
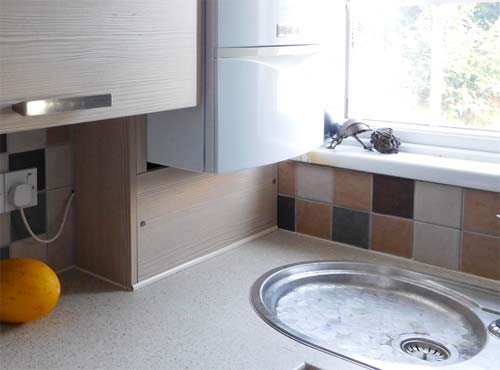
Panels added below boiler to hide visible pipework
The majority of modern boilers are quite neutral in appearance so you may decide that the boiler itself isn’t too unsightly. If this is the case then you may just want to box in the pipework and leave the boiler visible.
Sometimes in situations where space is limited to both add a complete housing unit that covers the boiler and allow enough “breathing space” this is the only option available.
To make your very own boiler housing to hide your pipework, you will need the following tools and items:
- At least one kitchen unit end panel to match your existing kitchen units
- 50mm x 25mm planed timber
- 50mm Countersunk screws
- 15mm Countersunk Screws
- 40mm Angle brackets (pack of 10)
- 35mm Mirror Screws (pack of 10)
- Construction Adhesive
- Sealant gun
- Combination drill driver
- A spirit level
There is a huge variety of items that can be used to make your boiler housing, these include old kitchen units, end panels, plinth panels or tongue and grooved match boarding.
What you use is really down to you and your own tastes, but it is always advisable to ensure that any items you add to a space match and complement what’s already there. To make your own boiler boxing unit, follow the steps below:
- To start with, measure the height and width of the area of pipework to cover. Make sure you allow enough safe breathing space
- Cut lengths of 2 inch x 1 inch timber to suit, adding a suitable overlap for maximum possible ventilation around the boiler and enough space to allow any maintenance
- Fix battens to wall using the appropriate screw and wall plug fixings and secure with construction adhesive. For help with this please see our project on building a cupboard or the project on cupboards under stairs. The basic battening technique is the same in both instances
- Cut down the end panel, plinth board or cupboard door you are using for the boxing to the correct sizes to form the required panels. this will either be a left and/or right hand side and a front section.
- Glue the panels to the frame, keeping cut edges hidden or using some edge trim to tidy them up
- Where access is require, instead of gluing them, screw the panel(s) in using mirror screws so they can be removed easily
- Once all panels are fixed in place and any edges have been tidied up and you have added sealant, you can stand back and admire your handiwork!
Start by making a timber frame for your boiler housing
Cutting down kitchen unit end panels to make boiler housing
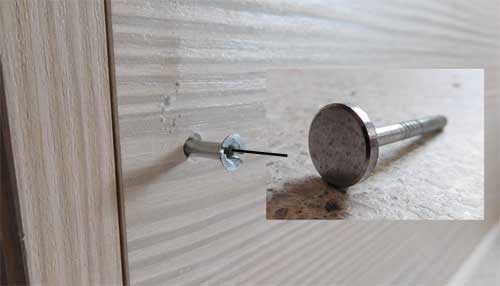
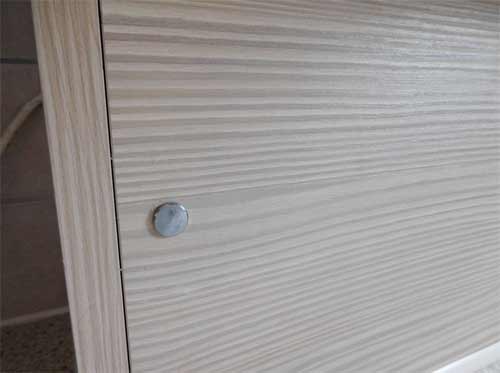
Mirror screws can be used to gain access later and they also look quite good
You can see that by using some correctly coloured sealant and some tiling trim a really first-class job can be achieved with just a little ingenuity and time.
Kitchen wall cupboards with a neatly boxed in boiler pipework