When the weathers nice there’s nothing better than eating outside. Whether it’s a BBQ, picnic, birthday celebration or any other reason eating out in the fresh air and the sun is extremely refreshing.
To allow you to eat comfortably decent seating and a table are essential and the ideal solution here is a sturdy picnic bench and this combines both into a nice neat solution.
Better still, to keeps costs as low as possible you could use recycled timber, old pallets or even as we have done in our example below, used offcuts from a decking project. Decking boards also have the added benefit of being treated so will be more resistant to the elements.
To these ends, below you will find a step-by-step guide on how to build your very own picnic bench for your garden.
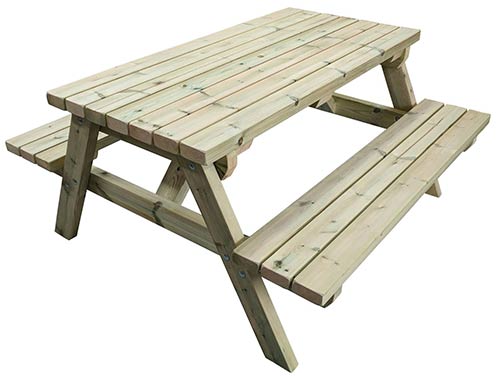
Standard 6 foot picnic bench
Tools and Materials Needed for Building a Picnic Bench
Here follows all the tools and materials you will need to build your picnic bench:
- Compound mitre saw or decent hand saw if you don’t have one
- Cordless drill/diver
- 8mm wood drill bit
- 3mm wood bit (for pilot holes)
- 32mm flat wood drill bit or auger bit
- Box of 2 1/2 inch decking screws
- 16x 80mm coach bolts, washers and nuts
- 13mm spanner for tightening nuts
- Tape measure
- Decent pencil
- Angled/sliding bevel (find out how to use one here)
- Protractor
- Roughly 18m of your chosen timber, should be at least 3×2 but preferably 4×2. This is to build a bench 1100mm wide, however if you want to go bigger you can increase this based on the cutting list below
How to Build a Picnic Bench
As we have mentioned, to build our picnic bench we are going to use decking board offcuts to both make use of timber that may end up getting thrown away and also as it’s treated will ensure our bench will last a decent number of years.
Cut all Timber to Length
The first job to do is to measure and cut all of our timber to the correct lengths for each section of our picnic bench.
The cutting list of timber required is as follows below. Note – As mentioned if you would like your bench to be wider than ours (currently 1100mm) simply increase the width of the 1100mm timbers in the list below to the length you require:
- 9x 1100mm
- 2x 1200mm
- 2x 580mm
- 4x 950mm (will be mitred and either end and cut to 880mm in length to form the legs)
The best tool to use to cut your timbers is a compound mitre saw as this will ensure a nice accurate and square cut. If you don’t have one of these tools that’s fine you can use a decent, sharp hand saw but just make sure you keep all of your cuts square.
Once all cut to required lengths use some 120 grit sand paper to clean off any rough edges.
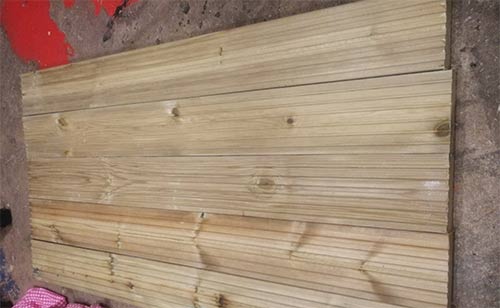
Measuring picnic bench timbers to length
Mitre Each end of Picnic Bench Legs
To construct our picnic bench we are going to use a tried and tested design – 2 A-frames at either end and then timber slats running between them to form the table top and benches so the first task is to form our A-frames.
Take one of your 4 880mm leg timbers and lay it out on a work bench. Using a protractor set your angled bevel to 125°
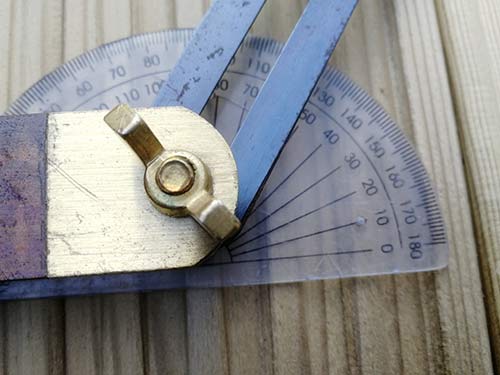
Setting an angled bevel using a protractor
Once you have set the angled bevel to the correct angle place it on the leg and slide it down until the blade touches the corner of the base of the leg then draw a line to mark your mitre cut.
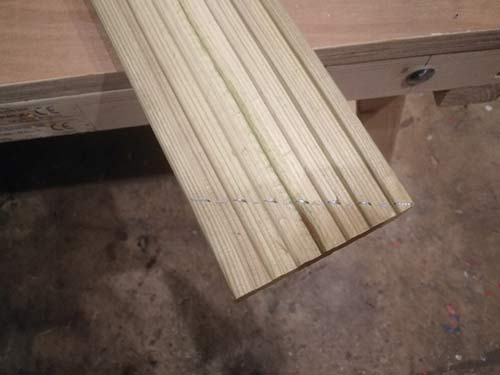
Mitre cut marked on base of picnic bench leg
Once the mitre cut is marked, use a mitre saw or hand saw to make your cut and then measure 880mm along one edge and mark this position and again use the angled bevel to mark a mitre cut at this point. As before, once marked make your cut. Repeat this process for the 3 remaining legs.
Once all cut take a second leg and lay it out on your work bench or floor along with the first one and align the feet of each leg with a straight edge. In this case we are using the edge of our work bench but you can use a long spirit level or similar object.
Once align move them together until the top edges touch. This is now the basis of our first A-frame.
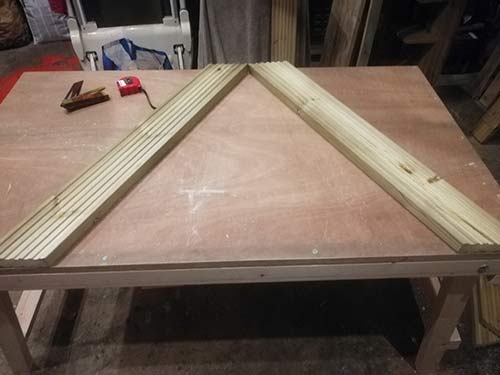
Align legs to form A-frame
Position and Align Crosspieces
The next job is to position the cross piece across the legs and align it accurately so take one of your 1200mm timbers and lay it over the top of the legs.
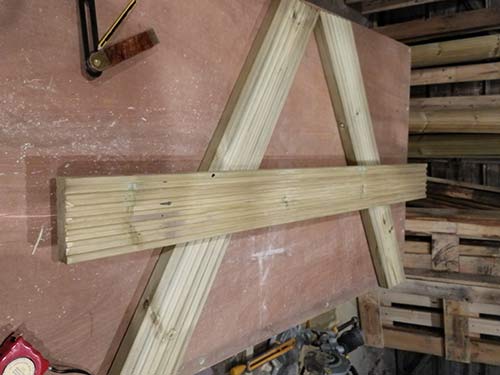
Position crosspiece on top of bench legs
Once in place use a tape measure to position the crosspiece so that the top edge is 400mm from the base of each leg. This will set the height of each bench seat to 430mm from ground level.
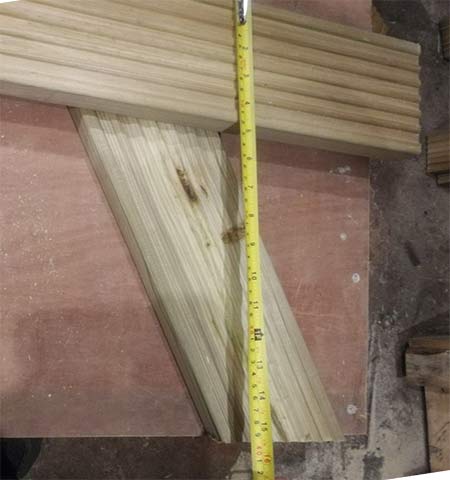
Set top edge of crosspiece to 400mm from base of leg
Once set at the correct height do the same for horizontal positioning – measure the distance of the top edge of the crosspiece until it hits the leg on both sides and then move it so the gap is exactly the same on either side. Once done check the height again and reposition if needed.
You should now be left with your crosspiece set to exactly 400mm from the base of each leg and, in the case of our bench, an overhang of 285mm at either end.
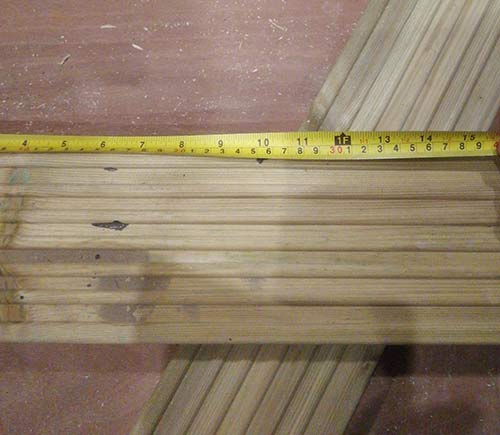
Position the crosspiece across the legs
Once the base crosspiece is positioned it’s now time to sort the top cross member. For this, cut 2 lengths of timber top 580mm in length and slightly mitre the ends of each timber roughly 40mm in from each end.
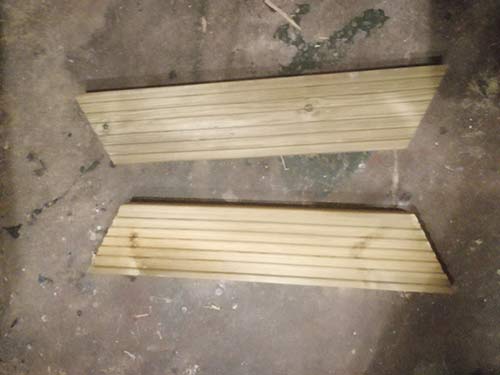
Top cross members cut to size and mitred
As with the base cross piece, position one of these timbers at the top and centralise it.
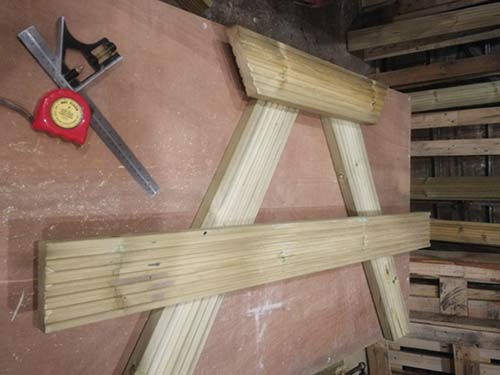
Crosspieces positioned on picnic bench legs
Drill and Fix Crosspieces to Legs
Once both crosspieces are accurately positioned pop an 8mm wood bit into your drill driver and drill out two staggered holes at each intersection. Measure and mark your holes as accurately as possible so everything looks uniform.
Run your drill bit through the hole a few times to clear it fully and ensure there isn’t any dust and debris left that will foul the bolt when you insert it.
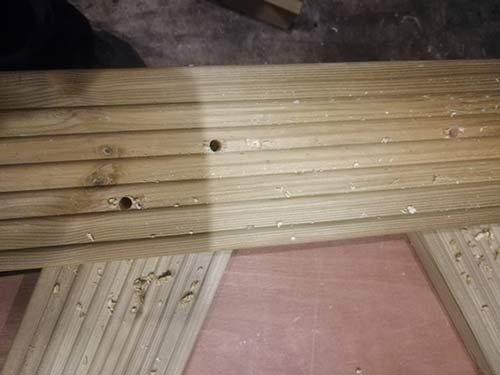
Drill out bolt holes
Once all your holes have been drilled out push a bolt through from the underside as we want the crosspieces and nuts to be on the inside of the picnic bench and then add a washer and a nut. Tighten each nut finger tight and then run around them all fully tightening each with a 13mm spanner.
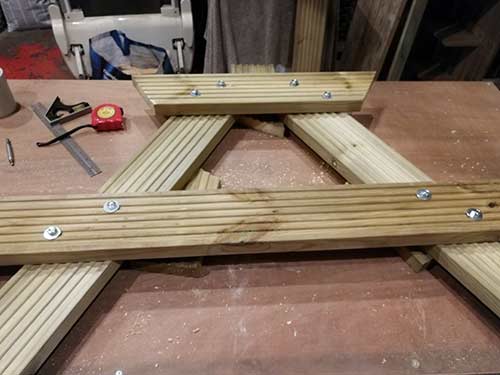
First picnic bench A-frame completed
With your first A-frame completed repeat the above steps for your second A-frame.
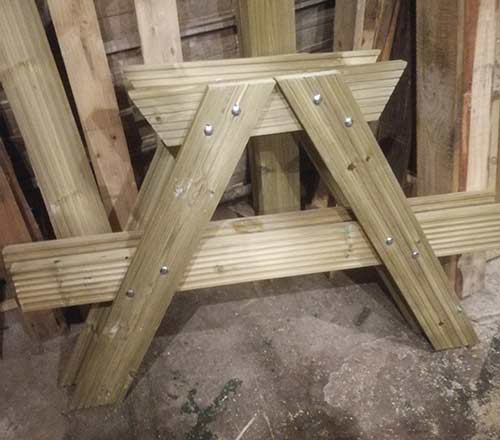
Both picnic bench A-frames completed
Prepare Picnic Bench Table Top and Seating Timbers
Lay out the table top on chocks on your workbench or on the floor with the underside facing upwards and accurately align the edges so that everything is fully squared up.
Measure in 50mm and mark at the top and bottom of each side and then draw a line between the marks. We are going to leave a 50mm overhang on both the table top and also the seating slats so these lines will allow us to align each timber to the outside edge of each A-frame and give a perfect 50mm overhang.
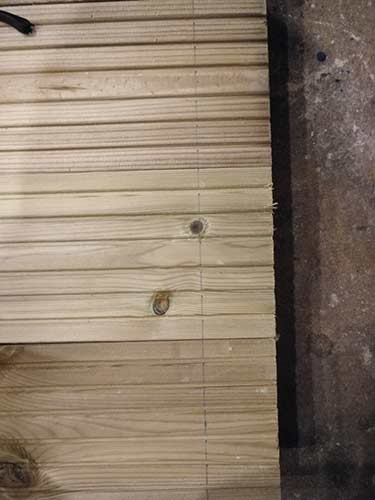
Mark in 50mm either end of table top for overhang
Once the table top has been marked out do the same for the seating timbers also.
Drill Pilot Holes in Table top and Seating Timbers
Once the overhang is fully marked out on both the table top and seating timbers we now need to drill some pilot holes at either end of each timber (find out how to drill pilot holes in our project here).
Using a 3mm wood bit or HSS bit drill 2 equally spaced holes roughly 15mm in from your overhang line at either end of each timber.
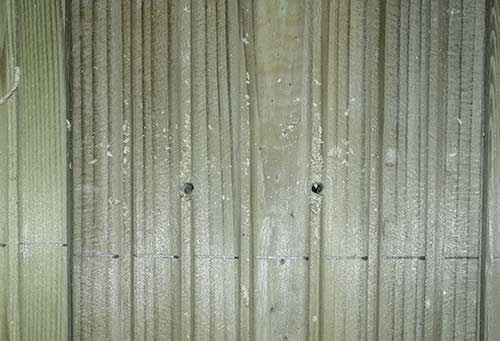
Pilot holes drilled in table top timber
Once all your pilot holes have been drilled out insert a 2 1/2 inch decking screw into each hole and screw it in part way.
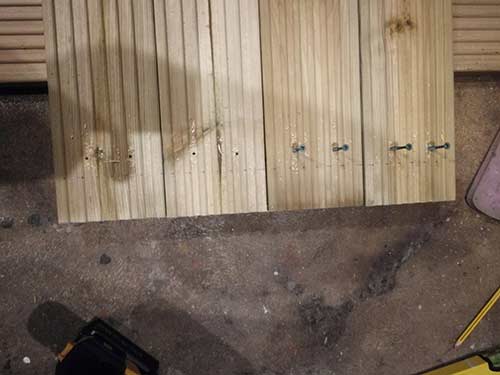
Decking screws inserted into table top timbers
Screw Table top and Seating Timbers to A-Frames
With everything prepped and ready it’s time to start assembling our picnic bench. First, measure and mark the very centre of each of the top crosspieces, this should be at the point they meet but just check any way.
For this next part it’s a good idea to get some help to support the second A-frame. Stand both frames upright and lay your first table top timber across them. Measure and mark the very centre of the width of this timber.
Align the centre mark on the timber with the centre mark on the crosspiece and then position the timber so the overhang line is aligned with the edge of the crosspiece. Now screw each screw all the way into the crosspiece. Repeat for the other A-frame also.
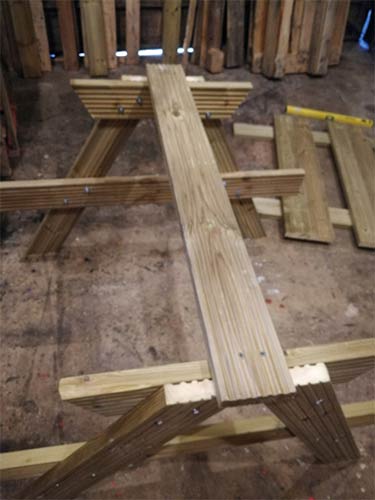
First table top timber fixed to A-frames
Next take another timber and place it on either side of the bottom crosspiece and use a tape measure to space each end 180mm from the edge of the leg. Depending on the size of your picnic bench this may vary slightly.
The best way top get the spacing correct is roughly position the timber and then also add the table top timbers and then sit on it and see how comfortable it will be to rest your arms on the table top. Adjust the timbers until you have the spacing correct.
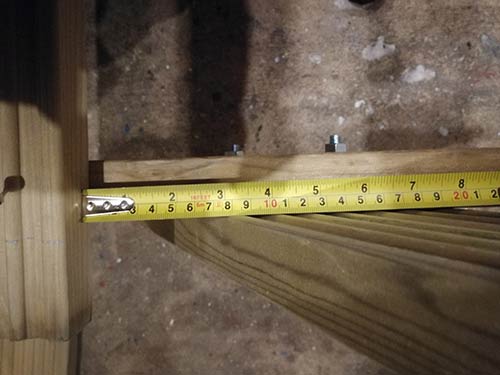
First seating timber correctly spaced from leg
Once positioned screw the timber into place at both ends and then repeat the same for the other side.
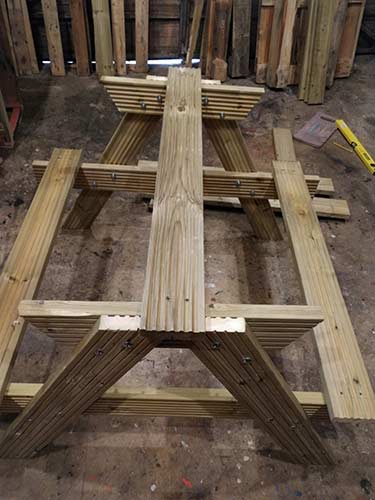
First 2 seating timbers fixed to picnic bench
Fix Remaining Timbers to Picnic Bench
The final job now is to fix the remaining timbers in place. Starting with the table top, position each timber in place making sure they are butted together and accurately aligned at each end and screw them in place.
Once the table top is fully fixed position the two remaining seating slats in place, butt them up to the two that are already fixed and screw them fully in place.
Once done your picnic bench should now be fully assembled.
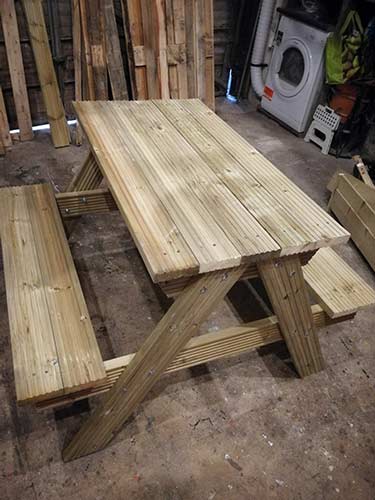
Completed picnic bench
A few points to note with our particular picnic bench design is that with many picnic benches gaps are left between the table top and also seating timbers. This is perfectly fine but can make the table tops uneven leading to dropped cutlery and spilled drinks etc so we have chosen to close these gaps up.
Likewise gaps in the seating timbers can become uncomfortable when sitting on them for long lengths of time so we have also opted to close these up.
One final point to note is that we haven’t included any bracing. Bracing is normally added from the bottom crosspiece of each A-frame up to the underside of the tabletop. This prevents the picnic bench from swaying side-to-side and loosening screws over time that inevitably lead to a collapse.
As we have double bolted each A-frame and also decking boards that are slightly larger than the normal 4×2 timbers that are used for picnic benches this has increased the structural rigidity of the bench a fair bit making it much more sturdy so we can get away without using bracing for now.
As the bench is used over time it will inevitably suffer some wear so the addition of bracing may be necessary at this point.
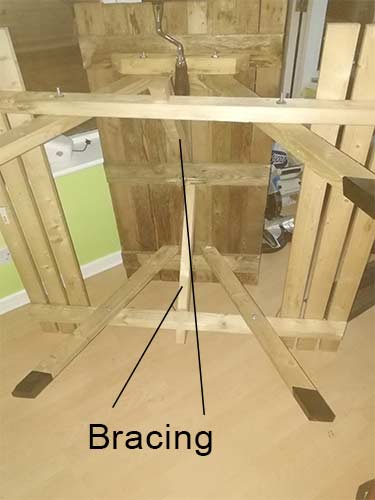
Bracing on picnic bench to prevent flexing
Drill Hole for Umbrella
The final job to do now before your picnic bench is fully ready and operational is to drill a hole dead centre in the table top so that an umbrella can be added if required.
Measure and mark the centre of the table top and then, using a 32mm flat wood bit or auger bit, pop it into a drill/driver and drill through the centre timber of your picnic bench.
Stop just before the drill bit breaks through the underside of the bench and flip the bench over and drill back through the hole. This will keep the hole nice and tidy and prevent any breakout.
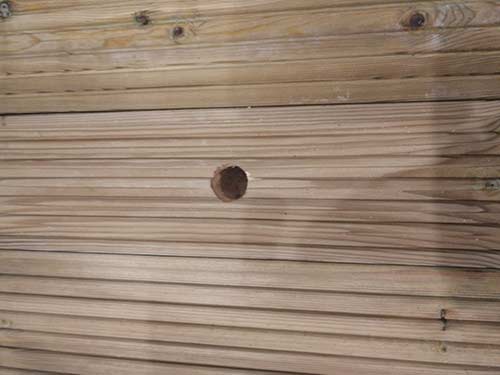
Hole drilled in picnic bench table top for umbrella
Building your very own picnic bench is a fairly straightforward DIY project and one that can be done for reasonably little money if you source or use free or recycled timbers or offcuts from another project.

