A patio is an ideal place for entertaining outside when the weather suits. They provide a great space for sitting and relaxing, BBQ’s, parties and a whole host of other events.
To keep a patio in top condition and ensure it lasts it’s essential that it’s pointed correctly and when it becomes damaged it needs to be repointed as soon as possible. Likewise, when you lay a patio it needs to be pointed so in this guide you will learn all about pointing and repointing a patio.
Should you Point Patio Slabs?
In short, yes you should absolutely always point patio slabs in the same way that you should grout wall and floor tiles. It not only keeps water out of the joints but fills them preventing weed growth and keeps everything looking neat and tidy.
If you were to leave all the joints unfilled and open, over time water would penetrate and through freeze and thaw action slabs would be loosened and everything would start moving.
As debris and seeds also find their way into the open joints, you are sure to start getting weed growth that in no time will totally fill all gaps making everything look scruffy and untidy (unless you are going for the natural look).
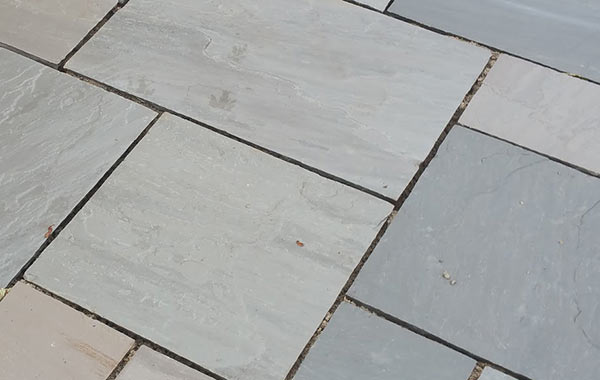
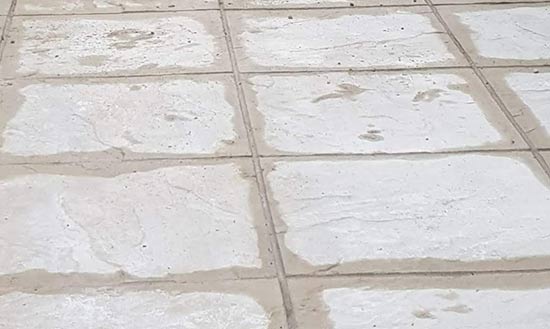
Patio slabs to be pointed
What’s the Correct Mix Ratio for Pointing Patio Slabs?
The correct mortar mix to use for pointing a patio is either 3:1 (3 sand 1 cement) or 4:1 (4 sand and 1 cement). Essentially either mix is fine and will produce nice firm mortar lines, the key is that it dries as slowly as possible so that it remains flexible and moves with the natural movement of the ground to prevent cracking.
There is much debate on the internet about which is the correct ratio to use, but as we have said, either are suitable or even 5:1 should be fine, it’s all about how slowly it dries.
Additionally there is also much talk around what sand should be used. Some state sharp sand, other state soft sand.
Sharp sand is much more prone to water ingress when it’s used for jointing as the gaps between the grains of sand are bigger. Water gets in, freezes and expands and so on, another example of freeze thaw action.
Here at DIY Doctor, we always prefer to use soft sand or builders sand as it’s known due to the fact the grains are much smaller and finer and produce a more solid and water tight joint.
Should you use a wet or dry mix?
There are 2 main methods of point a patio – using either a wet pointing mortar mix (applied by hand or brushed in) or a dry one. There are various pros and cons for each method, these are discussed below:
Wet or Hand Pointing
When referencing wet pointing, we are referring to the consistency of the mix in respect to the fact that water is added as you would with a standard mortar mix used for bricks, blocks or the similar.
There are in fact 2 different types of wet pointing for patio joints; hand pointing e.g. feeding and compacting the mortar in using the edge of a trowel and another less commonly used called wet grouting that involves brushing a wet sloppy mortar mix into the joints as you would when sponging grout into ceramic tile joints.
One of the best features of a wet mix is the fact that it can be compacted down into the joint, especially when hand pointing, ensuring that joints are fully filled and there are no potential gaps that can cause weakness or could incur freeze thaw issues.
Despite this wet pointing (both trowel and wet grouting) is a messy job and often involves getting mortar all over the slabs which can then stain them, so everything has to be thoroughly cleaned before the mortar dries.
Hand pointing is also very long drawn out and time consuming if you’re not used to it!
Hand pointing works with pretty much all types of slabs and joints whereas wet pointing tends to work well on irregular shaped slabs.

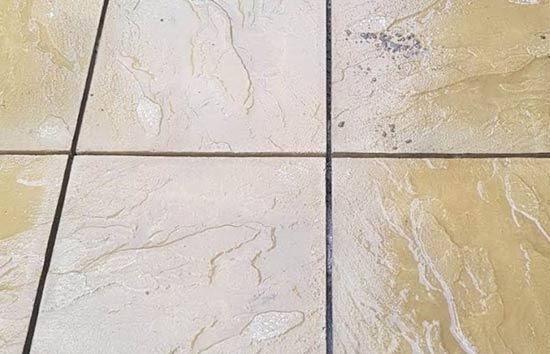
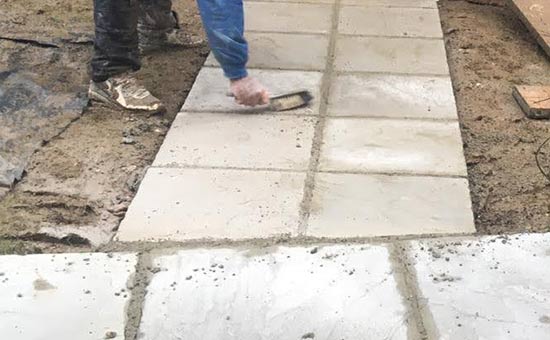
Wet pointed patio slab joints
Dry Pointing
As you may imagine from the name, dry pointing uses a dry mortar mix e.g. it has no or very little water content, making it fine and powdery.
A mix such as this is created as it normally would be in that the sand and cement are mixed together in the correct ratios, however unlike a traditional mix no, or very little water is used.
For the mix to cure it simply uses the natural moisture in the air and in the ground. As very little water or moisture are present, the curing process can take quite a while. In many cases to aid it, once the joints are filled, water is then sprinkled lightly over them.
The major advantages of this method is that it’s fast and can be easily brushed into your patio or paving joints and also doesn’t create any staining, as long as any excess is thoroughly cleaned and removed.
Also, as it generally cures slowly it remains very flexible and can then follow the natural movement of the ground without cracking.
One disadvantage however is that as it’s swept in, it doesn’t compact down to fill the joint fully often leaving hollow areas and gaps. This can then lead to cracking.
Despite this and if applied correctly it can be compacted down after using a trowel or similar and then refilled.
Dry jointing generally works best on joints that are all uniform as flat smooth slabs have been used.
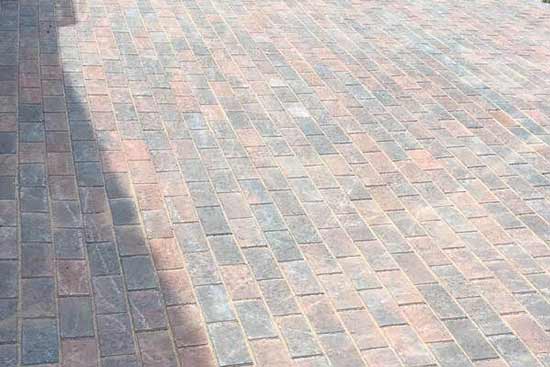
Dry pointed brick pavers
Striking Patio Slab Joints
Regardless of what method you use, after each joint has been filled it then needs to be “struck” or polished as it’s also known. Striking is the process of running a small shaped (normally concave) trowel or similar over the top of the joint.
This serves 2 purposes; the first is to close the surface over and make it more resistant to water and moisture ingress and the second is to compact it down in the joint ensuring it’s full and bonds correctly to the side each slab.
In terms of what to use there are many “striking tools” available on the market today, most featuring the standard concave profile but also others with different profiles to create different finishes e.g. flat, v-shaped etc.
One little tip here is that if you don’t have a specific pointing tool or can’t afford one, cut a small length of hose pipe or 15mm copper pipe and use this as it creates the same effect.
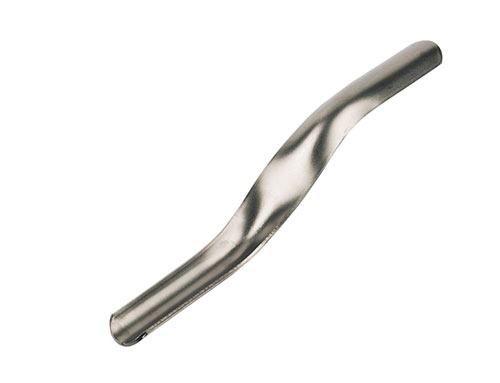
Pointing or striking tool
How Long Should Patio Pointing Last for?
If done correctly and all joints are fully filled and compacted down, there is no reason why a freshly jointed patio or series of paving slabs won’t last at least 10 years without requiring any maintenance.
If during that time you do find that small sections of the pointing are crumbling or cracking, chop them out and refill them as soon as possible as this will prevent any further degrading of the surrounding mortar.
What if you Only Have a few Damaged Joints?
If you only have a few damaged or cracked joints it makes absolutely no sense to go hacking out all of the good quality solid pointing just to have to replace it all again. That would be a total waste of time and money.
However, as suggested above, where some joints become damaged, simply chop out the damaged mortar and then replace it with fresh mortar.
This will ensure that none of the existing solid mortar also becomes damaged and also keep your patio slab joints in tip top condition for years to come.
Tools and Products Needed for Pointing and Repointing Patio Slabs
In order to successfully point or repoint a patio you will need the following tools and products:
- Sand
- Cement
- Large brick trowel (if hand pointing)
- Pointing trowel (if hand pointing)
- Long handled soft brush (if dry pointing)
- Handheld soft brush
- Watering can and fine rose head (if dry pointing)
- Striking tool or short length of hose
- Stiff brush (if wet pointing)
- Hose pipe and good water flow (if wet pointing)
- Lump hammer
- Bolster
- Plugging chisel
How to Point and Repoint Patio Slabs
Pointing and repointing need not be the huge dilemma a great many people think it is. For example there is no need to point it as you would do a brick wall.
Brickwork pointing is designed to go hard quickly and is not at all flexible as you can see by cracks in many new houses.
If you have a patio which has been pointed this way then follow our pointing brickwork project as the principle is the same. You may need to match the sand and cement for the right consistency colour and we have a matching mortar project for that as well.
Step 1 – Clean Existing Pointing
For new patios, or patios and paving where there is not a lot of the existing pointing left, its better to cut out all of the old stuff and start again. A hammer and bolster chisel are the best tools for this, along with a plugging chisel for tight joints.
Do not attempt to use an angle grinder unless you are used to handling one as they can quite easily skid across the surface of your slabs, marking them badly.
Working very steadily, position the bolster at the very edge of the old pointing, ensuring it’s not touching the edge of the slab and gently hit it with the hammer. It should start coming off in chunks.
Work your way along each joint, removing the old pointing as you go. Some will be more suborn than others.
Where it is particularly tough you may need to hit a little harder but be very careful not to hit too hard and crack the slab as they can be quite brittle!

Damaged patio pointing needing replacing
Step 2 – Clean Joints
Once all of the old pointing has been removed from the joints the next job is to clean them thoroughly from any debris residing down in the joint.
Using a stiff hand brush and a plugging chisel, rake it through each joint, pulling up and out, removing any rubbish and then run the stiff brush through it to remove any smaller remaining items.
If you are planning on using a dry mix to repoint your patio you will need to ensure that everything, including the joints themselves are totally bone dry as if there is the slightest bit of moisture this will cause the mix to clump up.
Totally clean patio joint ready for pointing
Step 3 – Refill Joints With new Pointing
Once you have successfully cleaned out all joints the next task is to get them repointed. How this is done will depend on the type of pointing mix you are using.
Using Hand Jointing
Hand jointing requires you to feed the pointing mortar off of a larger trowel or even a hawk down into the joint using a pointing trowel.
Step 1 – Mix Pointing Mortar
First, mix up a pointing mortar mix of 3:1 (3 sand 1 cement) using either building sand/soft sand or specialist kiln dried pointing sand, ensuring it’s the right consistency, not too wet or too dry.
If you have never done this before, see our project on mixing mortar here for help.
Step 2 – Load on to Trowel
Take a large brick laying trowel and load some of the mortar on to the trowel in the centre, ensuring there is none hanging over the side. Use a smaller pointing trowel to trim it off if so.
Step 3 – Apply to Joints
Position the larger trowel up to the edge of the joint and gently tip it so the trowel edge is sitting on the edge of the joint. Using your small towel, steadily scrape small sections of the mortar mix down into the joint. Use the edge of the small trowel to compact it down and fill it fully.
Work your way along the joint repeating this until it’s totally full and then run your striking tool or piece of hose over the top to compact it down and close the surface over.
Once you have filled one joint, repeat the above for all other joints.
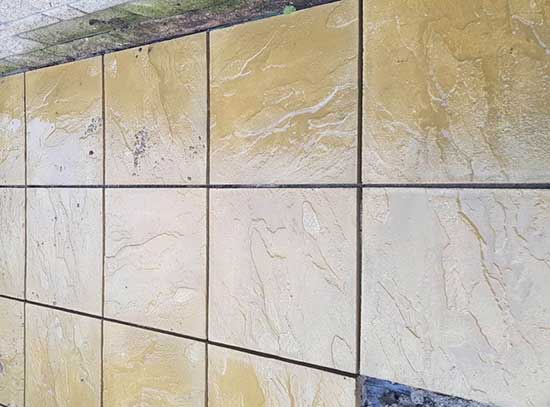
Patio joints hand pointed and fully filled
Step 4 – Remove any Spillages
To prevent any staining or lumps of pointing mix remaining on the surface and spoiling the appearance, any spillages need to be cleaned up right away before they dry. Using a soft hand brush, gently sweep up and debris into a dust pan.
Also, gently sweep over the newly repointed joint and remove any mortar crumbs from the surface and then run your striking or polishing tool over the joint once more to smooth it over.
If there is anything remaining on the surface of any of your slabs after removal then simply wipe it over with a damp cloth to remove it.
Mortar debris to be swept up
Using Wet Pointing
Wet pointing or wet grouting as it’s known is a cross between hand and dry pointing as you use a wet mix (wetter than normal, pretty sloppy) and brush it in like a dry mix.
Step 1 – Create Pointing Mix
Using a standard 3:1 ratio mix (3 sand 1 cement), mix up a batch but unlike a standard mix, make it quite sloppy, a sort of thick soup consistency so that it can easily flow into any and all joints.
Make sure you don’t mix too much that you will struggle go get it brushed in before it starts to go off. It’s best to work in smaller, more manageable areas at a time.
Step 2 – Wet Surface and all Joints
Using a hose or buckets of clean, fresh water, wet the entire area that you’ll be working on down, including all joints. Ensure they stay wet throughout the entire process. If they start to dry out, wet them down straight away.
Wet down patio or paving slabs to be wet pointed
Step 3 – Brush in Pointing Mix
Pour some of the pointing mix over the surface of the patio or slabs to be pointed. Using a decent long handled soft brush, brush the mixture over the surface, working it down into the joints and filling them up fully.
This is a messy job so ensure you’re wearing old clothes, boots, gloves and all other appropriate PPE gear.
Use the bristles of the brush to work the mixture down into each joint and ensure they’re totally full. Get as much of the mixture off the surface and into the joint as you can as this will minimise the cleaning work you have to do.
Repeat the above process for any further remaining joints, ensuring they’re as full as possible.
Step 4 – Scrape off Excess
Once all of the joints are totally full of pointing mix, leave it until it just starts to set and then remove the excess that will currently be all over your slabs.
Unfortunately this isn’t an easy job, in fact it’s pretty back breaking! Using a hose or buckets of clean water, gently wash over the surface while scrubbing away using a long handled stiff brush to loosen the remaining mix.
Unfortunately this will need to be done over and over and over again until all of the unwanted surface debris is gone, it may take you a while.
One point to be aware of is that don’t go too over the top with the water as if you use too much you can actually wash the cement out of the top layer of mortar, leaving it compromised.
Once all of the surface left overs have been cleaned off, the final job then is to run over all of the joints with a striking tool and ensure they are all fully closed making them as water tight as possible.
Using Dry Pointing
Out of all the 3 options, dry Pointing or dry jointing is probably the quickest and easiest for anyone that has never done this before.
Note: Dry pointing should only be done when it’s dry and when all of the slabs and joints you’re working on are dry, therefore it’s best to do this during the summer months.
Step 1 – Mix Pointing Mix
The first job is to mix up your pointing mix using a ratio of 3:1 (3 sand 1 cement) or 4:1, either will suffice. Again as mentioned, the mix should be totally dry and you should also try to use sand that is as dry as possible.
In terms of the sand, normal builders sand is fine, but if you want to ensure it is totally dry you can use kiln dried pointing sand.
Mix the sand and cement together until the entire mix is a uniform colour meaning it’s thoroughly mixed.
Step 2 – Fill Joints With Pointing Mix
The next job is to actually start filling the joints.
Using a bucket with your mix in, sprinkle it along a couple of joints, pouring in as much as possible and then use the edge of a small pointing trowel to work the mixture down into the joints as much as you can. After this they may slump a bit so use your soft brush to brush any mix sitting on the slabs down into the joint.
Make sure the joint is absolutely full even to the point of tamping it down with a piece of timber.
Sand and cement pointing mix ready to be swept into joints
When the joints are full, brush any surplus over to the next joint and brush it in. Repeat this process for all other joints, making absolutely sure each and every one is totally full.
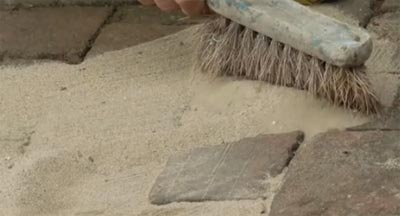
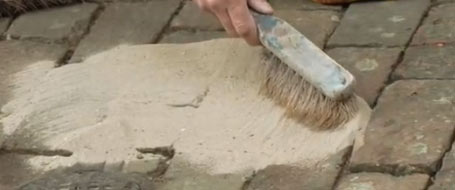
Sweeping the sand and cement mix into joints
Once full use a striking or polishing tool and run it over all the joints to close them over.
Step 3 – Clean up Wastage
With every joint full and compacted down, use your soft brush to brush up and remaining mixture from the surface of the slabs.
If any is left and it gets damp it will dry on the surface of the slabs creating marks and staining, spoiling the appearance
Once swept into a pile, scoop it up and pop it in an air tight tub for use later as over time you may need to top up here and there.
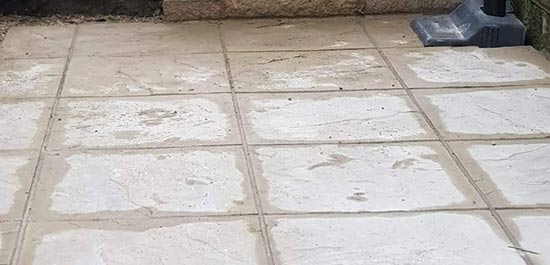
Dry pointed joints wetted down after filling
Step 4 – Sprinkle Water
Although the point of this method is that the pointing mix uses the naturally occurring moisture in the air and the ground to cure, many professionals like to help this process along a little.
This is done by using a rose sprayer or watering can with a fine rose head on it to gently sprinkle water over the surface of the joints. This then provides a little more moisture to increase the curing and you still maintain a very good level of flexibility.
Patio Joints That are Wider Than Half and Inch
If the joints are wider than ½ an inch, some professionals prefer to use a sharp sand as opposed to a soft sand as it helps to fill the joints a little more. As we have said, there is nothing at all wrong with this, however we believe a more complete finish is achieved using builders sand as the grains are smaller and can resist water ingress a little better.
There are several ways of pointing a patio and each has it’s benefits and drawbacks however which ever method you opt for, as long as it’s done carefully and methodically, should result in a job the pros would be happy of.