These are the steps required to remove your old washing machine and then fit your new washing machine into the remaining space. However before you start swapping your washing machines over, there are a few things to check:
- Before you rush out and buy a washing machine it is worth doing a little research into what you want. Have a look at our guidance on selecting and purchasing a new machine.
- If the connecting pipes are not installed then you will need to get these fitted; have a look at our project on plumbing in a washing machine or dishwasher.
- The same applies if your new machine needs a hot water supply and there isn’t one, although most new machines don’t so this is unlikely. Make sure that you have enough hot water pressure too.
- Make sure that there is somewhere for the waste water pipe to go, otherwise you’ll need to fit this. For this project we are assuming that this is also available since your old machine will have had to have one.
If you’re simple having problems with your machine, you might be able to get it repaired and save yourself the expense of buying a new one.
Removing An Old Washing Machine
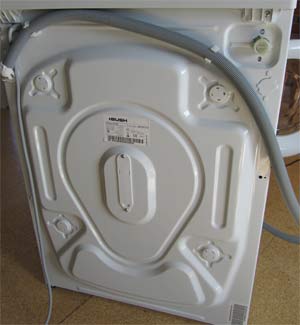
- Pull or slide out the old washing machine from it’s current location, and where the new one will go. It will still have pipes and cables that are connected so don’t pull it all the way; just enough so that you can see and get to what you have to disconnect.
- Turn off the water. If there are no taps or isolation valves on the hot and cold water supply or they are not usable, you will have to turn off the mains water supply and then fit these. For more information about fitting isolation valves see our main washing machine project.
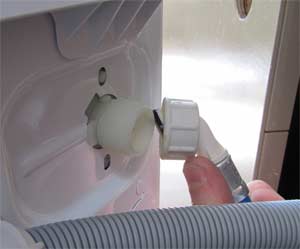
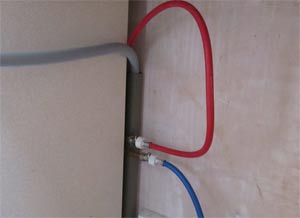
- Disconnect the water supplies, both hot and cold. This should be easy done as typically they will be hand-tightened screw connectors (as shown in the picture) on the water inlet hoses. These are the blue and red hoses that are attached to the washing machine. They might come with the new washing machine or you might have to re-use the old ones so hang on to them for now. If they have perished you will have to get new ones.
- Disconnect the power supply. This should simple be a case of turning off and unplugging the old machine. It will be on a standard 13 amp socket.
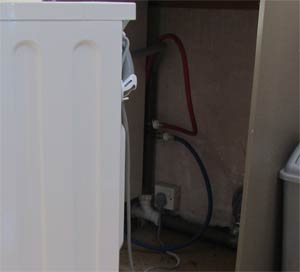
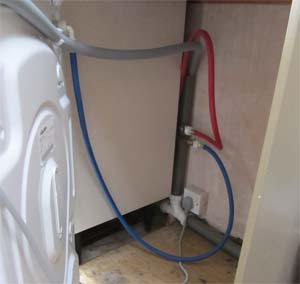
Old Washing Machine connected but not in position

Isolation valve cold water supply with tap missing
Now the old washing machine should be disconnected and you should be able to take it way. You should dispose of it correctly and please be careful when moving it.
Fitting A Replacement Washing Machine
Once the old washing machine has been removed you should get the new machine ready but the most important thing you should do is to read the manufacturers fitting instructions which will come with every washing machine; they’re usually put in the drum for transit:

Inside of washing machine drum with manufacturers instructions
- Read the manufacturers fitting instructions; the instructions here are only a general guide so follow their instructions. Our guidelines are for the typical machine and if you follow them then you should understand what needs to be done.
- Remove all the packaging from your new washing machine:
- Remove all the transit bolts. Most washing machines have special transit bolts or similar that stop the moving parts rattling around and getting damaged during transit. These should be removed and you can discard them:
- In some cases there are blanking plates which should be fitted – fit these to the holes left by the transit bolts:
- Position the washing machine in a suitable place near to the final location where you can access the back, which is where you will be working. The waste and inlet pipes will need to be able to reach to where they will be connected. The same applies for the cable and plug.
- Connect the water inlet hose pipes to the washing machine; typically this will be with hand tightened screw connectors. In this case there is only the cold that needs to be connected:
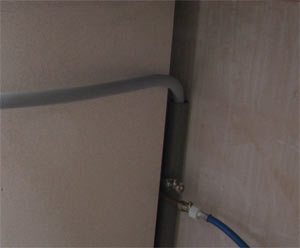
- Connect the other end of the mains inlet hose to the mains supply:
- Connect the washing machine waste hose to the waste pipe. This is where all the dirty water will go. If there is a problem and you need to fit a new waste water standpipe have a look at our project on doing this. You must check that it is above the height of the top of the washing machine’s drum, and ideally you should install a non-return valve to prevent the waste water being sucked back and into the machine. (We didn’t do this here, as we felt the waste pipe was high enough for this not to be a significant risk).
- By this point the waste and inlet pipes should be connected:
- If you have a washing machine that needs hot water, then you should connect the hot water inlet hose. If not , then you can fix a spare hose and tuck it away just in case you might need it one day or remove it altogether.
- Plug the washing machine in and turn on the socket switch.

New washing machine with all packaging removed
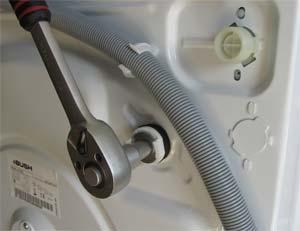
Removing the transit bolt from the rear of a new washing machine
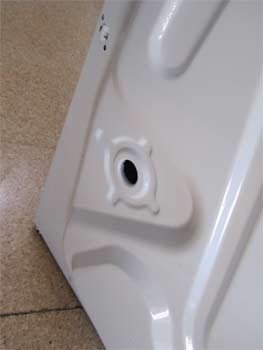
Hole left by the removal of the drum retaining transit bolt
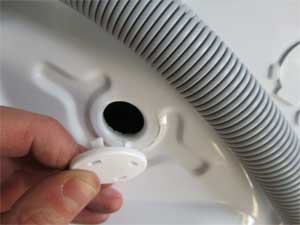
Fit blanking plate over transit bolt hole
Rear view of washing machine ready to begin fitting
Attaching the inlet pipe to the washing machine

Cold water inlet pipe connected to the mains water supply
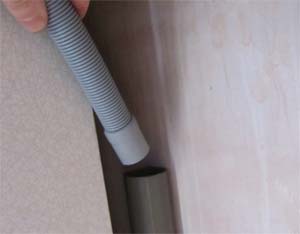
Insert the washing machine waste pipe into the mains waste outlet
Washing machine cold main and waste outlet pipes connected
Hot water inlet pipe connected and tucked out of the way
Please note when fitting a new washing machine it must have a switch above the counter that you can access to turn it off without having to pull the machine our from the wall – you will need to get a qualified electrician to do this. Please see our project on Part P of the building regulations to understand why you must not do this yourself.
In a replacement situation it is Ok to use the existing plug and switch, however we do recommend that you do make sure that you can turn the washing machine on and off from the plug without having to move the machine – it’s much safer.
Testing Your Washing Machine Installation
- Double Check all you connections.
- Turn on the cold supply from the isolation valve, and mains supply, if you turned this off too. If fitted do the same with the hot water valve.
- Check that there are no leaks.
- If all’s good, turn on the electricity.
- Run a short test cycle:
- If you’re happy that there are no leaks and the waste water is draining away you are very nearly done!
- Push the washing machine into position against the wall:
- Adjust the washing machine legs so that it is sitting level and doesn’t wobble. It will drive you made during the spin cycle if it wobbles and will not help the machine to last as long as it could.
Washing machine connected up and water turned on, no leaks present
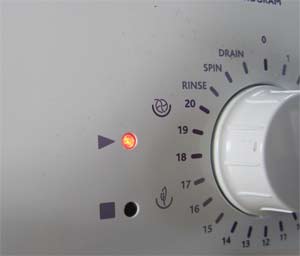
Washing machine turned on

Fitted and connected washing machine pushed back into place
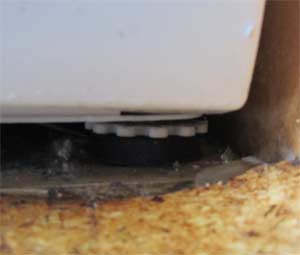
Adjusting the height of washing machine legs to ensure it is stable