Plumbing in a washing machine or a dishwasher is not a particularly hard job but some thought must be given to where you want to put them.
Washing machines need a hot and cold feed (Most machines are able to run on a cold only supply, but you are asking the machine to heat the water up. This will have been done elsewhere in the house for your domestic hot water so why pay twice!) The hot supply can be taken from most hot water systems but not a single outlet water heater.
Dishwashers mostly run on cold only supply. You need to be as close as possible to the hot and cold supply. The waste from the machines goes into the same waste outlet as your sink, which is joined at some point to your foul (toilet) drainage. It is therefore a good idea if you can be close to your sink outlet also.
You will also need to be near a 13amp socket to plug your washing machine or dishwasher into.
Once you have located a hot and cold feed by tracing the pipes to their respective taps, you must insert a valve to take the water from this pipe to the machine. There are many types of valve available, we will deal with the 4 easiest for DIY installation. For all 4 you will need to turn off the water first.
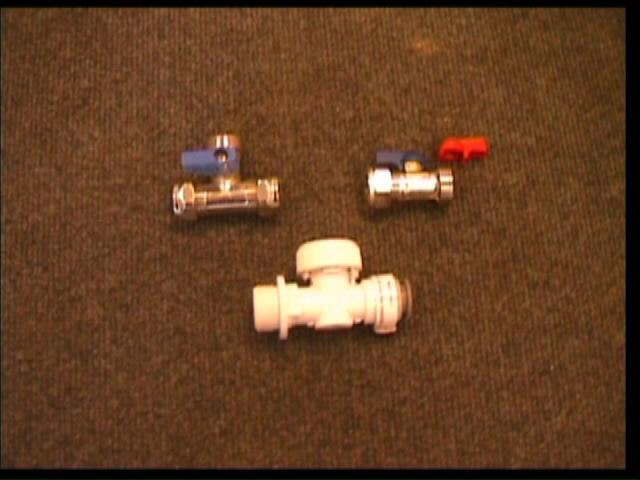
Water valves
Top left is a T piece valve that is inserted into the run of the pipe you are working on. The handle is colour coded for hot and cold. The appropriate washing machine hose screws onto the centre section and the handle turns the water on and off. To Insert this type of valve, a section of pipe 18mm long needs to be cut out of your feed pipe. We use a pipe slice for these cuts, this can be seen below and allows you to cut in very tight spaces. You clip it onto the pipe and turn to cut.
Cutting the pipe
The blade is on a spring inside. The nuts and olives need to be unscrewed from the valve and placed over each end of the cut pipes (which should be cleaned thoroughly and only copper should be seen). The valve is then inserted for which you will need some "give" on the pipe and it may be necessary to remove one section from the tap to allow this movement. When the valve is on, the nuts are tightened onto it, compressing the olives (small brass rings) into the seat of the valve. The washing machine hose is then screwed onto the outlet of the valve. Check the black rubber washer is inside the plastic nut of the hose.
If your washing machine is going to be more than a hose length away from a suitable place to put this type of connection, you will have to insert an ordinary T piece (the installation is the same if you use a compression fitting) and instead of the hose going on the T, another copper pipe is fitted, taking the water to the location of the machine.
This pipe must be clipped to the wall with pipe clips. A valve must then be added to the end of this pipe so your machine can be connected. Either of the two remaining valves can be fitted.
The one at top is fitted onto the end of the pipe by tightening the nut and olive as above.
The other is a speed fit connection valve and simply pushes onto the end of the pipe. It has a lock washer inside that secures it to the pipe.
The other end of both of these valves are made for the hose connection.

Self Cutting Valve
The last, and easiest of them all, is the self cutting valve that clamps onto the pipe, the handle is turned and it cuts a hole in the copper pipe. The hose is then screwed on as before.
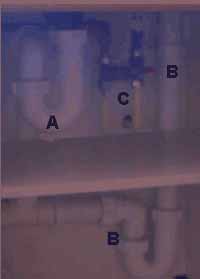
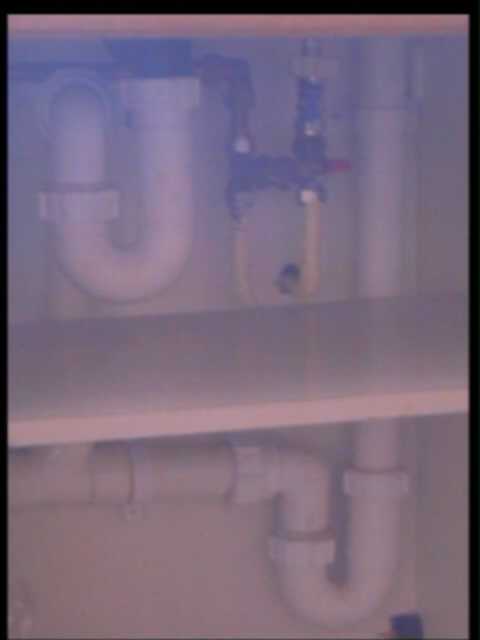
Washing machine waste positioned under a kitchen sink
The image above (apologies for the quality of the image but DIY Doctor is a company of working tradesmen and our examples are real. Other sites draw pretty pictures but have never done the job in their life) shows the sink waste (A) and the isolation valves (C) which turn the washing machine and dishwasher on and off. You will note there is a hot and cold valve so these are obviously for the washing machine.
Due to health and safety regulations a dishwasher must only be plumbed in to a cold water supply. This is so the machine can heat the water to a recommended minimum of 120 degrees Fahrenheit (approx 50 degrees Celsius) which will eliminate all the bacteria. Item (B) is the washing machine waste pipe with the trap at the bottom.
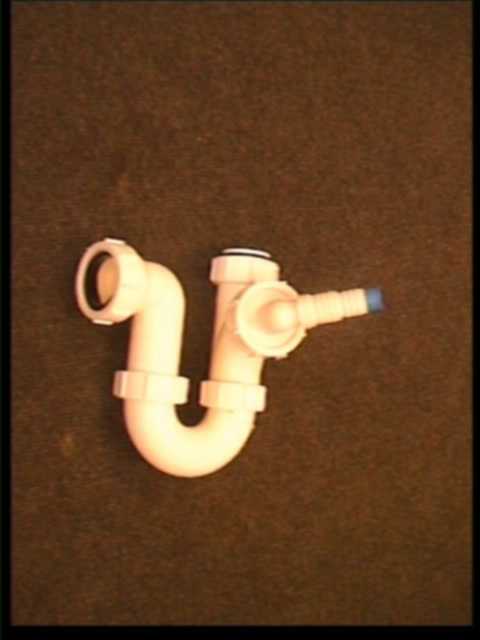
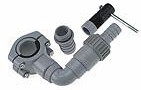
Waste Fitting
Removing the waste from your washing machine or dishwasher is easier the closer you are to the sink. The waste fitting above replaces the fitting you have and the machine hose is fixed to the nozzle. A jubilee clip is screwed on to ensure a watertight join.
These fittings are available with 2 nozzles to take a dishwasher as well and can also be fitted to a double bowl or bowl + half sink. Kits are available for this. There is also a self cutting, non return valve which will clamp directly onto your waste pipe, but this must be installed before a trap.
Selection of fittings
If you are too far away from the sink for these fittings, or the manufacturers instructions do not allow this type of waste removal, a stand pipe needs to be fitted to the wall. This then connects to the existing drainage system in your kitchen as the next photograph shows, or it can be taken out through a purpose made hole in the
wall.
Waste connections and pipes
The waste hose from your machine is then pushed down the stand pipe a minimum of 6 inches but must have a gap between the end of the hose and the water in the trap at the bottom. Waste water must pass through a trap before it leaves the house.
For more information on installing waste pipes click through to our Washing Machine and Dishwasher waste project.