Modern mixer taps are now common place in most UK kitchens and bathrooms and have largely replaced the traditional pillar tap, however like pillar taps they are still subject to wear and tear.
In this DIY guide we run through how to fix a leaking mixer tap, read on below.
What is a Mixer Tap?
A mixer tap is a type of tap found mostly in kitchens and bathrooms that allows both hot and cold water to flow out of the same spout. It also allows you to mix hot and cold water together in the tap body to get the perfect temperature water for your needs.
Mixer taps have several advantages over traditional individual pillar taps in that the overall temperature of any flowing water is much easier to control and adjust, often just by moving a lever.
They also look contemporary and modern in appearance and due to their popularity, are available in a huge range of styles and designs, with options to suit any and all tastes.
As you can easily mix and adjust the temperature of the water in the actual tap as opposed to the bath or basin you’re filling, they are also much safer to use and avoid the age-old process of dipping a finger or toe to see if you get burnt or frozen!
Aside from baths and basins, mixer taps are also commonly used for showers. Although they appear fairly different and are often mounted on the wall, they do essentially the same thing.
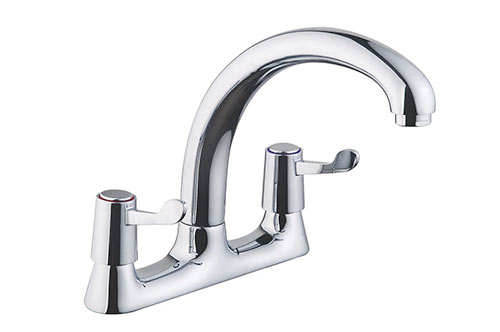
Modern kitchen mixer tap
Why do Taps Drip?
Like many things, mixer taps, whether they’re old or new, have moving internal parts and anything that moves over time will eventually wear and then fail.
Once you get limescale buildup or wear occurs in the tap seat, washer, ceramic cartridge, or the washer/O-ring at the base of the spout itself, this can allow water to bypass any seals and find its way out of the spout or base of the neck.
When this happens it’s time to strip the tap down where required and make repairs.
The Cost of a Dripping Tap
Water is a very valuable resource, nothing on our planet can survive without it so with this in mind it’s terrible to waste even a drop of it. This is even more prevalent if your home is on a metered water supply, you’re literally pouring money down the drain!
If you have a very slight drip you may be thinking; It’s only small, surely it’s not wasting that much water is it? Unfortunately yes you probably are.
Even a constant slight drip can waste up to 1/2 a litre of water an hour. Over the course of a year that’s nearly 4400 litres, a massive amount!
So with this in mind, never ever leave a dripping tap, always get it fixed as soon as you can.
Parts of a Mixer Tap
Due to the range of types and styles of mixer tap they do tend to vary quite a bit in their complexity, some more stylish and expensive models have many moving parts while most middle of the row variants are pretty basic.
To this end, here follows a list of parts that make up the most common mid range types of mixer tap:
- Tap body: This is the main body of the tap and houses all of the items required to make it function correctly
- Spout: The spout channels the water to the desired location when the tap is turned on
- Cover Plate: The cover plate covers the screw that holds the handle/headgear on to the cartridge or spindle
- Handle / Headgear: The handle or headgear as it’s also known allows you to turn the tap on and off and also hides and protects the cartridge and spindle and washer
- Cartridge / Spindle & Washer: This is the part of the tap that controls the flow of water, either shutting it off or allowing it to flow
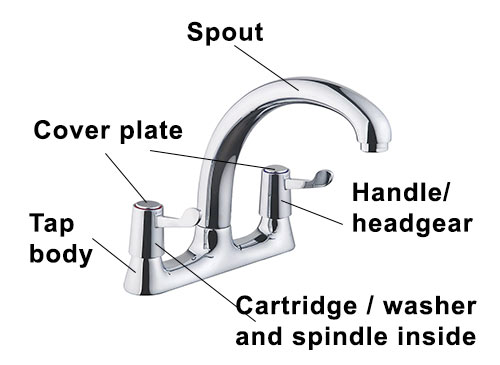
The main parts of a mixer tap
Where do Mixer Taps Usually Leak From?
There are 2 main areas that a mixer tap can leak from and that’s out of the top of the spout and also out of the base of the spout.
Water leaking out of the open end of the spout, even when both taps are turned off, is normally due to a faulty washer, ceramic valve, worn tap seat or buildup of limescale.
In older taps, when the tap is screwed closed, in the tap body a washer is pushed down on to a hole in the base of the tap that allows the water to flow and closes it off. Over time this washer will wear and allow a tiny amount of water to pass causing a leak.
Likewise if the base of the tap body or seat as it’s know that the washer closes down on to is worn this will also allow water past and cause a leak.
To solve this issue, many newer taps now use what’s know as a ceramic disc cartridge as opposed to a washer. They work by using 2 perforated ceramic discs that move over each other. When the tap is off the perforations are all out of line but when the tap is turned on they all line up and allow water to flow.
Although wear will be caused by the discs moving over each other, this is generally much slower than the time it takes for rubber washer to wear.
The final area of common leaks is at the base of the spout where it runs into the tap body. As most spouts swing side to side, over time this movement can wear down any seals at the base and thus cause leaks.
This also isn’t helped by the fact that may people also pull down and apply weight to the spout which in turn starts to pull it from the body preventing the washer or O-ring from sealing correctly.
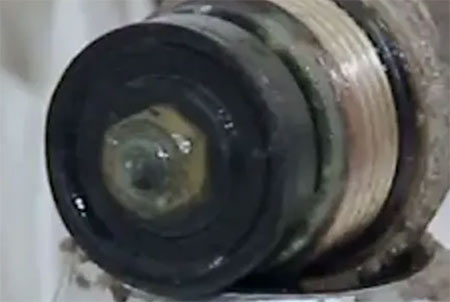
Failed and broken tap washer
Identifying the Cause of the Leak
Before fixing anything, the first job to do is to identify exactly where the leak is coming from. With a mixer tap this is fairly easy as there is really only 2 points it can leak from; the top of the spout or the bottom.
If leaking from the top this is a sure sign that the valve seat or one of the washers or cartridges (hot or cold) have failed and are allowing water to seep past.
However if the leak is coming from the base of the spout then this is most likely to be the O-ring seal between the spout and tap body.
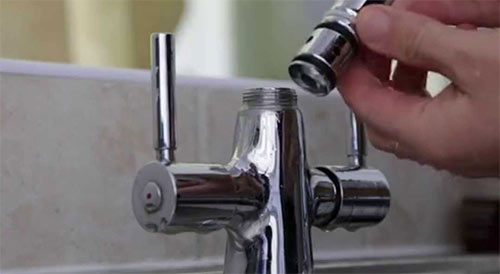
Mixer taps can leak from both ends of the spout
How to Repair a Leaking Mixer Tap
Once you have identified the likely cause of your leak it’s now time to get on and fix it so work through the relevant steps below.
Changing a Mixer Tap Ceramic Cartridge
When it comes to ceramic disc taps, typically it will be the ceramic discs that fail due to corrosion or limescale damage, especially if you live in a hard water area. If this is the case then the whole cartridge will need to be replaced as in pretty much all cases you can’t replace individual components in the cartridge.
If this is the case you might consider investing in a water softener as this will increase the life of these sorts of parts and other appliances too.
As there are so many different types of ceramic disc cartridge it can be very hard to find the right one for your particular tap. If you have the make and model of the tap this will be much easier as you can contact the manufacture or your local plumbers merchant.
If you cannot find the model, but know the make, you can still contact the manufacturer. Most have technical helplines than might be able to assist you.
Failing that it is a case of taking the part to your local merchant or trawling the web to find a replacement.
As before as there isn’t a separate spout per supply it’s a bit hard to see which side is actually leaking. One trick you can use if each pipe has its own isolation valve is to turn off each valve one at a time and see which tap stops dripping. You’ll then know which to work on.
If neither have an isolation valve, unfortunately it’s a case of pick a side and take a look and if it isn’t that side move on to the other.
Today, the majority of mixer taps will have a ceramic cartridge as opposed to a rubber washer so we have based this demonstration on a ceramic disc mixer tap. Each tap (hot and cold) will have its own ceramic cartridge.
- Step 1 – Isolate the Water Supply: Firstly, turn off the water supply to your chosen tap at the isolation valve if there is one and if not at the mains stopcock
- Step 2 – Remove Cover Plate: Use a small flat blade screwdriver to prise the cover plate off to reveal the retaining screw. Depending one the type of mixer you have will depend where this is but in most cases it will be on top of the handle/head gear. Once the cover is removed unscrew the retaining screw
- Step 3 – Remove Head Gear: Pull the head gear of handle up or to the side, depending on the type of tap you have. It may be a little stiff and you may need to wiggle it off or even prise it up using a spanner
- Step 4 – Remove and Replace Cartridge: Once the head gear is off, use an adjustable spanner to loosen the cartridge in the tap body and remove it. If it is stiff use penetrating fluid such as WD40 or the similar to help loosen it. Once the old cartridge has been removed, use an old rag to clean the area and then screw the new one down in finger tight and then tighten using the adjustable spanner
- Step 5 – Replace Head Gear: With the cartridge renewed, replace the handle or head gear and screw the retaining screw back in and replace the cover plate
- Step 6 – Test Tap: Turn the water back on and check for any leaks and then turn the tap on to make sure it turns on and off ok
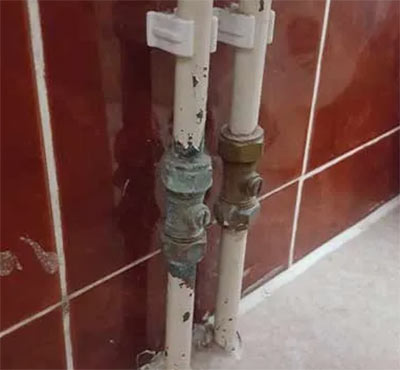
Turn off water to tap at isolation valve of stopcock
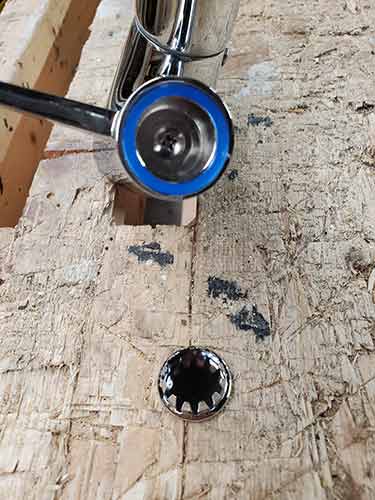
Remove cover plate to expose retaining screw
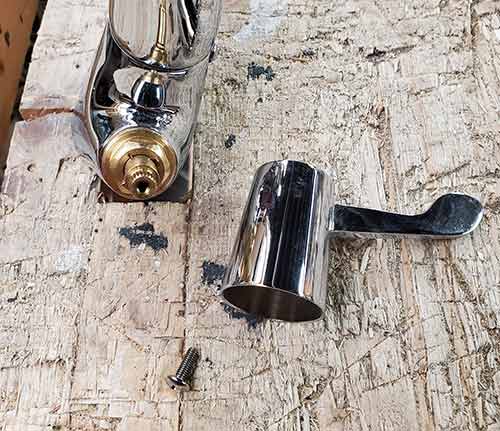
Remove tap headgear to expose ceramic cartridge
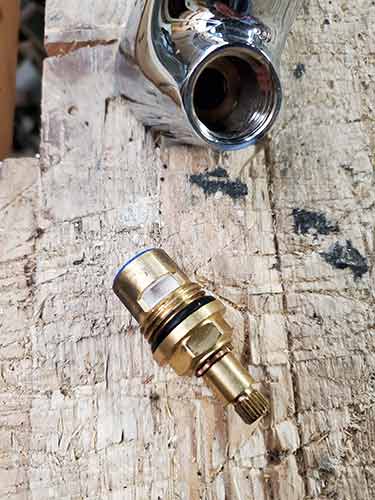
Remove the ceramic disc cartridge and inspect it
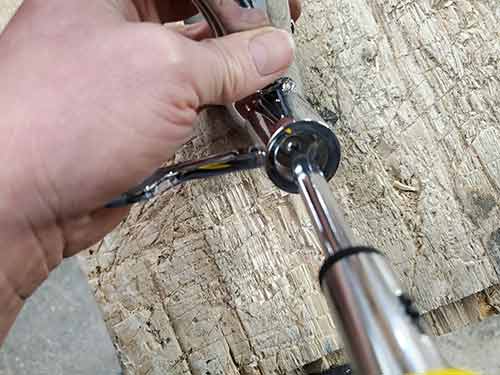
Replace the mixer tap headgear
Note: In most cases, your new cartridge should come with a new washer/o-ring, but if it doesn’t then source a new one and use that. Don’t be tempted to use the old one as it may leak.
Also, when replacing the cartridge, grease up the o-ring and any threads lightly using a good quality plumbers grease, available form all good DIY stores.
Changing a Washer on a Mixer Tap
As we have mentioned above, rubber washers only tend to feature in older style mixer taps so if you know for a fact your tap is fairly new then go back to the above section. However if your mixer tap is quite old then read on below.
Picking the side with the fault (unless both are faulty) can be hit and miss, but after removing and inspecting one side you should be able to tell immediately if the washer or valve seat are damaged or whether there is a lot of limescale buildup. In most cases it’s generally worth doing both sides.
- Step 1 – Isolate Water Supply: First turn off the water supply to the tap either using isolation valves (both hot and cold) if there are any or at the mains stop cock. Once shut off run both taps to drain any excess water out
- Step 2 – Remove Cover Plate: Staring with one side (your choice), remove the tap cover plate with a small flat blade screwdriver. Gently ease it in and flip the cap up
- Step 3 – Remove Handle/Headgear: Using a small Philips screwdriver, remove the retaining screw and then grip the handle/headgear and pull it up and off the spindles
- Step 4 – Remove Tap Valve/Spindle: Using an adjustable spanner, set the jaws to the correct size, slip them on to the valve and undo it. Sometimes they can be very stiff and if this is the case use WD40 or similar penetrating fluid to loosen it
- Step 5 – Inspect Washer and Seat: With the valve removed inspect the condition of the washer and also the seat that it closes down on to in the body of the tap. Also inspect the valve itself for any corrosion or damage. If there is you will need to get a new one
- Step 6 – Replace Washer and Grind Valve Seat: To replace the washer either undo the retaining nut holding it in place or use a flat screwdriver to prise it off. Even if it’s not in bad condition, as the taps apart it’s worth replacing now. Next use a tap valve seat grinding tool to flatten the base of the valve seat and provide a nice flat surface for the washer to close down on to
- Step 7 – Replace Tap Valve: With the washer replaced and valve seat ground down, screw the valve back into the tap body and tighten it up using an adjustable spanner
- Step 8 – Replace Handle/Headgear: Slip the handle or headgear back over valve spindle and ensure it’s sat down all the way to the base and then screw up the retaining screw and replace the cover plate
- Step 9 – Test and Repeat: Once the tap is back together, turn on the water and check for any leaks and then turn the tap on and off and ensure it works as it should do
When repairing washer and cartridge leaks, essentially this is the same as working on a single tap so if you would like more information and help then see our project here on repairing a dripping tap.
Repairing a Leaking Mixer tap Spout
Aside from leaks from the open end of the spout it’s also possible for it to leak around the base, as we have stated above. To do this, find out below.
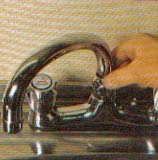
Mixer Tap Nozzle
Remove The Mixer Spout From The Tap
The very first task is to remove the spout from the tap body.
Mixer spouts are held on in three different ways; by a snap ring between the spout base and tap body, a small grub screw (normally at the rear) or in some cases they just pull out.
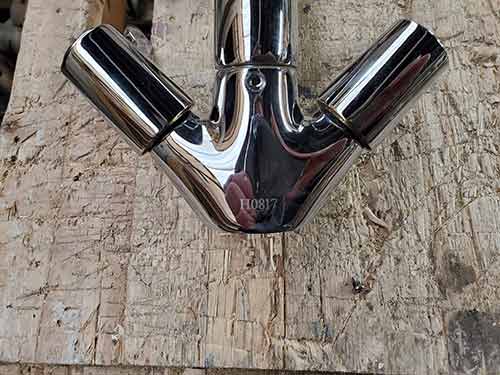
Retaining screw removed at rear of mixer tap to remove spout
In the case of the snap ring, this is usually between the spout and the body and is sometimes hidden by a cover that is screwed down or held with a grub screw at the rear.
In some cases there is a small grub screw at the back, which when undone will allow the spout to be pulled upward and away from the body.
Finally, some don’t have any fixings at all and to remove them you simply pull up on the spout and release it from the grip of the seal which is generally on the bottom of the spout.
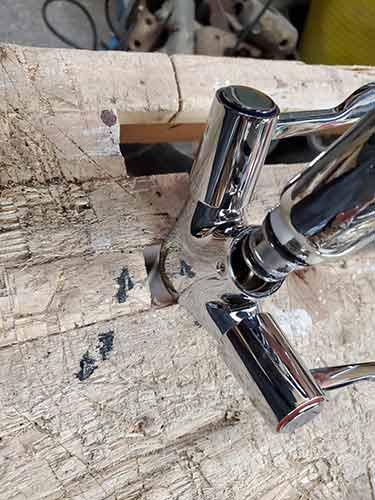
Tap spout removed from mixer tap body
Replace The Seal At The Base Of The Spout
The first two mentioned above have normally got a seal ring within the base. This seal ring, over time, will wear and cause leaks, usually from the base of the spout.
As you may imagine from the above, to resolve any leaks of this kind you will need to replace the seal ring.
Once you have removed the spout, look down inside the neck and locate the seal ring. In some cases you will be able to hook the seal out with your finger but if you are unable to use a small flat edge screwdriver to hook the seal out.
With the pull out type, the seal or seals are normally one the outside of the stalk that runs down into the tap body.
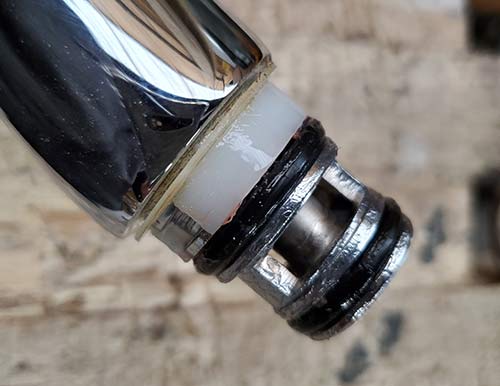
Mixer tap spout seals at base of spout
Replace The Old Seal With a New One
Depending on the make and model of your mixer tap will in some cases depend on the size of replacement seal ring you will need to use. The quickest and easiest way to get an exact match replacement is to keep the old one and take a trip down to your local plumbers merchants and ask them for an exact replacement or a plumbers repair kit (seen below).
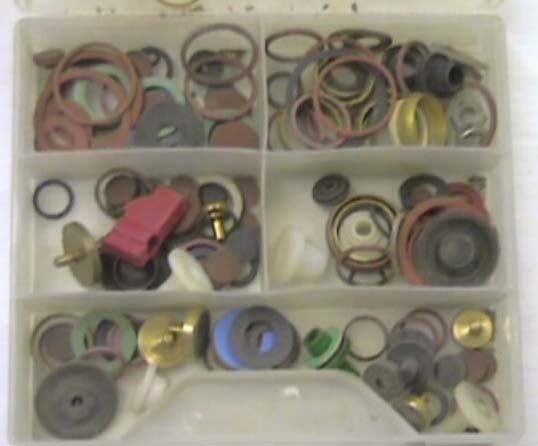
Plumbers Repair Kit
You may be lucky enough to have a selection of washers, O-rings, seals etc. in the form of a plumbers repair kit. If so have a look through and see if you can find a replacement. If not, then you will have to resort to a trip to your local plumbers merchants.
Once you have your replacement you will need to re-fit it. Drop it back down inside the neck of the tap and make sure it sits neatly at the base or refit it in the reverse manner that you removed it. Once the seal ring is in place re-fit the spout and secure it and you’re done.
Before refitting, make sure you add a little plumbers grease or lubricant to the seals so everything moves smoothly as if it doesn’t then the new seals could bind or wear out quickly.
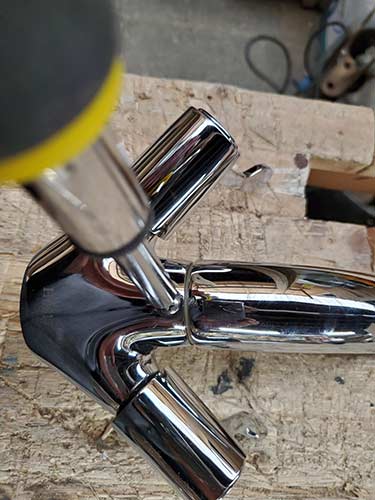
Mixer tap spout and retaining screw refitted after replacing leaking seal
Additional Fourth Type Of Mixer Tap
Thanks to Anthony Rudge for the following information:
I have found a fourth type of mixer tap which requires a different method of repair.
The spout is secured to the body of the mixer by a ‘key’ which runs in a groove in the body allowing the spout to rotate from side to side. To disengage the key and thus remove the spout, it is necessary to push the spout to the left (as you are facing the sink) and line it up with the body of the mixer. Lift, wiggle, and it comes away quite easily. There is a keyway in the body at the centre back which must be lined up with the key in the spout before removal can be effected.
Another reader, Lance, had a leak under the tap.
He replaced everything, eventually including the tap but any water splashed on to where the tap was seated resulted in drips underneath. Eventually he found that water was passing the ‘O’ ring supplied for the base of the tap.
He solved the problem by removing and then re-fixing the tap, ensuring that the tap and O-ring were aligned properly around the hole in the sink. One to watch out for – thanks, Lance!
A leaking tap is not only a pain but a huge waste of money and really bad for eth environment so if you have a leaking mixer tap, get it sorted right away.

