To maintain wooden decking and prevent rot, regular cleaning and treatment are essential. The frequency depends on the treatment used and the deck’s exposure to the elements.
For longevity and proper treatment of your decking, discover all the necessary steps below.
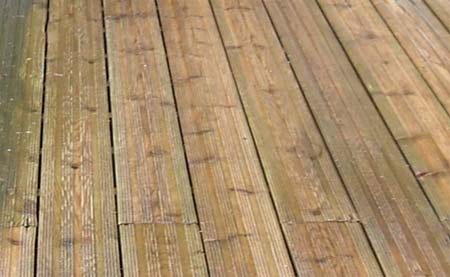
Dirty decking with green mildew buildup
Why Treat Your Decking?
Decks endure a great variety of weather conditions throughout the year, from scorching sun to heavy rain and freezing temperatures. This exposure is particularly hazardous to timber, leading to premature deterioration. With this in mind, treating your deck is crucial to extend its lifespan.
Without proper treatment, lichens and algae can thrive on the surface, making it slippery and hazardous to walk on. Treating the decking surface helps prevent the growth of these slippery substances.
Given these reasons, treating your decking is vital for its longevity and safety.
Choosing the Right Decking Stain
With numerous wood stains available, selecting the right one can be overwhelming. While any exterior wood stain works, specialised decking stains offer superior penetration and durability, as they’re made for the job.
For high-traffic decks, opt for stains resistant to wear. Translucent stains age better compared to opaque ones, which may flake off over time, leaving the deck appearing worn.
Consider the visual impact of dark or non-natural colours. What looks appealing on the tin might be overwhelming when covering a large deck area.
Before treating the entire deck, test the stain on a small, inconspicuous area to ensure it’s the desired colour. You can use leftover decking timber or a less visible part of the deck for this test.
If your deck is adjacent to a wooden fence, you may prefer a matching or contrasting colour scheme for a cohesive look.
While this guide focuses on decking stain, it’s worth noting that decking oils and paints serve similar purposes. However, stains tend to last longer due to better surface penetration.
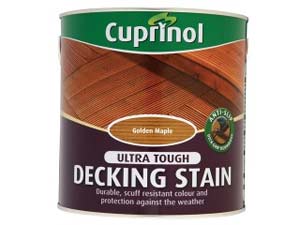
Ultra tough decking stain
Starting Your Deck Staining
For a smooth staining process, follow a systematic approach rather than randomly applying the stain.
Begin by staining any balustrades or rails using a brush. Start from the top and work downwards to brush out any drips. Address built-in features like benches or planters next.
When staining the deck itself, start from the farthest edge or wall and work backward. This ensures you have an exit path and won’t walk over freshly-stained areas by painting yourself into a corner.

Applying decking stain with a brush to balustrades and other items
Timing Your Deck Staining
Before applying your chosen stain or treatment to your decking, there are some important guidelines to follow.
If your deck is newly laid, wait around 6 months before treating it. This allows it to weather properly and ensures any factory treatments wear off, allowing new treatments to bond correctly.
Avoid staining in very cold or frosty conditions as the stain won’t dry properly and may wash off before bonding.
Choose a rain-free day for staining to prevent the stain from running or washing off if there’s a sudden downpour.
Avoid staining in direct sunlight or if the deck surface is too hot. Staining in shadier conditions ensures quick drying, a more even coverage, and reduces the risk of harmful gas being released from the stain due to overheating.
Finally, do not stain wet timber. Let the deck dry completely after washing, and ensure there’s no dew settling on the wood. Work when the deck is as dry as possible.
Preparing Your Decking for Staining
Success in any job depends heavily on proper preparation. Before staining your deck, ensure thorough preparation for a quality finish.
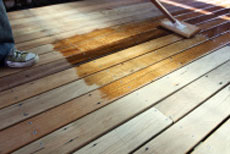
Start by cleaning the deck to remove leaves, lichens, and algae that can hinder stain absorption. Sweep with a stiff brush, then power-wash to clear any remaining debris.
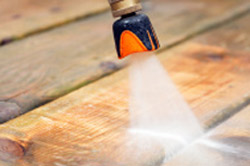
Power washing decking planks with a domestic power washer
Next, use a quality decking cleaner to ensure thorough removal of any remaining residues. Sodium Percarbonate cleaners work well on aged wood and are typically non-toxic.
If your deck has old stain, it must be removed with a stain stripper. These products can be toxic, so follow instructions carefully and protect vulnerable areas.
Sand down any blemishes or marks left after cleaning, using sandpaper or a small power sander.
Clear the area of movable objects like furniture and planters to avoid accidental damage or stain splashes.
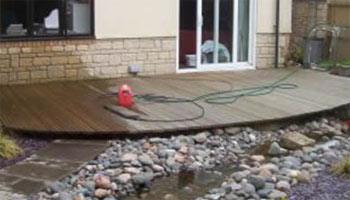
Clean your decking with a power washer before you stain it
Essential Equipment for Deck Staining
Before starting, gather protective gear including clothing, gloves, and eye protection to shield yourself from splashes. Staining can be a messy job so be aware of this.
Decide on your staining method: brush, roller, specialised pad or sprayer. While a brush covers less area and a roller can be messy, investing in a long-handled pad saves time and effort in the long run and sprayers can cover large areas fairly quickly.
Equipment checklist:
- Gloves
- Protective clothing
- Eye protection
- Chosen staining product
- Roller, specialised pad or sprayer
- Paint brush (2-3 inches)
- Masking tape
- Protective covers if needed
- Sandpaper
- Power sander
- Sodium Percarbonate or stain stripper (if required)
Applying decking stain using a special decking stain pad
If your deck adjoins other surfaces like a patio or doorstep, use masking tape to protect them from splashes.
How to Stain Your Decking
Now that you know exactly why you need to stain and protect your decking and what you need to use, it’s time to go through teh steps on exactly how to get teh job done.
Step 1: Prepare Your Decking
Prioritise preparing your decking thoroughly before starting any painting or staining.
Begin by clearing the area of movable objects and covering surrounding surfaces with protective sheets. Then, sweep the surface clean to remove debris and use a power washer if available.
Apply a high-quality decking cleaner to eliminate any lingering dirt. For stubborn stains, use a stain remover cautiously to avoid contact with delicate surfaces due to toxicity. Allow the decking to dry completely for at least 24 hours.
If any imperfections remain, use a palm sander or medium grit sandpaper to smooth them out.
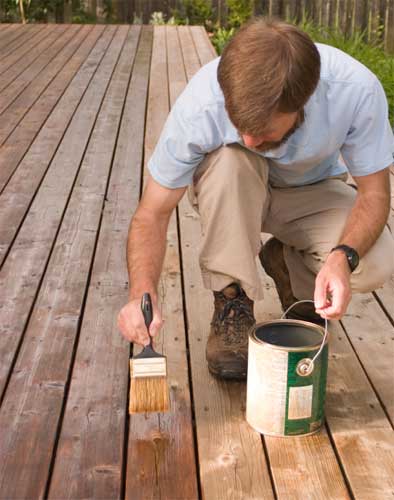
Step 2: Apply Decking Stain
Choose from various methods to apply your decking stain: brush, roller, paint pad, or sprayer.
A good quality roller provides even coverage, but use a thick-bristled brush to ensure the stain penetrates deeply. Apply the stain with the grain, maintaining a wet edge to prevent overlapping.
For tight areas and corners, use a brush before continuing with your chosen tool. Ensure the stain reaches into the gaps between decking panels.
Apply generously, allowing the stain to penetrate fully without puddles. Pay special attention to the end grains, saturating them thoroughly to prevent splitting.
Once applied, allow at least 24 hours for the stain to dry completely.
Applying decking stain with a brush following the grain of the decking boards
Step 3: Apply a Second Coat
Follow the manufacturer’s instructions to determine if a second coat of stain is needed for full protection.
If required, apply the second coat using the same method as the first, as outlined in step 2.
Once finished, allow 24 hours for drying before walking on or replacing furniture.
With the second coat applied, your decking is now fully protected against the elements.
If you have have a decked area at your home, to ensure that it lasts its full potential lifespan it is essential that, not only is it correctly treated, that any preparation work is also done to ensure the stain provides as full a level of protection as possible.