In this DIY guide, we’ll show you how to build a simple standing desk frame that fits on any standard desk or countertop, allowing you to stand while you work.
Many health professionals consider excessive sitting to be as harmful as smoking due to its health risks.
Given the sedentary nature of many jobs today, creating your own standing desk frame can help mitigate these health issues. Read on to learn how.
Types of Standing Desks
With growing awareness of the dangers of prolonged sitting, many companies now offer a variety of standing and sit-stand desk designs.
There are hundreds of options available to fit any taste or workspace.
Standing desks come in four main types: electrically adjustable sit-stand desks, manually adjustable sit-stand desks, portable standing desks, and converters that turn a standard desk into a standing desk.
Electrically Adjustable Sit-Stand Desks
Electrically adjustable sit-stand desks are top-of-the-line models, offering comfort, ease of use, and durability, albeit at a higher cost.
These desks look like standard office desks but have adjustable support legs with one or two electric motors.
With the push of a button, the motors raise the desk to standing height or lower it back down for sitting, providing flexibility and convenience.
For smoother operation and better quality, consider models with two motors, though they may be more expensive.
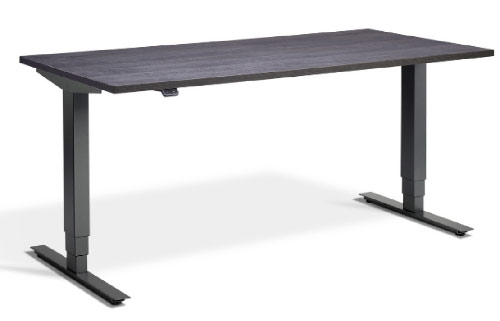
Electronically adjusted sit-stand desk
Manual Adjustment Sit-Stand Desks
Manual adjustment sit-stand desks function similarly to their electric counterparts but are adjusted by hand instead of motors.
These desks are generally cheaper than electric models, but the manual adjustment can be challenging, especially with a heavy load on the desk. Adjusting the height often involves lifting or lowering the desk manually, which can be difficult for some users.
Some pricier models come with a winding handle for easier adjustment, but they can still bind under heavy weight, particularly if they use a single handle.
If you don’t mind the manual effort, these desks are a cost-effective option for a sit-stand workspace.
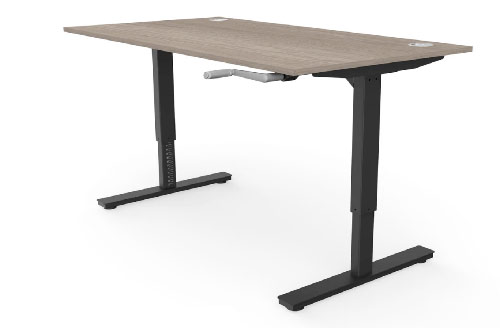
Manual wind up and down standing desk
Portable/Movable Standing Desks
Portable standing desks are perfect for those who need to move around during their workday, such as engineers using laptops for diagnostics or teachers navigating busy classrooms.
These desks come in various sizes and types, accommodating everything from single laptops to setups with additional screens and keyboards, making them ideal for mobile workers.
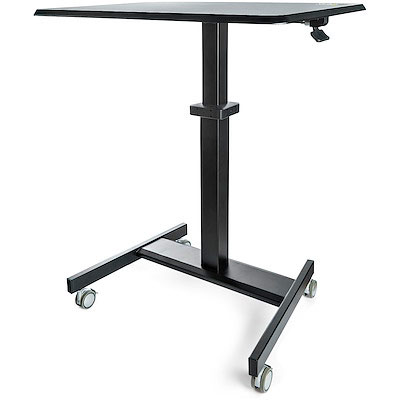
Portable or movable standing desk
Converters/Frames to Turn a Standard Desk into a Standing Desk
Converters and frames are the simplest way to turn a standard desk into a standing desk.
These devices are placed on top of an existing desk to elevate your laptop, keyboard, or monitor, allowing you to work while standing.
Many designs are available, each with unique features, but the basic concept is a small, adjustable frame.
Most converters have slots at various heights to customise the position of your equipment for a comfortable working height.
Typically made from materials like timber, MDF, plastic, or steel, these converters are a budget-friendly option compared to other standing desk solutions.
Ideal for those seeking an affordable and effective way to stand while working.
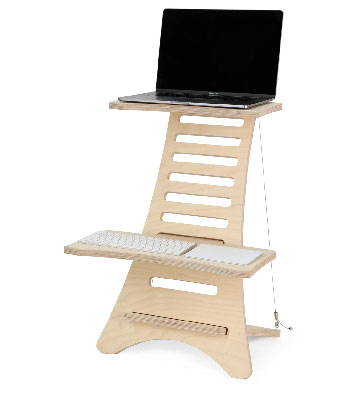
Converter or frame to convert standard desk into standing desk
How to Make a Standing Desk Converter/Frame
After exploring the main options, let’s learn how to make your own standing desk converter/frame.
We’ll focus on a simple design that transforms a standard desk into a standing desk.
For strength and durability, use 25mm plywood. While 18mm plywood or MDF can work, using high-quality materials ensures a sturdier desk.
Measure and Mark Frame Structure
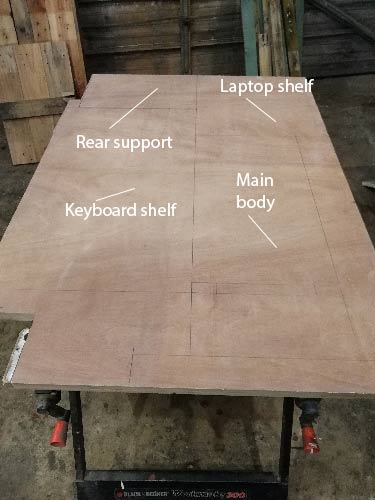
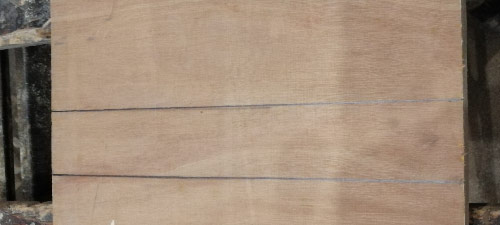
First, mark out your cuts on the chosen timber. For our example, the main body of the standing desk will be 800mm high and angled at 60°. Here are the dimensions for each component:
- Main body: 800mm height, 500mm wide at the base (support feet 60mm high, 100mm out from the main body), 300mm width from feet to top
- Main body rear support: 380mm height (including mounting tenon section), 260mm width
- Keyboard/mouse shelf: 700mm width, 430mm depth (including mounting tenon section)
- Laptop/screen shelf: 400mm width, 330mm depth (including mounting tenon section)
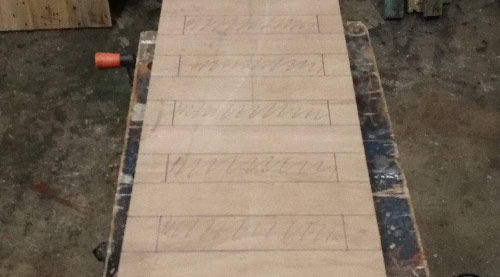
Cutting plan for standing desk
Plan your cuts efficiently to minimise waste and make the most of your timber.
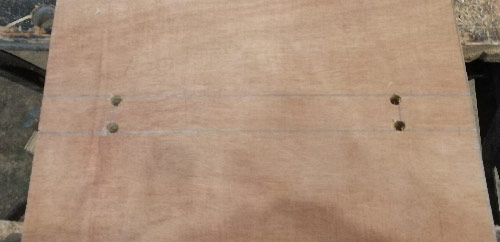
To ensure the desk sits at a 60° angle, mark the position of the rear support. The bottom edge should be 200mm up from the base of the main body. The mortise (cut-out section) needs to be 210mm wide and 25mm high to match the thickness of the plywood used. For more on this, see our mortise and tenon joints project.
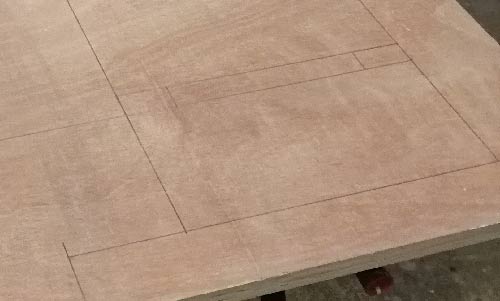
Mortise cut out for rear support marked on main body
Cut Out Framework Structure
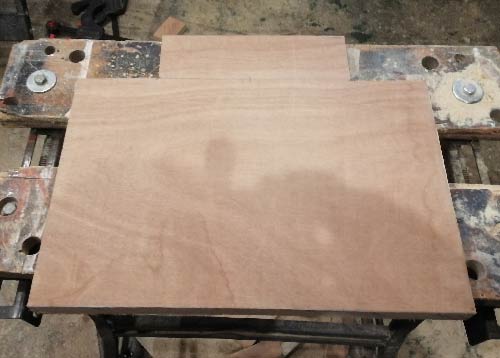
With all the desk elements marked on the plywood, it’s time to cut them out.
You can use a table saw, jigsaw, or a sharp handsaw for this task.
Work slowly and steadily to ensure straight, accurate cuts.
If using a handsaw or jigsaw, clamp the plywood down to prevent movement and ensure a straight cut.
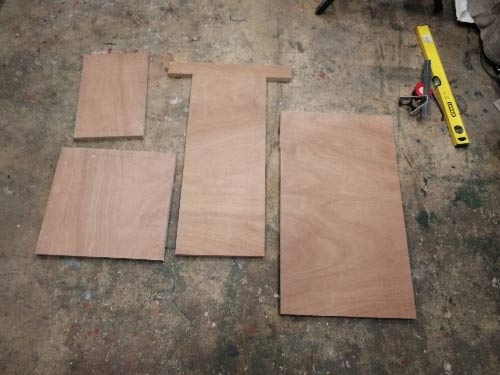
All standing desk parts accurately cut out using a decent sharp handsaw
Mark Out Shelf Mortises
With all pieces cut, it’s time to mark the mortise cuts on the main body for the keyboard and laptop/screen shelves.
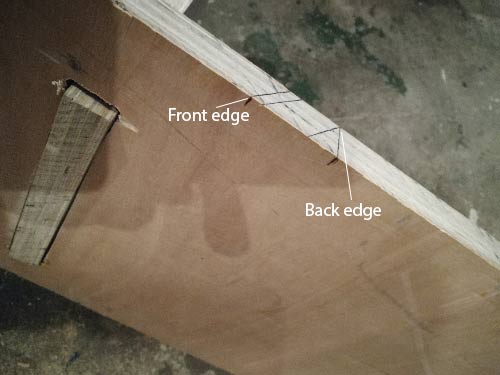
The key when cutting out is to ensure each shelf sits flat and level when assembled and this is achieved by marking the mortises accurately.
This is achieved by marking the 60° angle for your standing desk (or whatever angle you’ve set to) and then mark the depth of the timber from this angle. Mark the lowest point on the front edge and the highest on the back edge.
Marking out mortise cut for shelves to ensure they sit straight and level
Use a carpenter’s square to transfer each mark to the front edge. Repeat this process for the opposite side.
With both sides marked, use a straight edge, like a spirit level, to connect the top and bottom marks horizontally across the main body. Measure and mark 40mm in from each side, top and bottom, and draw vertical lines to define the mortise.
Horizontals marked to define correct size for shelf mortise to be cut
Use the first mortise as a template for the remaining supports. Measure 45mm up from the top of the first mortise on each side, mark these points, and join them with a straight edge.
Transfer the dimensions from the first mortise to the second, creating the cutting lines. Repeat this process until you reach the top of the main body or run out of space for additional mortises.
Shelf support mortises marked out along entire length of standing desk main body
Cut Out Shelf Support Mortises
To cut out the mortises, use a jigsaw after drilling 7mm holes at each corner of every mortise for blade access. Ensure the holes are precisely placed within the lines, so that the sides just touch the lines.
Holes drilled precisely at each corner of each mortise
Take your time and cut along each line with the jigsaw blade as straight and level as possible. Repeat this process for all mortises.
All shelf mortise joints fully cut out along main body of standing desk
Cut Tenons on Rear Support and Shelves
When measuring and marking the rear support and shelves, add extra length to accommodate the tenon joints. Each tenon should measure 210mm in width and 70mm in depth.
Find the centre of each item horizontally and mark it. Then, measure and mark 105mm horizontally on either side, and 70mm vertically. Mark the waste sections to be cut away on each side of the tenon.
Using a handsaw, jigsaw, or table saw, cut away the waste timber to create each tenon joint.
Tenon joints cut out of shelf so they can be slotted into main body of standing desk
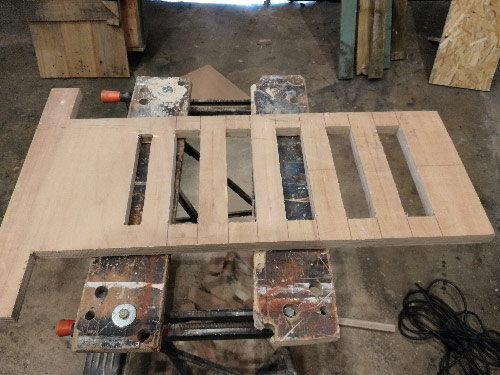
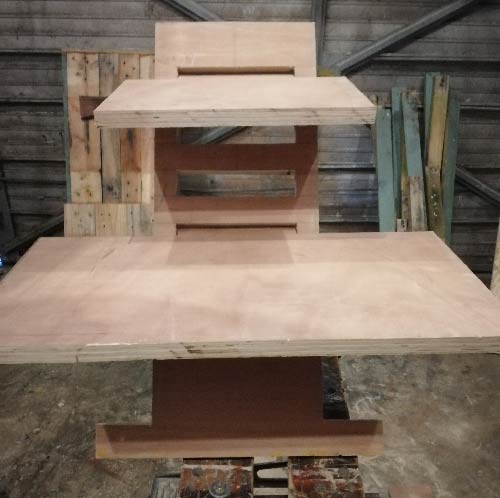
Test Fit Everything
After completing all the cuts, it’s time for a quick test fit to ensure everything fits accurately.
On a flat, level surface or Workmate, insert the rear main body support into place, allowing the main body to sit back onto it. If all is well, the mortise and tenon will lock together, holding the structure firm and upright.
Then, insert each shelf into its respective mortise slot to ensure a proper fit.
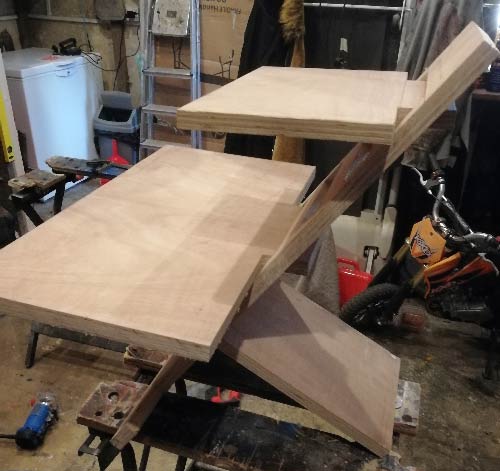
All elements of standing desk test fitted together
Sand and Finish
After the test fit, disassemble everything and proceed to sand down each component.
Use a random orbit sander with fine sanding disks, typically around 240 grit, to sand the top, bottom, and edges of each piece. When sanding the edges, hold the sander at a 45° angle to round or bevel them for a smoother finish.
Be cautious not to sand the internal area of the mortise joints on the main body too much, and lightly sand the tenon joints on the shelves and rear support to avoid affecting their fit.
If you have a router, you can use it to smooth the front edges of the shelves and support, as well as the edges of the main body, but avoid touching the mortise joints to maintain the desk’s stability.
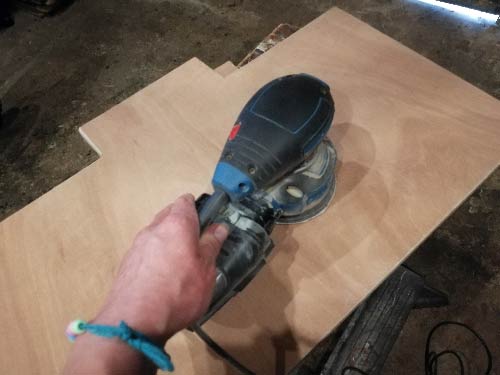
Sand down all standing desk components
Create Pins for Shelf and Support Fixing
Before wrapping up, craft small pins to secure the shelves and support in place when connected to the main body so nothing collapses during use.
Using a drill driver and a 6.5mm wood bit, with the desk unit fully assembled, drill a hole at each shelf mounting joint and the rear support. Drill through the side of the main body into the side of the shelf tenon joint.
Repeat for each shelf at every fixing level, ensuring the holes are clear.
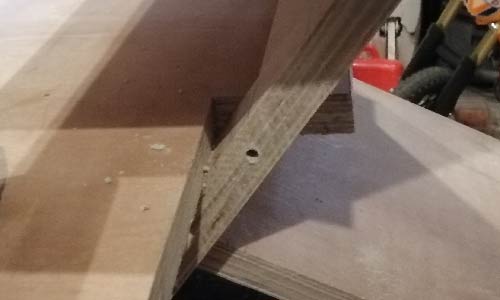
Pin fixing holes drilled in side of main body to hold shelves and rear support firmly in place
Source 6mm dowel rod and cut 3 sections to 120mm length. Bevel one end of each rod with sandpaper for easy insertion.

Timber pins cut to 120mm in length with end tapered
Test each pin in its respective hole to ensure a snug fit, securing the shelves and support firmly. Insert wood screws at the rear of the main body and tie 3 strings, each 350mm long, from screws to pins to prevent loss.
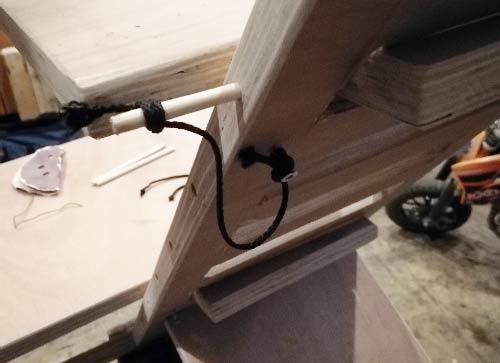
Timber pins secured to main body using lengths of string to prevent them getting lost
With this step complete, position your standing desk, add your equipment, and adjust it to your preferred working height.
Finished standing desk attachment to be used on top of an existing desk to allow you to stand as opposed to sit
Sitting and leading a sedentary lifestyle poses a significant risk to your health and sitting at a desk for long hours every day contributes significantly to this problem. Constructing and using a standing desk mitigates much of this associated risk and is also a great DIY project to boot!