It is possible to repair cracks in walls, which is great news if you plan to sell your home, as there is nothing more likely to put off a prospective buyer than a huge crack in the render. The technique is called crack stitching and in this project you will learn how to repair the cracks in your walls using a stitching kit.
Crack stitching is a wall reinforcement and permanent structural repair solution for cracking is masonry and brickwork.
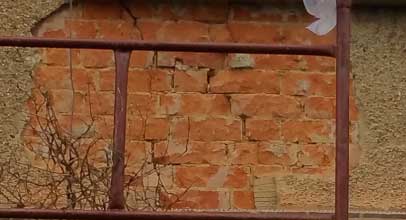
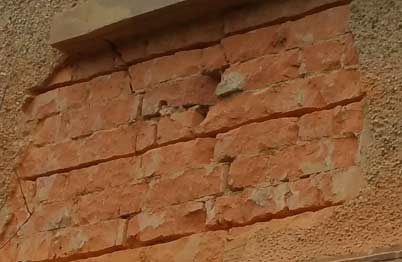
Cracks in wall that need stitching back together and repairing
When You Should Use Crack Stitching to Mend Cracked Walls and Masonry
If you are in any doubt about the repair that you are going to undertake you should get a structural engineer to come and have a look – you will be able to find one near you here.
It is advisable to contact your buildings insurer to notify them of the work that you are going to carry out.
Cracks can occur in walls for a range of reasons, such as settlement, deterioration of the mortar or the wall ties failing.
The first thing that you have to do is to see what you are dealing with so you can ascertain the cause.
Remove any render to get to the brickwork joints in order to mend (or “stitch”) the crack. Note that reinstatement of the render can be seen in our rendering external masonry project.
If the cause is subsidence of the ground, this is something that needs to be dealt with first. Once the ground has been stabilised then you can deal with the crack in the knowledge you have dealt with the cause.
Stitching is the term applied to placing and securing a very lightweight reinforcing bar into the brickwork joints (either horizontally or vertically).
Each stitch provides support to the brickwork, or blockwork, above and minimises the chance of the bricks moving more and enlarging the crack.
Tools Required for Sticking Brickwork
Here is a list of the tools that you need to affect a suitable mend on a cracked wall:
- Suitable mechanical chasing tool or Disc Cutter (optional – see step one below)
- PPE (Personal protective equipment) especially eye protection
- Crack stitching pointing gun and nozzle (usually provided in kits)
- Mixing paddle and trowel (usually provided in kits)
- Stitching kit, including resin and helical bars
- Pointing mortar and trowel
Steps for Successful Stitching of Brickwork
Step 1 – Cut out Brickwork Joints
Use a small disc-cutter to cut out the brickwork joint to a depth of about 30-40mm. Special discs can be bought for this purpose.
If you prefer to do this by hand, you can use a plugging chisel. It’s hard work, but a bit cheaper.
Always cut the joint out so that it reaches at least 500 mm either side of the crack.
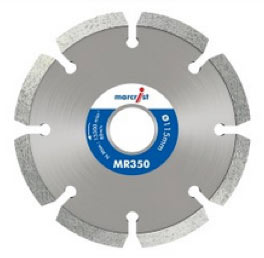
Diamond mortar joint cutting disc
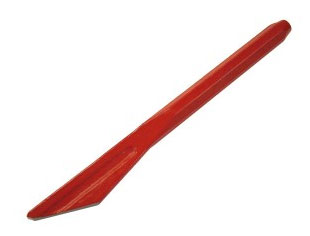
Plugging chisel for cutting our mortar joints
Always measure from the brick face when measuring the depth you are cutting out and inserting the bars. Do not include the thickness of render/plaster when the wall is rendered or plastered especially when inside properties.
Step 2 – Clean up
Brush out all the dust from the cut and hose or spray down the brickwork including directing the hose into the cut.
Brickwork cleaned and ready for stitching
Step 3 – Mix up Cement Grout
Mix up the special cement based grout which comes with the stitching kit. The stitching kit we recommend is one from Permagard (below).
As you can see, in the kit you will find the tub of fixing resin, a paddle, or which, to put in your electric drill and mix the resin, a pointing gun with which you apply the resin to the joints, a spare nozzle, of a different size, to use on thinner joints, 10 twisted (or helical spiral bars) at 1m long and a pointing tool to push the resin into the joints fully.
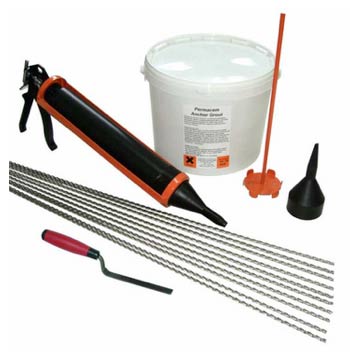
Stitching kit from Permagard
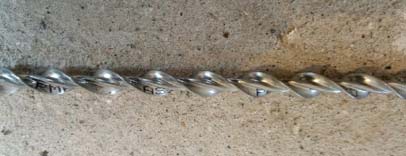
Helical stitching bar
Helical bar
Step 4 – Fill Mortar Gun
Fill the mortar gun up with the mixed resin and apply a bead about 10mm thick into each joint you have chased out.
Step 5 – Insert Helical Bar
Push a bar into the joint as hard as you can making sure it is well embedded into the resin.
The more helical bars that you insert into the repair the stronger it will be, as you will be providing more support.
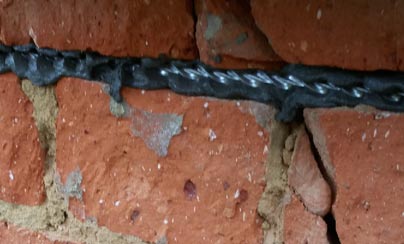
Helical bar inserted in to crack
Step 6 – Apply Bead of Resin
Apply another bead of resin over the top of the bar to fill the joint up. Push this bead home really well using the pointing tool.
It is a great idea to take a photo of the repair channels in walls prior to re-pointing or plastering. There are a few reasons for doing this:
- So you can identify exactly where you put the bars so that future building work can avoid them. It is very important that these joints are not inadvertently ground out as this will cause the structural problems to return
- To ensure that you can monitor the success of the remedial action taken. It is very unlikely that further cracks will appear, but if they do you will know where the existing structural repair has been made
- You might be required to proved these to your buildings insurance company as evidence of the repair

Crack repaired and stitched back together
Step 7 – Finishing up
Finish the wall. This will either be rendering it or pointing over the stitching resin.
Essentially, you will want to go with the existing finish to match teh rest or your property.
The Benefits of Stitching Mortar Joints
Stitching is not hard. We see so many people trying to repair cracks simply be repointing without giving a thought to the fact that the brickwork moved for a reason and, given that nothing has changed, it will probably move again and the cracks will reappear.
While stitching might be a little more expensive and time-consuming, it is a sure fire way of knowing you have supported your masonry in a way which does not compromise it and will reduce the likelihood of any further movement causing further damage considerably.
In summary, the key benefits of stitching mortar joints are:
- Cost effective; re-pointing without stitching will not provide a structural prepaid and is a waste of time and money
- It is a permanent structural repair which is not invasive or destructive; you don’t need to move out while it is being made.
- Anyone can do it; there are no specialist skills required to carry out the repair. That said, it might be worth seeking advice from a structural engineer to confirm if this is the correct solution before proceeding
- The bar spreads the stresses caused by the wall movement across it’s length so stopping cracks enlarging or new ones appearing. They can do this will still allowing enough natural movement that occurs to all buildings