If you have ever done any carpentry you should be well aware that successfully hiding screw heads to get a neat and professional finish can be a tough job.
There are quite a few techniques and products that can be used to effectively hide screw heads such as countersinking and filling, using screw caps etc but none really give that polished end result, but if this is the finish you are looking for it’s certainly more than possible using wood plugs to hide screw heads and other fixings.
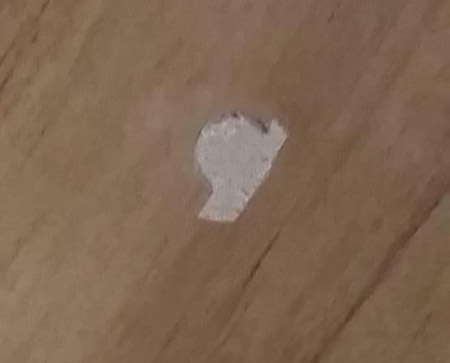
Screw head filled using wood filler
What is a Wood Plug or Timber Plug?
In simple terms a wood plug is exactly what it sounds like it should be, a “plug” made of wood.
We’re not talking about an electrical plug made of wood but a plug in the sense of “plugging” a hole.
As mentioned above, getting an attractive and professional visual finish that you can be proud of is certainly satisfying when you know you have achieved it yourself and small details such as visible screw heads can easily ruin this.
The normal solution to this is to countersink the screw head below any surrounding timber surfaces and then fill the top of the hole using a suitable wood filler.
This is an ok solution if you are planning on painting the object you’re working with as the paint will hide it, but if you’re staining, waxing or similar the filler is going to be visible and stand out like a sore thumb!

Screw head filled with wood filler and then poorly stained
Many manufacturers claim that their particular product will take stain in a similar manner to timber, but in practice this is rarely the case.
This is where timber or wood plugs come into their own as they provide a natural look and if you use an off cut of the same timber to make your plugs and then ensure the grain of the wood plug runs inline with the grain direction of the timber object you’re working with, once sanded, the plug itself can become almost invisible.
As briefly mentioned, it is possible to almost seamlessly blend a wood plug with the timber surrounding it, but you can also use different types and shades of timber to create different finishing effects.
If you are using a wood plug to hide a screw head sometimes it’s better to make a feature of it. After all, it’s there so why try and hide it!
In the majority of cases wood plugs are most commonly used when constructing and fitting stairs as the finish required always needs to be impecable. Other common uses are for bespoke kitchens, furniture, fencing and in fact anywhere that requires a professional visual finish.
How do you Make Wood Plugs?
There are two ways that you can obtain wood plugs; you can either buy them pre-made or you can make them yourself. Which route you choose to take very much depends on how often you’ll be using them and what type of finish you are after.
Buying pre-made wood plugs will certainly save you the time it takes to make them. Making them frmo scratch can be a little time consuming and if you’re a tradesman out on site and under pressure to get a job finished, the last thing you want to do is spend 2 or 3 hours making a load of plugs.
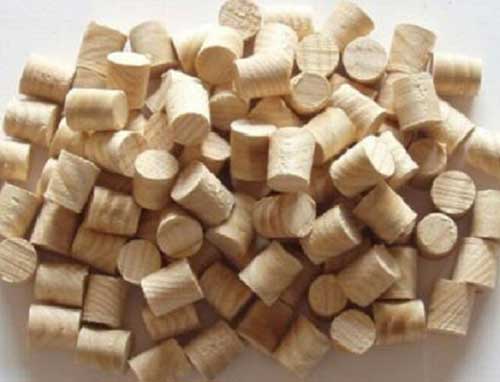
Pack of pre-made wood plugs
The pre-made route will also save you the cost of having to purchase the specialist plug cutters required in order to make them from scratch.
Additionally, as the pre-made plugs are made on mass in a factory or joiners shop they do tend to be fairly accurate in terms of their exact size.
Despite the above there are disadvantages, the first being that they can be quite expensive. If you require quite a few to plug all the screw heads on a large stair case, costs can quickly mount up.
Also, the timber used to form pre-made wood plugs is likely to be different from the timber you’re working with meaning that the plug will certainly be visible. If you’re going for an invisible, seamless look then these won’t do at all.
In reality, making your own wood plugs is often the best way to go. In most cases you will have a few lengths of scrap timber of the same type your working with so you won’t need to buy any to make them.
Scrap off cuts will also obviously be the same, so making them invisible once inserted into your timber is certainly more than achievable.
In terms of costs, purchasing a fairly decent set of wood plug cutters is pretty minimal. For between £10 and £15 you can get a set of four cutters that will cut 6, 8, 10 and 12mm wood plugs, and if you’re only giong to be using them occationally they should last you quite a while.
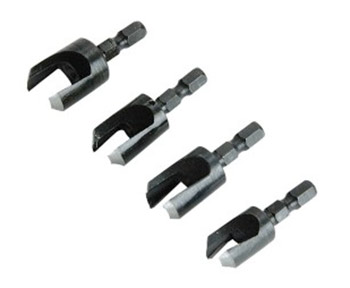
Wood plug cutter set including sizes 6, 8 10 and 12mm
What Type of Timber Should you use to Make Wood Plugs?
In answer to what type of timber you should use to make your wood plugs, this is totally up to you.
As we have mentioned earlier in this project, if you want your wood plug to blend invisibly in with its surroundings then you will need to make your plugs yourself using an off cut of the same timber, cutting the plug itself from an area that matches as closely as possible to the timber surrounding area that needs plugging.
By this we mean trying to match any shapes, patterns or shading in the grain itself so that when the plug is fixed in place and sanded down it becomes almost invisible to the eye.
However if blending the plug into its surroundings is not a major concern then you may want to make a feature of it. By this we mean if the timber you’re plugging is pine then why not use an oak or similar wood plug. By doing this you can make the plug a feature and add a little contrast to the item your working on.
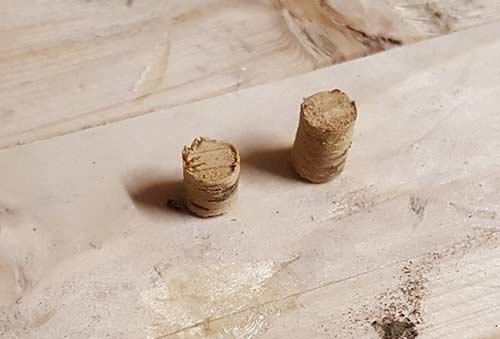
Timber plug made from oak that will make a feature of the plug once inserted a hole
How to Make and use a Wood Plug to Hide a Screw Head
As we have now looked at exactly what a wood plug is and how they can be used to disguise screw heads and other fixings in timber items such as staircases, cabinets, highend kitchens etc, lets now take this a step further and make a wood plug and use it to plug a screw hole.
Step 1 – Make a Wood Plug
The first job is to actually make a wood plug. To do this, source a scrap piece of timber of your choice.
As stated above, the timber you use is entirely up to you. Use a matching piece to hide teh screw head or someting a little different if you want to accentuate the plug.
In this example were going to be hiding the screw head in a piece of pine but we’re going to use a piece of oak to make our plug.
As we are making our own plugs we are going to be using a plug cutter to cut them out, which in turn will require the use of a drill.
As the cutting edge of a plug cutter is flat, using a standard drill/driver can be a little tricky as the bit itself has a tendancy to slip and skate across the surface of the timber.
With this in mind, the best drill to use is a pillar drill as it provides a lot more control through ensuring the bit doesn’t move and also drills directly vertically down, which in turn ensures the plug itself is square.
However, not everyone has a pillar drill to hand so if you don’t, a standard drill or drill/driver is fine to use, just make sure you hold it as vertically upright and level as you can whilst using it.
Firstly, clamp your scrap timber to a stable and solid work bench so that it doesn’t move.
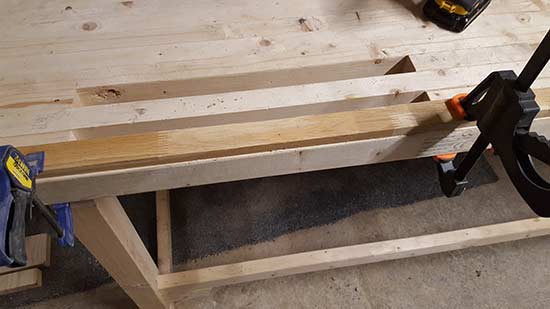
Scrap timber clamped firmly to work bench
Next, insert a wood plug cutting bit of the correct size into your drill and tighten the chuck. In this case we need to cut an 8mm plug to fill an 8mm hole.
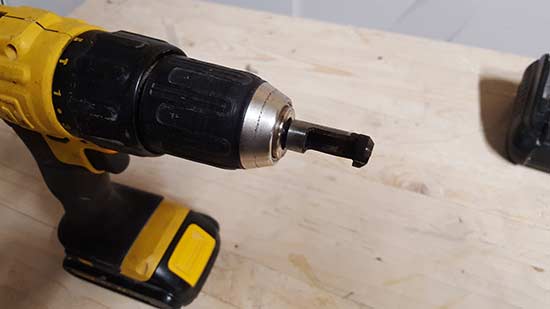
8mm wood plug cutter inserted into drill
With the bit inserted and ready, position it flat down on your scrap timber and squeeze the trigger slowly to begin with. Once the bit has started to cut into the surface squeeze the trigger of the drill a little harder to speed it up. Once it’s broken the surface of the timber and cut a channel it shouldn’t slip.
Drill down 10mm or so ensuring that the depth of the plug is greater than the depth of the hole it’s going to fill.
Once done withdraw the bit from the hole. Although you have now successfully cut your timber plug, at this point it’s still attached to the scrap wood.
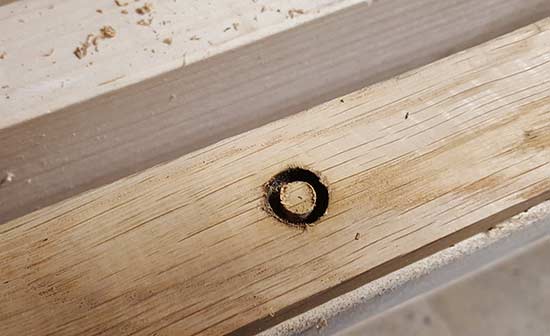
Wood plug cut and ready to be removed from scrap timber
If you have cut quite a few plugs in yout piece of wood, the best method to remove them is now to run the timber over a table saw, setting the saw to ensure the blade cuts through the back of the plug detaching it form the timber.
As we are only dealing with one plug the quickest and easiet method is to insert a small screwdriver between the side of the plug and the rest of the timber, making sure that the screwdriver is inline with the grain of the timber and give it a little twist to break it off.
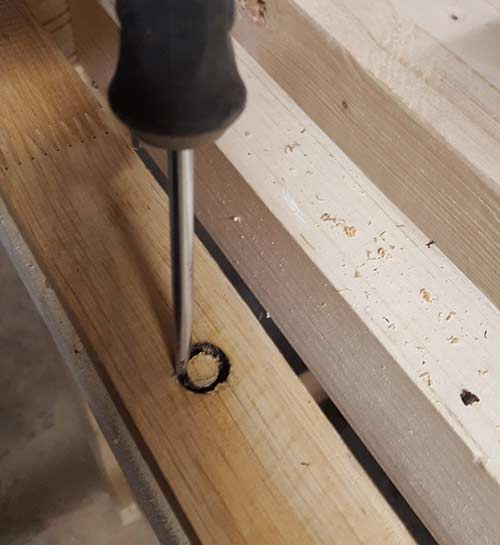
Prising out timber plug using a screwdriver
At this point you have now successfully cut a wood plug ready for use. You can now move on to actually plugging up your screw hole.
Drill out Hole to be Plugged and Insert Screw
Now that we have a wood plug, we now need a hole to use it in.
Measure out and mark the exact location for your hole and use the correct size drill bit to drill it out. The hole in question needs to be the exact size of our plug and also deep enough to house both the screw head and the plug.
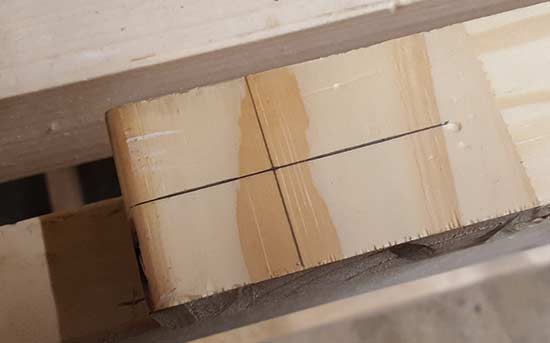
Hole marked out ready for drilling
In this instance the hole needed to be 8mm in width and around 10mm in depth so we used an 8mm brad point wood drill to drill out the hole.
We drilled down very carefully so that we didn’t go too deep and also to avoid damaging the edges of the hole itself. If any blow out or tearing is caused this can seriously affect the finished appearance as, regardless if the plug fits perfectly, any missing or damaged timber around the hole will stand out a mile off.
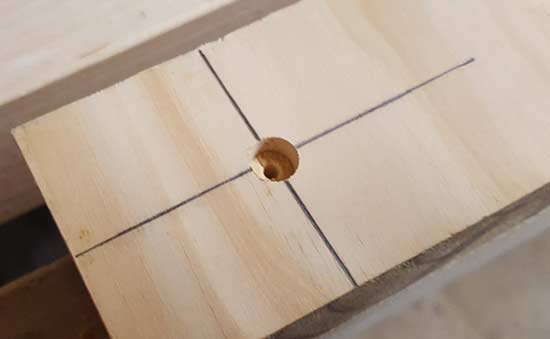
Hole drilling ready for screw and plug
With the hole drilled, the next task is to get the screw in place. Line up any joining timbers below precisely and then pop your screw in the hole and use a drill/driver to screw your screw down through and into the timber below.
With the screw now screwed up tighly and your joining timber securely fixed in place it’s time to cover it up using our wood plug.
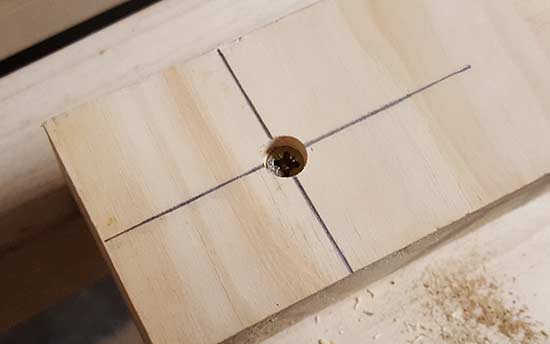
Screw inserted and screwed up tightly
Insert Wood Plug
To ensure the wood plug stays firmly in place it’s necessary to add a little glue to both the hole and also the plug itself.
If you have quite a few plugs to insert, a handy little tip is to use the hole that you’ve cut your plug from to squeeze a bit of wood glue into so that you can dip the plug in and fully coat it.
When it comes to what glue to use, any decent resin-based PVA wood glue should be fine.
Using a small paint brush, brush some of the glue around the inside of the hole and also around the base of the hole and then, holding the plug at the top, dip it down into the wood glue until it’s fully coated.
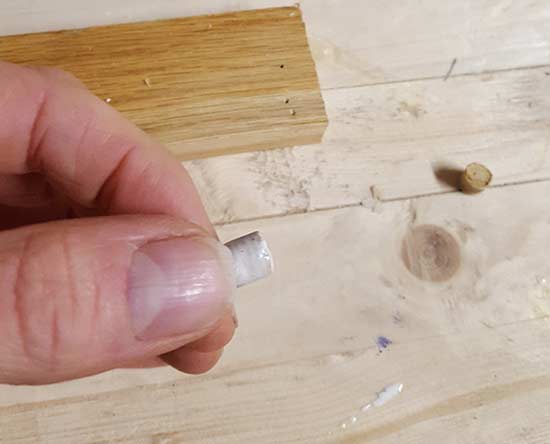
Wood plug coated in glue ready to insert into hole
Next, pop the plug into the hole and gently push it down with your thumb. If the plug and the hole are both precisely 8mm the fit should be tight.
To ensure it’s inserted down as far as possible, give it a few gentle taps on the top with a hammer to force it down in as far as possible.
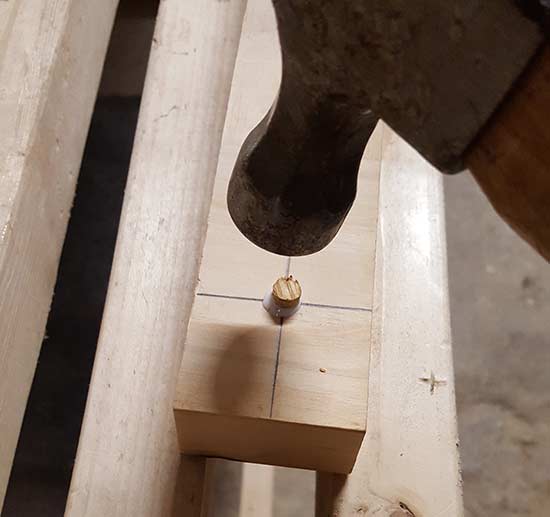
Tapping in wood plug with hammer
With the plug in as far as it can go, it’s now time to leave it for the glue to set. Refer to the manufacturers guidelines on how long you will need to wait.
Trim off Plug Excess and Sand Back
Once the glue has had time to fully set, the final tasks are now to trim it up and then sand it flat and flush with the surrounding surface.
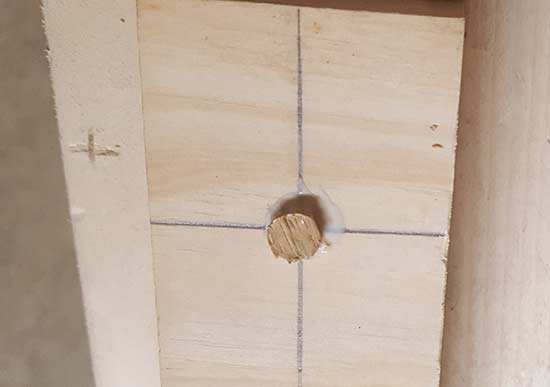
Glue cured and wood plug set in place
Trimming the plug up can be done a few ways:
- Use a flush cut saw (special saw that allows timber items to be cut down without damaging the surface around it) to trim the top of the plug off flush with the area around it
- Use a sharp chisel to take the top of the plug off
- Trim off as much as possible using a standard saw (making sure not to damage the area around the plug) and then plane it flat with a carpenters block plane
For this example we are going to use a sharp chisel to take of the bulk of the plug and then use some sandpaper to sand it off flush.
Position the angled beveled edge of the blade flat on top of the timber surface with the tip of the blade just touching the plug and the point it meets the surrounding timber surface.
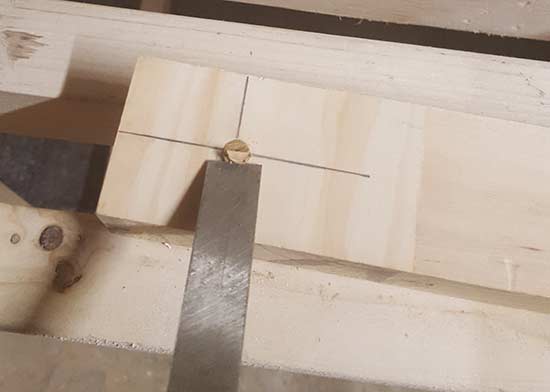
Chisel positioned ready to chop top off of wood plug
Tap the chisel gently with your hammer to chop off the plug. It’s important that the chisel is sharp, if not, as you tap it with the hammer it will likely just prise the plug out of the hole.
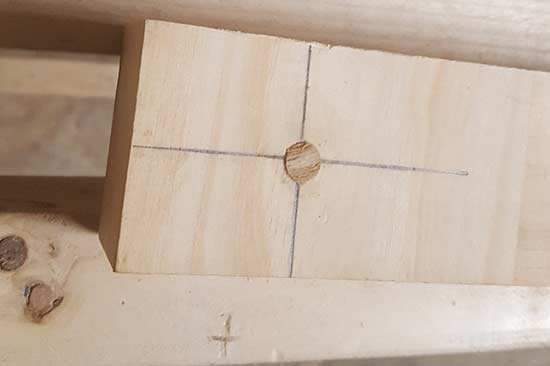
Wood plug trimmed off using chisel
Once trimmed off, use some 120 grit sandpaper on a flat sanding block (in this case we just used a flat scrap piece of timber) to sand the remaining proud parts of the plug back until the whole area was flush with its surrondings.
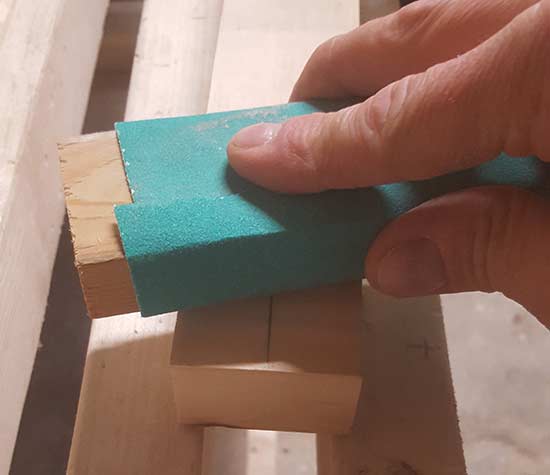
Sanding plug off until it’s totally flush with the area around it
As you sand, periodically run your finger tips over the surface to check for proud points. At the point you no longer feel any you’re all done!
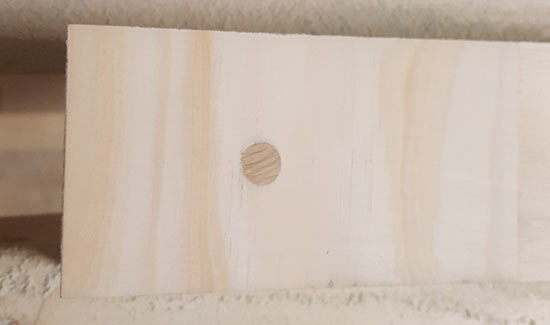
Wood plug successfully inserted and sanded off
As you can see from the above, plugging a hole using a wood plug gives a neat and professional finish to any carpentry job and as long as you take your time and use the right tools, it’s a finish that can be achieved by anyone!

